Ghost Face Nails: Easy Halloween Designs for Short Nails
If you are staring at your natural hands wondering how to pull off spooky nail art without massive length, you are in the right place. Ghost face nails are the ultimate solution for short nails because the iconic, elongated screaming face scales down perfectly onto any nail bed. In fact, you can complete a full set of these easy Halloween nails at home in just 30 minutes with zero professional art training.
This step-by-step guide walks you through creating spooky, salon-quality ghost face nails on natural, short nails using simple tools you already own.
At-a-Glance: What’s Ahead
Here is a quick snapshot of what we will cover in this ultimate DIY Halloween nail guide:
- Essential Toolkit: The budget-friendly tools you need for precise linework.
- Step-by-Step Tutorial: Master the base coat, facial features, and sealing.
- Short Nail Customizations: Adapting the look for square, almond, coffin, and squoval shapes.
- Design Variations: Cute pastel ghosts, glow-in-the-dark accents, and metallic twists.
- Troubleshooting: Fixing thick polish, smudged eyes, and cuticle flooding.
- Salon Guide: Exact terminology to request this style from your nail tech.
What Are Ghost Face Nails?
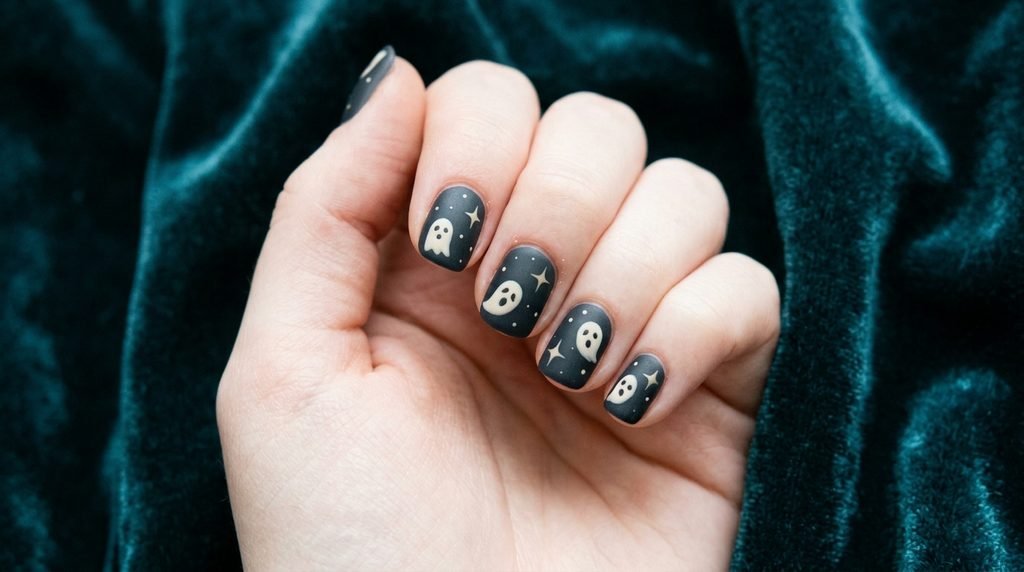
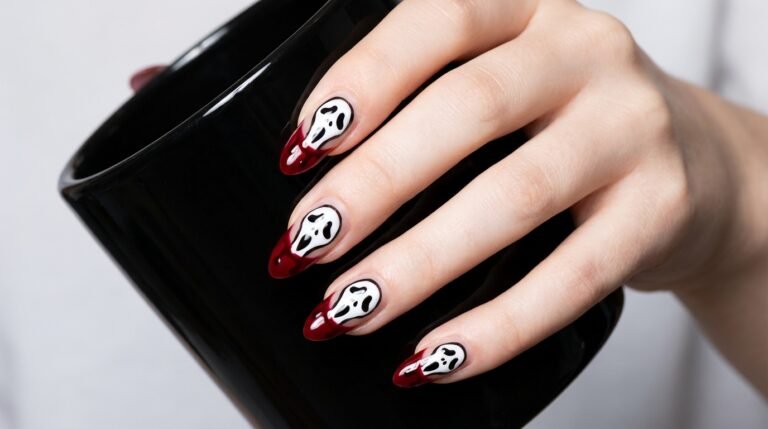
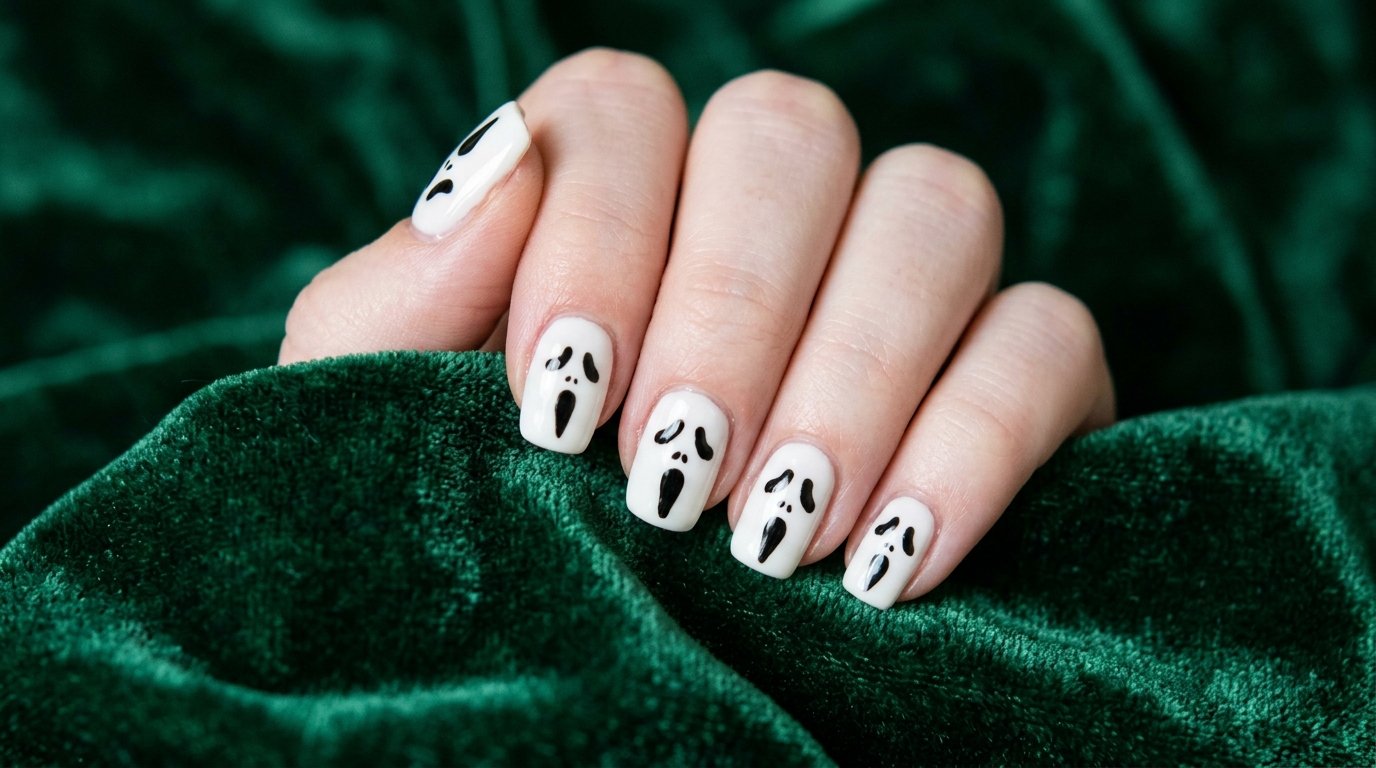
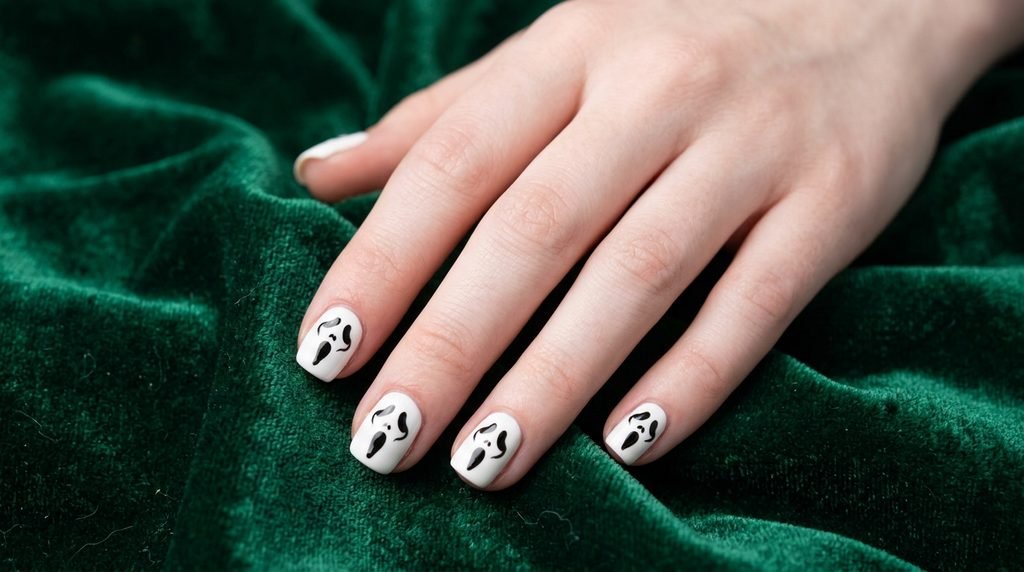
What are ghost face nails? A Halloween nail design where a stylized screaming ghost face is painted on the nail, usually featuring two elongated eyes and a stretched mouth in black on a white base coat. This high-contrast aesthetic creates an instant spooky vibe while remaining clean, minimalist, and exceptionally easy to execute on short natural nails.
Can You Do Halloween Nails on Short Nails?
Can you do Halloween nails on short nails? Yes, absolutely! Simple designs like small ghost faces, fine dots, minimalist french tips, and single accent nails work brilliantly on short nails. Short nail beds offer a compact canvas that actually prevents detailed art from looking overwhelming or messy.
How Long Do Easy Halloween Nails Take?
How long do easy Halloween nails take? A complete set of DIY ghost face nails takes approximately 25 to 35 minutes from initial nail preparation to the final top coat cure. Working on short natural nails speeds up dry times significantly compared to working with long acrylic extensions.
What Tools Do You Need for Ghost Face Nails?
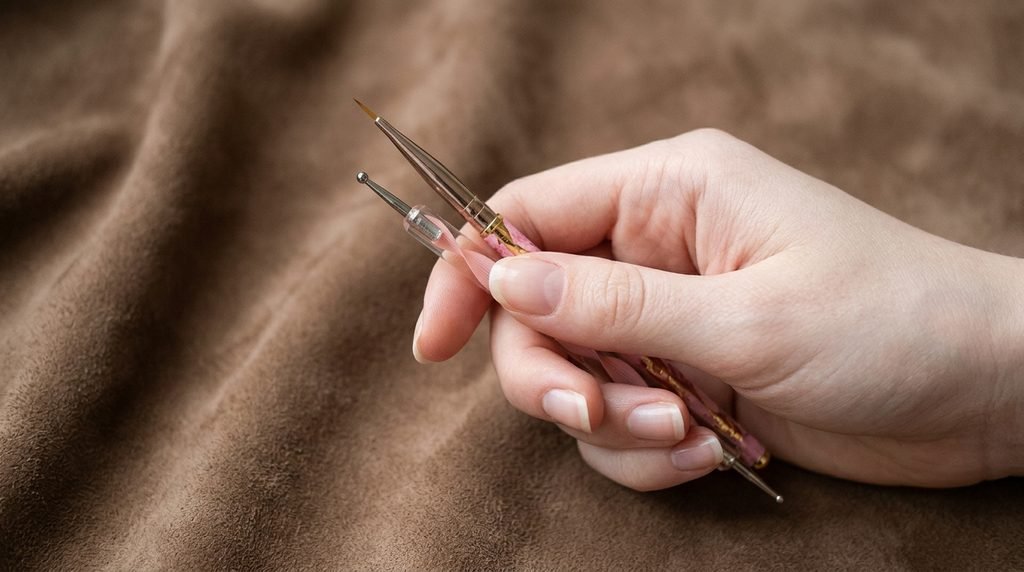
You do not need an expensive gel kit to build a flawless set of Halloween nails. A simple, budget-friendly toolkit allows you to draw sharp facial expressions without your hand shaking.
- Base Coat: A smoothing, protective layer to prevent dark pigment staining.
- White Gel Polish or Lacquer: High-opacity white forms our ghostly body.
- Black Gel Polish or Paint: Deep black pigment for contrast features.
- Dotting Tools: Double-ended dotting tools (1mm and 2mm ball sizes).
- Fine Detailer Brush: A 7mm or 9mm thin nail art liner brush.
- Top Coat: A high-shine or velvety matte top coat for sealing.
- Clean-up Brush & Acetone: A flat angled brush for crisp cuticle edges.
Preparing Short Nails for Flawless Art
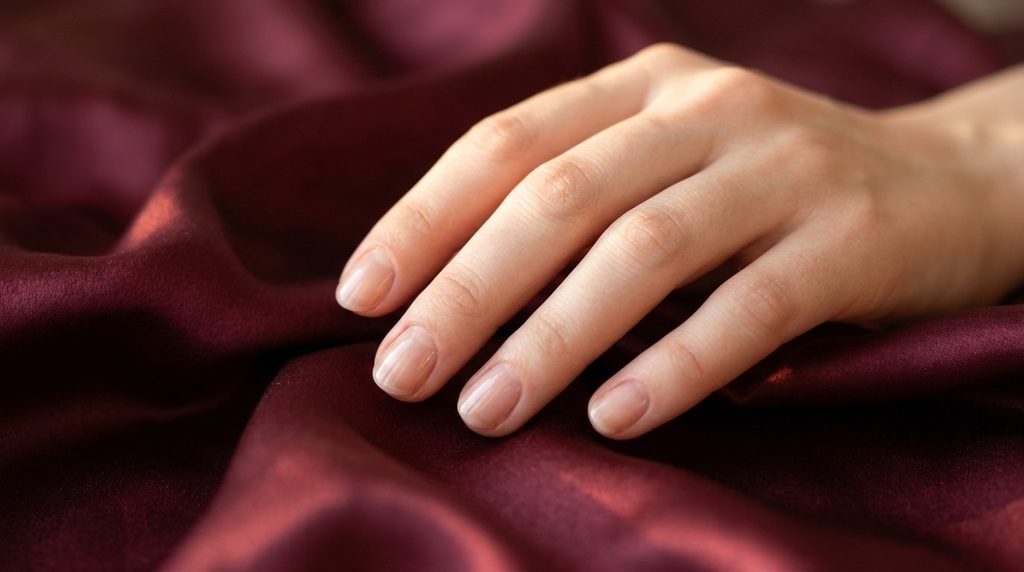
Preparation determines whether your manicure lasts three days or three weeks. Short nails require precise cuticle management to maximize available surface area.
First, push back your cuticles gently using a wooden cuticle pusher. Gently buff off the shine from your natural nail plate using a soft 240-grit buffer. Cleanse the nails thoroughly with 99% isopropyl alcohol to remove oil and debris.
Applying a dehydrator and primer ensures your base coat grips firmly, preventing early lifting around the free edge.
Applying the Perfect Base Coat
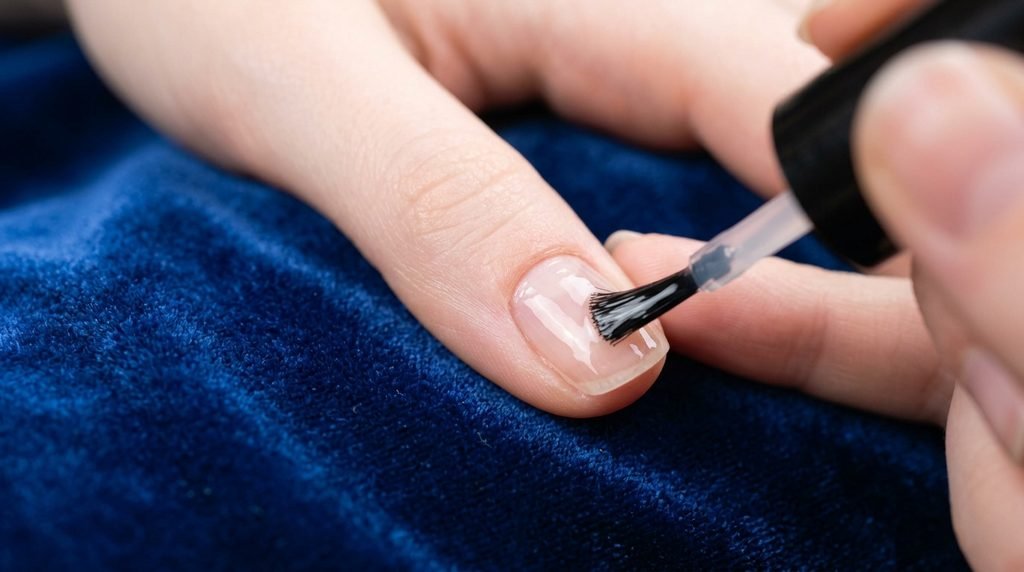
A rock-solid foundation prevents natural nail staining from heavily pigmented black polishes while giving your design an even surface.
Apply a ultra-thin layer of rubber base coat or strengthening base coat. Be sure to leave a tiny 1mm gap between the liquid and your cuticle wall to prevent cuticle flooding.
Cap the free edge of your short nails carefully. Cure for 60 seconds under a LED lamp (or allow 3 minutes to dry if using traditional air-dry polish).
Painting the Opalescent Ghost Base
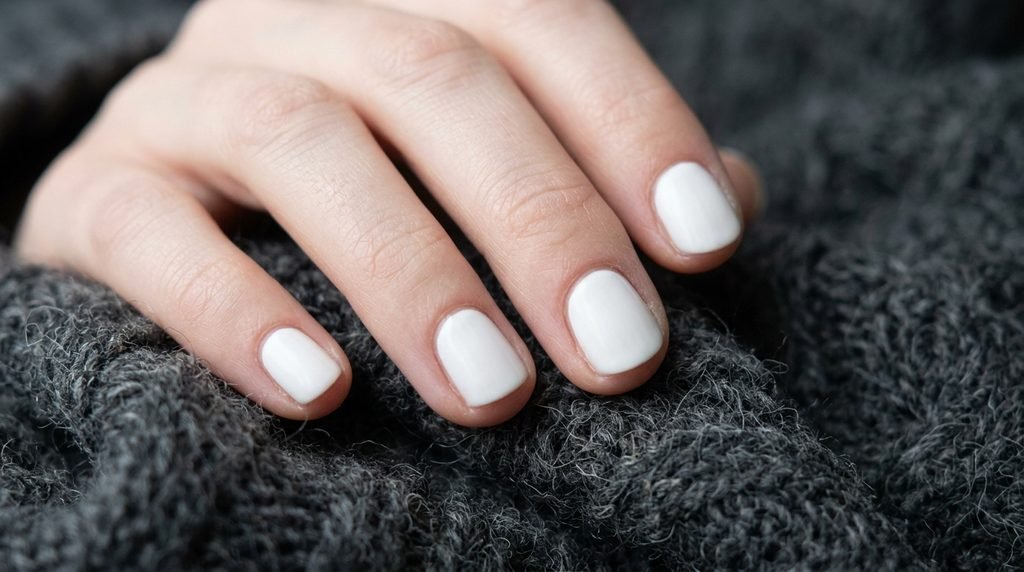
To make your ghost face pop, you need an opaque, streak-free background. White polish can sometimes streak if applied too thick.
Apply your chosen base shade—either stark chalk white, sheer milky white, or a moody sheer nude. Apply two paper-thin coats rather than one thick layer.
Cure or dry completely between coats. Thin layers guarantee that your detail work won’t sink into uncured, squishy polish later in the process.
How to Map the Eyes and Mouth
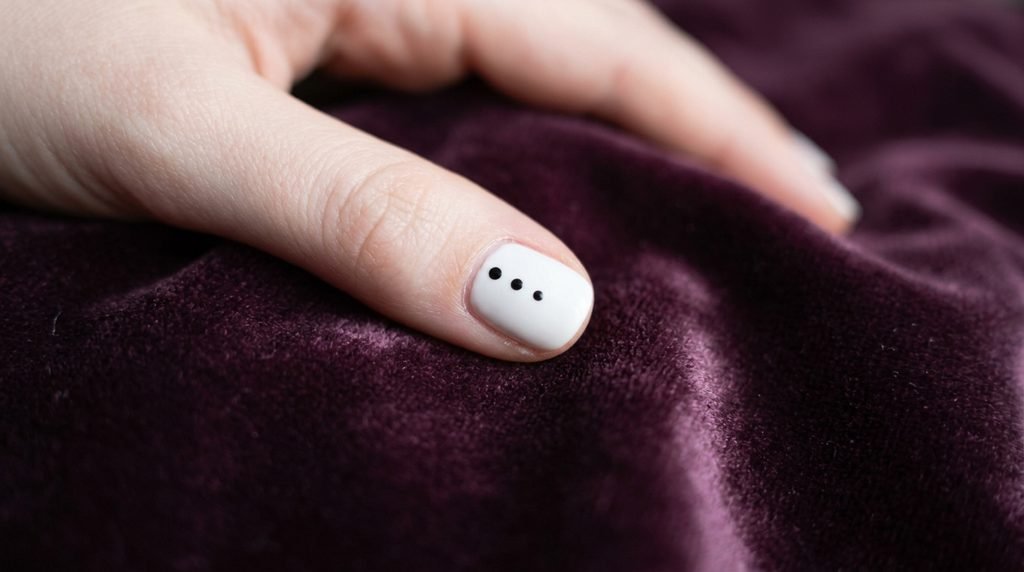
Precision comes from structural mapping rather than freehand guessing. Mapping out facial features using tiny guide dots guarantees perfect symmetry.
Dip the tip of your smallest dotting tool into black gel polish. Place two vertical guide dots right in the center of the nail bed for the eyes.
Place a slightly larger dot lower down to mark the top of the stretched screaming mouth. This simple three-dot layout sets your proportions before you start painting lines.
How to Paint Ghost Eyes Step by Step
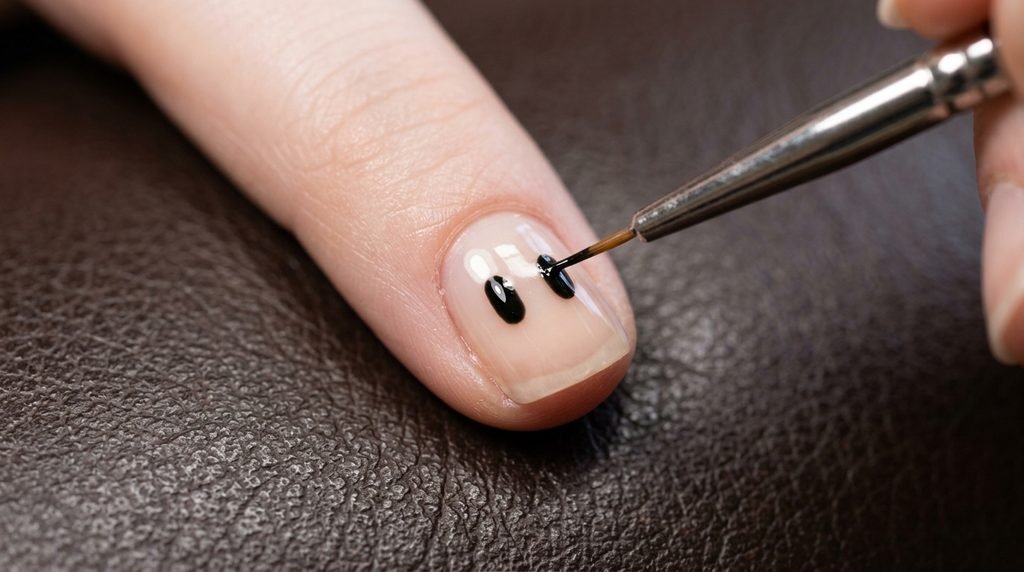
The classic ghost face features oval, hollowed-out eyes that give it an eerie, recognizable expression.
Using your fine 7mm liner brush, gently pull the top and bottom of your guide dots outward into vertical ovals. Keep your pressure light so the lines stay sharp.
If you prefer a cute, friendly ghost look instead, leave the eyes as solid round dots. Add a tiny white highlight dot inside each black circle using a tooth-pick tip.
How to Draw the Stretched Screaming Mouth
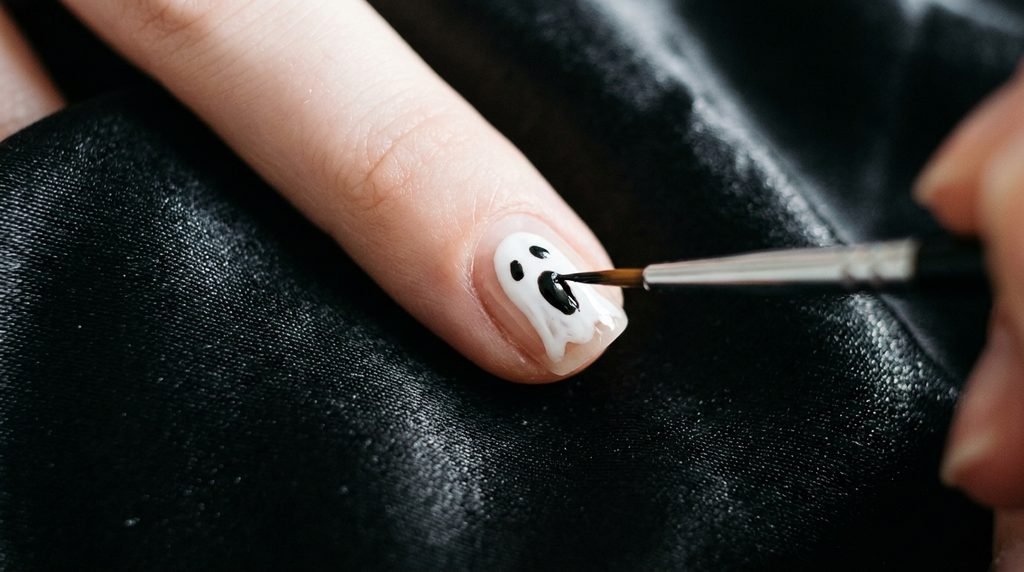
The stretched, oval mouth provides that iconic horror-movie silhouette.
Take your detail brush and extend the lowest guide dot downwards into an elongated drop shape. Make the bottom of the mouth slightly wider than the top to capture that classic screaming illusion.
Keep acetone and a clean-up brush nearby. If the mouth appears crooked, wipe it away instantly with alcohol before curing and try again.
Curing and Sealing Your Halloween Nail Art
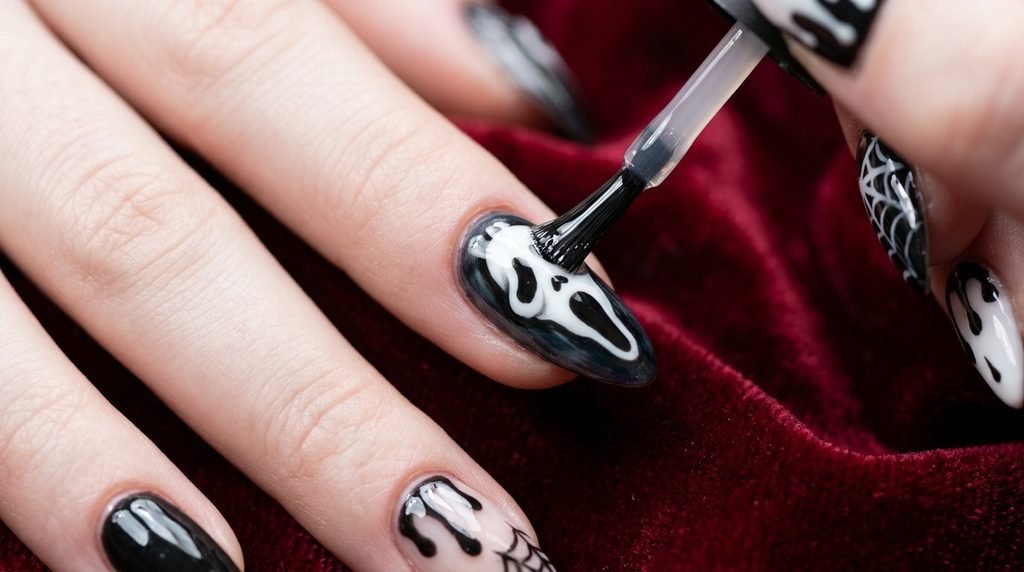
Sealing your artwork protects your fine line work from chipping during everyday tasks.
Once you are satisfied with your faces, cure the black design layer for 60 seconds. Apply a generous layer of smudge-free top coat over the entire nail.
Hover the top coat brush over the nail rather than pressing hard, which prevents dragging uncured black pigment across your white base. Cap the short tip carefully and execute your final cure.
Ghost Face Nails for Short Square Nails
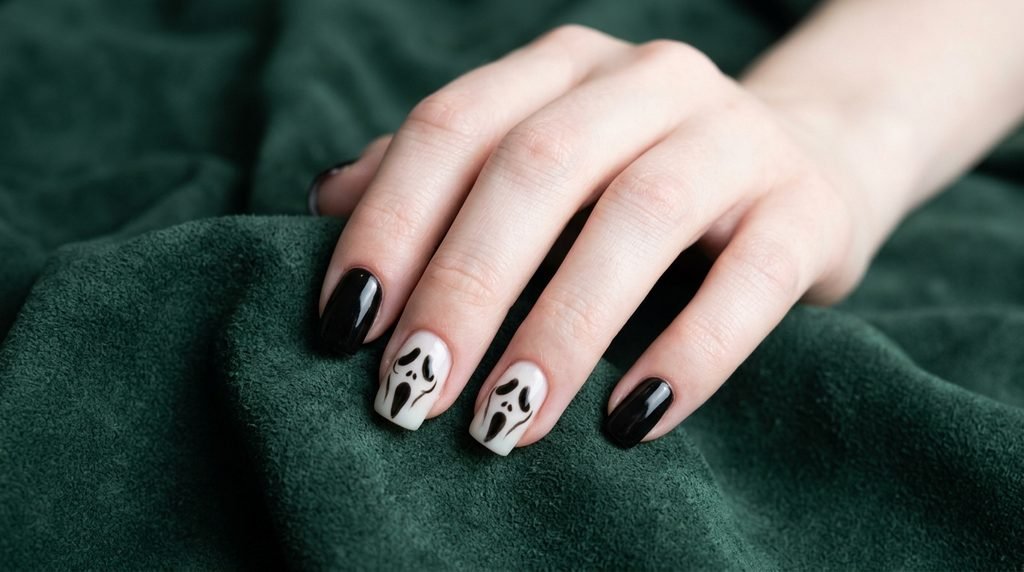
Short square nails offer crisp corners and a wide, flat canvas that suits bold, geometric nail art.
Paint the ghost face large enough to fill the entire center square of the nail bed. The flat free edge acts as a natural frame for full-coverage ghost face accents.
Pair this shape with crisp matte black accent nails on the surrounding fingers for a dramatic, moody contrast.
Ghost Face Nails for Short Almond Nails
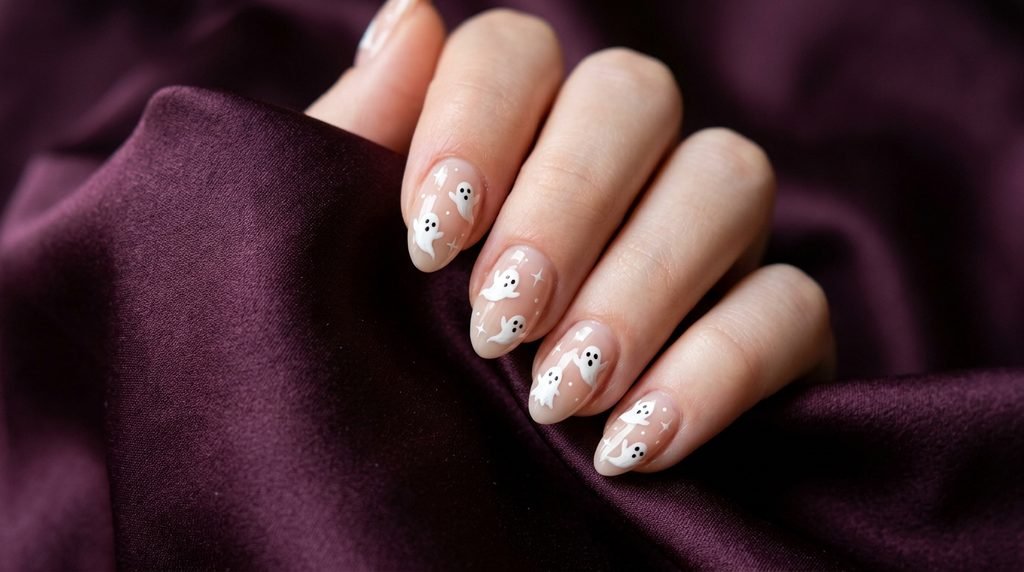
Short almond nails taper gently toward the tip, naturally elongating the look of shorter fingers.
Position the ghost face slightly higher on the nail bed, allowing the tapered tip of the nail to naturally mimic the bottom of a ghostly shroud.
A sheer nude or pale milky pink base shade works best here, giving the illusion of a floating ghost against your natural skin tone.
Ghost Face Nails for Short Coffin Shapes
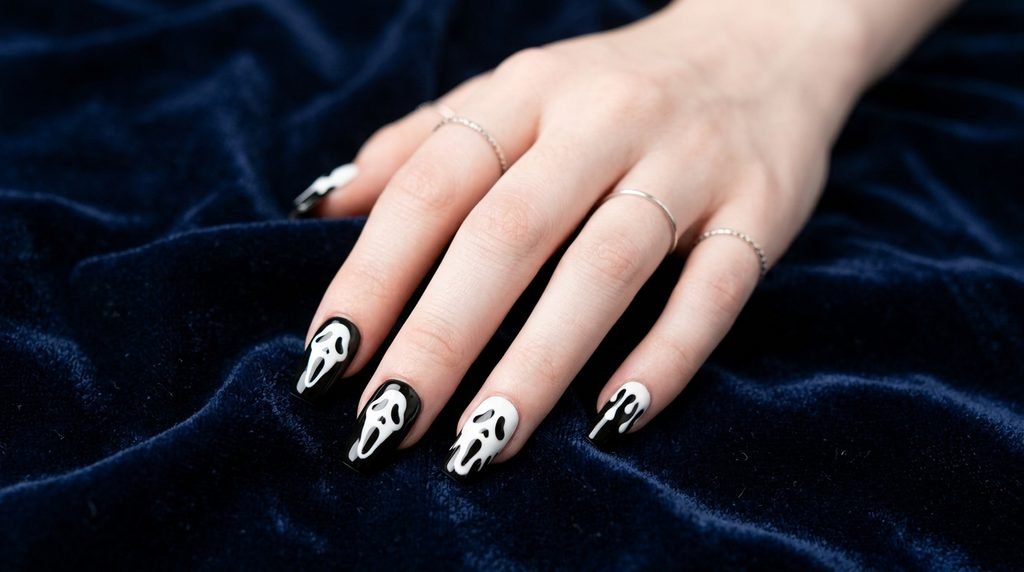
Short coffin nails feature tapered sides with a flat top, creating an edgy silhouette perfect for spooky Halloween aesthetics.
Center the screaming ghost face directly in the middle of the coffin shape, aligning the vertical eyes with the straight side walls.
Finish with a ultra-matte top coat to accent the sharp angles of the coffin edge and highlight the high-contrast art.
Ghost Face Nails for Short Squoval Nails
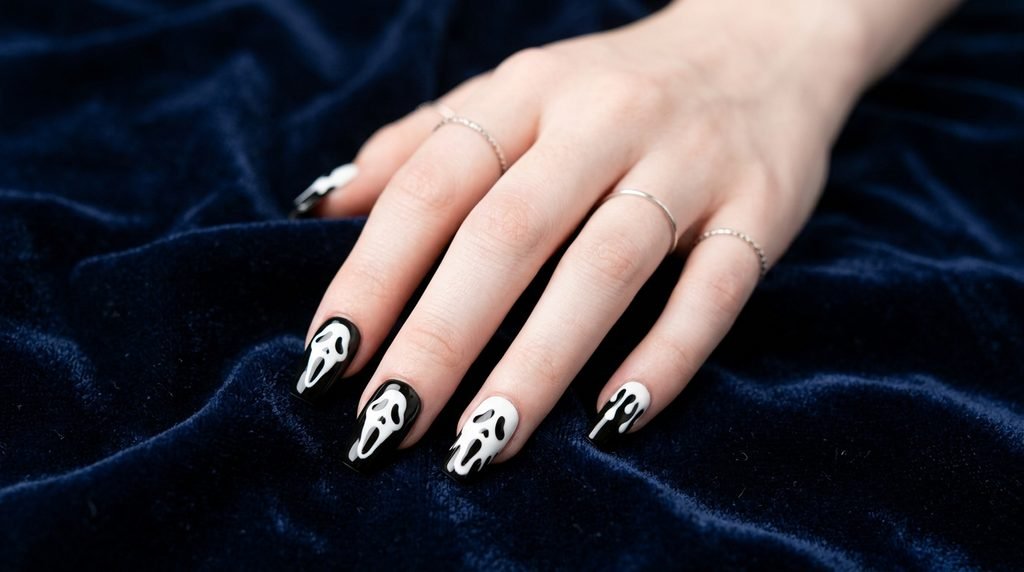
Squoval nails combine the strength of a square edge with the softness of rounded corners, making them ideal for practical everyday wear.
Because squoval shapes have soft edges, they look amazing with softer, cuter ghost face variations featuring rounded eyes and tiny blush spots.
This shape handles daily typing and hands-on work without chipping the detailed art along the edge.
Halloween Nail Design 1: Classic Black and White
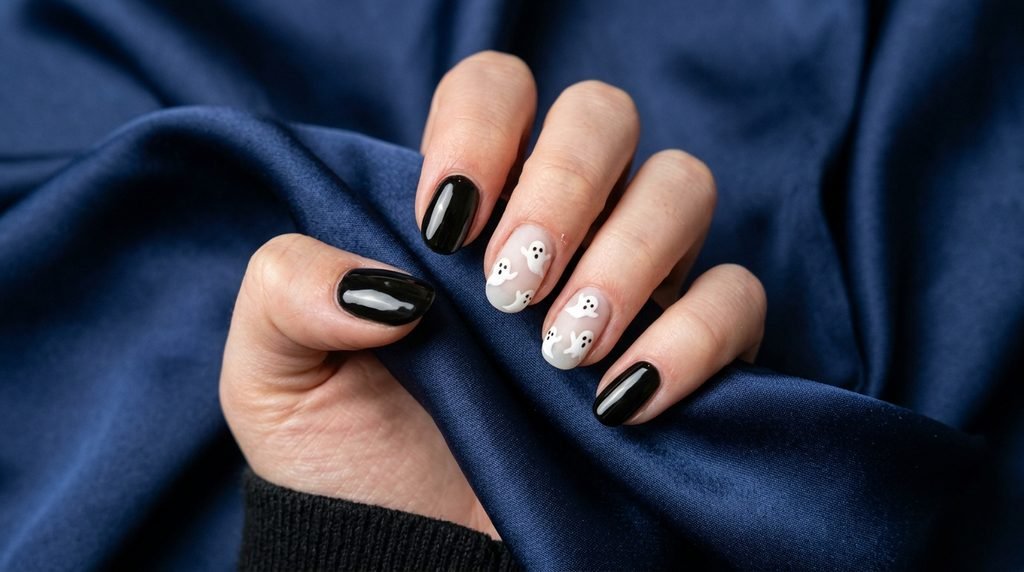
You can never go wrong with a classic monochrome set. This timeless design relies on crisp contrast and minimalist lines.
- Base: Opaque stark white on the ring and middle accent nails.
- Accents: Solid high-shine jet black on the index, pinky, and thumb.
- Art: Elongated screaming ghost faces painted on the white accent nails.
- Finish: High-gloss shine across all ten nails.
Halloween Nail Design 2: Matte Spooky Ghost Accent
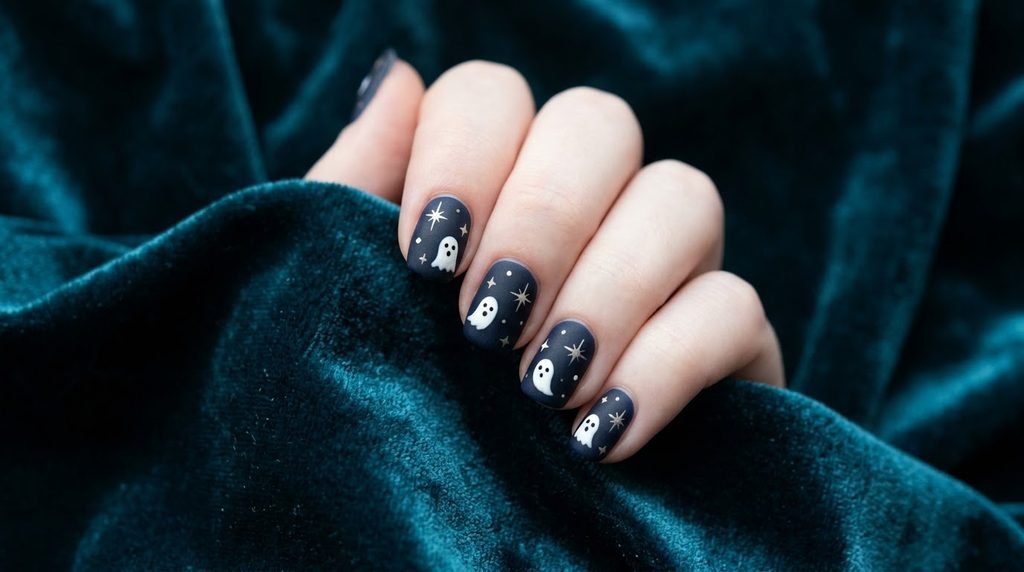
Matte finishes transform basic nail art into a soft, velvety masterwork with an elevated salon aesthetic.
- Base: Milky translucent white base coat across all nails.
- Art: Delicate ghost faces applied only to the ring finger and thumb.
- Details: Add tiny black starbursts and micro dots around the floating ghosts.
- Finish: Velvety matte top coat for an ethereal, smooth effect.
Halloween Nail Design 3: Minimalist French Ghost Tips
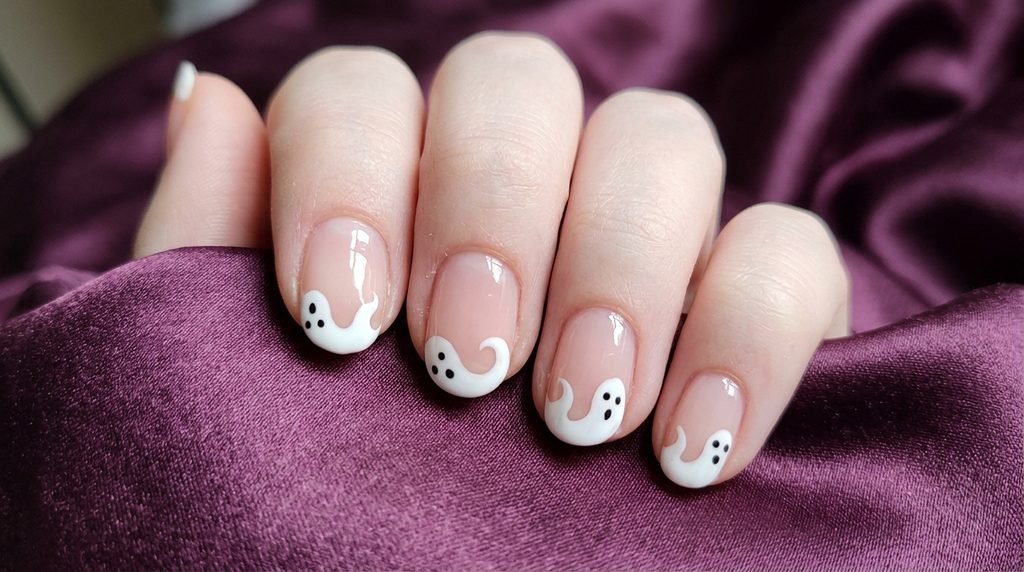
Combine classic elegant french tips with spooky Halloween themes by turning traditional white smile lines into flowing ghosts.
- Base: Sheer pink or nude base shade matching your skin tone.
- Tip: Paint a wavy, organic white french tip along the short free edge.
- Art: Add two tiny black dots and a small oval on the white tip to create a ghost smile.
- Finish: Super-glossy gel top coat.
Cute Pastel Ghost Nails
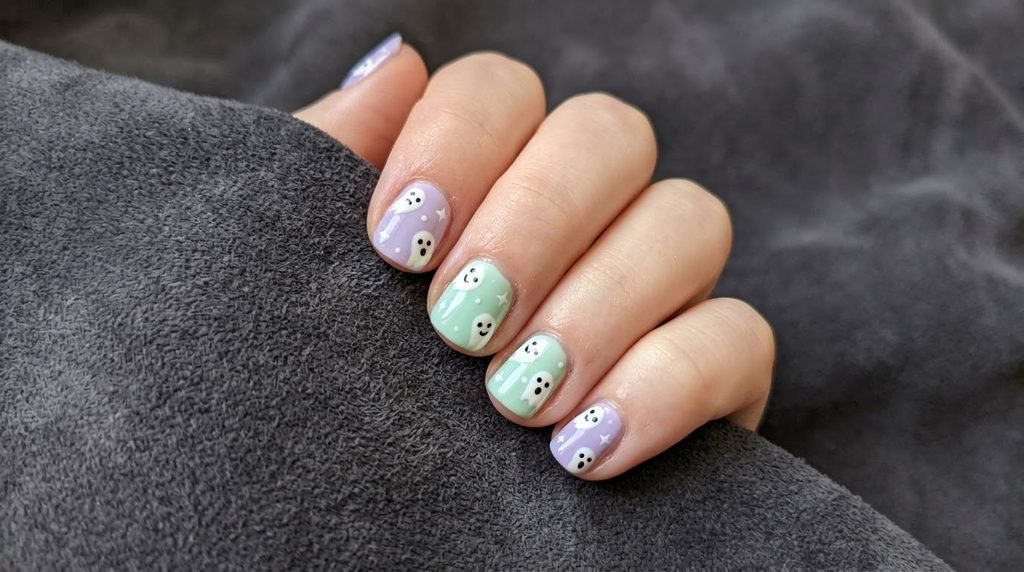
Halloween designs don’t always have to be dark and terrifying. Soft pastel tones offer a playful, trendy alternative for autumn.
Replace the stark white base with soft lavender, pastel mint, or pale butter yellow shades. Paint cute ghost silhouettes with round eyes and tiny pink cheeks using a dotting tool.
This softer aesthetic appeals directly to anyone who wants festive nails without heavy gothic colors.
Glow-In-The-Dark Spooky Accent Nails
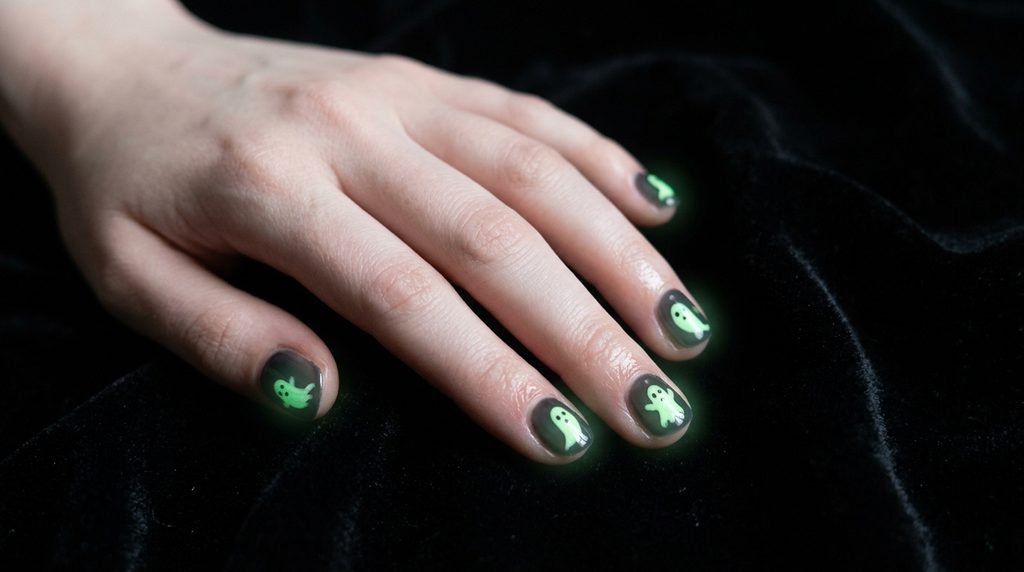
Take your Halloween nails to the next level by making them illuminate under dark lighting or blacklights.
Apply a coat of specialized glow-in-the-dark top coat or luminous pigment powder over your white ghost base layer before painting the black facial features.
During the day, your nails look like a crisp white manicure. At night, the ghost silhouettes illuminate brightly in electric green or turquoise.
Metallic and Chrome Ghost Accents
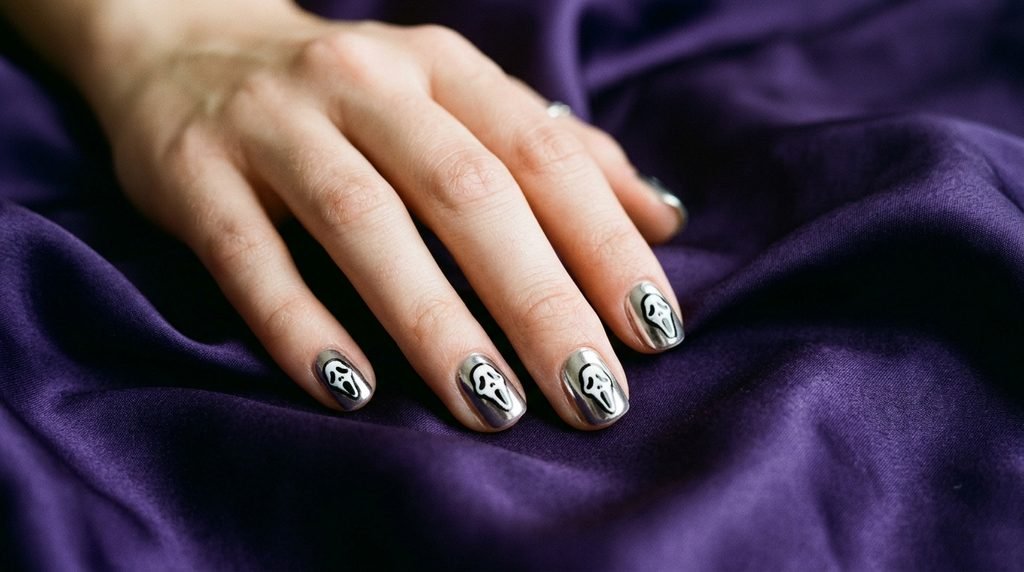
Incorporate modern chrome powders to give your eerie nail design a luxurious, metallic edge.
Paint your ghost faces over a silver liquid chrome or pearl aurora base coat. The iridescent sheen shines through around the ghost shape, catching the light from every angle.
This high-shine technique elevates simple short nails into a sophisticated accessory suitable for evening events.
DIY vs. Salon Cost & Application Comparison
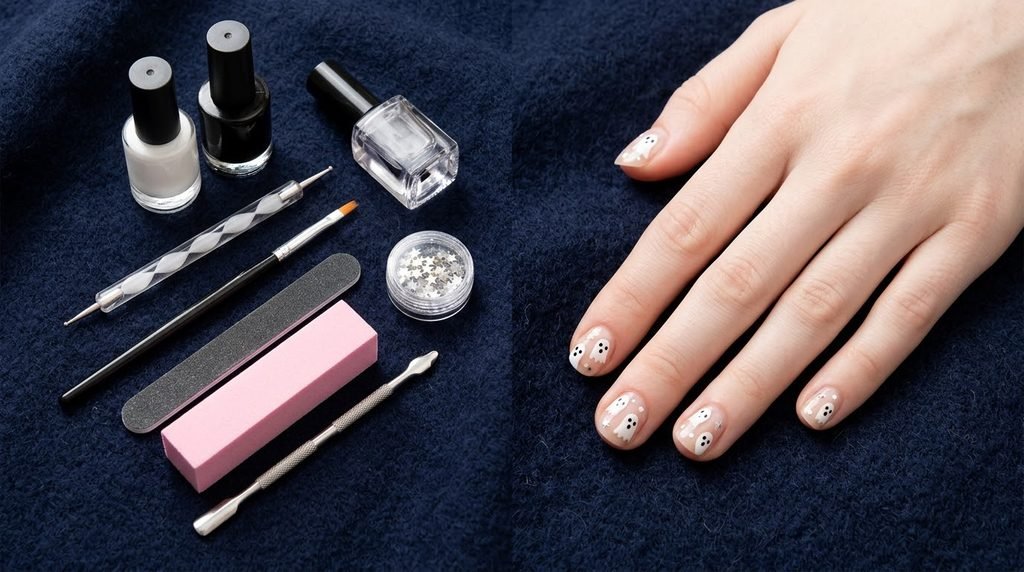
Deciding whether to paint your own nails or book a professional appointment depends on your budget, time, and comfort with nail tools.
| Feature / Tier | At-Home DIY | Press-On Nails | Salon Appointment |
| Average Cost | $10 – $20 total (reusable tools) | $12 – $25 per set | $50 – $85 + tip |
| Time Required | 30 – 45 minutes | 15 minutes | 60 – 90 minutes |
| Longevity | 7–14 days (gel) | 5–10 days | 3+ weeks |
| Skill Needed | Beginner / Intermediate | None (Glue & Go) | Professional |
| Customization | Unlimited flexibility | Fixed designs | High custom detail |
Shape, Finish, and Occasion Compatibility Guide
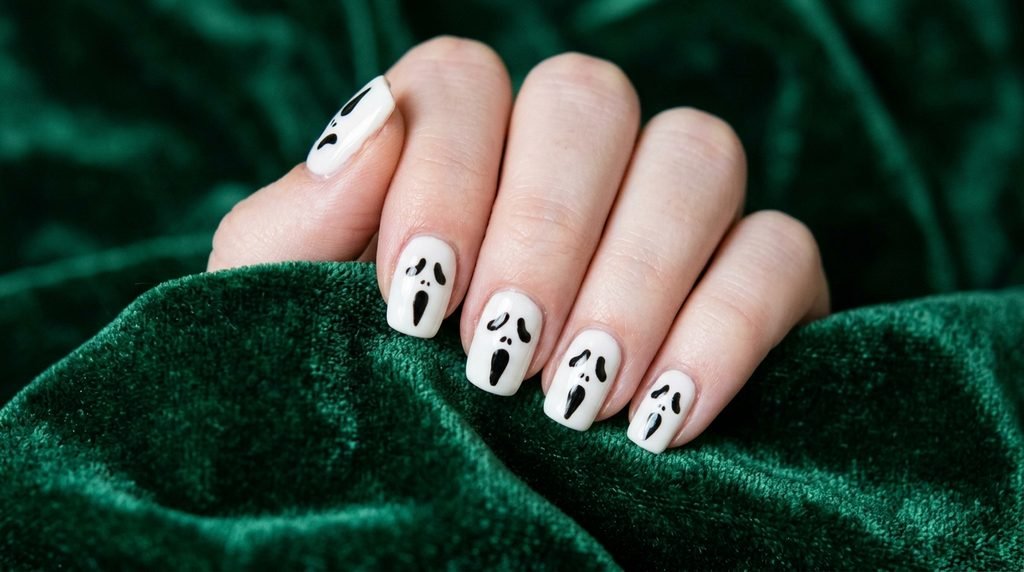
Matching your nail art to your specific daily routine ensures your manicure lasts longer and feels comfortable.
| Nail Shape | Best Finish | Ideal Occasion | Durability Tier |
| Short Square | High-Gloss | Office & Casual | Maximum |
| Short Almond | Soft Matte | Halloween Parties | Moderate |
| Short Coffin | Metallic Chrome | Evening / Night Out | High |
| Short Squoval | Velvet Matte | Daily Wear / Typing | Maximum |
How to Avoid Cuticle Flooding and Pooling
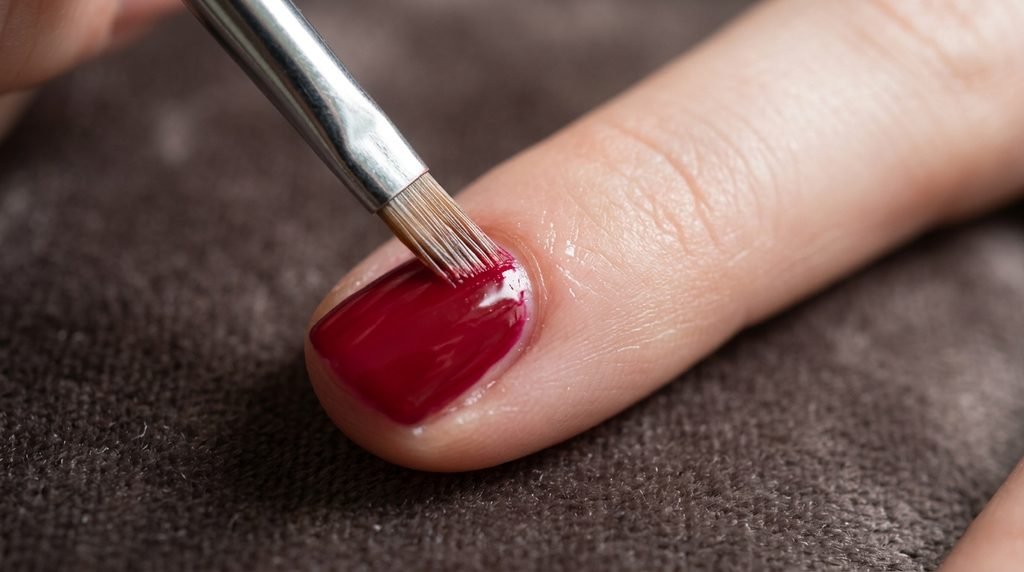
Cuticle flooding occurs when wet gel polish runs into your side walls, causing early peeling and messy edges.
To avoid this, wipe one side of your polish brush clean on the bottle neck before applying liquid to the nail. Place the brush 2 millimeters away from the cuticle line, push gently toward the fold, and pull forward to the tip.
If polish touches your skin, clean it immediately using a flat angled brush dipped in pure acetone before you cure under the light.
Fixing Smudged Faces and Thick Gel Coats
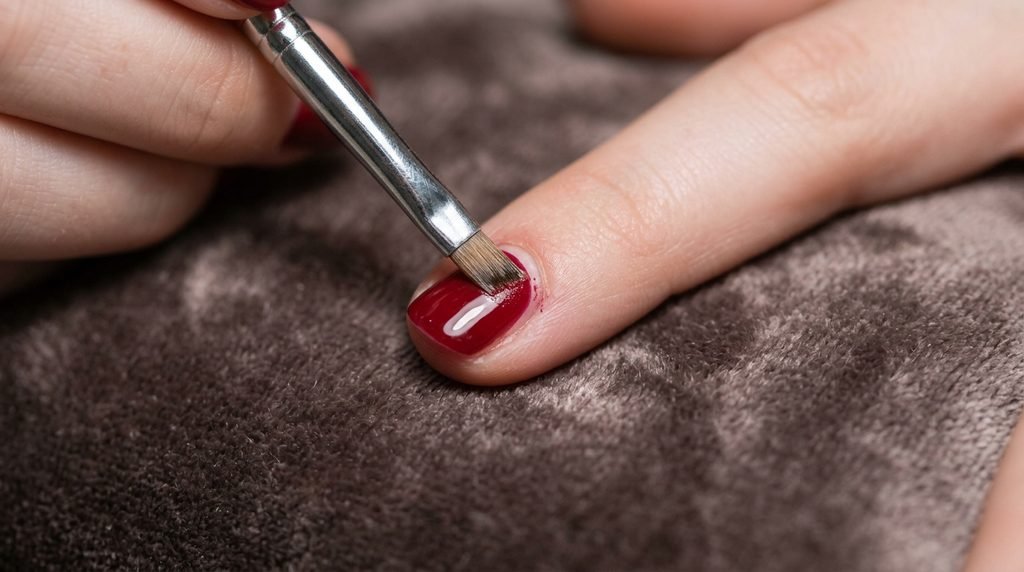
Working with thick polish layers leads to wrinkled gel surfaces and smudged facial features during application.
Always apply gel polish in paper-thin layers. If your black dotting work feels too raised or thick, flash-cure it for 10 seconds immediately after painting to lock the gel in place without letting it spread out.
If you smudge a wet line, wipe the uncured layer off using a lint-free wipe soaked in alcohol, leaving your cured white base completely intact.
Salon Communication: How to Ask Your Tech
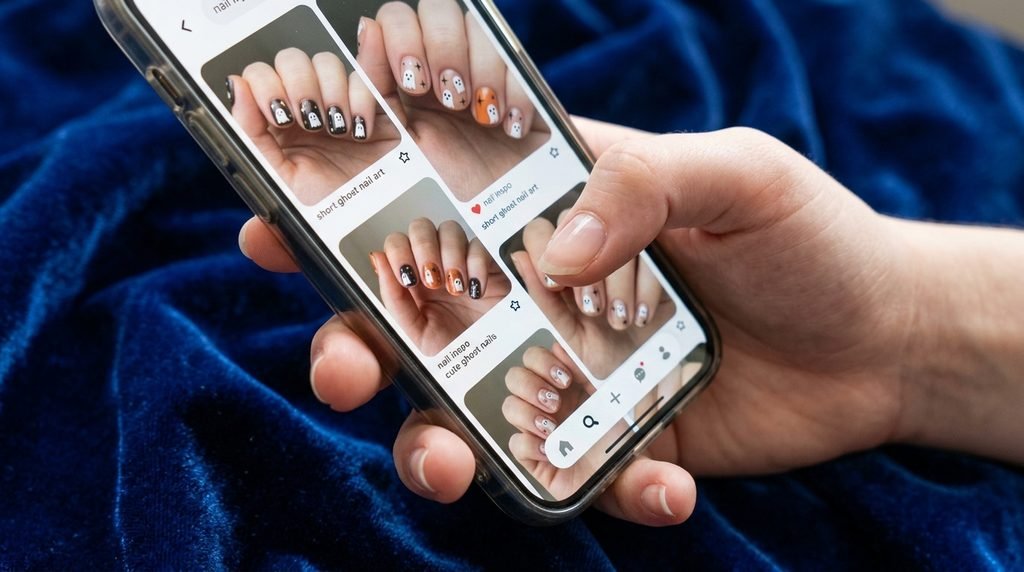
Walking into a salon without clear visual references or terms can result in a design you didn’t quite ask for.
Show your nail tech reference photos directly on your phone. Ask for a “short natural-length gel manicure with an opaque white base and hand-painted minimalist screaming ghost accents.”
Specify whether you prefer a high-gloss gel top coat or a velvety matte finish, and clarify if you want accent nails only or ghost faces on all ten fingers.
Step-by-Step DIY Summary Tutorial
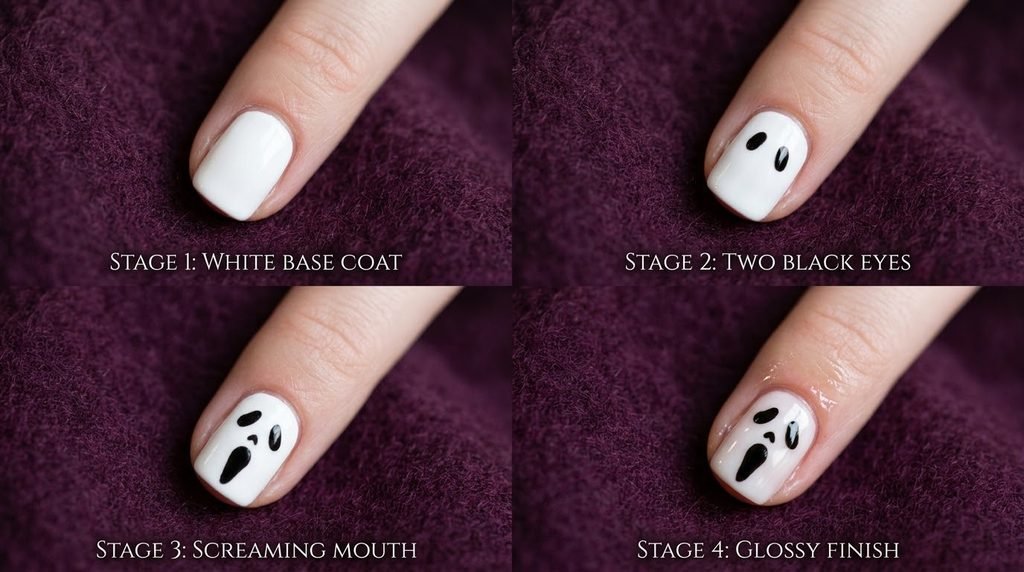
Here is your quick-reference checklist for painting ghost face nails at home:
- Prep: File short nails, push back cuticles, and wipe with isopropyl alcohol.
- Base: Apply a thin layer of base coat and cure for 60 seconds.
- Color: Apply two thin coats of opaque white or nude polish; cure between coats.
- Map: Place two vertical black dots for eyes and one dot for the mouth.
- Detail: Drag dots slightly with a thin brush to create hollow eyes and an open scream.
- Seal: Cover with a smudge-free top coat and perform a final 60-second cure.
Frequently Asked Questions (FAQs)
What are ghost face nails?
A Halloween nail design featuring a stylized screaming ghost face painted on the nail bed. It typically uses black facial features—elongated eyes and an open mouth—painted over an opaque white or nude base coat.
How do I make my short Halloween nails last longer?
Proper prep is key. Gently remove surface shine, clean the nail plate with alcohol, cap the free edge with base coat and top coat, and apply cuticle oil daily to maintain flexibility.
Can I paint ghost face nails with regular nail polish?
Yes! Allow your white base coat to dry completely for at least 10 minutes before painting the black face features. Use a light hand when applying top coat to prevent smudging air-dry polish.
What is the easiest nail tool for drawing ghost eyes?
A dual-ended metal dotting tool is the easiest option. The small rounded tip allows you to create perfectly uniform eyes and mouth placements without needing advanced brush control.
Conclusion
Creating spooky, salon-worthy ghost face nails on short natural nails is fast, easy, and incredibly fun to do at home. By following simple mapping techniques and using thin polish layers, you can enjoy a crisp, professional Halloween manicure without long extensions or expensive salon visits. Save this guide for your next manicure prep, or show these exact steps to your nail tech at your upcoming appointment!

Mia founded Daily Nail Idea after a decade in beauty editorial, tired of watching great nail art disappear into the scroll. She now leads the team’s editorial direction — deciding what’s worth featuring and what’s just noise — and still paints her own nails every Sunday night, no exceptions.