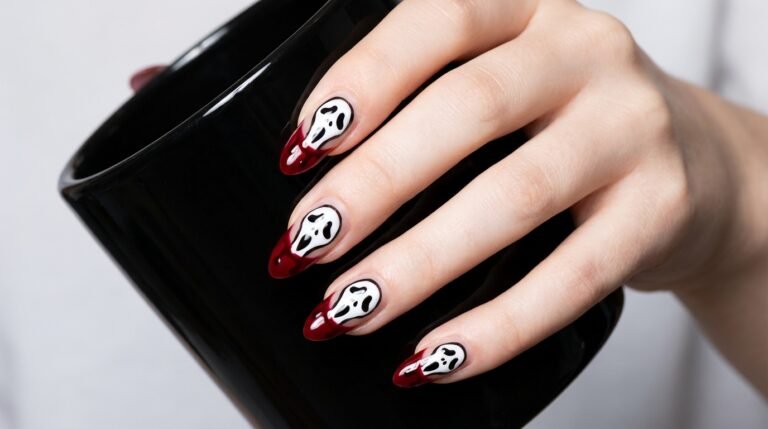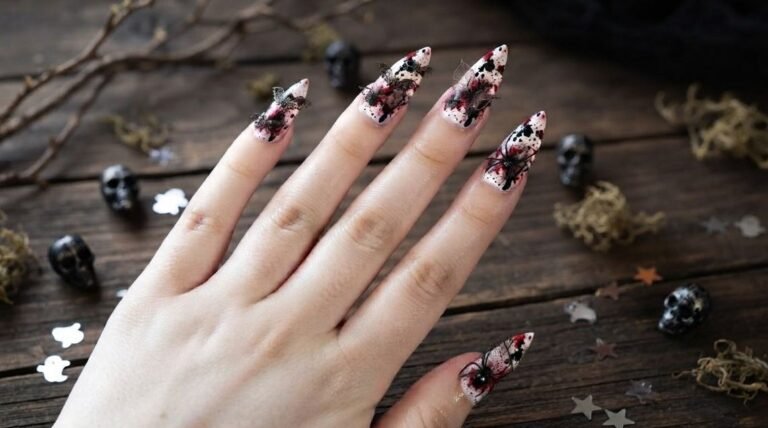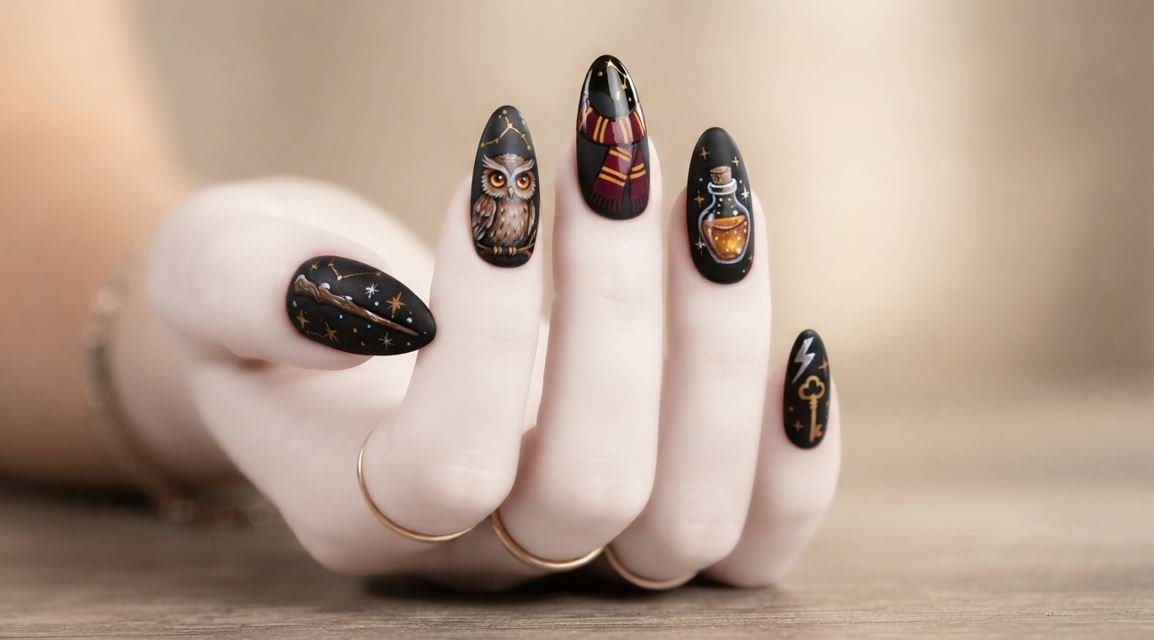
Spooky & Spellbinding: Inspired Ultimate Guide to Wizard Nail Art for Halloween October 2026
Struggling with your next manicure idea? If you’re scrolling Pinterest, feeling overwhelmed by generic ghosts, I have you covered. You want something magical, maybe book-inspired, but not cheesy. I will show you how to get enchanting wizard nail art without specific characters. We are leaning right into the moody aesthetic that’s perfect for Halloween.
At-a-Glance Summary
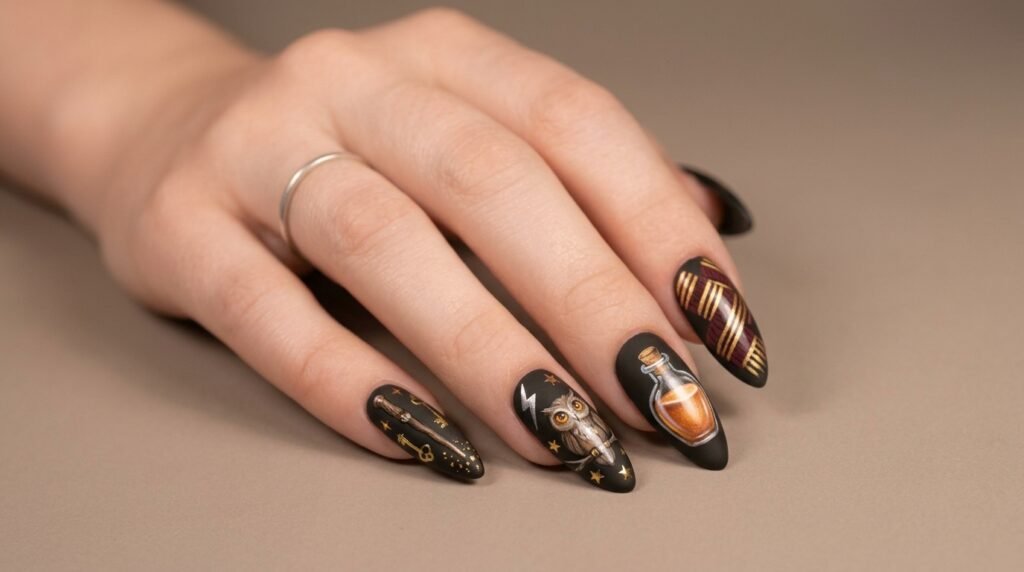
This guide dives deep into creating spooky, spellbinding wizard-themed nails. I share detailed breakdowns of classic symbols. We will cover painting wands, bubbling potions, and even generic owls. These looks work for all shapes, from short square to long almond. I have included “salon talk” tips for communicating your vision. You’ll also find step-by-step DIY guidance for achieving this fantasy nail art. Let’s make your nails the ultimate accessory for the spooky season.
| Key Symbol | Best Base Color | Recommended Shape | Difficulty Level |
| Magic Wand | Matte Black | Long Almond | Intermediate |
| Potion Bottle | Midnight Blue | Coffin | Advanced |
| Stylized Owl | Deep Forest Green | Oval | Advanced |
| Lightning Bolt | Charcoal Grey | Stiletto | Beginner |
| Striped Scarf | Rich Burgundy | Square | Beginner |
Nails Overview in Detail
Finding Your Hogwarts: Wizard Nail Art Inspo
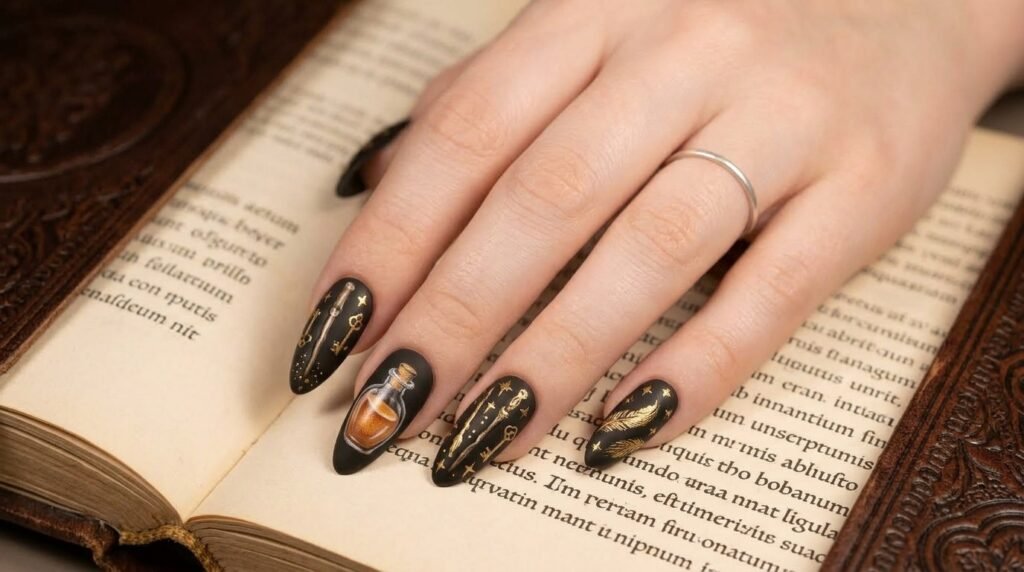
Are you getting into the Halloween spirit? You need a manicure that speaks to your inner witch or wizard. Many people search for “Harry Potter nails” but actually want unique, inspired designs. I wrote this post to help you find that magical aesthetic without copying official branding. Therefore, we are focusing on generic, enchanting symbols everyone recognizes.
Think about what makes a fantasy book feel real. Indeed, it is the wands, the potions, and the mysterious symbols. That is what we are capturing on your nails today.
This isn’t just generic halloween nail art; it’s specific wizard storytelling. Start your inspiration journey by focusing on the exact feeling you want to evoke. Is it dark and moody, or bright and whimsical?
Choosing Your Base Color for Magic
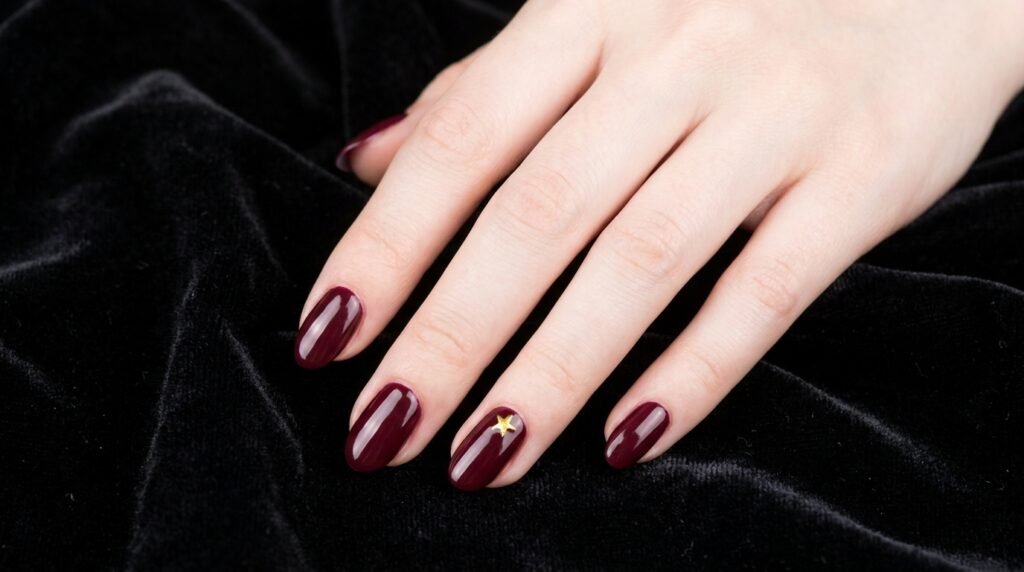
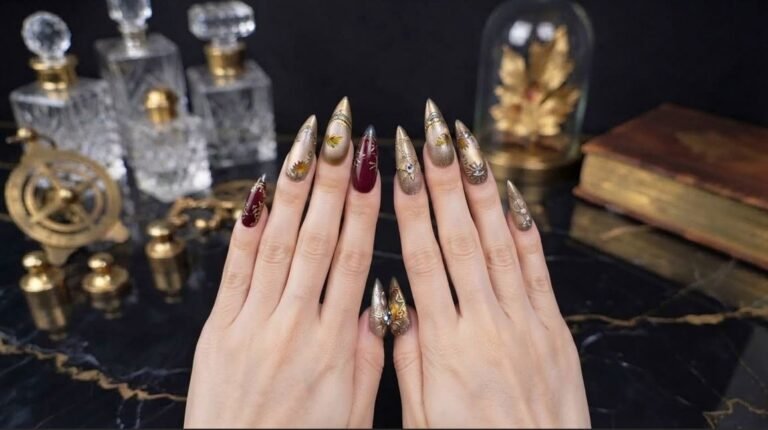
The first step in any epic manicure is picking the base color. For wizard nail art, always think deep and rich. Matte black is a classic starting point for any spooky nails design. It instantly adds drama and contrasts beautifully with metallic accents.
However, don’t feel limited to just black. Deep navy, forest green, or even burgundy work perfectly.
- Deep Navy: Evokes a midnight sky aesthetic.
- Forest Green: Gives a moody, potion-brewing vibe.
- Rich Burgundy: Perfect for cozy, book-inspired themes.
These colors provide a sophisticated backdrop for your magical elements. If you prefer something softer, consider a deep purple.
The key is setting a clear mood. Thus, your base color dictates the entire vibe of your wizard-themed manicure.
Mastering the Magic Wand on Nails
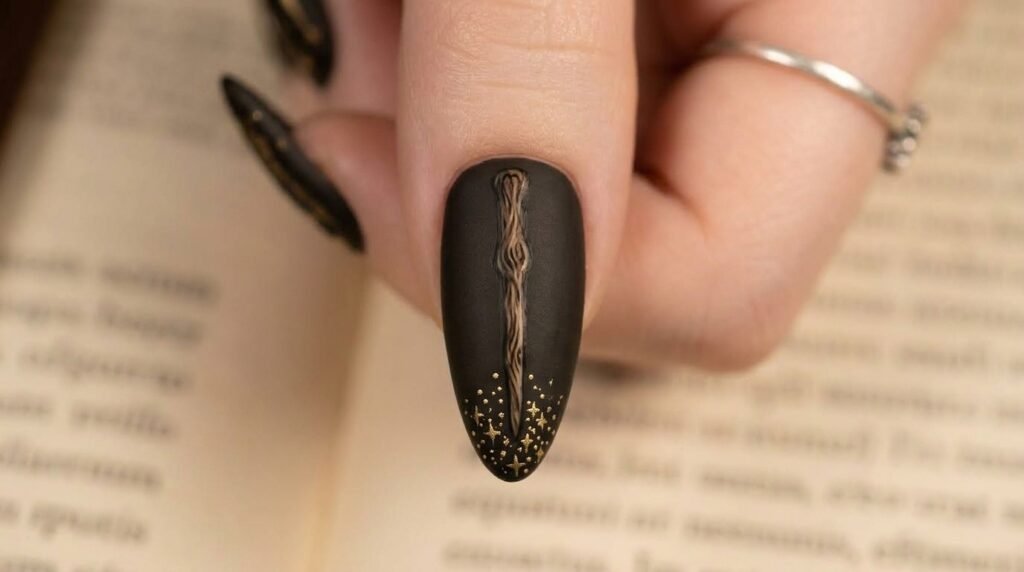
Want to know how do you paint a magic wand on your nails? It is an essential element for any wizard design. A wand can be sleek and simple, or gnarled and ancient-looking.
For this design, I always suggest a simple wooden-style wand.
First, start with a dark brown polish line across one or two nails. Use a thin detailing brush for precision. Next, add subtle texture with lighter brown streaks. Finally, place a tiny dot of metallic silver or gold at the tip.
This simple dot represents the “spark” of magic. Asking your nail tech for a stylized wood-grain effect works exceptionally well here. [Internal link opportunity: → Nail art tool recommendations for DIY]
Bubbling Potion Bottle Nail Art Designs
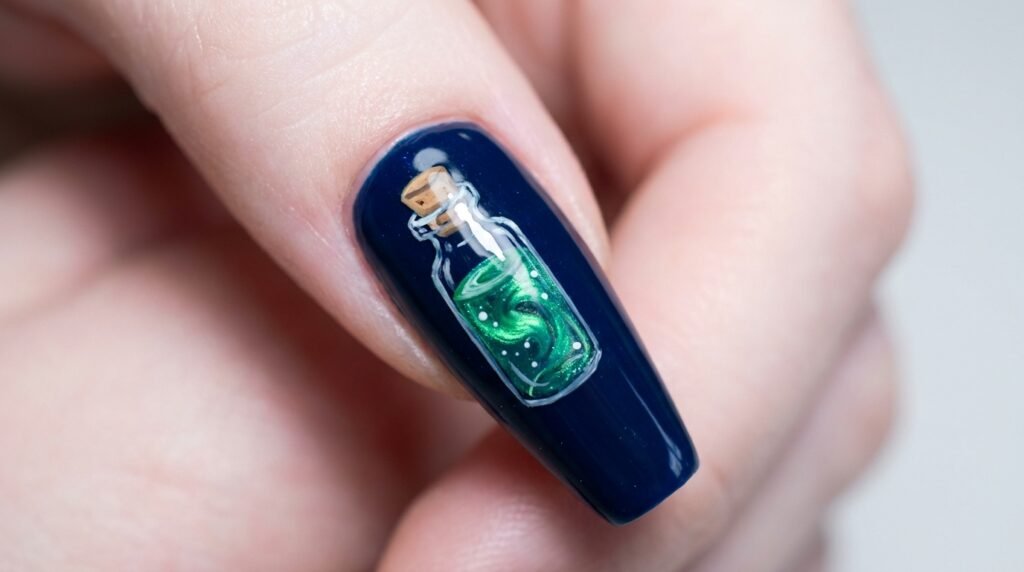
Potion bottle nail art designs are visually iconic and so fun to wear. They are a massive staple of fantasy nail art halloween trends. You don’t need fancy skills for this wizard nail art design.
Start with a generic bottle shape using a contrasting polish color. I love using a shimmering emerald green or glowing amber.
Add a tiny light brown “cork” at the top of the bottle. To make it look like it’s bubbling, place small white dots just above the liquid line.
Ask your tech for “simple potion bottle illustrations.” They don’t need to be hyper-realistic; the iconic shape is instantly recognizable.
The Perfect Oval: Owl Nail Art for Wisdom
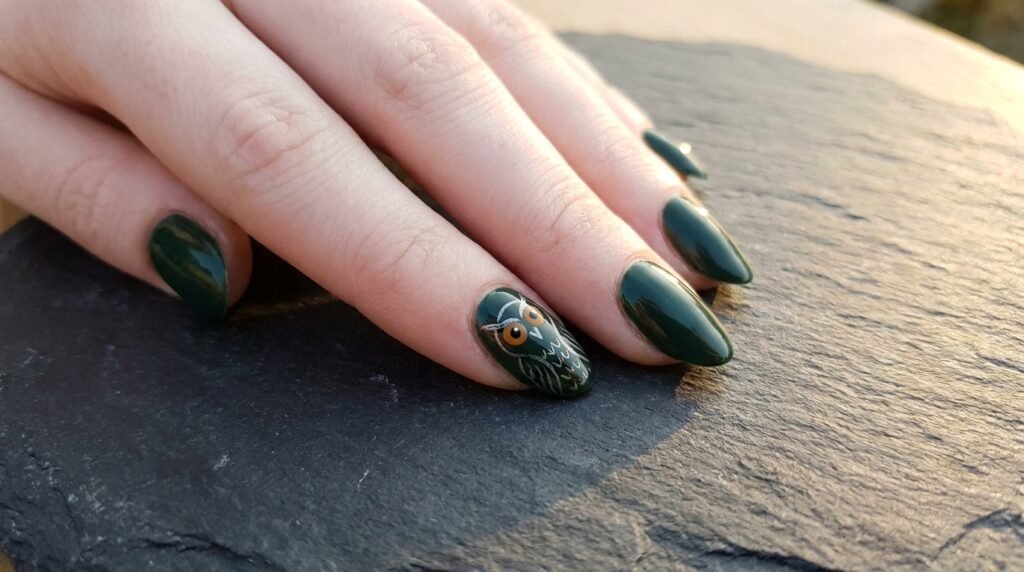
Owls are synonymous with wizarding worlds and ancient wisdom. A generic owl design adds instant charm to your fantasy manicure. It is an essential part of an owl and wand nail design. For this look, I advise keeping it simple and stylized. A full, highly detailed owl can be tough on short nails.
- Focus primarily on the large amber eyes.
- Use a fine liner brush for feather textures.
- Place the owl silhouette on a neutral accent nail.
Use contrasting colors like deep grey or brown against your base. Ask for “a stylized, friendly owl illustration.” This avoids copyright issues while capturing the essence completely. Almond or oval shapes are fantastic for elongating this design.
Weathering the Storm with Lightning Bolts
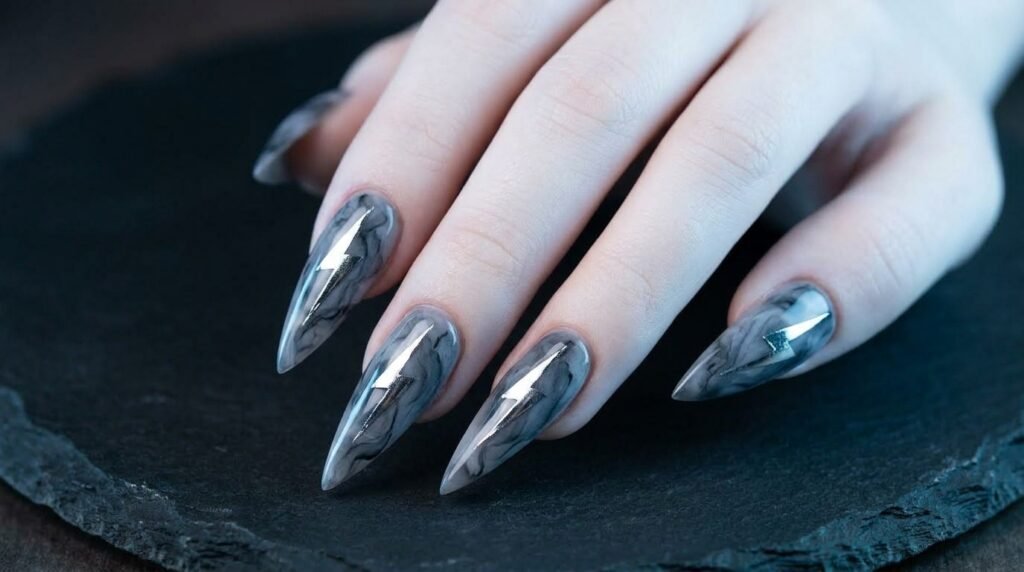
Lightning bolts are classic magical symbols and incredibly simple to create. They add instant energy and a recognizable touch of wizardry. This is perfect for those seeking simple halloween nail designs with a fantasy twist. You can paint them freehand with a thin brush and metallic polish. Silver, gold, or even a sparkling white look truly magical. Alternatively, use tiny nail decals for perfectly crisp lines. A single bolt on an accent nail is surprisingly powerful.
Ask your nail tech for a “stylized, slightly jagged lightning bolt” in a bright metallic shade.
Deepening the Mystery: Matte Black Fantasy Nails
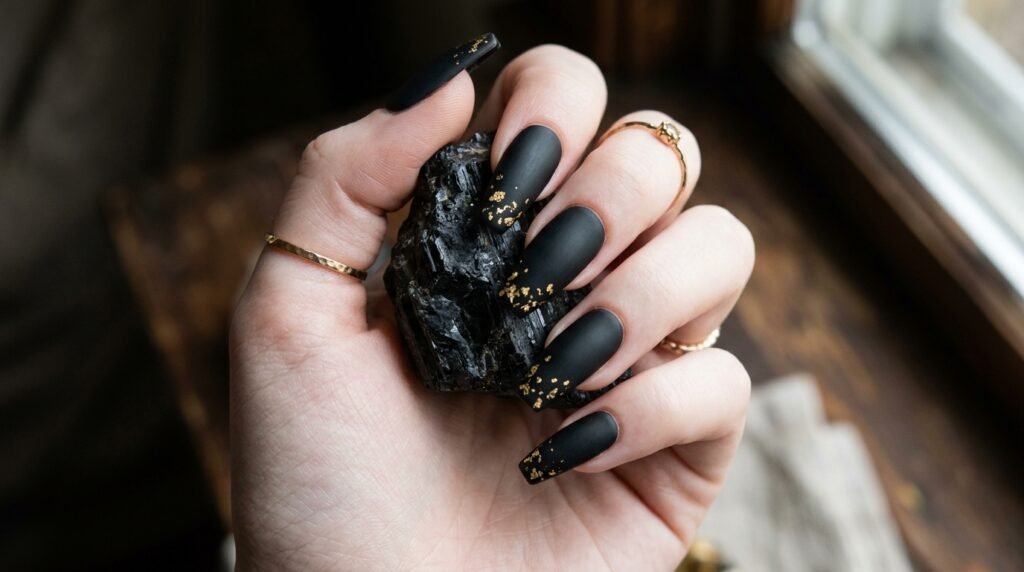
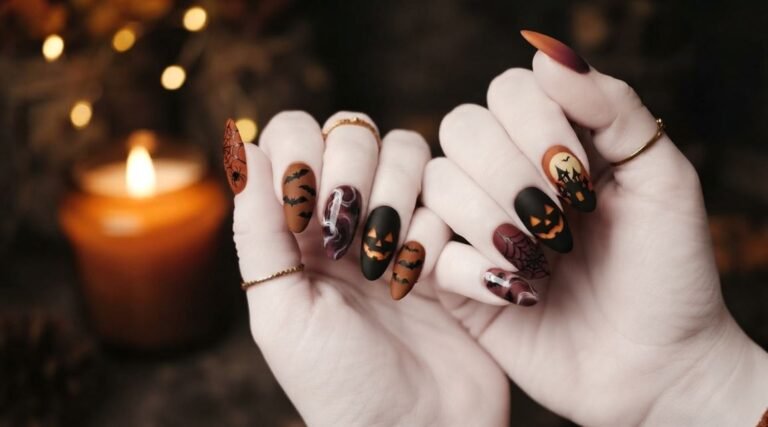
There’s something incredibly chic and moody about matte finishes. Matte black fantasy nails provide the ultimate dark, mysterious base for your detailed art. The flat finish makes metallic elements really pop off the nail.
It feels sophisticated and very appropriate for spooky nails. Ask your salon for a “velvet matte top coat” over a rich black polish.
Be aware: matte finishes can show wear faster than glossy coats. They can also attract dust, so keep them clean. But the moody aesthetic payoff is absolutely worth the extra care.
Sparkling Spells: Adding Stars and Glitter
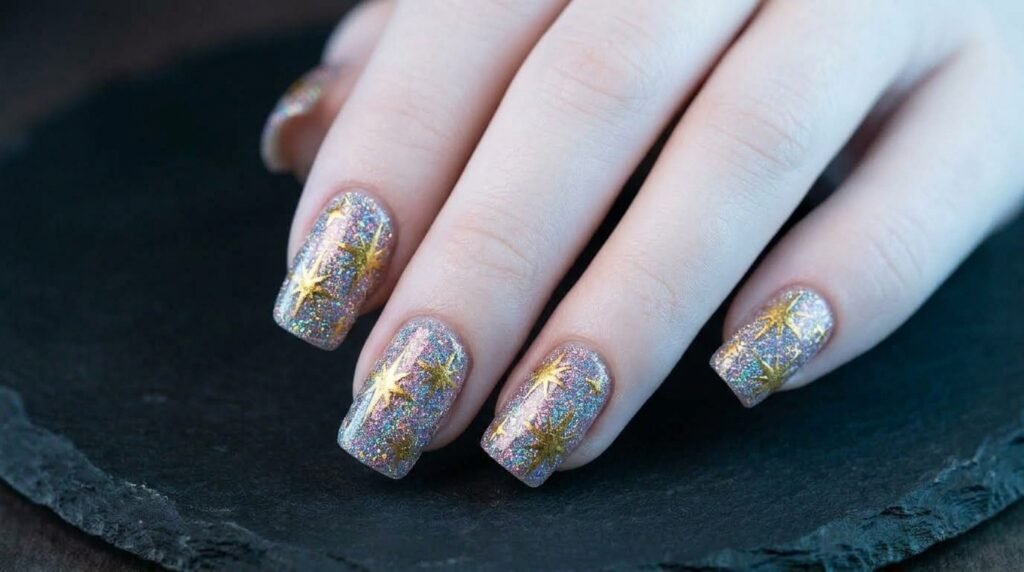
No magic is truly complete without sparkles! Tiny gold or silver stars are essential accents for wizard nail art. They frame other symbols and fill negative space beautifully. You can use tiny nail gems, star-shaped glitters, or freehand painting. Scatter them randomly or cluster them around other designs like lightning bolts.
To get that truly enchanted feel, ask for “micro-fine holographic glitter over specific nails.” It catches the light perfectly whenever your hands move.
Show Your Colors: Striped Scarf Designs
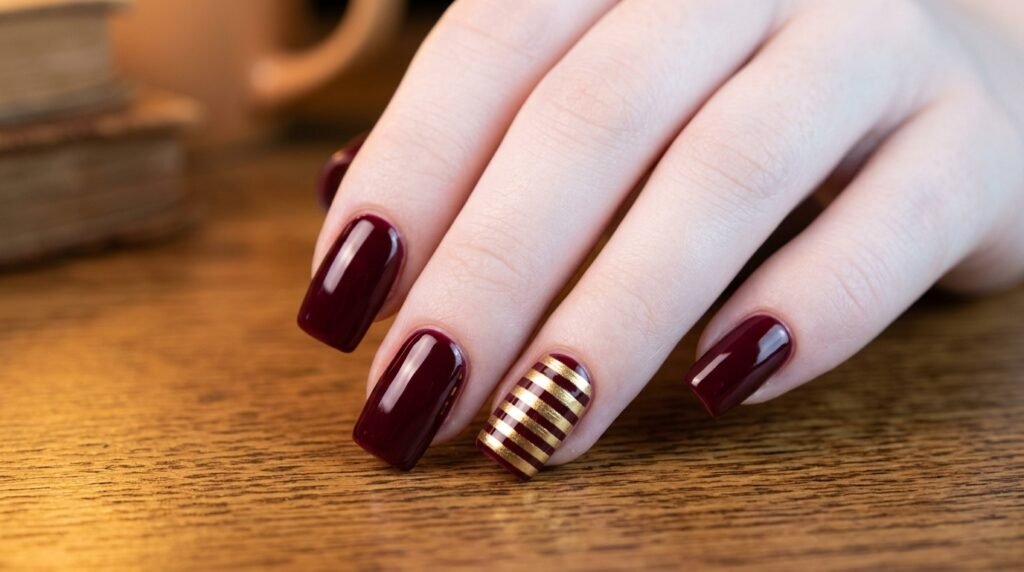
A striped scarf is a cozy and iconic wizarding element. It instantly brings to mind cozy common rooms and magical studies. This is a subtle yet effective book-inspired nail art detail.
Choose colors that resonate with your favorite “house” aesthetic.
- Burgundy and Gold: Classic, rich, and regal.
- Forest Green and Silver: Cool, sharp, and mysterious.
- Navy and Bronze: Wise, understated, and chic.
Paint simple horizontal stripes on one accent nail. Keep the lines crisp by using striping tape or a steady hand. Ask your tech for “clean, graphic stripes in house colors.”
Unlocking Potential with Magical Keys
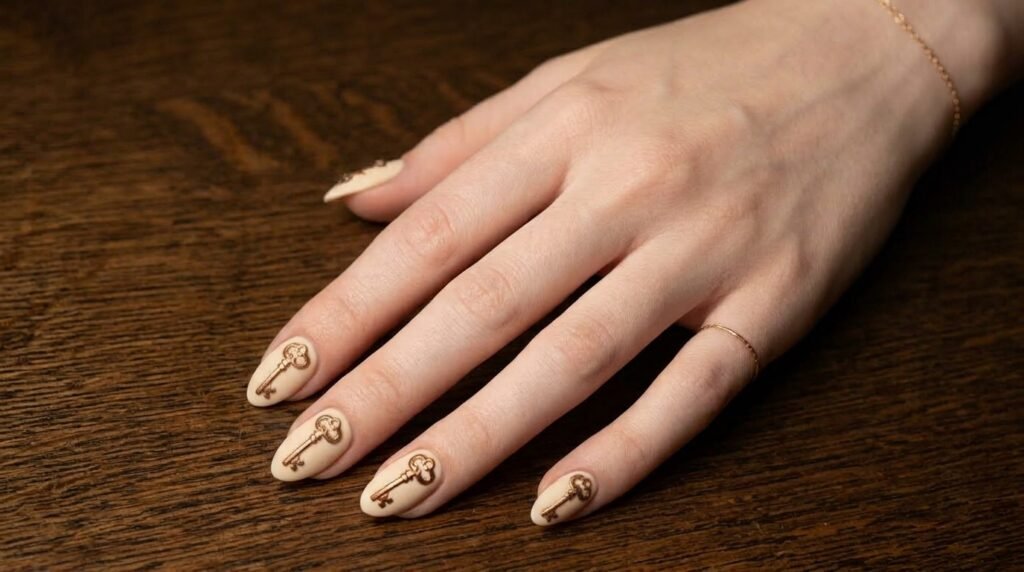
Antique-looking keys represent secrets and unlocking new magical potentials. They fit perfectly into any magic themed nails collection. Use metallic gold or bronze polish for a realistic, slightly aged look. The key shape should be ornate but not overly complex. A small key on the ring or thumb nail makes a lovely accent. Ask for an “aged skeleton key design” in a metallic finish.
This symbol is general enough to be universally recognized as magical. Thus, it keeps your manicure elegant without feeling like a costume.
Adapting Magic for Short Nails
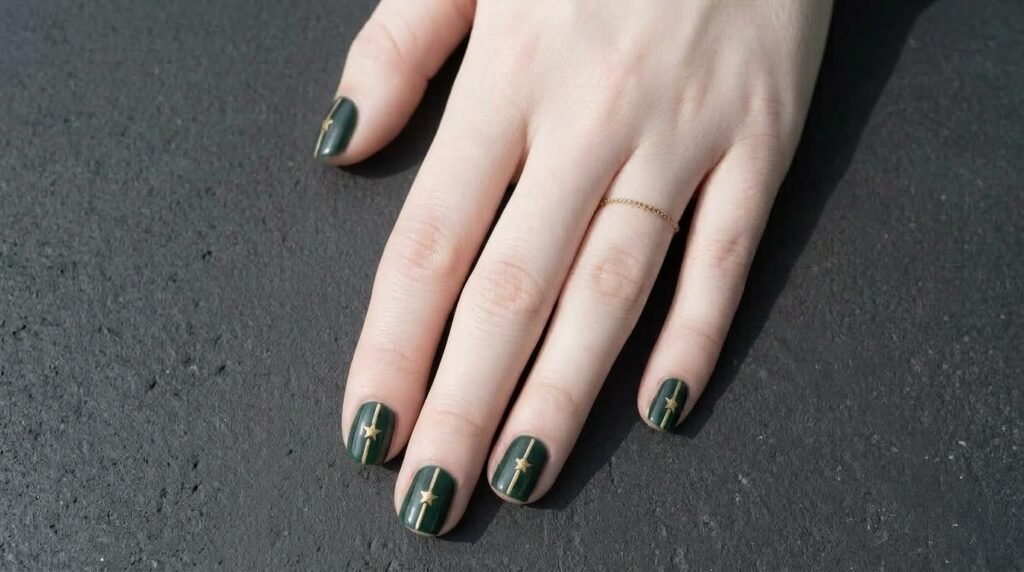
Don’t have long extensions? No problem at all! You can absolutely achieve spooky nails and wizard magic on short nails. The key is adjusting scale and selection. Instead of trying complex illustrations, focus on simple symbols. A tiny lightning bolt, a few stars, or a potion bottle on one or two nails works wonders.
Use negative space effectively. A matte black base with one metallic star nail looks incredibly chic on short nails.
Ask your tech for “minimalist fantasy symbols” that fit your exact nail bed size.
Enchanting Almond and Oval Shapes
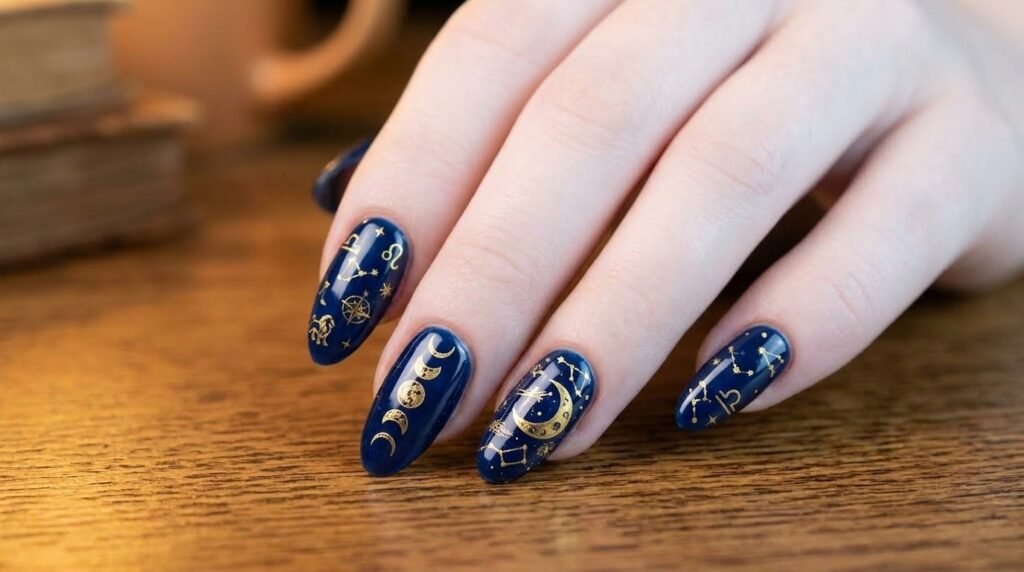
For those who love elegant length, almond and oval shapes are dream canvases. These shapes naturally elongate the fingers, which suits detailed fantasy designs. The soft, tapered shape is perfect for intricate owl and wand nail designs. Potion bottles and longer lightning bolts also fit beautifully. The curves complement organic shapes like swirling magic or bird motifs. If you have the natural length or extensions, embrace them for multi-element wizard nail art.
Bold Magic for Coffin and Stiletto Nails
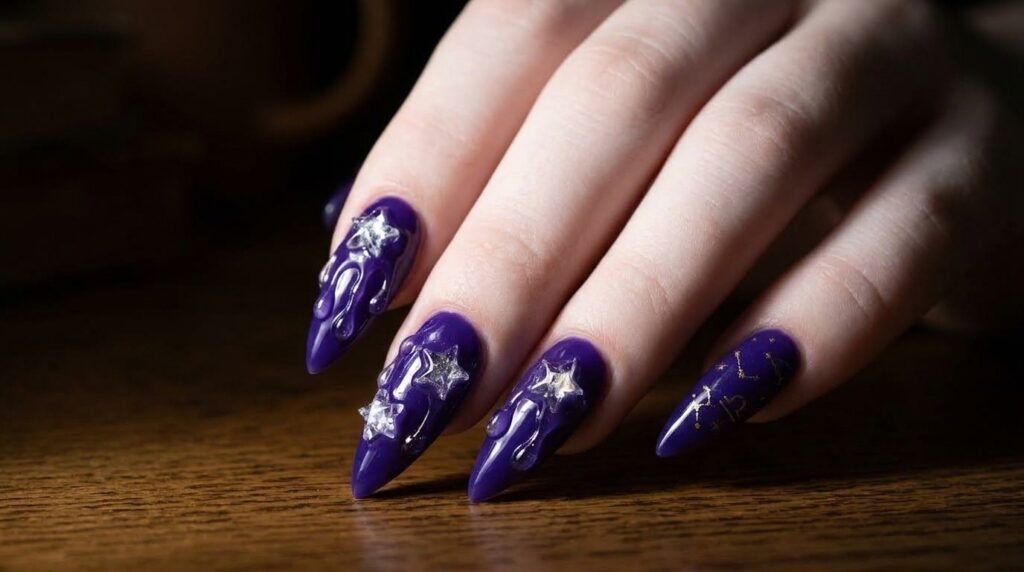
Coffin and stiletto shapes make a major statement. They are the ideal backdrop for bold, dramatic wizard nail art. The flat tips of coffin nails offer a great canvas for graphic elements. Think larger potion bottles, intricate wands, or swirling constellations. Stiletto shapes add extra drama and edge. Embrace rich colors and intricate details like 3D elements. Ask for “bold, detailed fantasy art” that utilizes the full nail length.
Simple and Chic: Square Nail Solutions
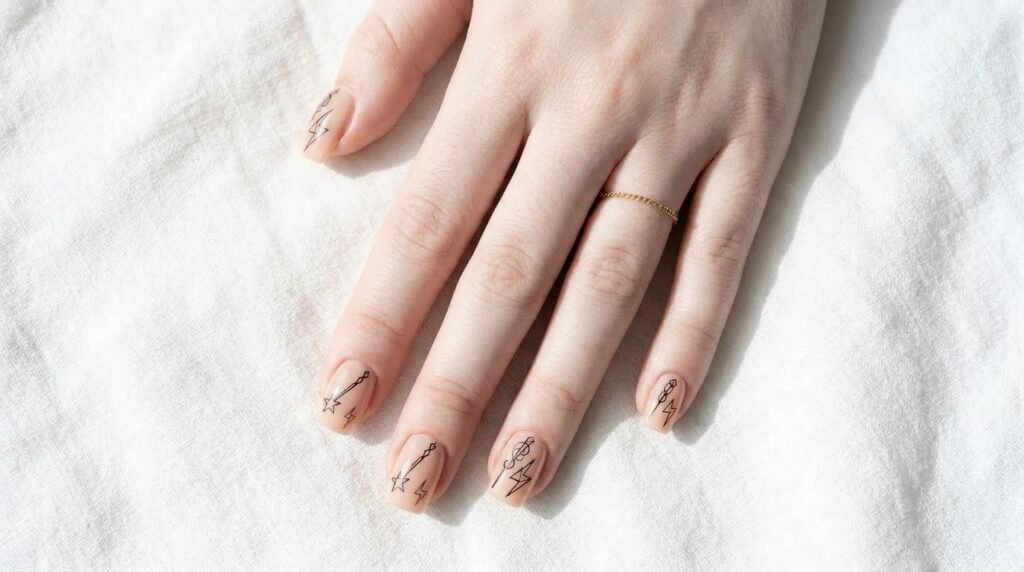
Square nails offer a modern, clean palette for your magical designs. While less organic than almond shapes, they excel at showcasing graphic, linear art.
Focus on elements like stripes, lightning bolts, and abstract constellations.
- Linear Art: Clean lightning bolts align naturally with straight edges.
- Stripes: Scarf patterns look crisp on a flat square tip.
- Centered Symbols: A single key or bottle centered on the nail bed.
A simple gold key works so well centered on the nail. Use crisp lines for a contemporary fantasy nail art look. Ask for “clean, geometric fantasy symbols.”
Salon Talk: How to Request Generic Magic
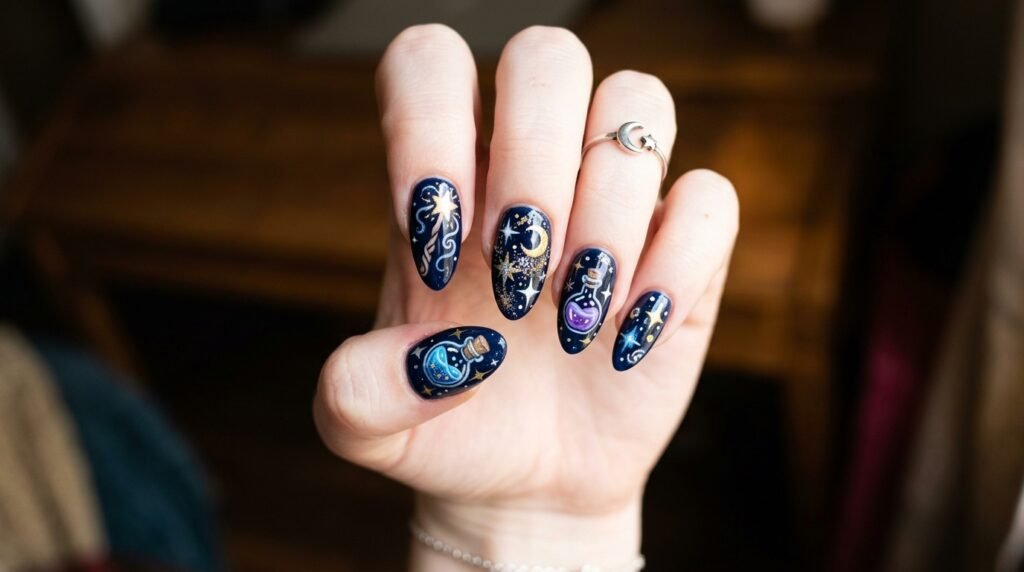
Walking into a salon and asking for “Harry Potter nails” can sometimes lead to confusion. Your tech might worry about getting licensed character art exactly right. The trick is using descriptive, generic language.
Tell your tech: “I want wizard-inspired fantasy nail art. Can we do generic symbols like a wooden wand, a potion bottle, and some metallic stars?”
Bring reference images of style, not specific commercial merchandise. This clarifies your vision and ensures you get spooky nails you love. Specify “stylized” or “graphic” rather than photorealistic illustrations.
DIY Potion Power: Step-by-Step Tutorial
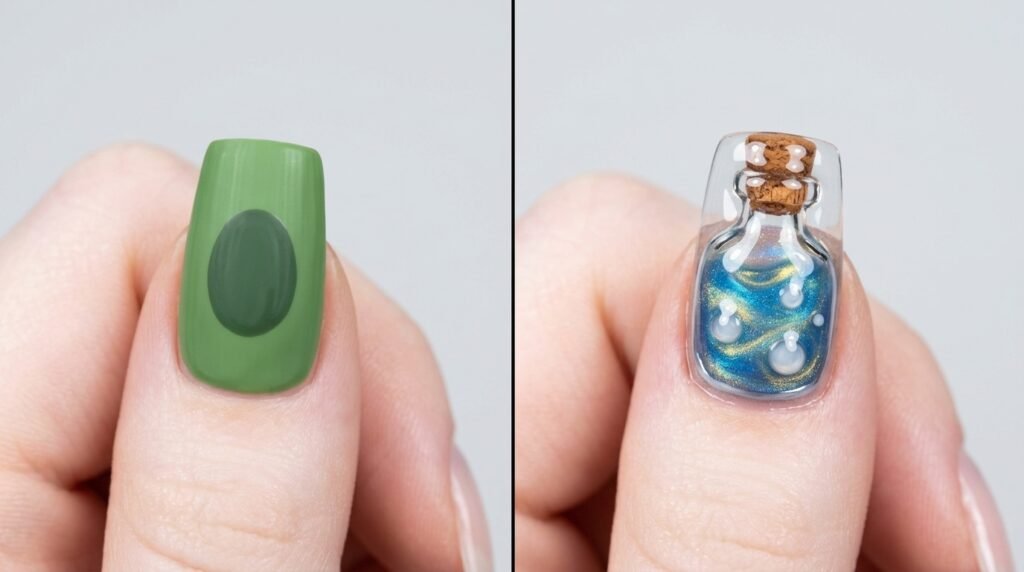
Ready to try simple halloween nail designs at home? Here is my quick guide for painting potion bottles:
| Step Number | Phase | Action Required |
| Step 1 | Prep & Base | Clean nails, apply base coat, and paint deep base color. |
| Step 2 | Bottle Outline | Paint an emerald oval shape using a medium detail brush. |
| Step 3 | Neck & Cork | Add a short neck above the liquid and a light brown cork top. |
| Step 4 | Bubbles & Seal | Add tiny white dot bubbles and lock it in with top coat. |
- Prep: Start with clean, shaped nails and apply your base coat.
- Base: Paint your nails with a deep color (like matte black). Let dry completely.
- Bottle Shape: Using a detail brush and contrasting polish, paint an oval or round shape.
- Bottle Neck: Use the same polish to add a short neck above the main shape.
- Cork: Dip a thin brush in light brown and add a small rectangle at the top.
- Bubbles: Add tiny white or pale green dots just above the liquid line.
- Seal: Finish with your favorite high-gloss or matte top coat. [Affiliate opportunity: recommended detailed brushes]
Gel vs. Traditional Polish for Intricate Designs
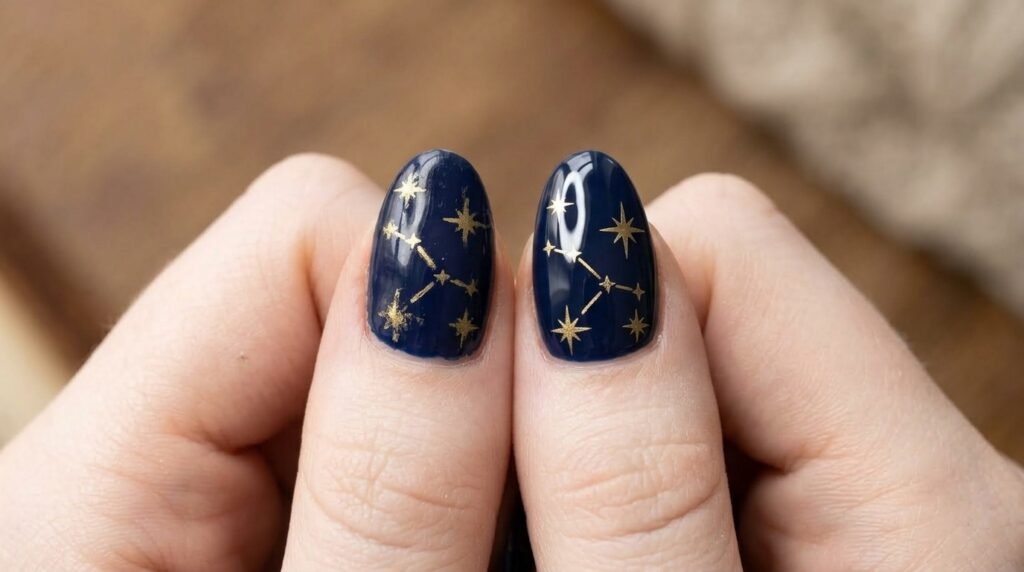
When opting for detailed fantasy nail art, the type of polish matters immensely. Gel polish is generally far superior for intricate work. Gel allows for crisp lines that don’t smudge during application because you cure each layer. It also offers incredible vibrancy and longevity.
Traditional polish, however, is much easier for beginners to use and remove at home. If you want high-quality, long-lasting salon wizard nail art, always ask for gel.
Elevating with 3D Magic and Gems
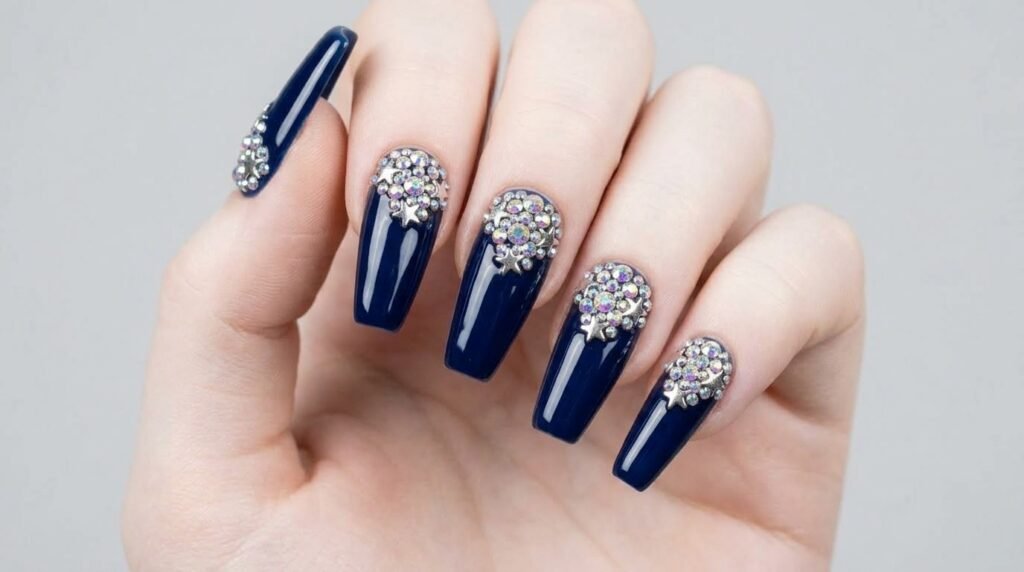
Want to take your wizard-themed manicure to the next level? Consider adding subtle 3D elements. Small stars, moons, or tiny bubbles can make your nails truly enchanting. Ask your tech about subtle, low-profile 3D gel art or tiny nail charms. These add texture and dimension without being overly bulky.
A cluster of tiny gems representing stars is always a classic choice. Just ensure they are sealed well with gel to prevent snagging.
Occasion Check: When to Wear Your Spells
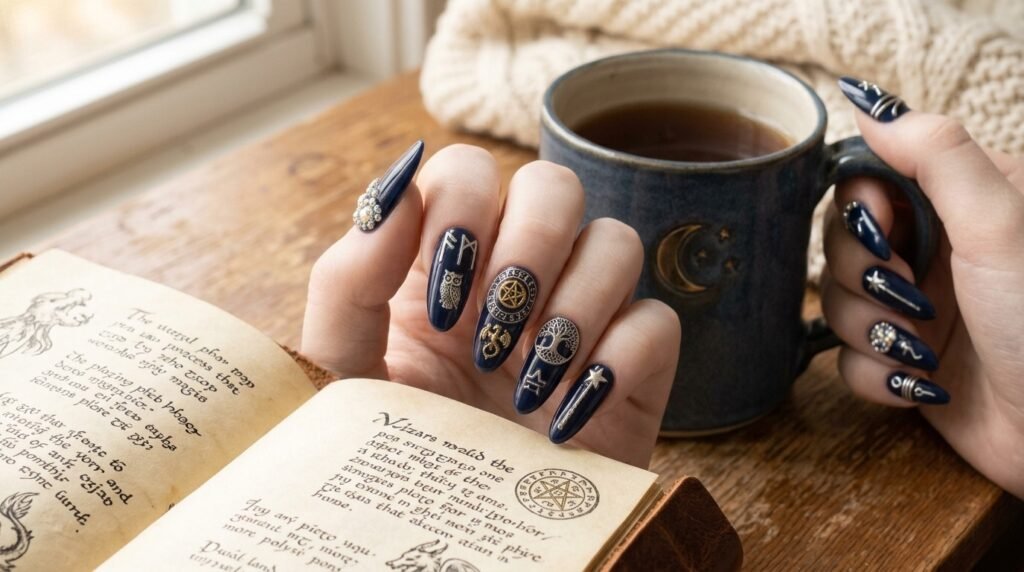
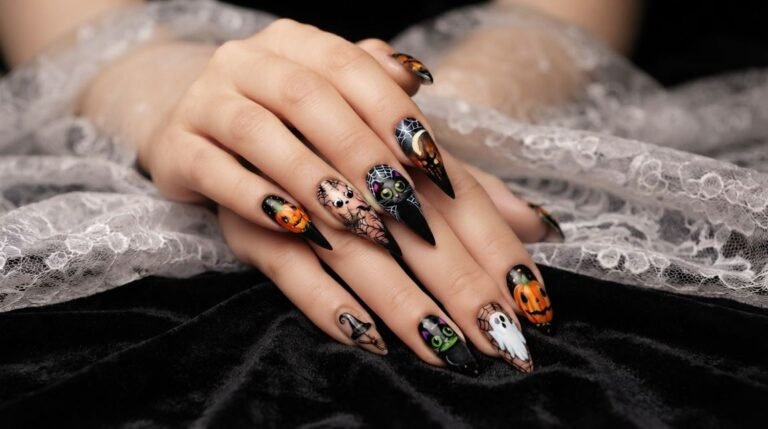
Naturally, Halloween is the prime time for spooky nails. But fantasy nail art halloween looks are surprisingly versatile year-round. They are perfect for costume parties, book club meetings, or fantasy conventions. You can also tone down the design for a subtle, everyday “witchy” aesthetic. For the workplace, keep the designs smaller or focus on rich colors with simple star accents. This look is all about embracing your love for magic comfortably.
Your Wizarding World FAQ
Here are answers to common questions about this enchanting nail style:
What is wizard-themed nail art?
It is nail art inspired by magical worlds, using generic symbols like wands, potions, stars, and owls without commercial branding.
How do you paint a magic wand on nails?
It is a simple wooden line with small brown textures, fine detailing, and often a sparkly metallic tip.
What colors work for a fantasy book-inspired manicure?
Deep moody colors like matte black, midnight blue, forest green, burgundy, and metallic accents work best.
Is fandom nail art okay to sell or post commercially?
Yes, as long as you use generic, original illustrations rather than copyrighted logos or trademarked character names.
What’s a good nail shape for detailed fantasy illustrations?
Long almond and coffin shapes provide the best surface area, but short square nails work great for minimalist magic symbols.
Wrapping Up Your Enchanted Journey
I hope this guide has sparked your imagination for getting unique wizard nail art this season! We have covered everything from base colors to specific symbols like potion bottles and owls. We even touched on DIY tutorials and how to request these looks at the salon. Now, it is time to choose your favorite elements and plan your next magical manicure. Save this post for your upcoming appointment, or grab your liner brushes and try it at home tonight!

Mia founded Daily Nail Idea after a decade in beauty editorial, tired of watching great nail art disappear into the scroll. She now leads the team’s editorial direction — deciding what’s worth featuring and what’s just noise — and still paints her own nails every Sunday night, no exceptions.