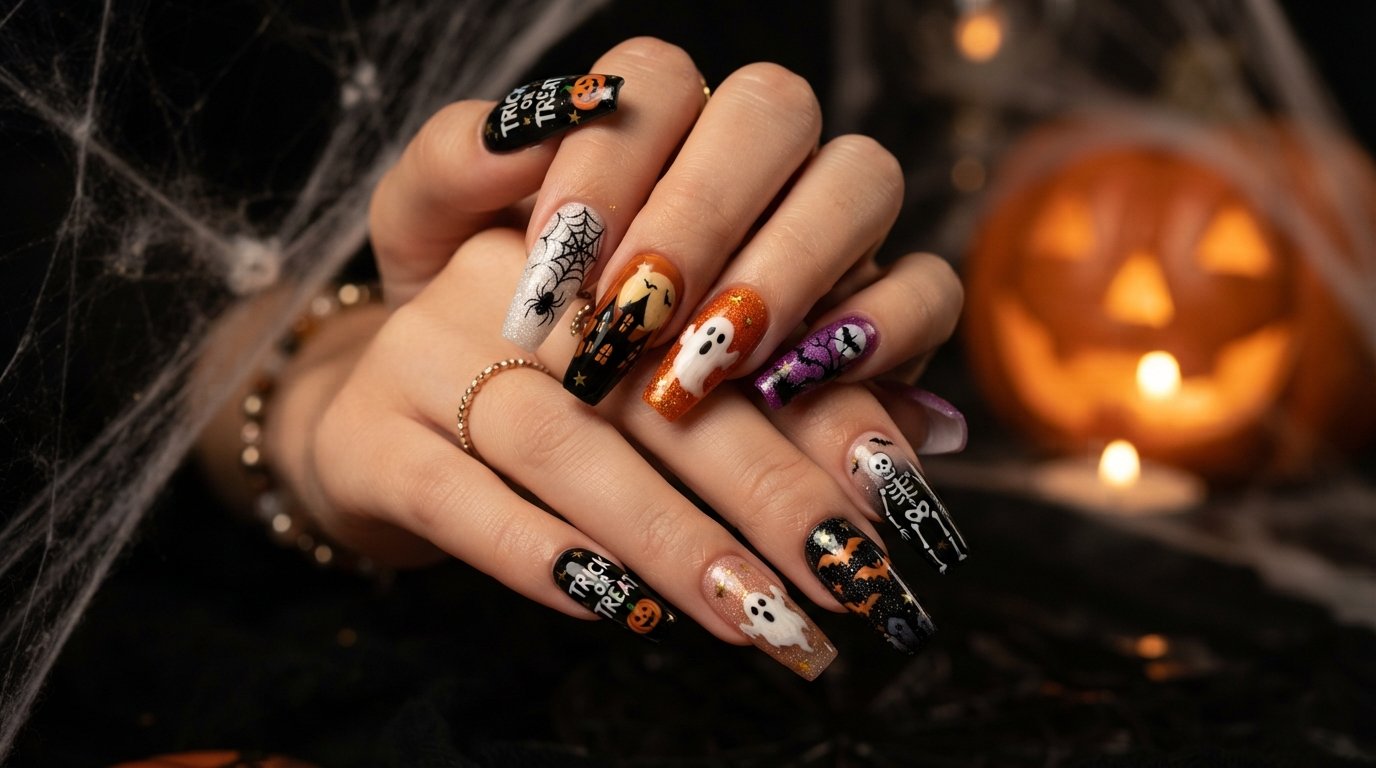
Go Big or Go Ghoulish: The inspired Maximalist Halloween Nail Art Guide You Need Before Your Salon Visit
Introduction
Maximalist halloween nail art is at hype for interested people. Hey there, fellow nail enthusiast! I am so glad you are here today. You are probably scrolling while thinking about your next salon appointment. Trust me, I know that feeling so very well! Halloween is right around the corner now. Have you saved dozens of spooky looks on Pinterest already? Yet, you might still feel completely unsure about what to ask for. That happens to the best of us! That is precisely why I created this complete guide for you.
You want to embrace the spooky season fully. But choosing just one design feels impossible. So why choose when you can have everything? Maximalist halloween nail art is your absolute best answer here! This guide walks you through an entire over-the-top set. You will get haunted houses, ghosts, and skeletons all together. So, take a deep breath! We have your complete spooky look covered today. Let’s get ready for some serious nail envy at your next appointment!
At-a-Glance: Maximalist Halloween Nails Summary
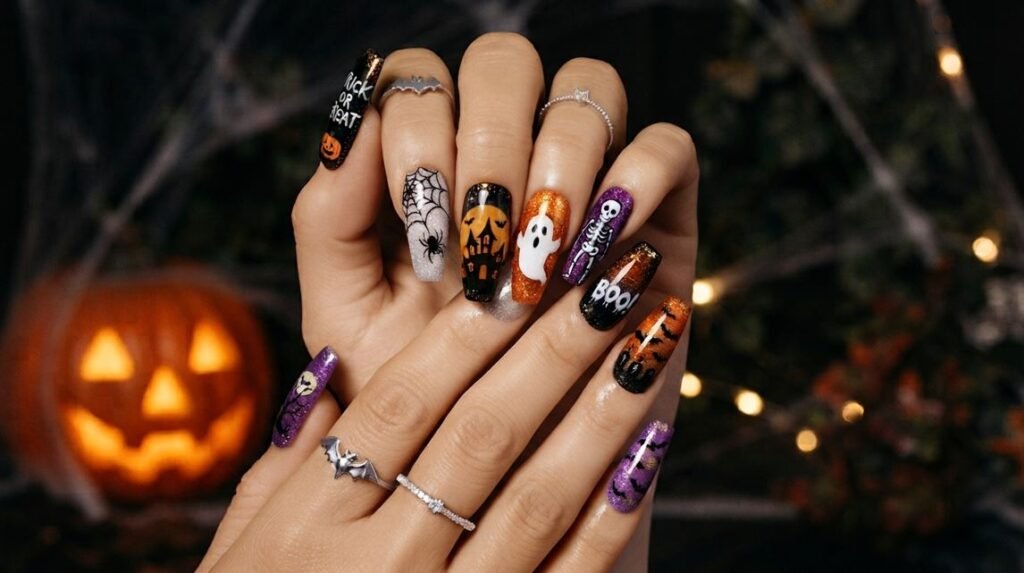
This isn’t your average, subtle Halloween manicure list. No, this is for those who want their nails to scream “Halloween” from across the room! Here’s what’s ahead in this maximalist breakdown: we’re diving deep into an all-out, every-finger-decorated spookfest. Picture this: intricate haunted houses, cheeky “BOO!” text, sparkling glitter ombres, and even detailed skeletons. We’re not just throwing random things together; this is about achieving a cohesive, yet wild, “more-is-more” aesthetic. You’ll learn how to mix classic Halloween colors – deep blacks, vibrant oranges, and ghostly purples – into a truly custom full set. We’ll cover the best nail shapes for detailed art (spoiler: coffin and almond are top contenders!) and provide you with actionable tips for getting these designs. Whether you’re heading to a professional salon with your favorite nail tech or daring to DIY at home, I’ll help you navigate every step. Prepare yourself for a complete look that doesn’t hold back. Read on to find out how to make your nails the ultimate Halloween accessory!
Here is what is ahead in our deep dive:
- Design Variety: We cover haunted houses, dripping “BOO!” text, sparkling glitter ombres, and full skeletons.
- Color Palette: Master the classic blend of deep pitch black, fiery orange, and rich dark purple.
- Cohesive Execution: Learn how to mix 10 distinct designs without making your hands look messy.
- Professional Techniques: Specific tips for cuticle safety, art layering, and long-lasting gel top coats.
Defining the Maximalist Halloween Nail Aesthetic
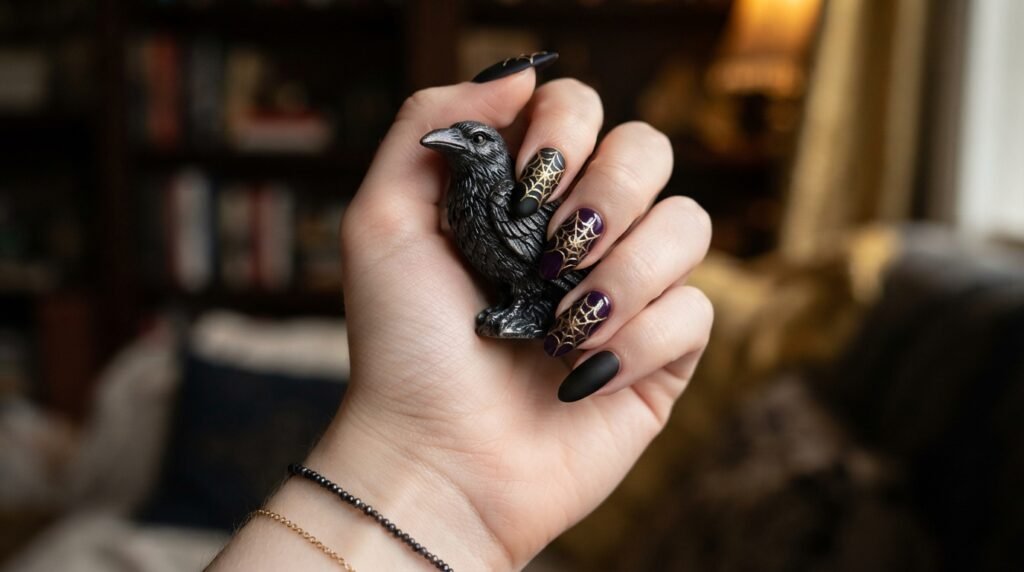
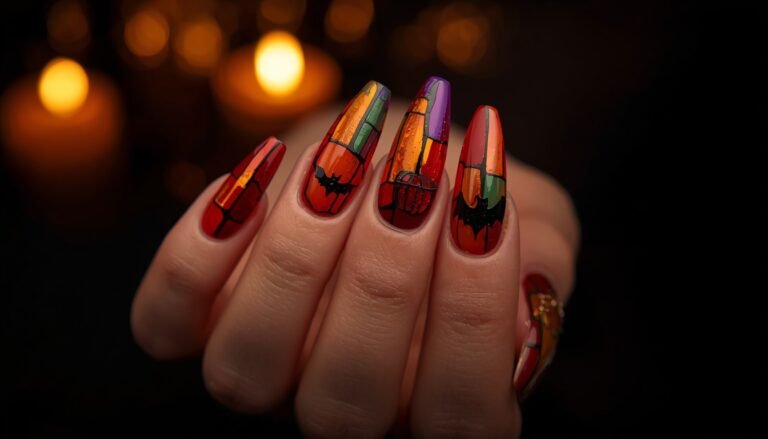
First, what is the maximalist halloween nail art aesthetic? It stands directly opposite to minimalism! Forget a basic single accent nail. Instead, every single finger becomes an individual canvas. This style embraces absolute abundance and creativity. Forget a single, subtle spiderweb accent nail. Think “every single finger is a canvas.” This aesthetic is about embracing abundance. It’s a riot of patterns, textures, colors, and classic Halloween icons all coming together on one hand. You can mix matte and glossy finishes, layer glitters, and use 3D elements. It’s about expressing your full spooky spirit! The goal is for your hands to tell a whole Halloween story. So, don’t be afraid to combine ghosts, bats, pumpkins, and spiders all in one go. The more details, the better the final effect!
You can seamlessly blend multiple textures and finishes. Mix matte backgrounds with high-gloss top coats. Layer chunky glitters under fine hand-painted lines. Thus, your hands tell a complete spooky story!
Essential Color Combinations for Spooky Sets
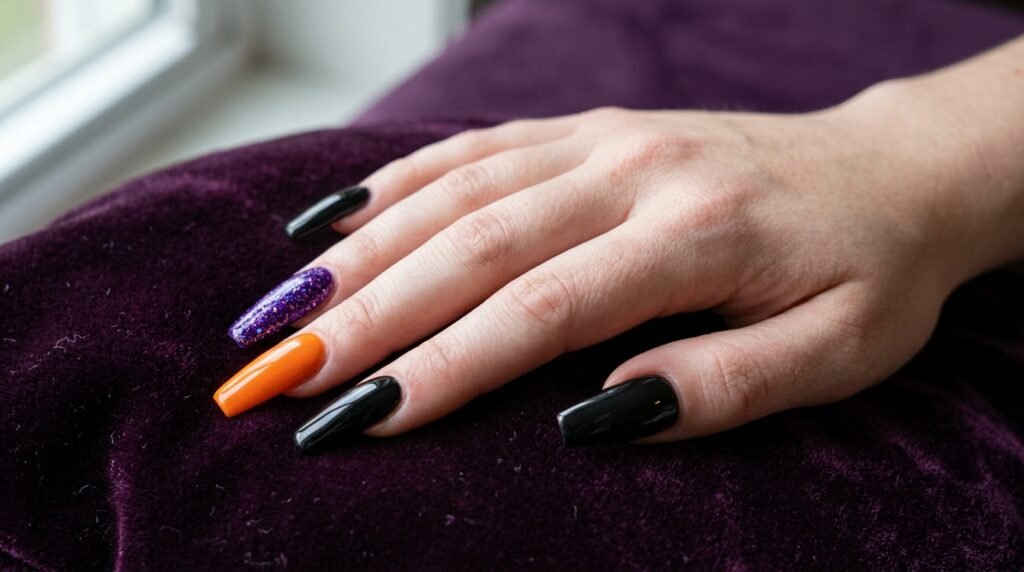
For a maximalist Halloween look, you need a strong, classic color palette. Black, orange, and purple are your best friends here. You can’t go wrong with these foundational spooky colors. Black provides a dark, stark background for other designs. Orange adds vibrant pops of classic pumpkin spirit. Purple, from deep plum to amethyst, introduces an eerie, magical touch. But don’t just use flat colors. Mix up the finishes! Use glittery purples, matte blacks, and even neon oranges. The key is to blend them effectively across all ten nails to maintain that intentional, yet busy, vibe.
Pitch black creates intense, moody contrast for detailed silhouettes. Vibrant pumpkin orange brings energetic festive cheer. Meanwhile, rich purple adds a mysterious, magical touch.
Step-by-Step Tutorial: Prepping for Detailed Nail Art
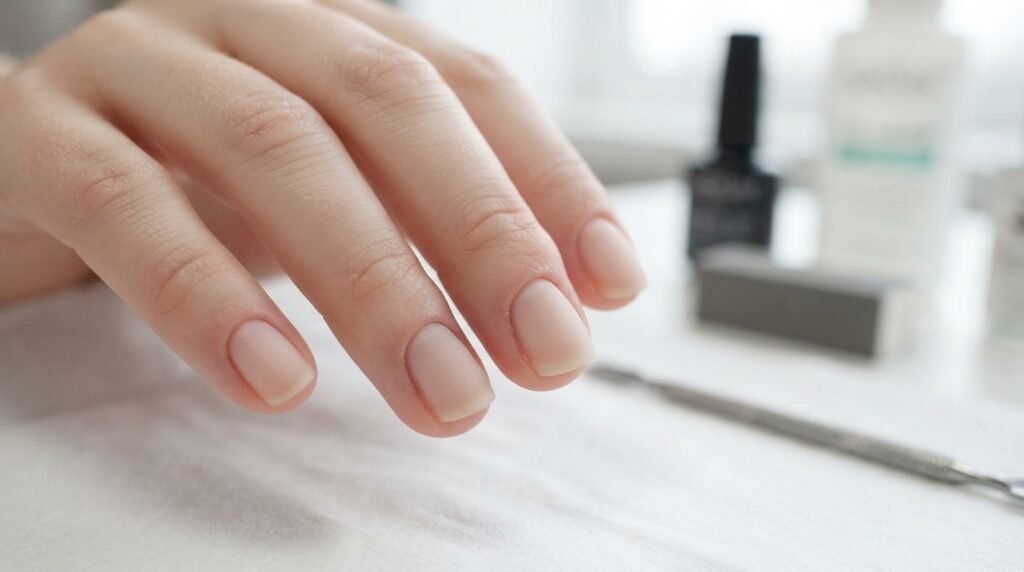
Detailed artwork demands flawless surface preparation. Without proper prep, intricate gel paint lifts quickly. Follow these crucial steps before painting any complex scene:
- Gently push back cuticles using a sanitized pusher. Clean the nail plate thoroughly.
- Remove surface shine using a fine 240-grit buffer block carefully.
- Dehydrate the nail bed with alcohol or pure acetone solutions.
- Apply a thin layer of rubberized base coat. Cure fully for 60 seconds.
Shape and Length Adaptations: Coffin, Stiletto & Almond
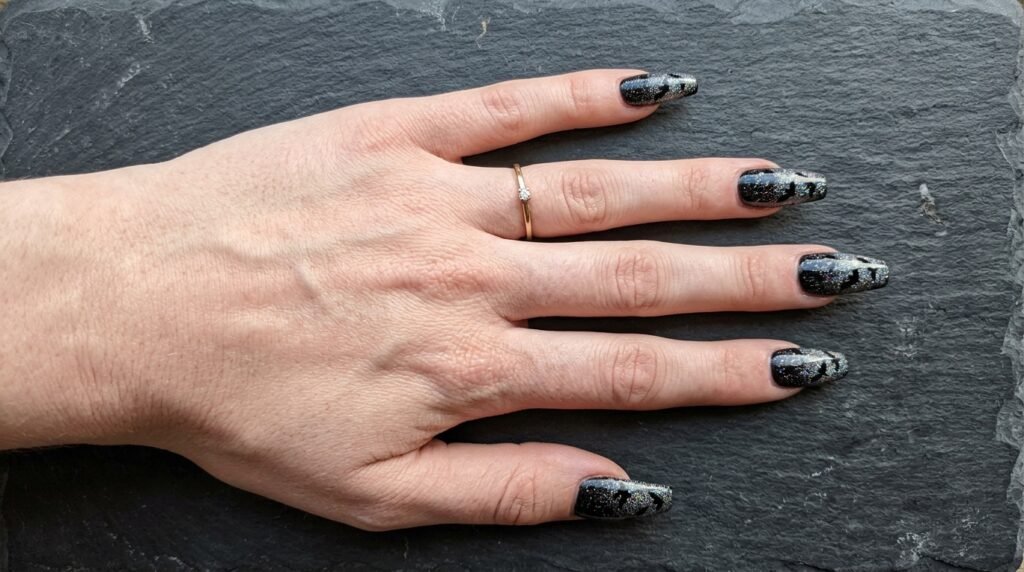
Nail shape changes how your detailed artwork renders! Long coffin shapes offer flat tips, ideal for lettering. Meanwhile, stiletto shapes accentuate sharp, creepy motifs like spiderwebs.
Almond nails soften dramatic scenes beautifully. Even short square nails can host detailed art! Simply scale down your silhouette size accordingly.
Nail Shape Compatibility Guide
| Nail Shape | Best Suited Design Motifs | Canvas Advantage |
| Long Coffin | Haunted Houses, Dripping Text, Skeletons | Wide, flat surface area for horizontal detail. |
| Stiletto | Spiderwebs, Flying Bats, Creepy Vines | Sharp focal point enhances eerie shapes. |
| Almond | Ghosts, Full Moons, Pumpkin Faces | Soft curves complement rounded character art. |
| Short Square | Glitter Ombre, Tombstones, Mini Stars | Compact frame keeps busy art looking tidy. |
Glitter Ombre Halloween Nails: The Sparkling Foundation
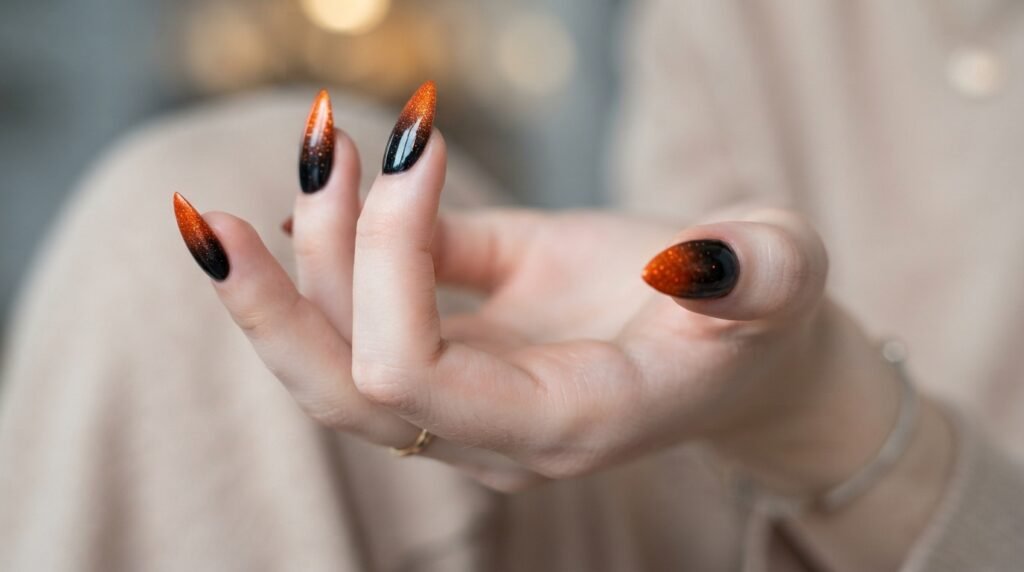
A glitter ombre is the perfect base for building your maximalist set. It’s fun, spooky, and surprisingly versatile. You can do an orange-to-black glitter gradient. Or maybe a purple-to-silver sparkle. I love starting with a glitter ombre on at least a few nails. It adds instant depth and sparkle. Plus, it serves as a stunning background for more complex designs like bats or ghosts. This technique helps bridge the gap between different solid-colored nails. It’s also one of the easier maximalist elements to achieve at home!
A glitter ombre creates an ethereal backdrop. It provides instant depth beneath hand-painted details. I love starting with a rich gradient on several fingers.
Try a black-to-purple glitter fade for dramatic night skies. Alternatively, blend orange glitter into nude bases. This technique unifies different solid-colored accent nails seamlessly across your hand.
The Haunted House Nail Art: Silhouettes and Details
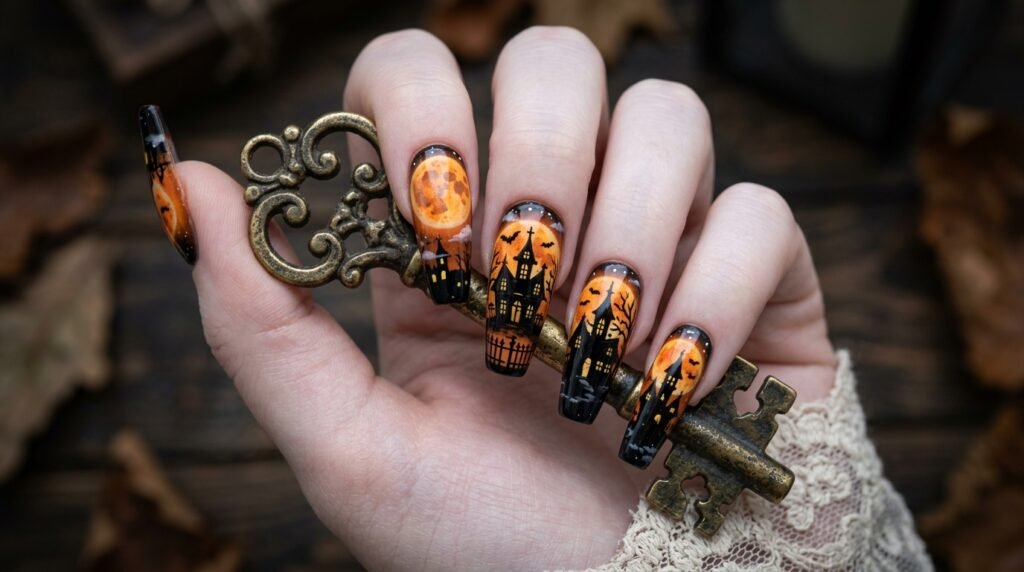
No maximalist Halloween set is complete without a haunted house. This design is all about dramatic silhouettes. Picture a spooky black house with glowing yellow windows. Maybe there’s a crescent moon or some bare branches in the background. Your nail tech can paint this by hand, or you can use stamping plates. It’s a more complex design, making it a great focal point. I recommend placing it on the thumb or ring finger where there’s more space. Ask for a matte top coat over the black silhouette for an extra eerie vibe! Haunted houses serve as the ultimate centerpieces! This motif thrives on dramatic, dark silhouettes. Imagine a crooked house with tiny glowing yellow windows.
Position this detailed scene on your widest nail plates. Your thumb or ring finger works best! Always ask your nail tech for precision liner brushes here.
Capturing Classic Ghouls: Ghost Nails and “BOO!” Text
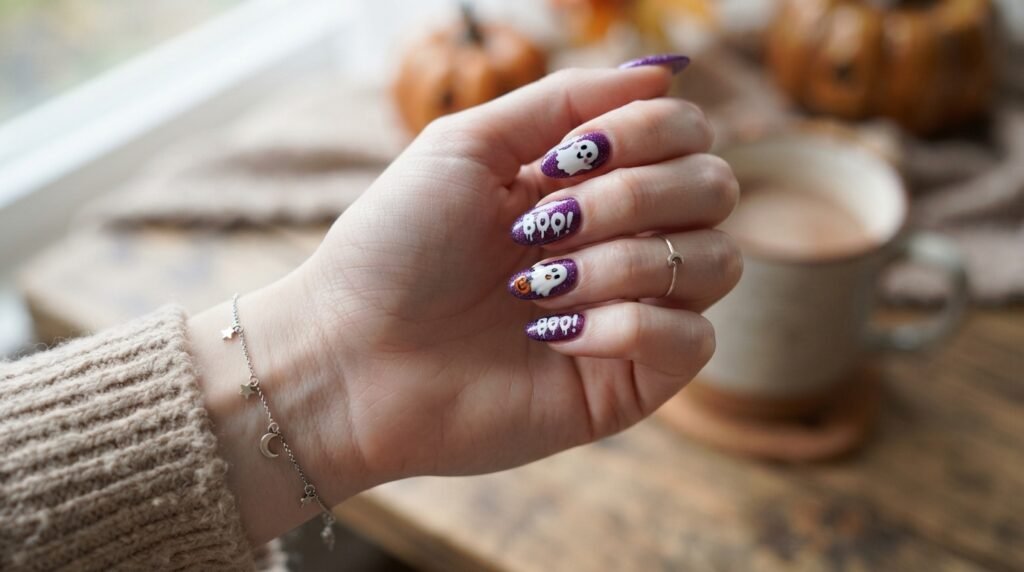
Cute and classic, ghosts are essential for any spooky manicure. They add a touch of playfulness to the more detailed scenes. You can have simple, painted white ghosts. Or perhaps ghosts with cute, swirling shapes. For a maximalist twist, layer them over glitter bases or add text. Text is huge right now, so why not add “BOO!”? Your nail tech can paint “BOO!” dripping or with a sparkling finish. This playful text pairs perfectly with the ghosts, adding another layer of fun to your full set. Playful ghosts bring instant charm to spooky sets. They lighten the moody atmosphere created by darker elements. Paint cute white wisps over purple glitter.
Pairing ghost art with bold text works brilliantly! Add dripping “BOO!” lettering on an adjacent nail. This creates immediate visual interest that catches eyes instantly.
The Web Weaver: Detailed Spiderweb Nail Art
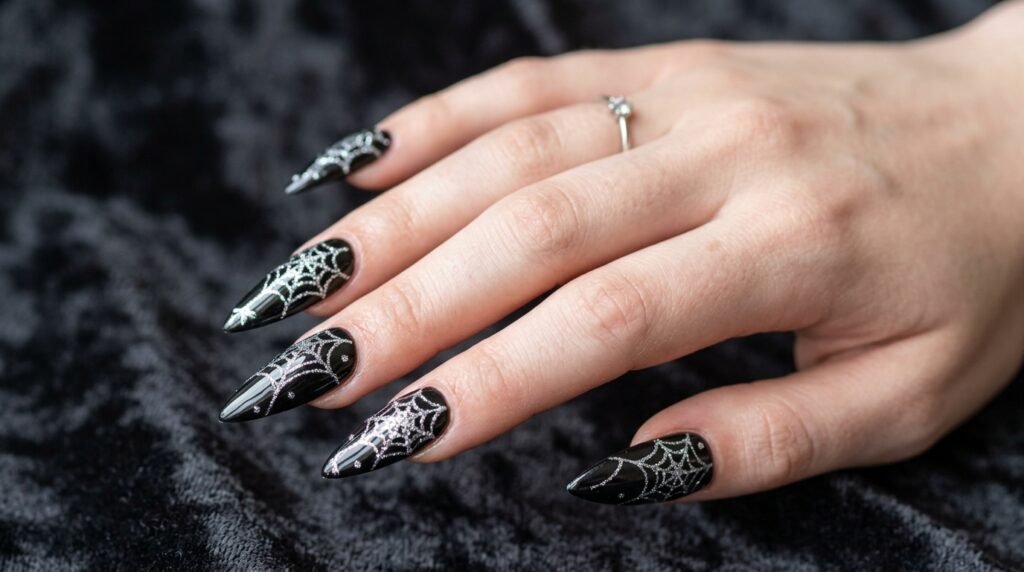
Spiderwebs are an absolute Halloween staple, offering intricate detail and immediate recognizability. For a maximalist look, you can’t just have one simple corner web. We’re talking detailed, multi-fingered webs or webs layered over unexpected bases. A white spiderweb painted over a chunky black glitter base looks incredible. Or a gold web over a deep purple. You could even have a spider crawling on one nail and its web stretching across the next. It adds texture and draws the eye across your whole hand. I love making one nail entirely covered in a detailed web for maximum impact! Spiderwebs offer intricate line work and instant recognition. For maximalist nails, cover full nail beds instead of tiny corners. Layer silver glitter webs over jet-black polish.
Alternatively, paint crisp white webs over bright orange bases. Adding a tiny 3D spider charm takes this look to new heights!
Trick or Treat Nail Art: Text and Pumpkin Combinations
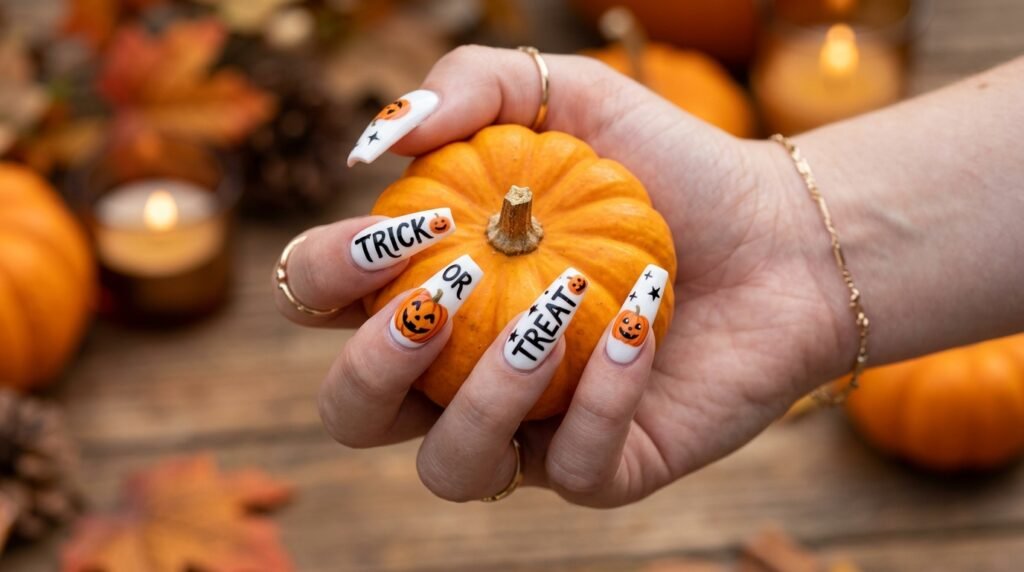
Let’s add some classic Halloween messaging with “TRICK OR TREAT” text. Again, text adds so much character. Your nail artist can write this out in a spooky font. Mix it with tiny, smiling pumpkin details for that perfect Halloween night feel. I like seeing this text on the index finger. It’s bold and immediately clear what your theme is. Remember to play with background colors. This text looks amazing over a vibrant orange or stark white base. It contributes to the story-telling element of your whole manicure.
Incorporate classic messaging with crisp lettering! Painting “TRICK OR TREAT” adds nostalgic Halloween spirit directly to your manicure. Use bold block fonts for maximum legibility.
Accompany your text with cute painted pumpkin faces. Bright orange jack-o’-lanterns contrast amazingly against dark background polishes!
Flying High: Bats and Full Moon Nail Scenes
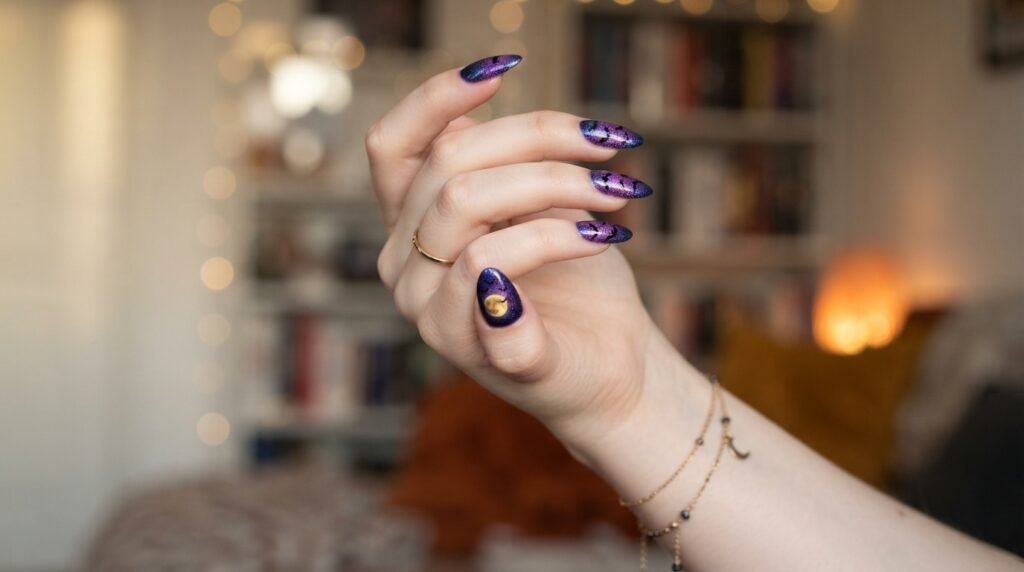
Bats are another must-have for any cohesive Halloween set. They provide movement and create dramatic scenes. You can have a swarm of tiny bats flying across one or two nails. Or a single, detailed bat silhouette against a full moon. I find that placing bats on a purple glitter ombre creates an exceptionally eerie effect. The contrast is fantastic! It feels like a miniature spooky night sky right on your fingertips. It adds that finishing touch of complete, detailed scenes.
Bat silhouettes introduce dynamic movement to your set. Paint a swarm of tiny bats fluttering across multiple nails. This connects individual fingers into one scene.
Anchor your bats with a glowing yellow full moon. Placing this design over deep purple glitter creates an enchanting midnight sky effect.
Skeletons and Tombs: Macabre Details for High Impact
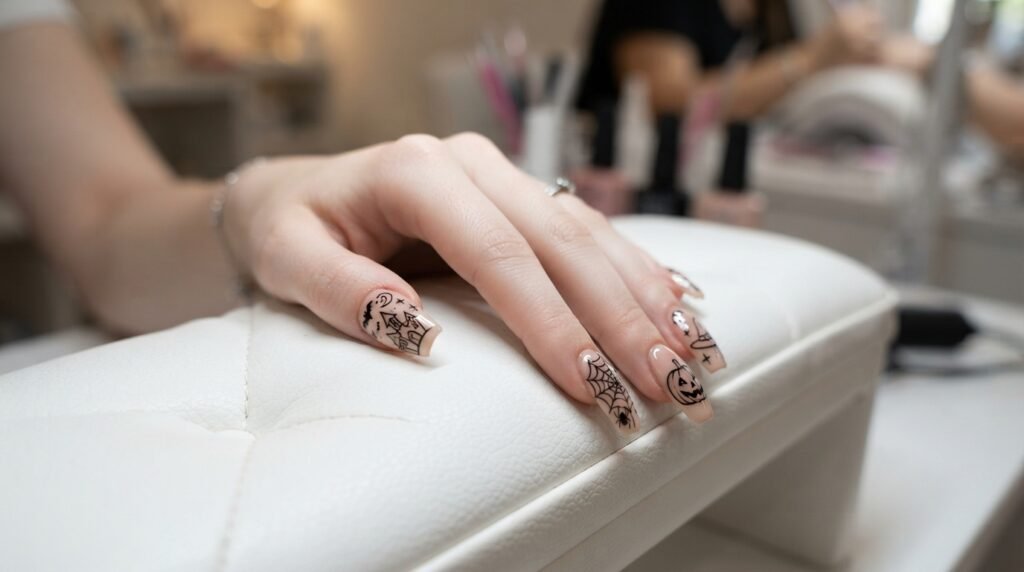
For those who like a slightly more gothic touch, skeletons and tombstone details are perfect. A detailed skeleton figure painted on a deep black base looks incredibly cool. You don’t have to show the whole skeleton. A hand or skull works wonderfully. Pair it with tiny tombstone silhouettes and some bare trees. It adds that classic graveyard element. When mixed with the other brighter designs, it brings a perfect balance of fun and macabre to your overall maximalist aesthetic. This level of detail is a true testament to the “more is more” philosophy.
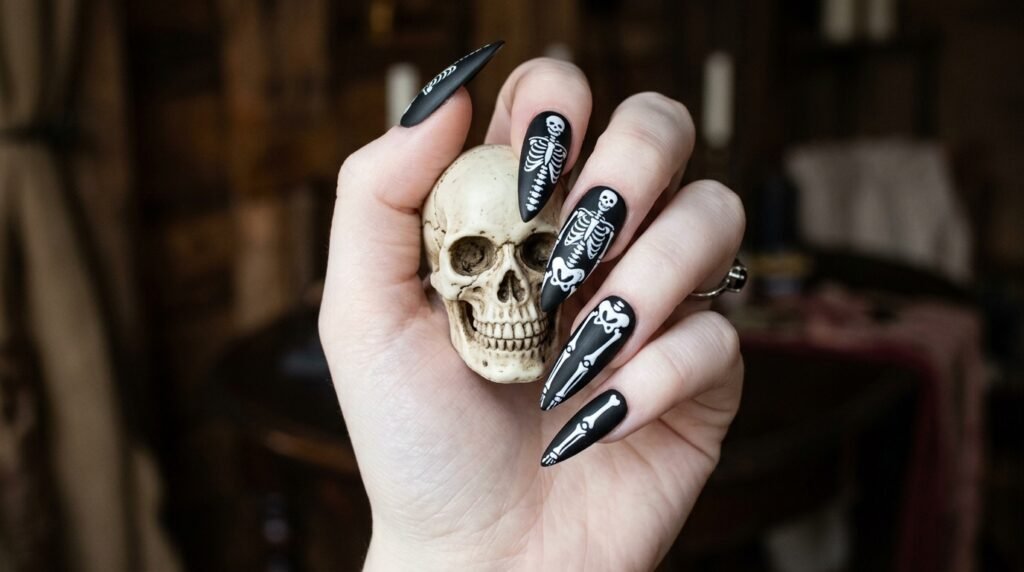
For gothic flair, add hand-painted skeleton bones! Detailed bone art looks striking over matte black gel polish. You don’t need a full skeleton either.
A simple skeleton hand or skull works wonders! Pair this with subtle tombstone silhouettes. This adds dramatic macabre elegance to your overall set.
Salon Communication: What to Ask Your Nail Tech For
Communicating your vision clearly ensures great salon results! Maximalist sets require extra time and specialized skill. Follow these quick communication guidelines:
- Book a “Full Set with Tier 3 / Complex Nail Art” slot in advance.
- Show reference photos showing your specific color palette clearly.
- Specify which nails should feature detailed hand-painting versus glitter bases.
- Confirm if your tech prefers gel paint or acrylic for fine line work.
Technical Tips: Preventing Cuticle Flooding and Chipping
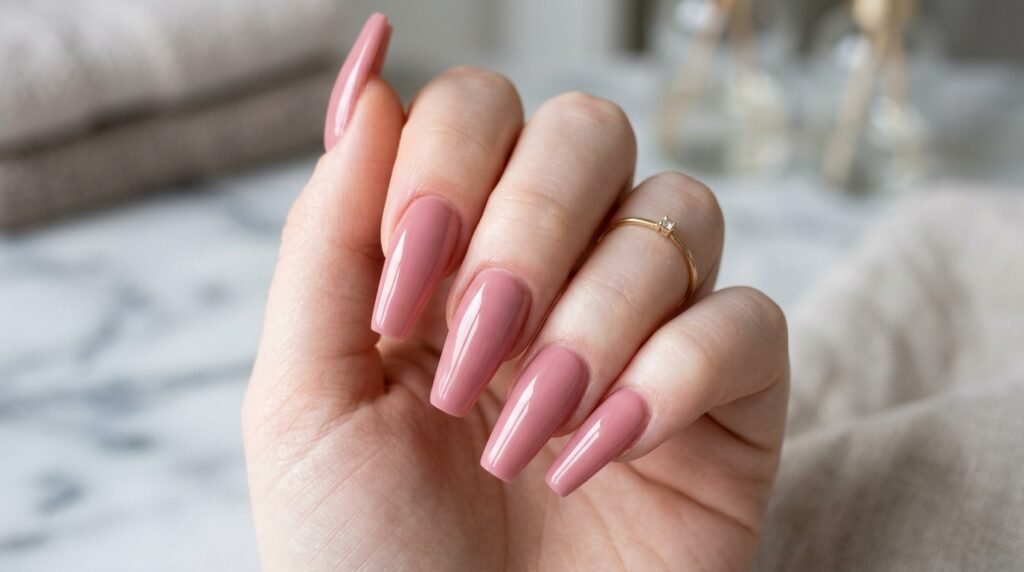
Flooding cuticles ruins crisp nail art fast! Always maintain a tiny gap between polish and skin. Use thick gel art paints for fine line details.
Troubleshooting Common Nail Art Issues
| Common Issue | Primary Cause | Pro Salon Solution |
| Art Bleeding / Smudging | Uncured base polish or wet gel | Flash cure detailed lines for 10 seconds immediately. |
| Cuticle Flooding | Overloading brush with thin polish | Wipe brush clean; use high-viscosity gel art paint. |
| Top Coat Peeling | Skipping inhibition layer wipe | Buff gel art gently before applying non-wipe top coat. |
| Glitter Clumping | Direct heavy application | Dab glitter on with a makeup sponge for smooth layout. |
Sealing and Maintenance: Step-by-Step Curing & Care
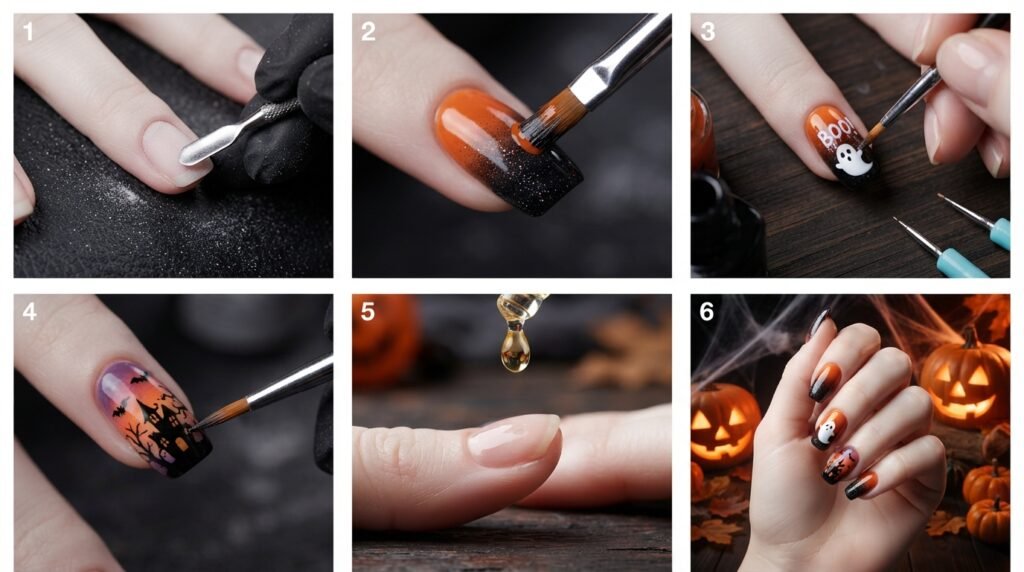
Protecting your intricate artwork requires proper sealing. A high-quality top coat locks down gems, foil, and paint. Follow these curing steps:
- Apply a generous layer of non-wipe gel top coat over the entire nail art.
- Cap the free edge carefully to prevent edge chipping later.
- Cure under a full-spectrum LED lamp for 60 to 90 seconds completely.
- Massage nourishing cuticle oil into surrounding skin twice daily.
Mismatched But Cohesive: Unifying Your Full Set
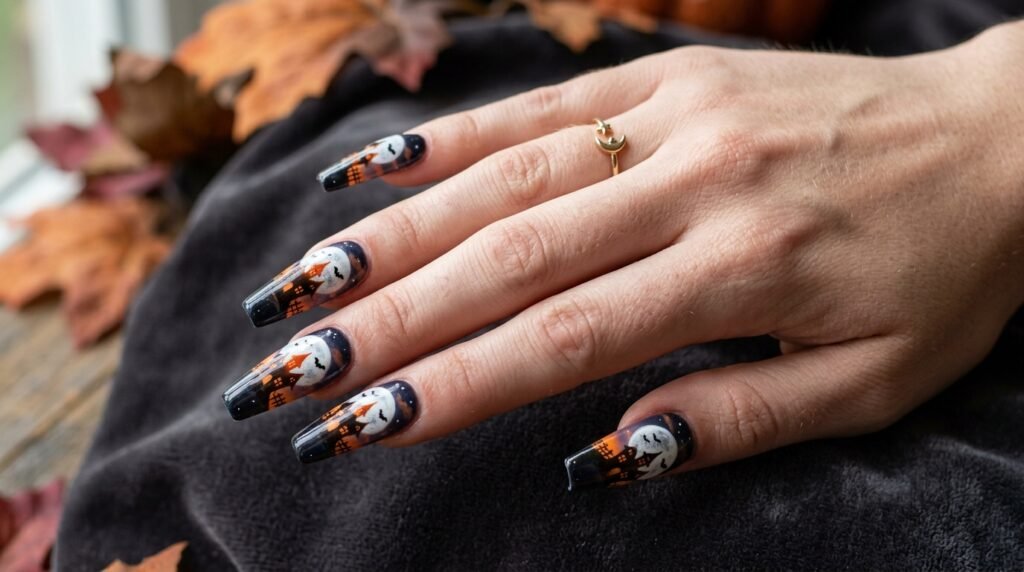
How do you prevent maximalist nails from looking messy? Cohesion comes from unified color palettes and consistent finishes. Keep your base shades strictly within black, orange, and purple.
Distribute fine gold star glitter across multiple nails! This repeating element ties wildly different designs together into one stunning collection.
Matte vs. High-Gloss Finishes for Halloween Sets
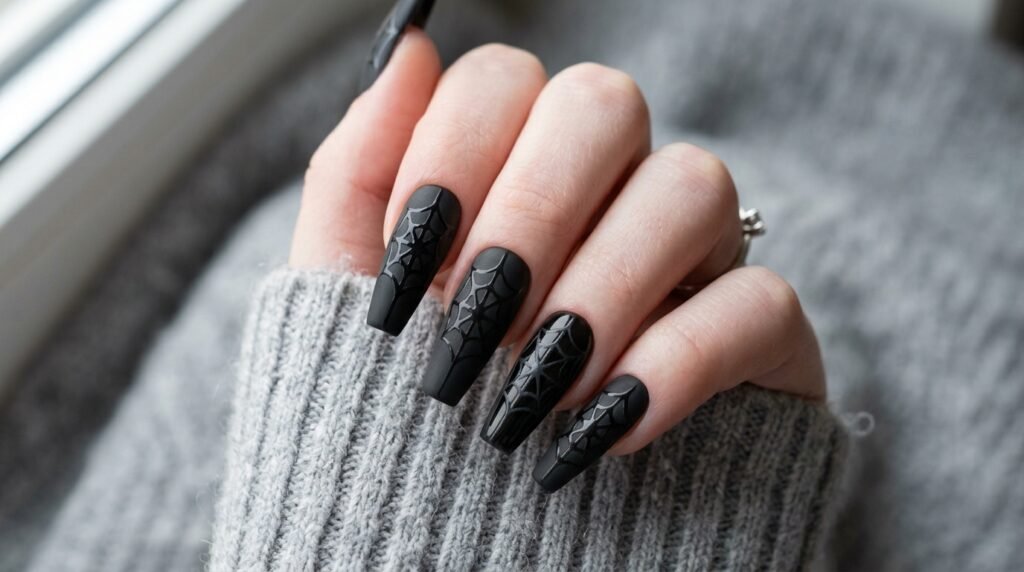
Choosing the right top coat finish changes the mood of your set entirely! Glossy top coats amplify glitter depth and make hand-painted details shine like glass.
On the other hand, matte finishes offer a velvety, gothic appearance. Matte black sets an eerie velvet backdrop for glossy spiderweb overlays or neon accents. You can even mix both finishes on the same hand for ultimate maximalist contrast!
Budget-Friendly Options: Salon, DIY, and Press-On Tips
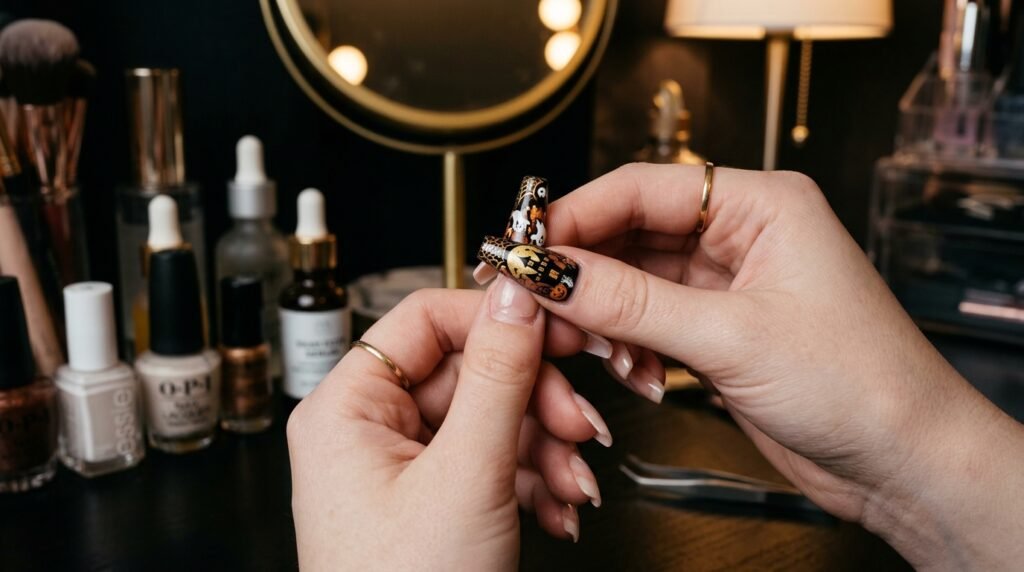
You do not need to spend a fortune to achieve a stunning maximalist set! Salon appointments offer hand-crafted precision, but DIY techniques can save serious cash.
- Salon Set: Best for intricate hand-painted haunted houses and custom gel extensions.
- DIY Art: Use stamping plates, nail stickers, and detail brushes over gel polishes at home.
- Press-On Sets: Buy pre-painted maximalist press-ons for instant, reusable luxury without salon wait times!
Transitioning Your Set After Halloween
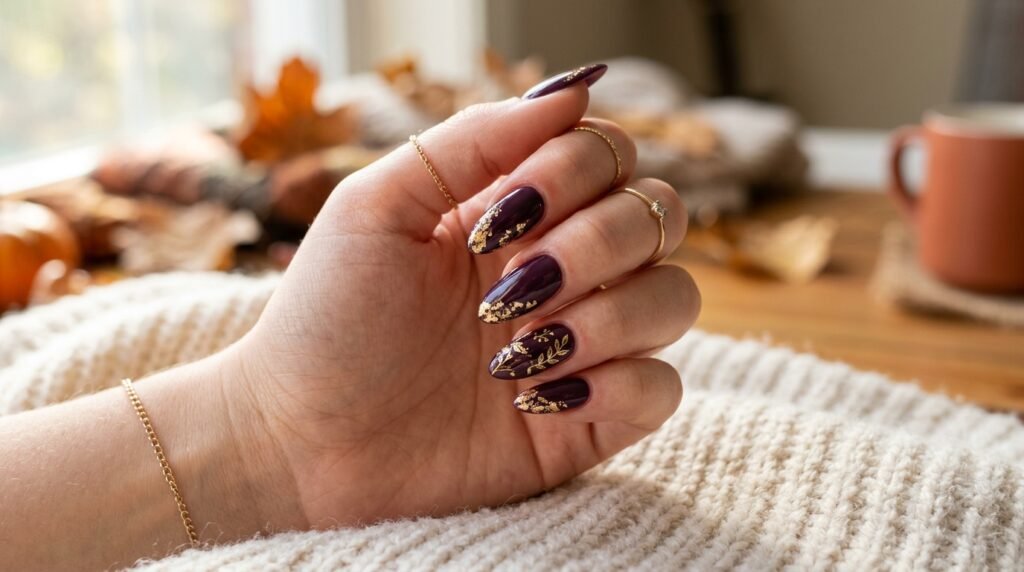
Love your dark, moody set so much that you want to keep it going into November? Transitioning spooky nails into late autumn is easier than you think!
As your nails grow out, file down the extreme tips or buff off specific Halloween text like “BOO!”. Replace spooky accents with simple metallic gold foils or rich plum tones to carry that vampy aesthetic straight into Thanksgiving.
Frequently Asked Questions (FAQ)
We get it, maximalist nails can be a little overwhelming at first! Here are answers to some frequently asked questions from readers like you:
How do you paint a haunted house on your nails?
While it looks complex, you can paint a basic haunted house silhouette! Use a very thin liner brush and black gel or acrylic paint. Start by painting the main shape of the house with a large base and a pitched roof. Add towers and windows using the same brush, then fill it in. Wait for it to dry completely. For the glowing windows, use a dotting tool and yellow or white paint. Stamping plates or decals are great alternatives for easier, detailed designs!
What nail shape works best for detailed Halloween scenes?
Longer nail shapes offer the best canvas for detailed art. Long coffin or stiletto nails provide maximum surface area. This allows space for detailed haunted houses and complex patterns. But you don’t have to have long nails! Short almond or short oval shapes can still rock detailed ghosts and text, just scaled down slightly. Discuss with your nail tech which shape they prefer for the level of detail you want!
How do I make my mismatched Halloween nails look cohesive?
Cohesiveness comes from a shared theme and color palette. Stick to a tight set of colors, like black, orange, and purple, throughout all the designs. Use similar art styles or texture elements, like a touch of gold glitter, on multiple nails. Plan the designs across all ten fingers. For example, you might place complex scenes on your thumbs and ring fingers and use simpler patterns on your index and pinky fingers to balance the overall look.
Can I achieve maximalist Halloween nails at home?
Yes, with some practice and patience! Start by mastering simpler designs like glitter ombres, ghosts, and dots. Use nail stamping kits for detailed patterns like spiderwebs. For complex art like haunted houses, try using nail stickers or decals. Remember, practice makes perfect. Don’t be afraid to experiment! [Affiliate opportunity: recommended nail stamping kit for intricate designs] Take your time, work nail by nail, and enjoy the process.
What colors work best for a maximalist Halloween manicure?
The classic combination of black, orange, and purple is always a winner for maximalist Halloween nails. You can also incorporate white for contrast, and metallic silver or gold for added sparkle and texture. Don’t be afraid to play with different shades – think deep eggplant purples or burnt oranges. Remember, you want contrast. Black works well for dramatic silhouettes, while bright orange makes a bold statement on its own or as a pop of color!
Conclusion- Go Forth and Get Ghoulish!
Alright, are you feeling inspired? I certainly hope so! We’ve covered everything from the base glitters to the complex haunted house scenes. You’ve seen how to mix colors like black, orange, and purple to create a balanced yet wild full set. Remember, the key to great maximalist nails is detailed design on every finger and a consistent color story. Whether you’re showing these photos to your favorite nail tech or breaking out the brushes yourself, I can’t wait for you to try this look. So, which finger design are you most excited for? Is it the spooky text or the full skeleton? Go ahead and save this post for your next appointment. Happy spooky season, and happy painting!

Mia founded Daily Nail Idea after a decade in beauty editorial, tired of watching great nail art disappear into the scroll. She now leads the team’s editorial direction — deciding what’s worth featuring and what’s just noise — and still paints her own nails every Sunday night, no exceptions.