Halloween Nails to Match Your Costume: Simple Designs for Witch, Vampire, Black Cat, Skeleton and More
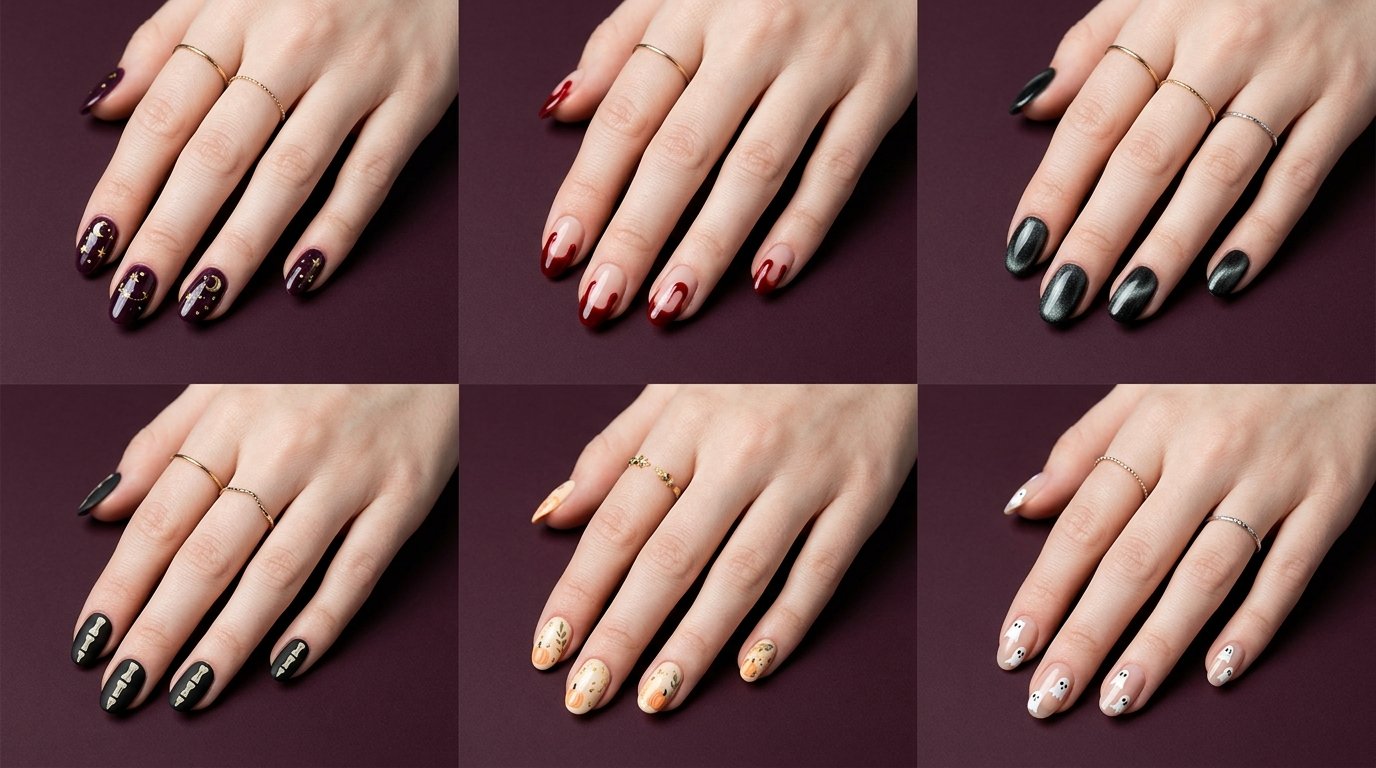
Matching your nails to your costume comes down to picking one dominant shade from your outfit, then adding a single signature detail on an accent nail. Whether you need deep crimson drip accents for a vampire look or soft pastel pumpkin accents for a cute outfit, these 12 simple Halloween nail designs will completely elevate your overall style. Every design featured below works beautifully across short, almond, coffin, and square shapes, making it effortless to customize your look at home or in the salon chair.
At-a-Glance: Finding Your Perfect Halloween Match
Here is a quick look ahead at how to pair your costume style with the right nail shape, color scheme, and difficulty tier before you dive into the step-by-step styling breakdown.
| Costume Style | Recommended Nail Shape | Primary Color Scheme | Finish Type | Difficulty Tier |
| Witch | Stiletto or Long Almond | Deep Plum & Emerald | High-Gloss Metallic | Easy |
| Vampire | Coffin or Oval | Blood Red & Noir Black | Glossy Jelly Drip | Medium |
| Black Cat | Short Square or Almond | Jet Black & Emerald Green | Satin Matte | Easy |
| Skeleton | Medium Square | Bone White & Onyx | Ultra Matte | Medium |
| Zombie | Short Natural | Olive, Slime & Distressed Gray | Matte & Gloss Combo | Medium |
| Ghost | Short Round | Sheet White & Soft Nude | High-Gloss Sheer | Easy |
| Pumpkin | Almond or Oval | Burnt Orange & Cream | Shiny Cream | Easy |
| Bat | Coffin | Midnight Blue & Dark Black | Sheer Jelly & Cream | Easy |
| Fairy | Long Almond | Iridescent Pink & Lavender | Chrome Pearl | Medium |
| Alien | Medium Almond | Slime Green & Silver | Holographic Metallic | Medium |
| Devil | Sharp Stiletto | Crimson Red & Pitch Black | High-Gloss Polish | Easy |
| Spider | Medium Coffin | Nude Pink & Deep Black | Sheer & Glossy Line | Medium |
How to Pick Halloween Nails for Your Costume
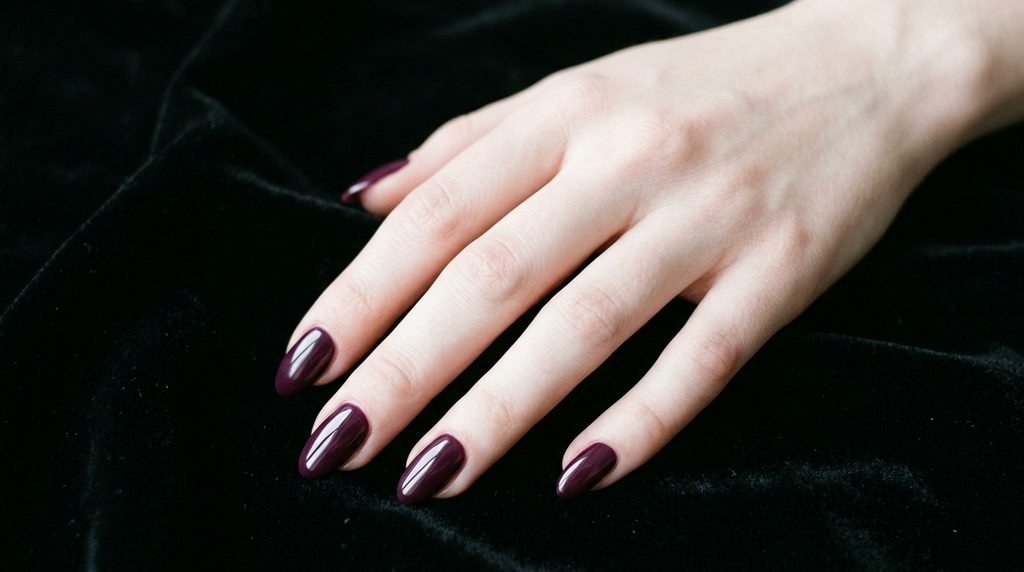
Choosing the right manicure requires evaluating three main factors: your costume’s primary color, your nail shape, and your desired finish. You want your nails to enhance your outfit without overwhelming your total look, so balancing these elements is key.
Start by picking one dominant color from your costume fabric, then select a contrasting accent shade. [Internal link opportunity: → Shape+Style Combos/Nail Shape Guide] Matching your nail shape to your character adds an immediate custom feel to your look. Sharp stiletto shapes complement villainous costumes, while short round nails keep cute character art clean and crisp.
Costume Fabric Shade ──> Select Primary Polish Base
│
▼
Choose Finish
┌───────────────┴───────────────┐
▼ ▼
Ultra Glossy Satin Matte
(Vampires, Aliens, Fairies) (Skeletons, Cats, Witches)
Finally, decide between a satin matte or high-gloss finish. Glossy topcoats accentuate jelly drips and metallic chrome, whereas matte finishes work best for bone textures and dark velvet costumes.
Salon Communication Tip: Ask your nail tech for a solid nude base color if you want your Halloween accent art to pop cleanly without looking overcrowded.
Classic Witch Costume Nails
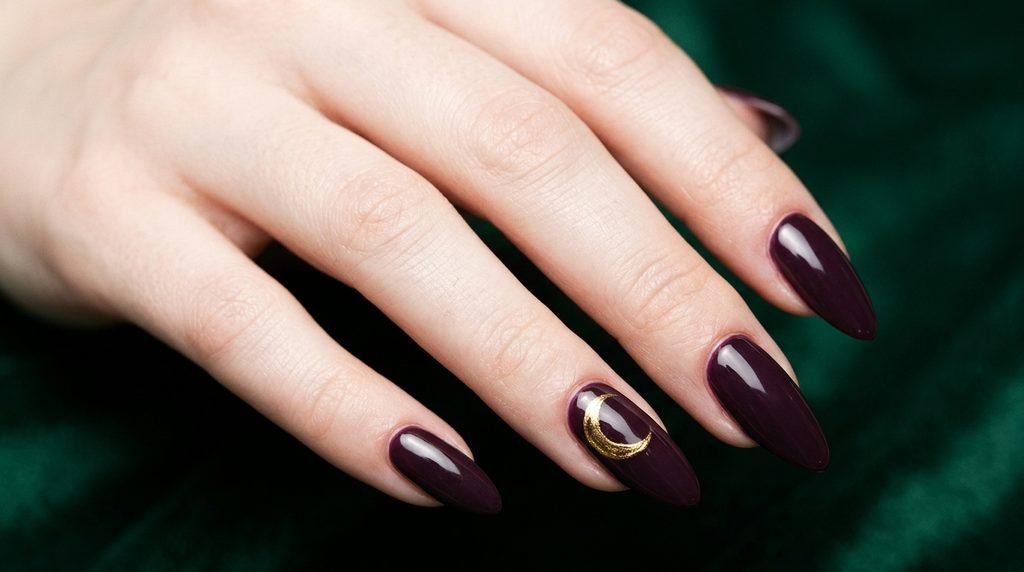
Witch costumes thrive on rich jewel tones, sheer mysterious bases, and subtle metallic accent work. Deep plum, forest emerald, and pitch black build the ideal color foundation for this timeless magical aesthetic.
[Deep Plum Polish Base] ──> [Fine Detail Brush] ──> [Gold Metallic Crescent] ──> [Glossy Gel Topcoat]
To recreate this classic look, paint four nails in a deep glossy plum tone. Keep one nail sheer nude, then use a tiny detail brush to draw a delicate gold metallic crescent moon near your cuticle.
- Best Nail Shapes: Stiletto, Long Almond, or Medium Oval.
- Salon Request: “A rich plum gel base with a thin gold chrome crescent moon on the ring finger.”
- At-Home Technique: Apply two coats of dark plum, paint your moon accent using a fine nail art brush, then seal with topcoat.
- Budget Tier: Press-ons offer a budget-friendly route for quick sharp stiletto shapes.
Vampy Red Blood Drip Nails
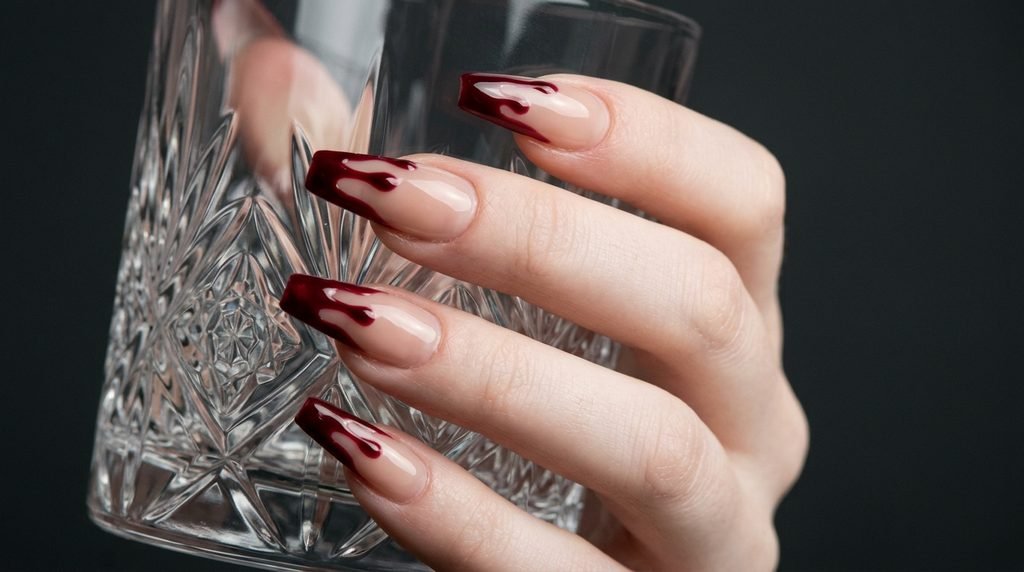
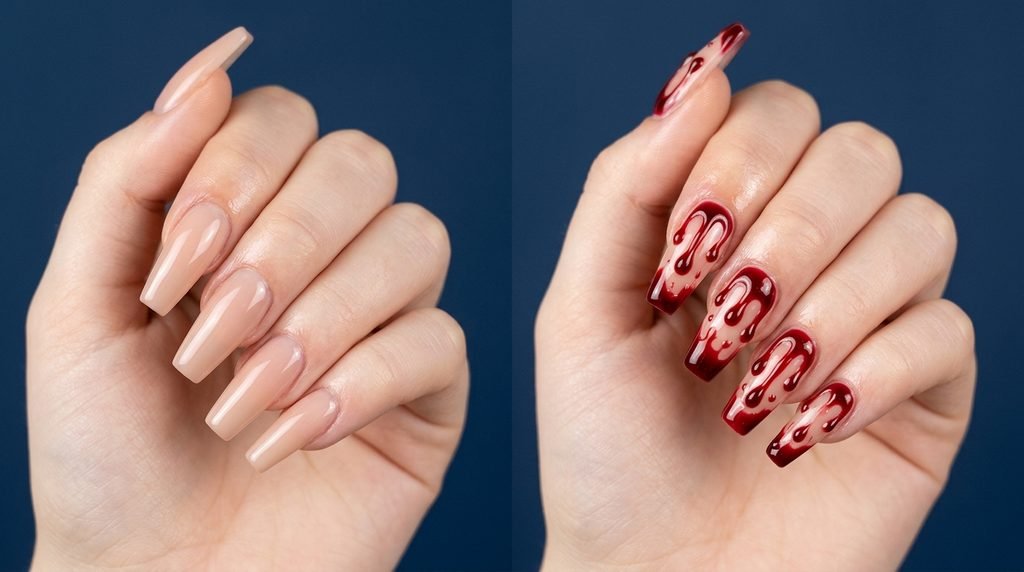
Nothing matches a dark vampire costume like rich crimson blood drips running down a pitch-black or translucent jelly base polish.
[Translucent Red Jelly] ──> [Dotting Tool Bead] ──> [Drag Drip Lines Upward] ──> [High-Gloss Seal]
Begin with a sheer nude base shade. Dip a medium dotting tool into thick blood-red polish, place small dots near the tip of your nail, then drag the polish back toward your cuticle to create natural liquid drips.
- Best Nail Shapes: Long Coffin or Almond.
- Salon Request: “Deep red glass drip nail art over a nude sheer base.”
- At-Home Technique: Use a dotting tool to deposit polish drops, then connect them using a thin striping brush.
- Budget Tier: DIY jelly polish allows you to achieve this dimensional look using simple drugstore supplies.
Minimalist Black Cat Nails
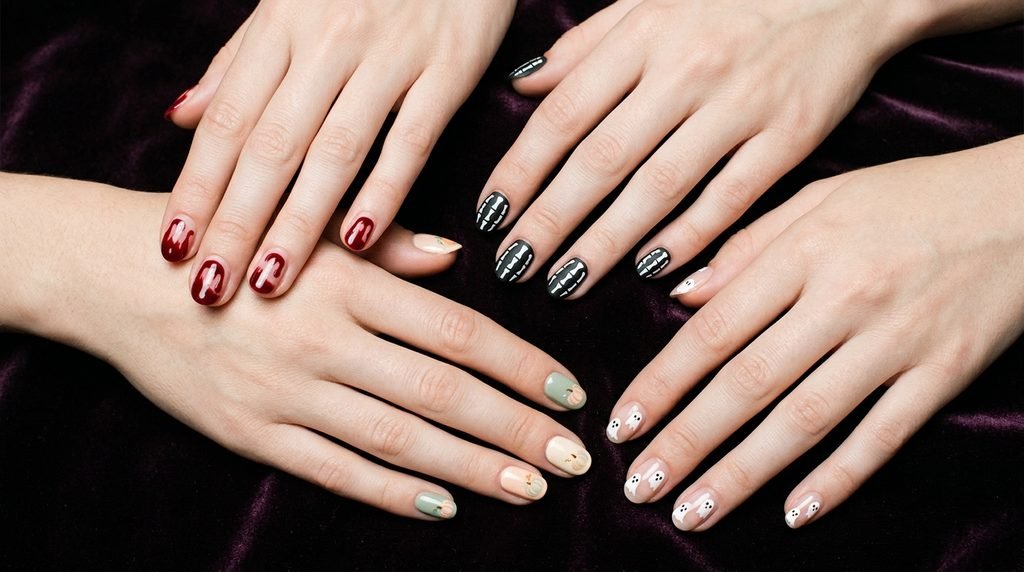
Black cat nails give you a sleek, classic look that takes under fifteen minutes to paint at home using a dotting tool.
[Pitch Black Base] ──> [Dot Two Green Eyes] ──> [Add Slit Pupil Detail] ──> [Satin Matte Topcoat]
Apply two smooth coats of jet-black polish across all ten nails. On your accent nail, dip a dotting tool into bright emerald green polish to form two small cat eyes, then place a tiny black vertical line inside each dot for the pupils.
- Best Nail Shapes: Short Square, Round, or Almond.
- Salon Request: “Matte black nails with subtle green cat eye accent dots on the ring finger.”
- At-Home Technique: Keep your hand resting flat on a table to ensure steady control when dotting the eye details.
- Budget Tier: Gel polish strips deliver a smudge-free matte finish in minutes.
Spooky Skeleton Bone Nails
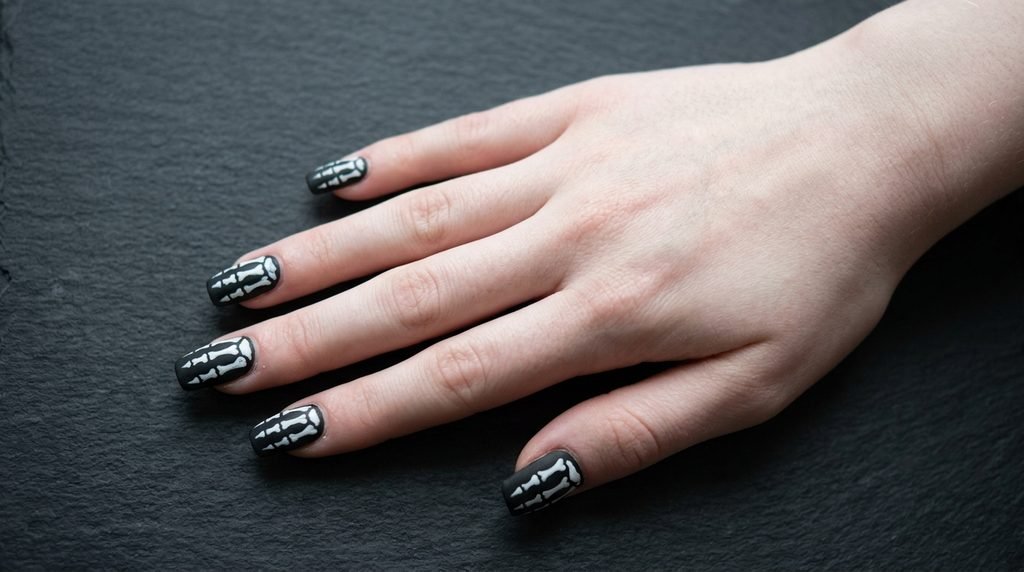
Bone-white lines drawn over a pitch-black background create a striking skeleton effect that instantly transforms simple dark outfits.
[Matte Black Base] ──> [White Bone Line Work] ──> [Joint Dot Detail] ──> [Ultra Matte Topcoat]
Paint your nails with a solid matte black base. Using a fine liner brush and crisp bone-white polish, paint thin straight lines along the center of each finger, adding small white circles at your knuckles to depict finger bones.
- Best Nail Shapes: Medium Square or Coffin.
- Salon Request: “Black matte base with hand-painted white skeleton finger bone line art.”
- At-Home Technique: Paint key structural lines first, then add smaller joint details using your fine brush.
- Budget Tier: DIY striping tape keeps your straight skeleton bone lines crisp and defined.
Distressed Zombie Slime Nails
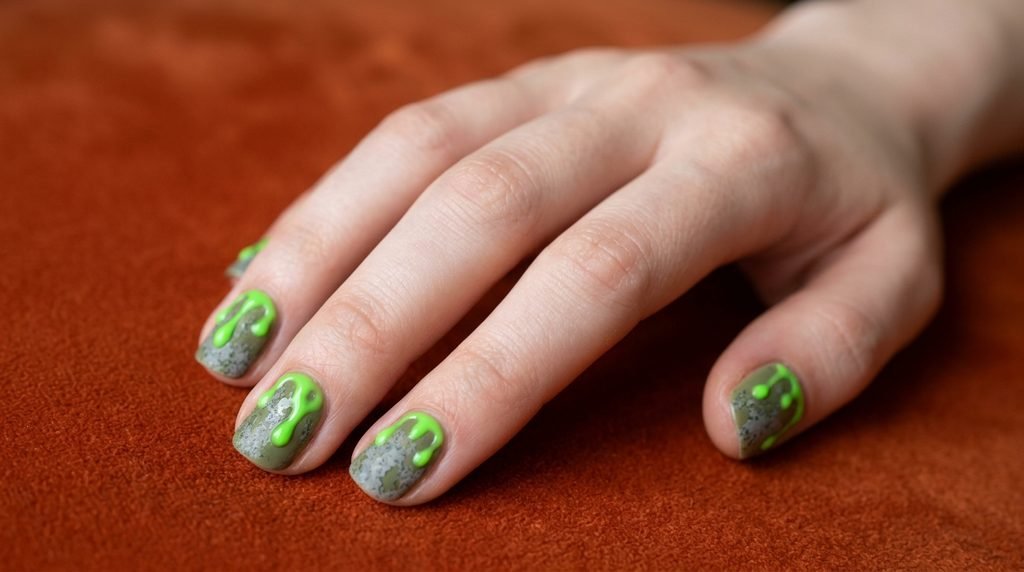
Zombie-inspired manicures combine distressed olive green tones with toxic neon slime accents to create a grimy, cinematic effect.
[Olive Green Base] ──> [Sponge Gray Texture] ──> [Add Slime Green Drips] ──> [Mixed Finish Topcoat]
Start with a muted olive green base. Lightly dab charcoal gray polish around your nail tips using a cosmetic sponge to add a distressed texture, then lay down bright neon green polish along your cuticle edge.
- Best Nail Shapes: Short Natural or Worn Square.
- Salon Request: “Muted olive green base with distressed gray sponge textures and neon slime details.”
- At-Home Technique: Lightly dab gray polish using a cosmetic sponge before applying your bright green slime drips.
- Budget Tier: Drugstore olive and neon shades make this custom style accessible at home.
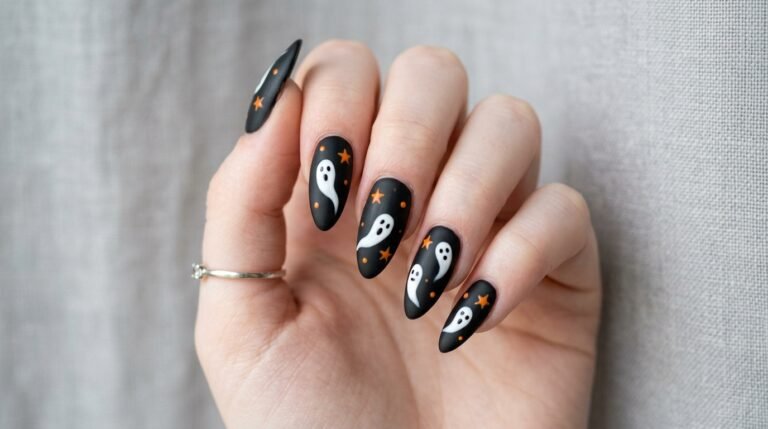
Cute Sheet Ghost Nails
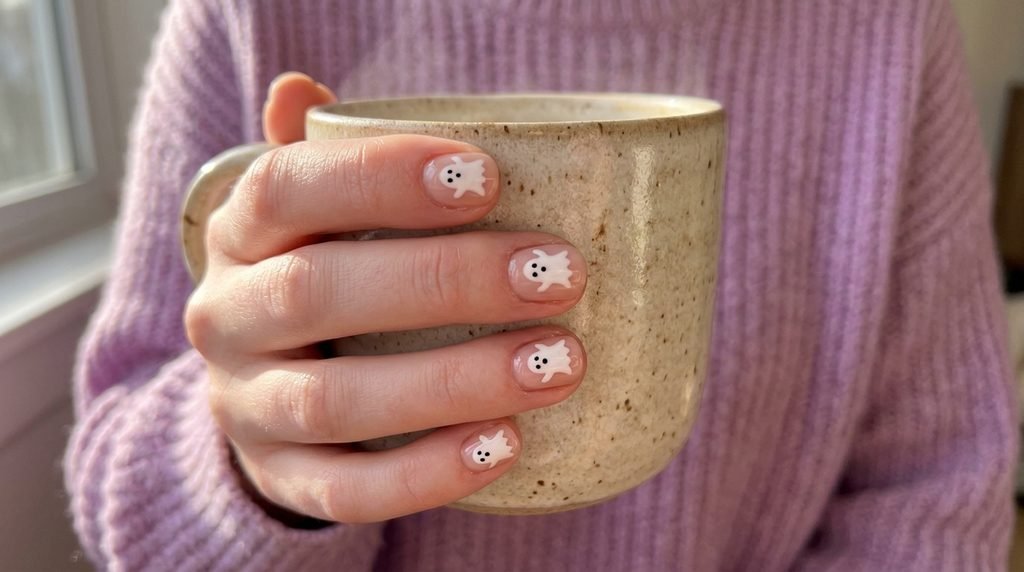
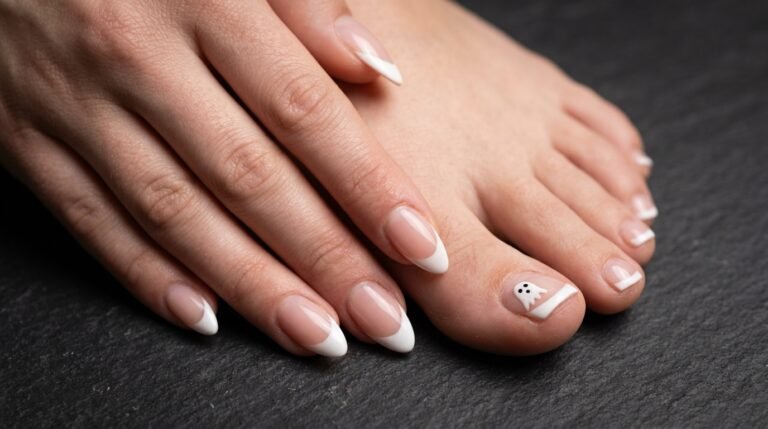
Sheet ghost designs offer a playful, adorable contrast to dark Halloween costumes. [Internal link opportunity: → Aesthetic & Mood-Based/Ghost Face Nail Art] This soft art style works on all nail lengths.
[Sheer Nude Base] ──> [White Wavy Sheet Silhouette] ──> [Dot Black Eyes] ──> [High-Gloss Topcoat]
Apply a sheer nude polish across your nails. Use crisp white polish to paint an arching wave pattern along the top half of your nail, then place two small black dots near the center for the eyes.
- Best Nail Shapes: Short Round or Oval.
- Salon Request: “Sheer nude base featuring cute white sheet ghost silhouettes.”
- At-Home Technique: Paint your white ghost shapes using a rounded polish brush, then add eye dots using a toothpick.
- Budget Tier: Cute nail stickers deliver instant ghost art without needing fine brushwork skills.
Pastel Pumpkin Patch Nails
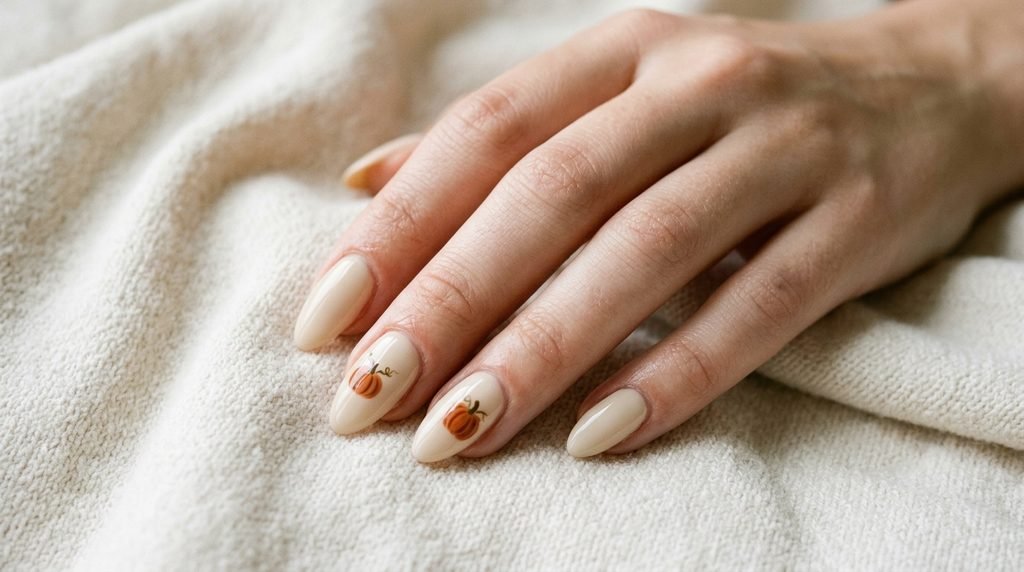
Burnt orange and creamy beige tones transform standard pumpkin nail art into a chic, elevated seasonal design.
[Cream Beige Base] ──> [Orange Pumpkin Oval] ──> [Add Brown Stem] ──> [Shiny Cream Topcoat]
Coat your nails in a soft cream beige shade. Use a burnt orange polish to map out a small rounded oval on your accent nail, then draw a tiny brown stem at the top using a fine detail tool.
- Best Nail Shapes: Almond or Oval.
- Salon Request: “Soft beige base with minimal burnt orange pumpkin art on my accent nails.”
- At-Home Technique: Layer your orange polish twice to build rich color payoff before adding stem details.
- Budget Tier: High-shine topcoat gives drugstore beige and orange polishes a salon-quality gel look.
Flying Bat Silhouette Nails
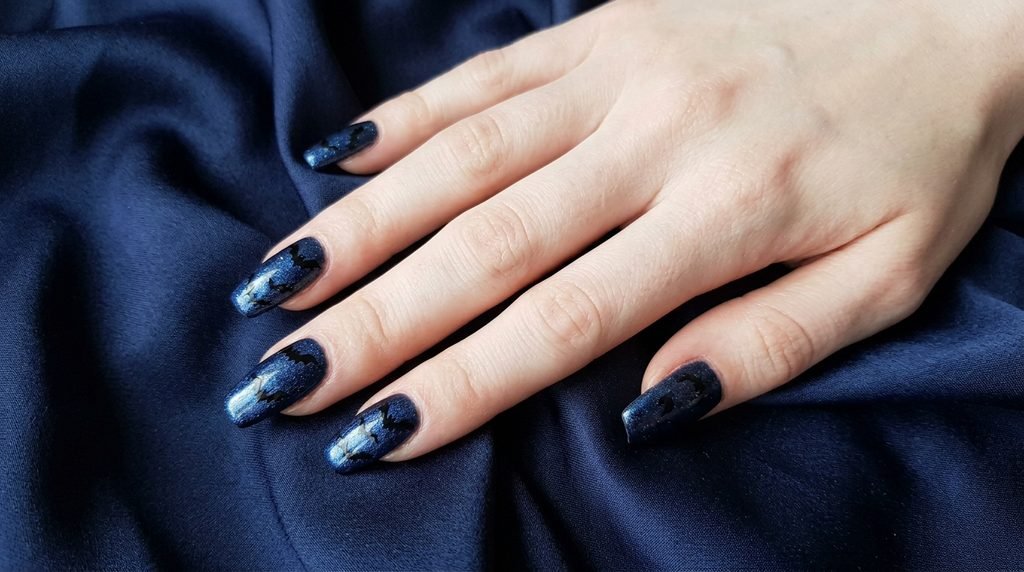
Deep midnight blue paired with dark flying bat silhouettes offers an enchanting nighttime look that pairs naturally with dark costumes.
[Midnight Blue Base] ──> [Black Bat Center Detail] ──> [Add Wing Arches] ──> [Glossy Gel Finish]
Paint your nails in a dark midnight blue shade. On your accent nail, draw a tiny black dot in the center, then extend two curved wing lines outward to complete your flying bat silhouette.
- Best Nail Shapes: Medium Coffin or Almond.
- Salon Request: “Dark blue shimmer base with tiny black hand-painted flying bat accents.”
- At-Home Technique: Practice your bat wing shapes on a piece of paper before painting directly on your nails.
- Budget Tier: Reusable nail art stencils make painting flying bats quick and symmetrical.
Whimsical Fairy Dust Nails
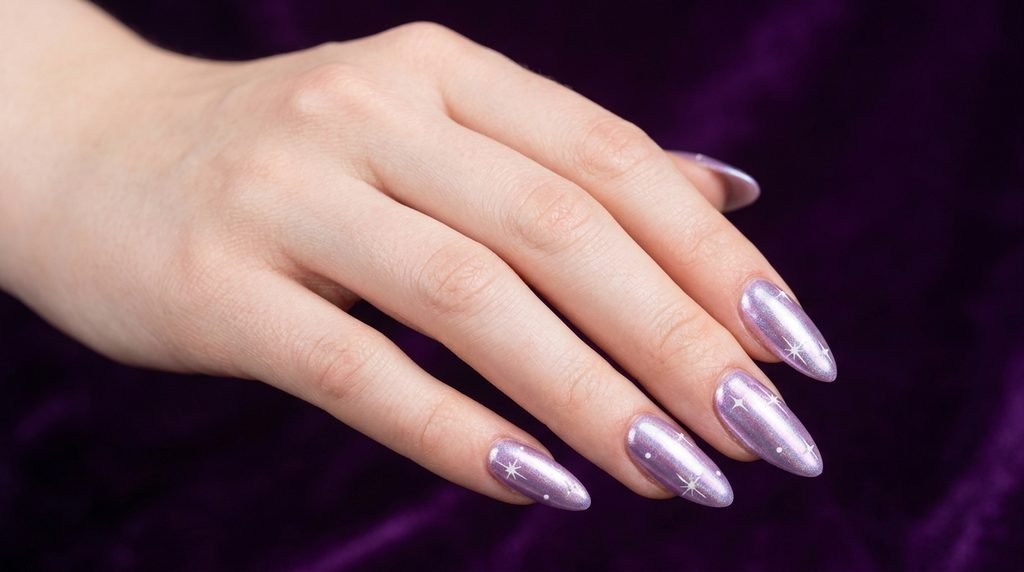
Iridescent pinks and soft lavender shades create an ethereal fairy dust manicure that shines under party lighting.
[Sheer Pink Base] ──> [Rub Iridescent Chrome] ──> [Dot White Sparkles] ──> [High-Gloss Polish]
Apply a sheer lavender or soft pink polish base. Gently rub iridescent chrome powder across your cured topcoat to create a glowing pearl effect, then add tiny white star sparkles using a liner brush.
- Best Nail Shapes: Long Almond or Oval.
- Salon Request: “Iridescent chrome powder over soft lavender polish with subtle white sparkle accents.”
- At-Home Technique: Rub chrome powder into a tack-free topcoat using an eyeshadow applicator for maximum shine.
- Budget Tier: Iridescent topcoats provide a similar magical sheen without requiring special chrome powders.
Glowing Alien Slime Nails
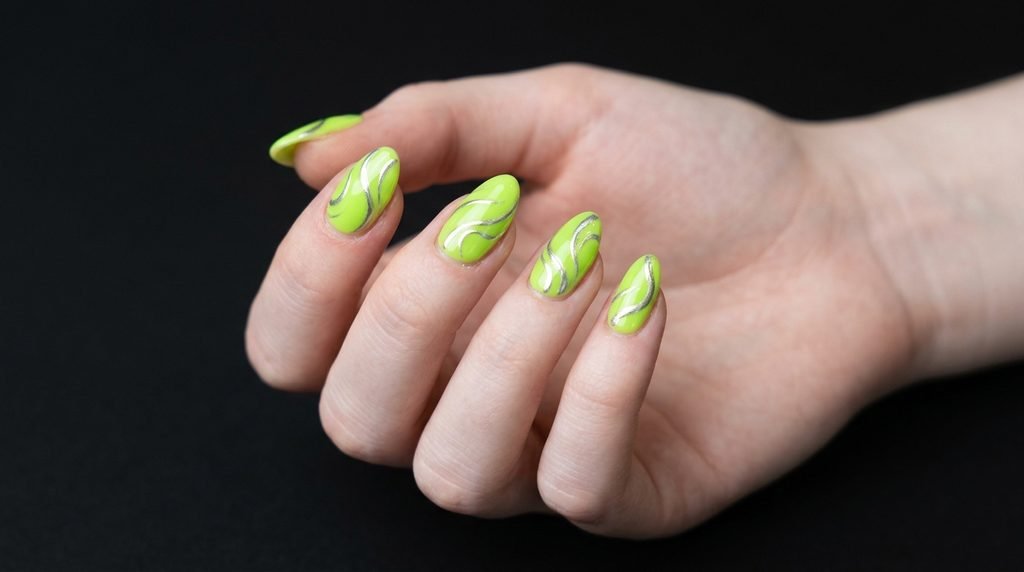
Neon lime green paired with bright silver chrome accents captures a bold sci-fi aesthetic for futuristic costumes.
[Neon Lime Base] ──> [Add Metallic Silver Swirls] ──> [Layer Holographic Glitter] ──> [High-Gloss Topcoat]
Paint your nails in a solid neon lime green color. Trace thin silver metallic swirls across each nail using a striping tool, then seal the artwork under a glossy topcoat for maximum reflection.
- Best Nail Shapes: Medium Almond or Coffin.
- Salon Request: “Neon lime green gel base with silver metallic chrome swirl accents.”
- At-Home Technique: Keep your silver swirl lines thin to ensure your neon green base polish remains the star.
- Budget Tier: Bright neon polishes paired with silver striping tape keep this design budget-friendly.
Fiery Devil Horn Nails
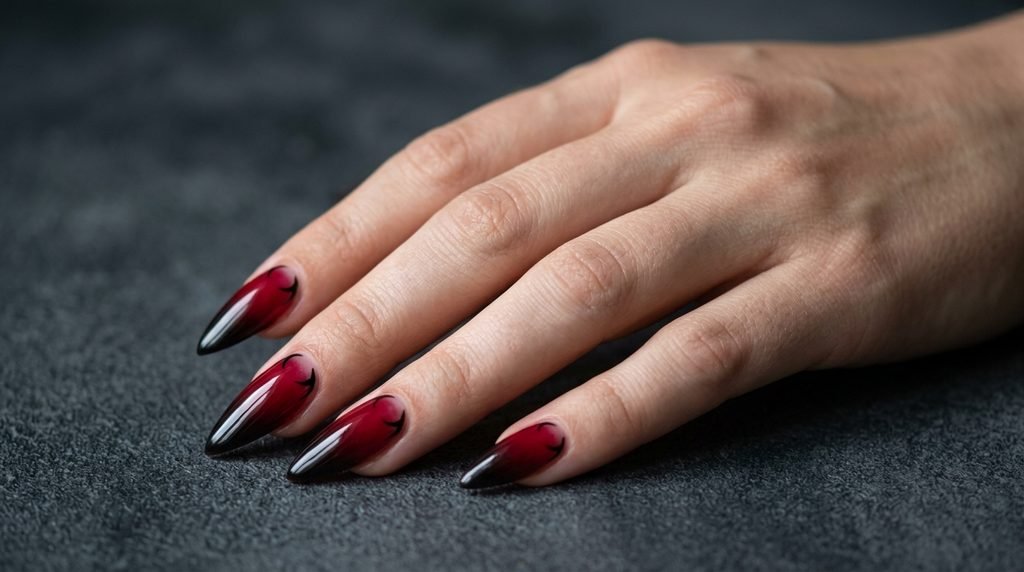
Crimson red paired with pitch-black accents creates a dramatic manicure suited for classic devil costumes.
[Crimson Red Base] ──> [Black Tip Gradient] ──> [Draw Small Horn Accents] ──> [High-Gloss Topcoat]
Apply two coats of deep crimson red polish across all nails. Sponge dark black polish along the tips to create a smoky gradient, then add tiny black horn outlines near your cuticle edge.
- Best Nail Shapes: Sharp Stiletto or Long Coffin.
- Salon Request: “Deep red to black ombré gradient with subtle black horn accents near the cuticle.”
- At-Home Technique: Use a damp makeup sponge to blend your red base smoothly into the dark black tips.
- Budget Tier: Gradient sponge tools allow you to achieve smooth ombré blends at home effortlessly.
Spider Web Accent Nails
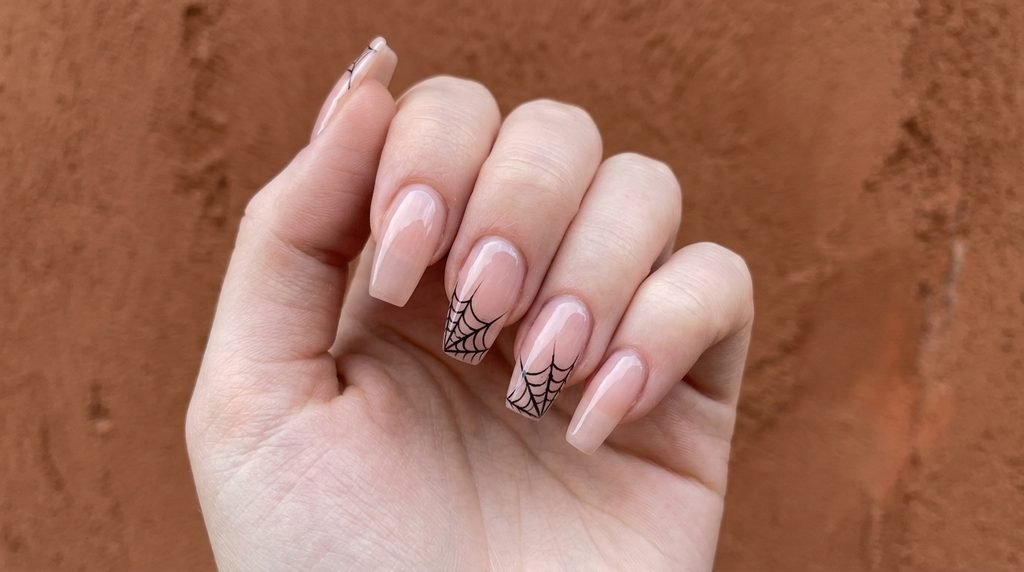
Delicate black spider webs painted over sheer nude polish create an elegant, creepy look that enhances simple outfits.
[Sheer Nude Base] ──> [Paint Focal Point Dot] ──> [Draw Radiating Web Lines] ──> [Connect Curved Arches]
Apply a clean nude base. Paint a small black dot near the corner of your nail, draw straight lines extending outward from that point, then connect them with tiny curved arches to complete your web.
- Best Nail Shapes: Medium Coffin or Stiletto.
- Salon Request: “Sheer nude base with fine black spider web line work on the accent nails.”
- At-Home Technique: Use a long liner brush to draw your web lines in single, smooth strokes.
- Budget Tier: Fine line art pens make drawing precise spider webs simple for DIY painters.
Simple Halloween Nail Designs You Can Do in 10 Minutes
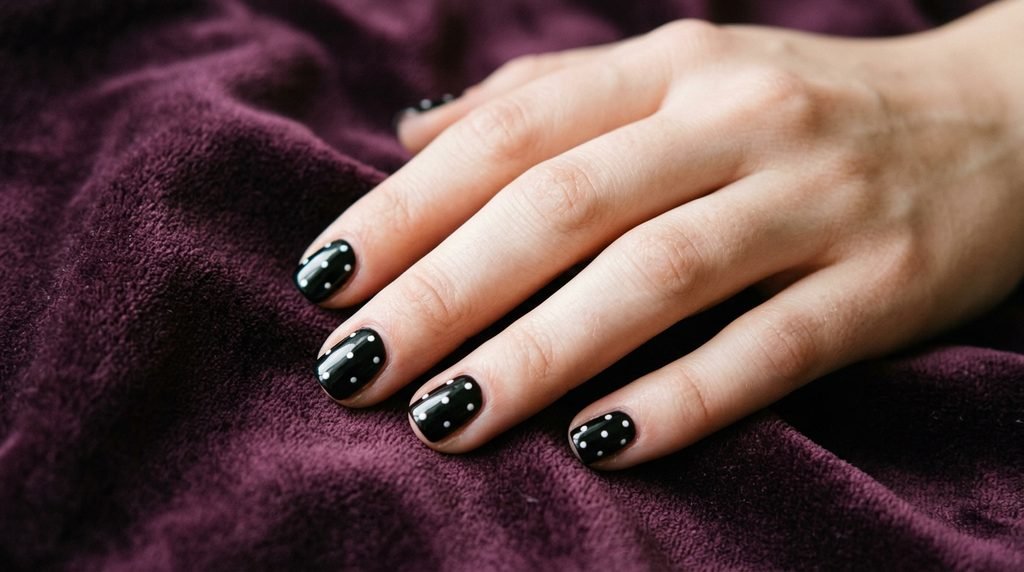
When you need quick Halloween nails before heading out, focusing on single-color bases with simple dotting tool accents delivers great results without taking hours.
[Base Coat Color] ──> [Dip Dotting Tool] ──> [Apply Minimalist Accents] ──> [Quick-Dry Topcoat]
Choose two contrasting polishes, such as black and white or orange and cream. Paint all nails in your primary color, then use a toothpick or dotting tool to add simple dots or polka dots across your accent nail.
- Best Nail Shapes: Short Square, Round, or Oval.
- Salon Request: “Simple solid manicure with minimalist dotting tool accents on the ring finger.”
- At-Home Technique: Apply quick-dry topcoat five minutes after painting to prevent smudges while rushing.
- Budget Tier: Standard drugstore polishes work perfectly for fast ten-minute dotting designs.
Tools and Polishes You’ll Need for DIY Halloween Nails
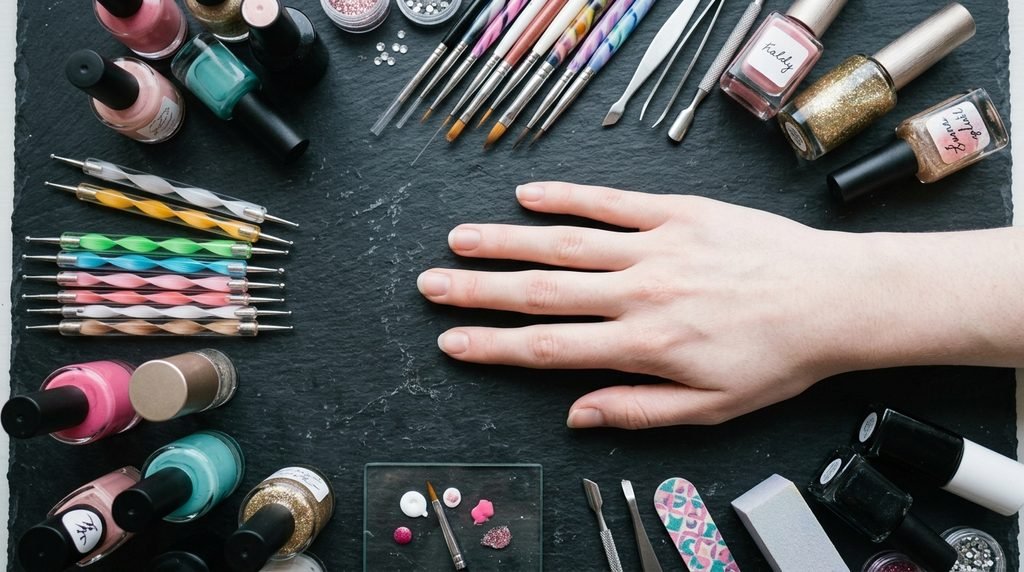
Having the right nail art supplies makes creating clean Halloween designs at home faster and easier.
[Nail Art Brushes] ───┐
[Dotting Tools] ───┼──> [Precision Application] ──> [Clean Professional Finish]
[Quick-Dry Polish] ───┘
You do not need an expensive setup to create great Halloween manicures. Investing in three basic tools will give you total control over fine lines and dots. [Affiliate opportunity: recommended nail art brush set and dotting tool kit]
- Fine Liner Brushes: Essential for painting crisp spider webs, skeleton bones, and cat eyes.
- Dual-Ended Dotting Tools: Ideal for creating perfect ghost eyes, polka dots, and blood drip bases.
- Clean-Up Brush: A flat brush dipped in acetone cleans polish off cuticles instantly.
- Quick-Dry Topcoat: Seals hand-painted art while preventing accidental smudges.
Short Nail Adaptations for Halloween Designs
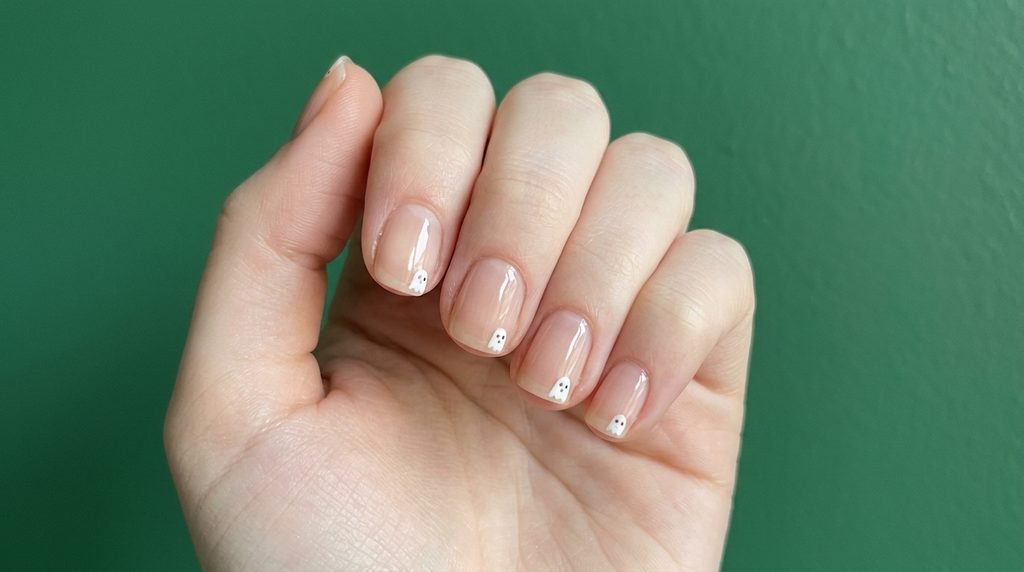
Short nails offer a neat, comfortable canvas for Halloween manicures when art proportions are adjusted correctly.
[Short Natural Canvas] ──> [Scale Down Art Size] ──> [Position at Nail Tip] ──> [Clean Balanced Look]
Keep your line art small and focused near the tips or cuticles to maximize open space. Micro ghost faces, tiny half-moons, and minimal blood drips look deliberate and proportional on short nails.
- Best Nail Shapes: Short Square, Squoval, or Natural Round.
- Salon Request: “Micro-scale Halloween line art designed specifically for short natural nails.”
- At-Home Technique: Avoid thick polish coats that can flood short cuticles or blur tiny details.
- Budget Tier: Micro nail decals offer crisp, scaled-down designs that fit short nails perfectly.
Almond Nail Shapes for Halloween Art
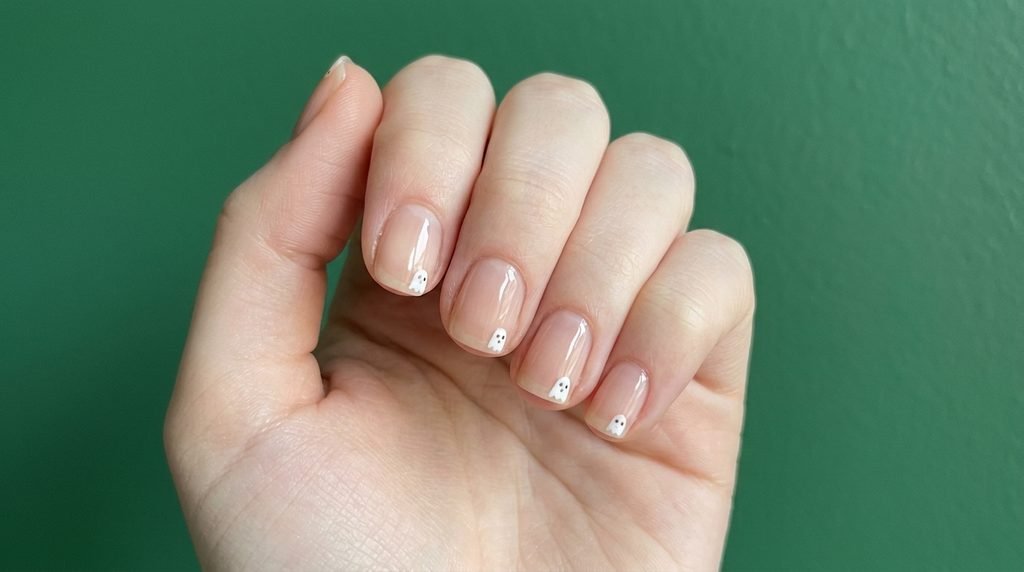
Almond nail shapes lengthen the visual appearance of your fingers, making them an ideal canvas for elegant Halloween art.
[Almond Canvas] ──> [Elongate Line Art] ──> [Focus Detail on Tapered Tip] ──> [Sleek Elegant Finish]
The gentle taper of an almond shape draws attention toward the tip of your finger, making it ideal for blood drips, spider webs, and metallic crescent moons.
- Best Design Match: Vampire blood drips, fairy sparkles, and witchy moon accents.
- Salon Request: “Medium almond shape with fine line art aligned along the natural curve.”
- At-Home Technique: File in one continuous direction to maintain a smooth, balanced almond taper.
- Budget Tier: Full-cover almond nail tips let you achieve this sleek silhouette at home instantly.
Coffin Nail Shapes for Halloween Art
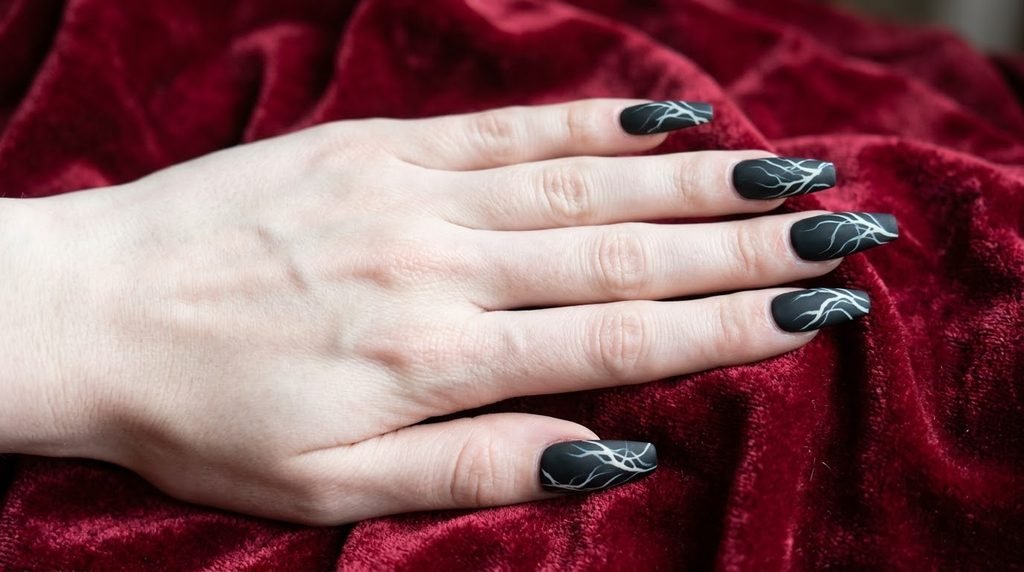
Coffin nail shapes offer a wide, flat canvas that accommodates detailed artwork and bold color blocks effortlessly.
[Square Flat Tip] ──> [Tapered Side Walls] ──> [Expand Design Canvas] ──> [Bold Dramatic Look]
The flat, squared-off tip of a coffin nail creates space for skeleton bones, flying bats, and dramatic gradient fades without feeling crowded.
- Best Design Match: Skeleton bones, devil horn gradients, and flying bats.
- Salon Request: “Long coffin shape with a clean square tip and smooth side taper.”
- At-Home Technique: Keep side edges filed straight to preserve the crisp geometric look of the coffin shape.
- Budget Tier: Pre-shaped coffin press-ons give you a dramatic salon look at a fraction of the cost.
Square Nail Shapes for Halloween Art
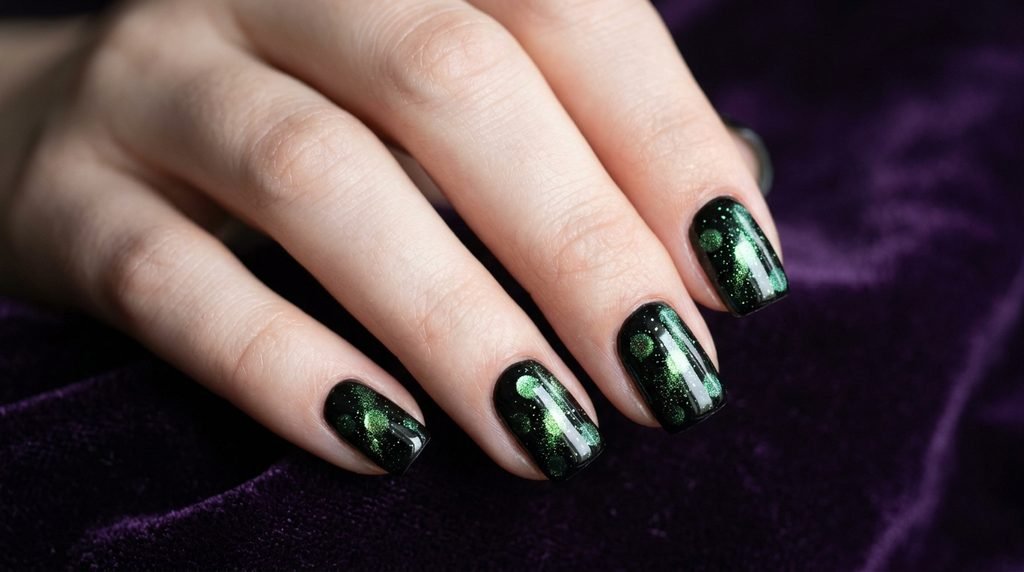
Square nail shapes provide sharp corners and straight lines that ground minimalist Halloween patterns cleanly.
[Straight Side Walls] ──> [Flat Horizontal Edge] ──> [Align Geometric Art] ──> [Crisp Modern Style]
Straight edges create an ideal framing structure for minimalist black cat art, sheet ghosts, and ten-minute dotting tool designs.
- Best Design Match: Black cat nails, sheet ghosts, and quick ten-minute dot designs.
- Salon Request: “Classic short square shape with clean, sharp corners.”
- At-Home Technique: Hold your file perpendicular to your finger to create a perfectly flat top edge.
- Budget Tier: Natural nails filed into short squares provide a clean canvas using standard files.
Salon Communication Guide: What to Ask For
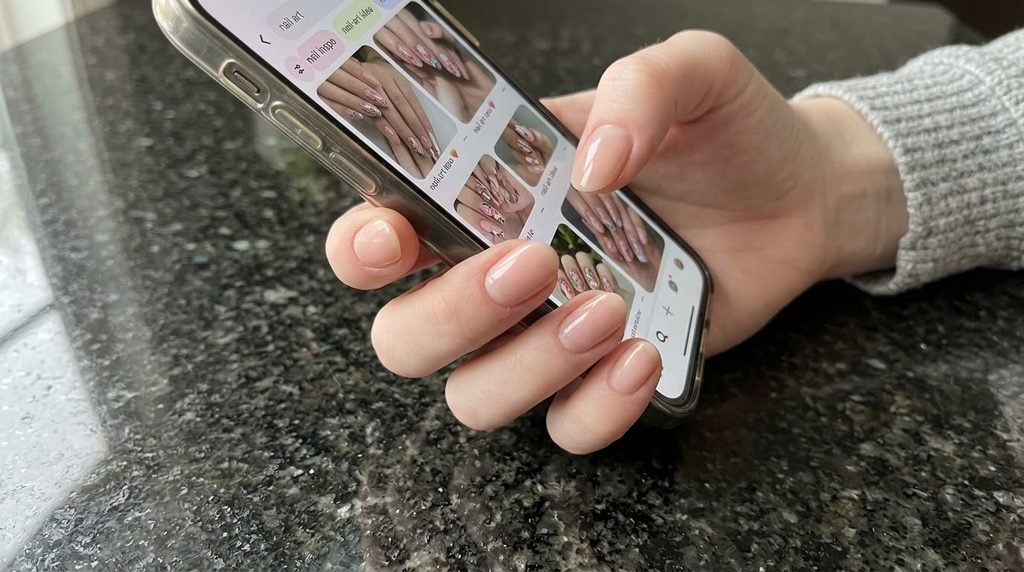
Getting the exact Halloween manicure you want requires describing your desired shape, color finish, and accent placement clearly to your nail tech.
[Specify Nail Shape] ──> [State Base Color Finish] ──> [Describe Accent Placement] ──> [Confirm Final Topcoat]
Bring reference photos that clearly show the design details you prefer. State your base color choice first, clarify whether you want matte or glossy topcoats, and specify which fingers should feature accent art.
- Step 1: Specify your desired length and nail shape clearly before your tech starts prepping.
- Step 2: Request your primary polish color and state your preferred finish (matte or glossy).
- Step 3: Point out which fingers will feature accent details (usually the ring or middle finger).
- Step 4: Confirm whether you want hand-painted artwork, chrome powders, or nail decals.
DIY vs. Salon vs. Press-On Options
Choosing between doing your nails at home, visiting a professional salon, or applying press-ons depends on your budget, timeline, and skill level.
| Manicure Option | Average Cost | Application Time | Longevity | Best For |
| DIY Manicure | $5 – $15 | 20 – 40 Minutes | 3 – 7 Days | Simple dotting designs & budget flexibility |
| Press-On Nails | $10 – $25 | 10 – 15 Minutes | 1 – 2 Weeks | Instant long shapes & intricate pre-made art |
| Salon Gel Manicure | $40 – $90+ | 60 – 90 Minutes | 2 – 3 Weeks | High-durability gel art & custom shapes |
DIY manicures work best for simple single-color bases with light dotting art. [Affiliate opportunity: high-durability press-on nail kit] Press-ons offer complex detailed art and long coffin or stiletto shapes without requiring hours in a salon chair. Salon gel appointments deliver the highest durability and precise custom artwork for special events.
Long-Lasting Tips for Halloween Night
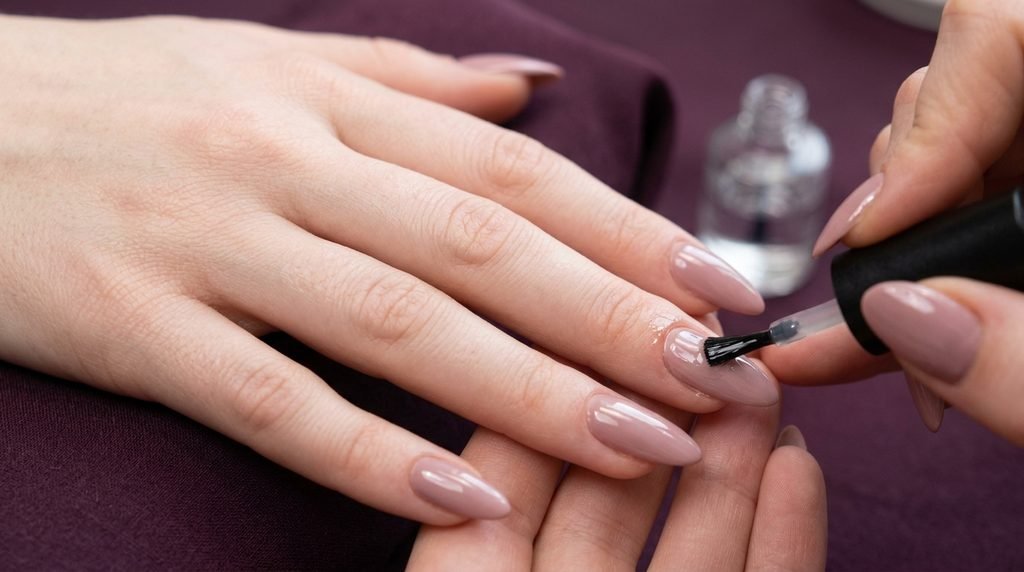
A few simple application tricks will ensure your Halloween manicure stays shiny, chip-free, and flawless throughout your party night.
[Dehydrate Nail Plate] ──> [Apply Thin Base Gel] ──> [Cap Free Edge Polish] ──> [Reapply Topcoat]
Always clean your natural nail plates with isopropyl alcohol before applying polish to remove oils that cause premature peeling. Cap the free edge of each nail with topcoat to seal the tips against chips and wear.
- Tip 1: Wipe nail beds with alcohol before applying base coat to ensure maximum polish adhesion.
- Tip 2: Apply polish in thin layers to prevent air bubbles and speed up drying times.
- Tip 3: Reapply a thin layer of topcoat every three days to keep your hand-painted art protected.
- Tip 4: Wear gloves when doing dishes or handling household cleaners to protect your gel finish.
Color Combinations That Work for Any Costume
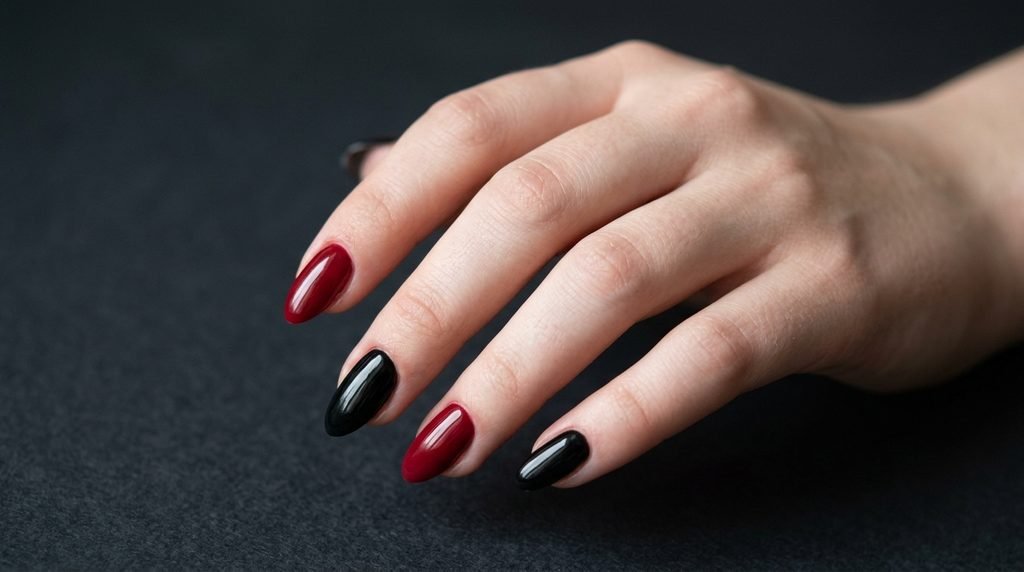
Pairing classic Halloween polish shades ensures your nails look cohesive with any costume you choose.
[Pitch Black Base] ────┬──> Add Blood Red (Vampire / Gothic)
├──> Add Emerald Green (Witch / Slime)
└──> Add Cream White (Skeleton / Ghost)
Combining pitch black with deep red creates an instant dramatic look suited for vampires and ghouls. [Internal link opportunity: → Color-Specific/Dark Aesthetics] Black paired with emerald green delivers a mysterious witch vibe, while soft beige and burnt orange keep autumn pumpkin styles warm and inviting.
- Black & Blood Red: Ideal for vampire, gothic, and devil costumes.
- Black & Emerald Green: Perfect for witch, potion, and dark magic themes.
- Beige & Burnt Orange: Great for pumpkin patches, scarecrows, and cozy fall looks.
- Sheer Nude & Crisp White: Works beautifully for ghosts, skeletons, and minimalist styles.
Frequently Asked Questions
What nails go with a witch costume?
Deep plum, forest green, or jet-black polishes with small gold moon or star accents complement a witch costume beautifully. Choose a high-gloss gel or satin matte finish depending on your outfit’s fabric texture.
What are easy Halloween nail designs for beginners?
Single-color polish bases featuring simple accent dots, polka dots, or thin stripe lines are the easiest Halloween designs for beginners to paint using a dotting tool or toothpick.
How do you match nails to a Halloween costume?
Pick one dominant shade from your costume fabric as your primary nail color, then choose a secondary accent detail that reflects your character’s theme, like blood drips, cat eyes, or stars.
Can you do Halloween nails on short nails?
Yes, micro-scale designs such as small ghost silhouettes, tiny half-moons, single-dot cat eyes, and minimal blood drips fit short natural nails perfectly without cluttering your canvas.
How long do press-on Halloween nails last?
When applied using proper nail prep and quality nail glue, press-on Halloween nails typically last between one to two weeks without lifting or falling off.
Conclusion
Matching your nails to your Halloween costume does not have to be complicated or stressful. By selecting one signature shade from your outfit and adding a targeted accent detail, you can easily create a polished manicure that elevates your entire look. Save this guide to your Pinterest board so you can bring it up during your next salon visit or DIY manicure session. Which design will you try first?

Mia founded Daily Nail Idea after a decade in beauty editorial, tired of watching great nail art disappear into the scroll. She now leads the team’s editorial direction — deciding what’s worth featuring and what’s just noise — and still paints her own nails every Sunday night, no exceptions.