Cute Halloween Nails: Cute Jack-o’-Lantern Nail Design & Ghost 3D Crystal Design
You are scrolling Pinterest late at night. You want cute halloween nails right now. You saved twenty photos already. However, you still do not know what to ask your nail tech to paint today. Some designs look too scary. Other designs look like childish stickers. You need something festive, glam, and super cute for October. You are in the right place. I have worked behind the nail desk for years. Today, I will help you build the ultimate spooky-cute set.
We are combining jack-o’-lanterns, tiny ghosts, and 3D crystals. Let’s make your nails look amazing!
At-a-Glance: What is Ahead
Here is a quick look at our festive nail journey:
- Color Secrets: Mixing oxblood red, bright orange, charcoal, and black.
- 3D Crystal Magic: How to place rhinestones so they never catch on your hair.
- Character Art: Painting friendly pumpkin faces and cute little peeking ghosts.
- Shape Pairing: Why almond and squoval shapes work best for detailed nail art.
- Pro Salon Tips: Exactly what to say to your nail tech to avoid awkward mix-ups.
Choosing the Right Colors for Cute Halloween Nails
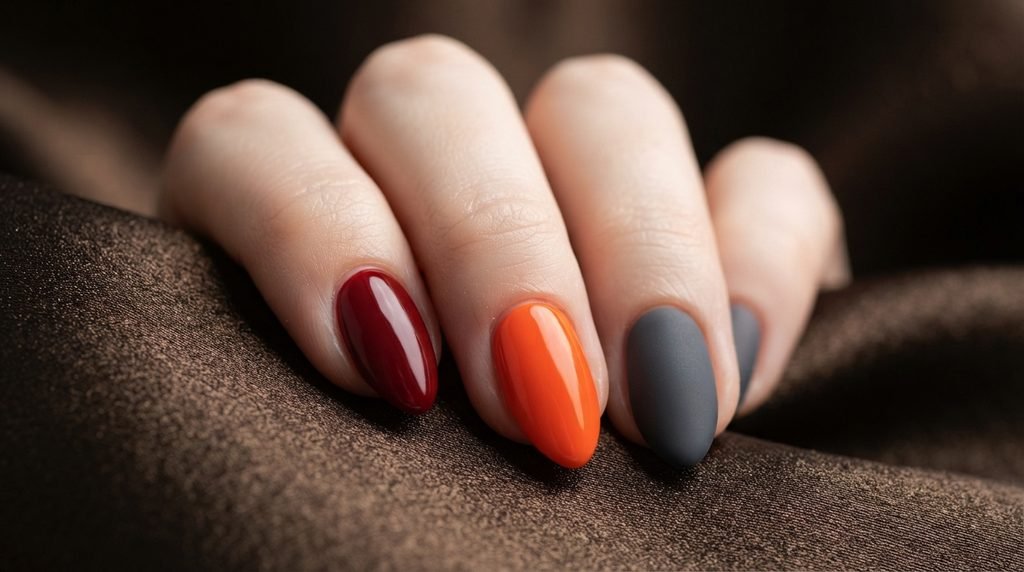
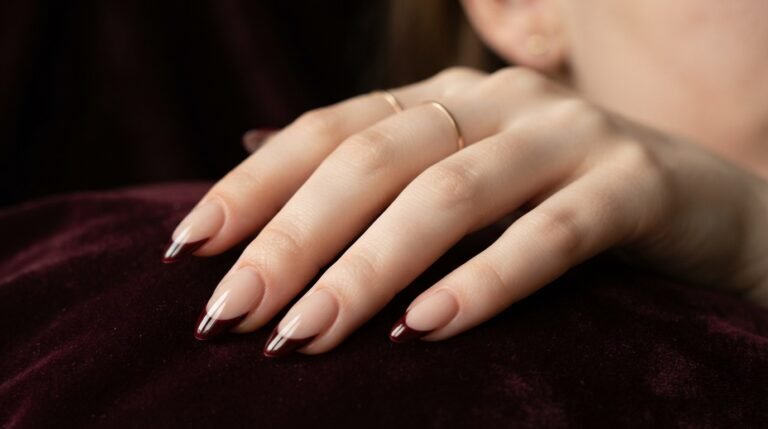
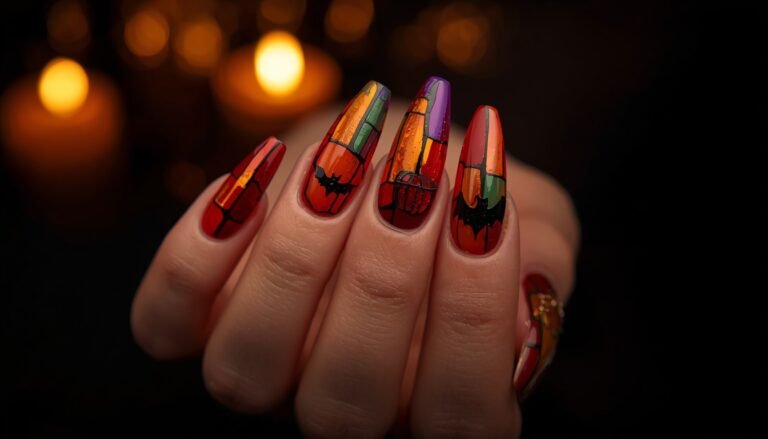
Halloween is not just basic orange and black anymore. To get truly cute halloween nails, you need a rich palette. I love pairing fiery pumpkin orange with deep oxblood red. The dark red adds instant depth.
Then, add a matte charcoal grey accent nail. It softens the contrast so the black polish does not look harsh. This color mix keeps your set looking elevated. It feels like a high-end designer manicure.
Plus, white ghost art pops amazingly well over these dark, moody base shades!
Preparing Your Natural Canvas for Detailed Halloween Nail Art
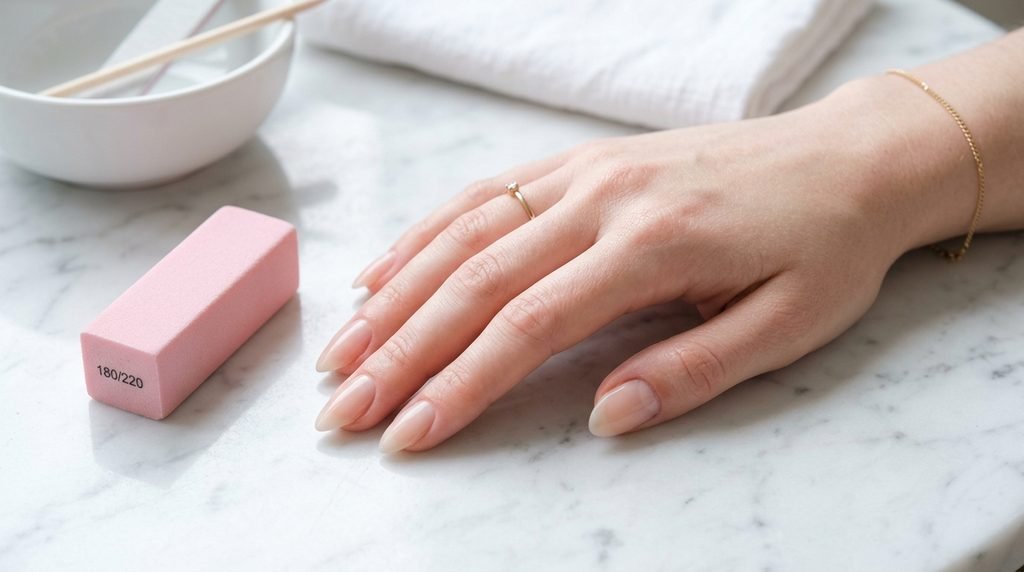
Great art needs a clean base. Start by gently pushing back your cuticles. Remove all invisible cuticle skin from the nail plate. This step prevents product lifting later. Next, buff the natural shine away using a soft 240-grit buffer. Clean the nail with pure alcohol. Do not use acetone here because it can leave a greasy residue. A clean, dry nail plate ensures your gel art lasts over three full weeks without chipping.
Avoiding Cuticle Flooding During Complex Art Application
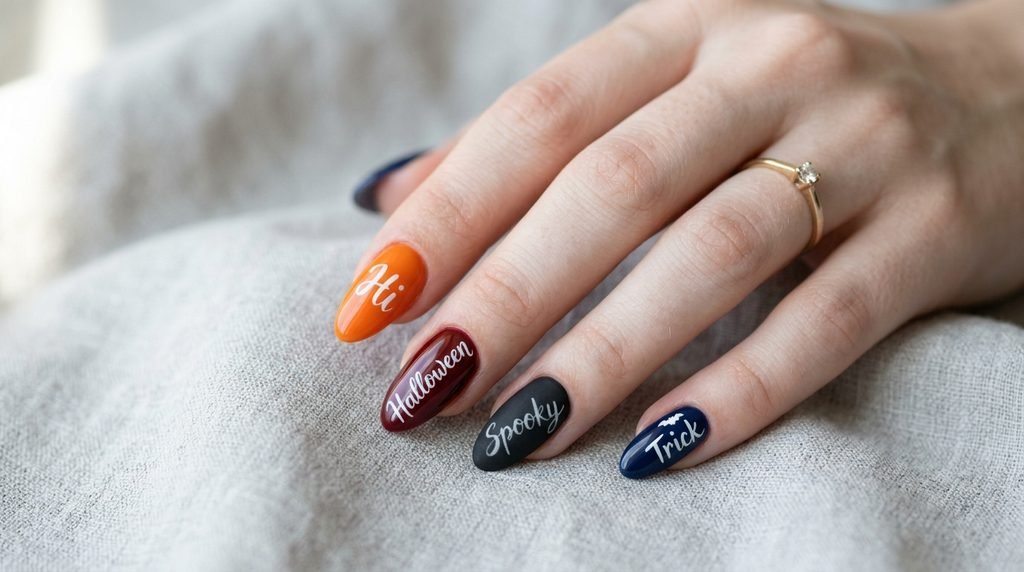
Cuticle flooding ruins gorgeous nail art fast. It causes painful gel allergies and sudden peeling. When painting base colors, leave a tiny hair-width gap near the cuticle skin. Always flash-cure base colors for ten seconds. Flash-curing freezes the polish in place immediately. It stops the gel from running into your side walls. Work on one single finger at a time when creating detailed character bases.
This simple salon trick keeps your line work clean and ultra-crisp.
The Magic Base: High-Gloss Red, Orange, and Black Foundations
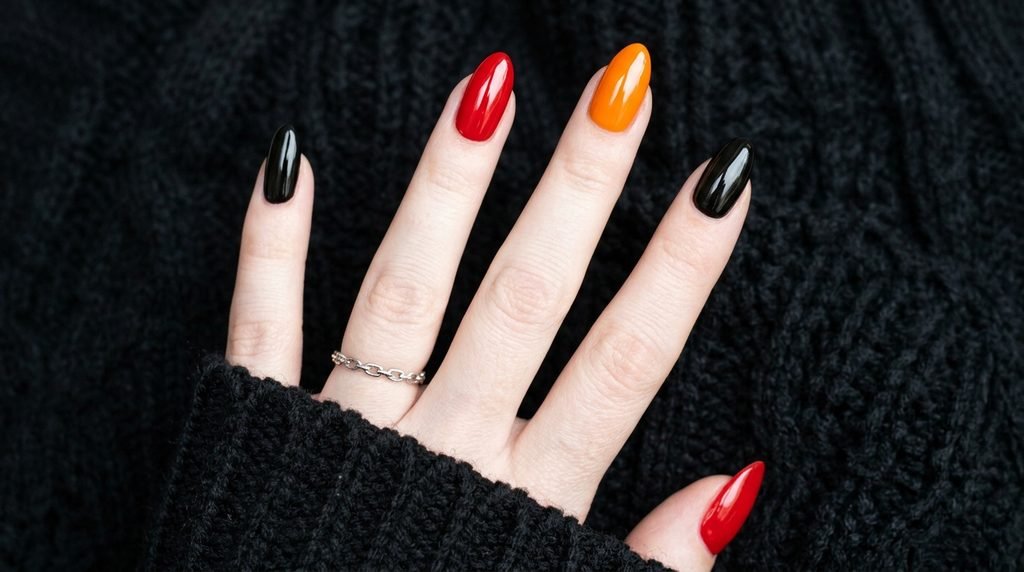
- Now, let’s lay down our foundation colors! Paint your index finger in rich oxblood red.
- Paint your middle finger in vibrant pumpkin orange. Make your pinky nail solid high-gloss black.
- Apply two thin coats of polish instead of one thick coat. Thin coats cure much better under LED lamps.
- Thick coats can trap uncured, squishy gel underneath the top layer.
- Take your time layering these deep shades for opaque, streak-free color depth.
Painting Your First Jack-o’-Lantern Nail Design Step-by-Step
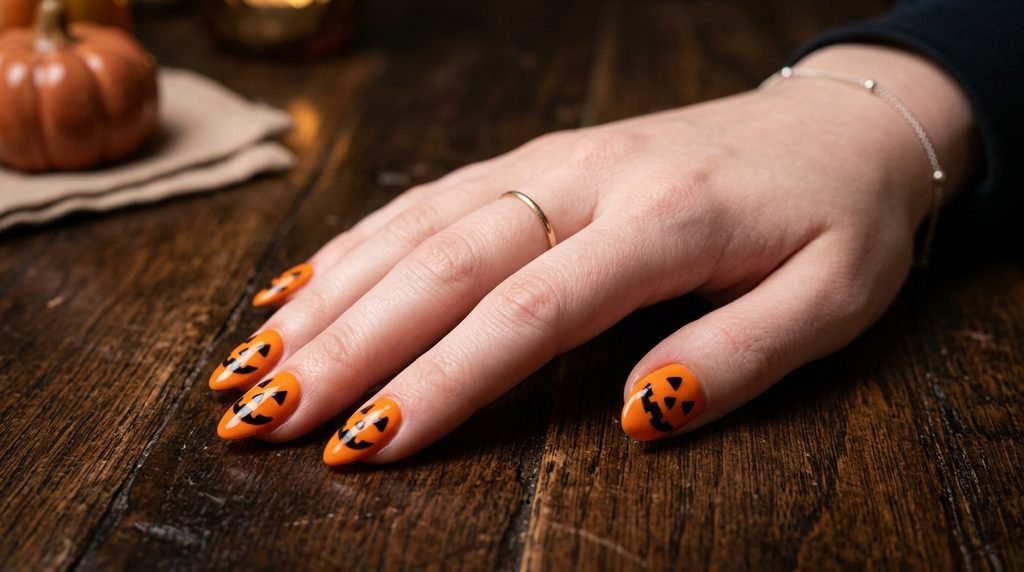
- Let’s paint a cute pumpkin! Start with your solid orange base nail ready.
- Grab an ultra-thin 7mm liner brush and black gel polish. Paint two tiny triangles for friendly eyes.
- Add a small, curved smile with two tiny square teeth missing. Keep the lines soft and curved.
- Harsh, sharp angles make the pumpkin look mean rather than adorable!
Add Ghost characters
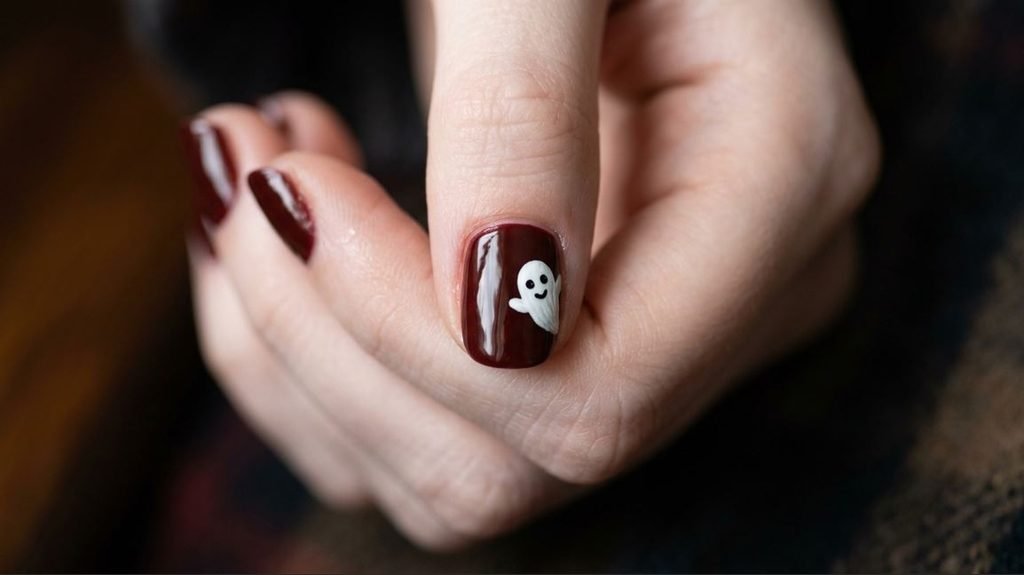
Ghosts add instant sweetness to your set! You can paint a ghost peeking behind your pumpkin.
Dip a dotting tool into bright opaque white gel paint. Place a soft circle right next to your orange pumpkin.
Drag the white gel downward using your liner brush to form a wavy sheet tail.
Cure the white shape completely first. Then, use your liner brush to add two dot eyes.
Add a tiny vertical oval for an “open mouth” surprise expression!
Creating Ethereal Ghost Nails with Dimensional Shimmer
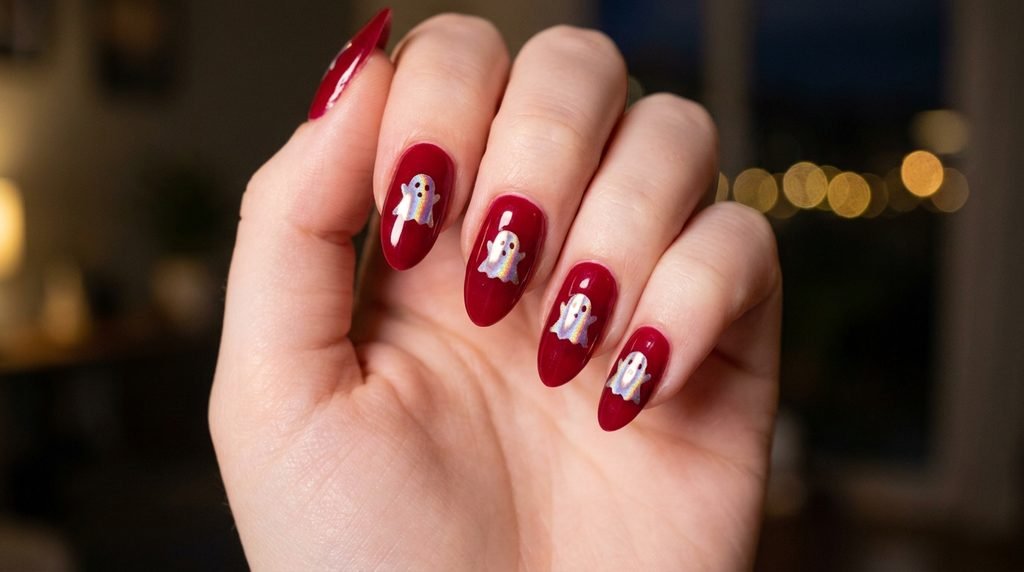
Want your ghosts to look extra magical? Add a hidden shimmer shift!
Before painting black facial features on your white ghost, grab some pearl chrome powder.
Rub a tiny bit of chrome over the white cured gel body. It gives the ghost a glowing, spectral finish!
Brush away excess dust carefully. Now, paint your black eyes and mouth over the shimmering body.
This subtle detail makes your ghost nails catch the light amazingly well.
Spiderweb Accent Nail Halloween Secrets for Clean Lines
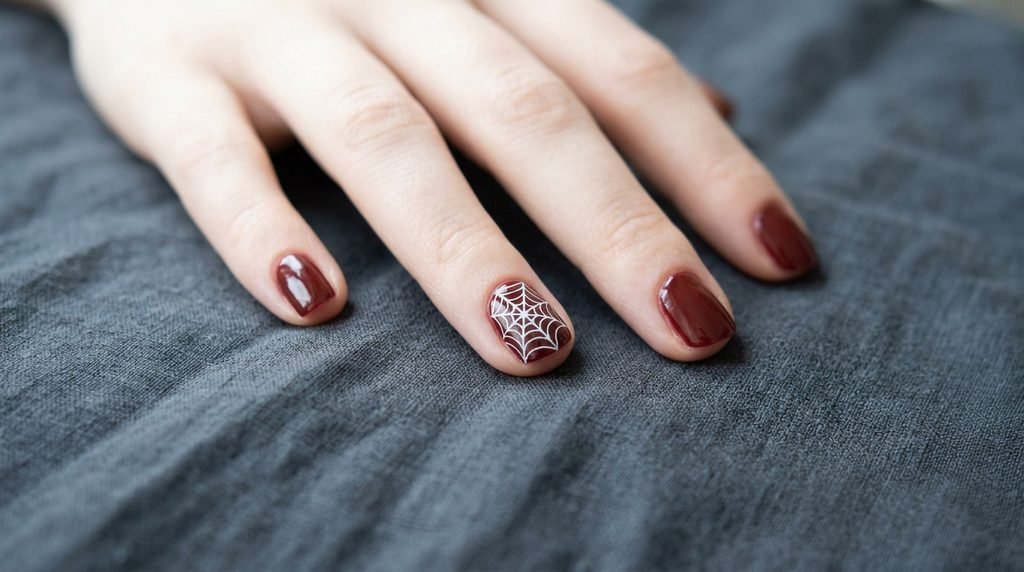
Spiderwebs seem tricky, but they are super easy with the right tool! Use a high-tack black spider gel.
Dip a dotting tool into the thick spider gel. Touch it to the nail edge and pull away gently.
The gel stretches into a perfect, paper-thin line across your red accent nail!
Anchor the lines across the nail tip to create your main web spokes.
Then, connect them with tiny hand-painted curved arches using your thin liner brush.
Designing Red Orange Black Halloween Nails with Balanced Contrast
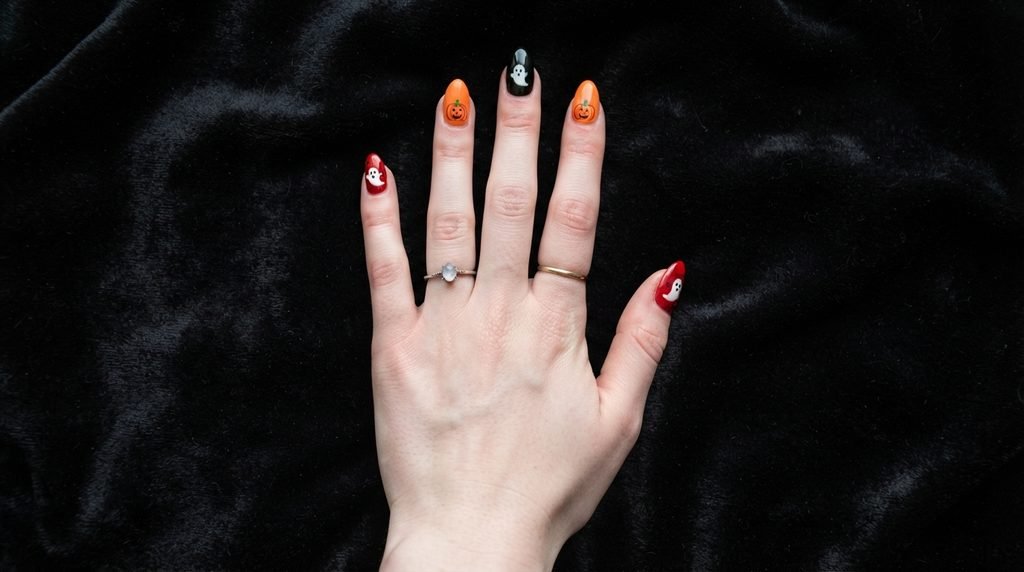
Balance is key when working with bold colors. Never place two dark black nails right next to each other.
Instead, alternate your shades across your fingers: Red, Orange, Black, Orange, Red.
This pattern spreads the visual weight evenly across your whole hand.
It lets your character art shine without feeling overwhelmed by dark polishes.
It also ensures your hand looks bright and flattering in every single photo!
3D Rhinestone Halloween Nails Placement Guide for Longevity
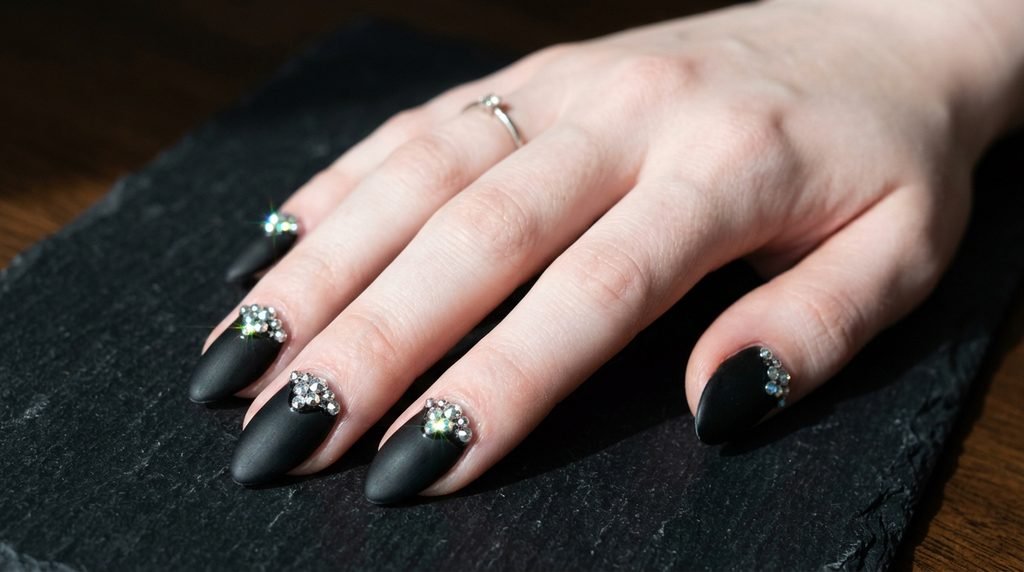
Crystals make this set truly pop! However, falling gems are super annoying.
Never glue crystals on top of your final slick top coat. They will snap right off!
Instead, apply a thick drop of gem gel resin over your cured color coat.
Press your clear 3D rhinestones directly into that gel blob. Nestle them close together near the cuticle base. Cure completely under your lamp to lock them in permanently.
How to Apply Rhinestone Accents to Nail Art Without Catching Hair
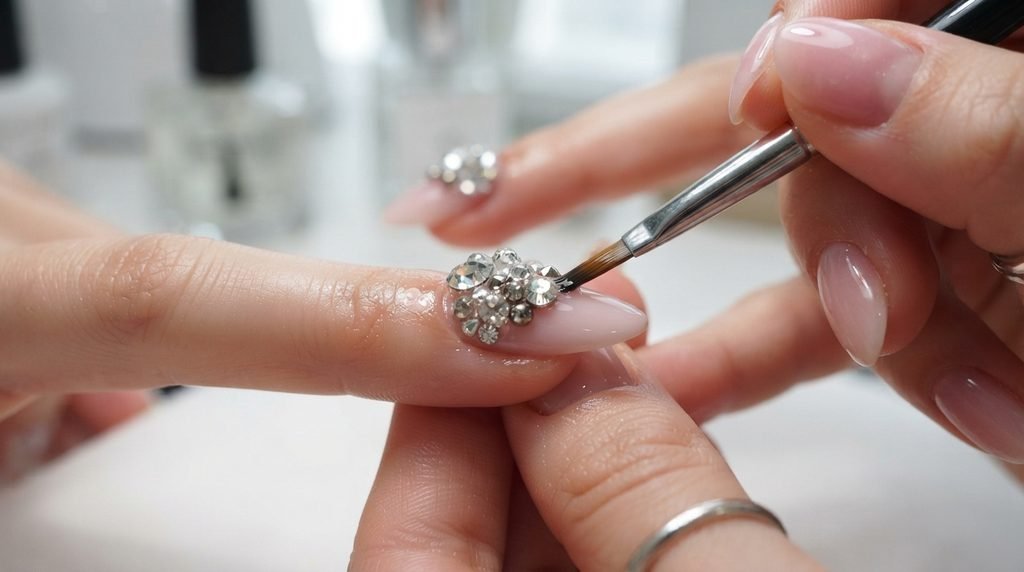
Hair snagging is the absolute worst part of rhinestone nails! Here is how to fix it forever. Take a fine liner brush dipped in clear top coat. Trace around the outer base edges of every single crystal. You are creating a tiny smooth gel ramp from the nail plate up to the crystal edge. Do not cover the faceted top of the rhinestone, or it loses its sparkle!
Cure for sixty seconds. Now your hair glides smoothly over your gems without snagging!
Almond Halloween Nails with Crystals: Why Shape Matters
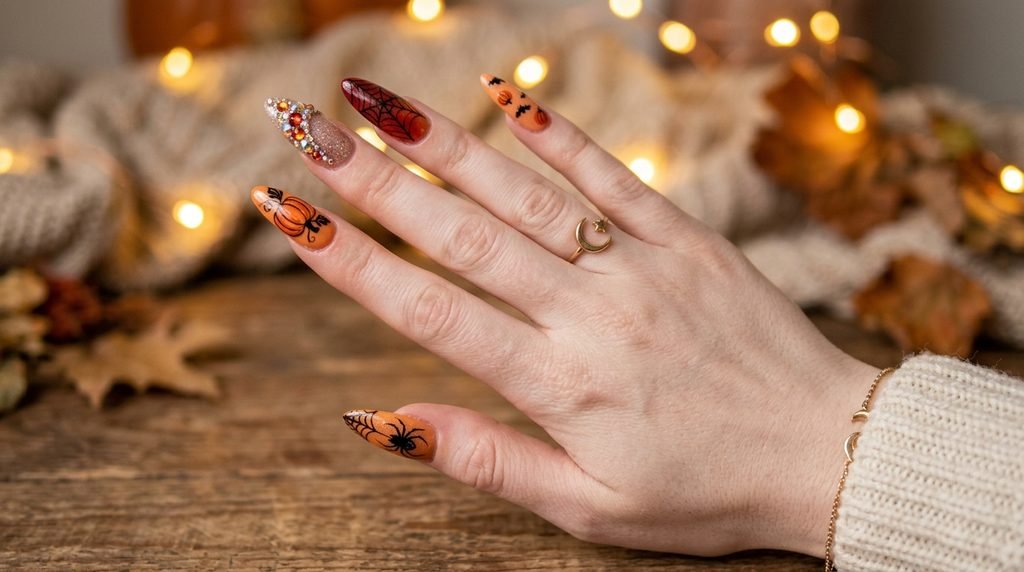
Shape changes everything! Almond halloween nails are the absolute best choice for this design layout. The gentle, tapered point of an almond nail visually slims and lengthens your fingers instantly. It provides a wide center canvas for detailed pumpkin art. Plus, the rounded tip tapers softly, which prevents your spiderweb lines from looking blocky or truncated.
Almond shapes also resist side cracking much better than sharp coffin or square shapes.
Mismatched Halloween Nails: The Trend That Is Taking Over
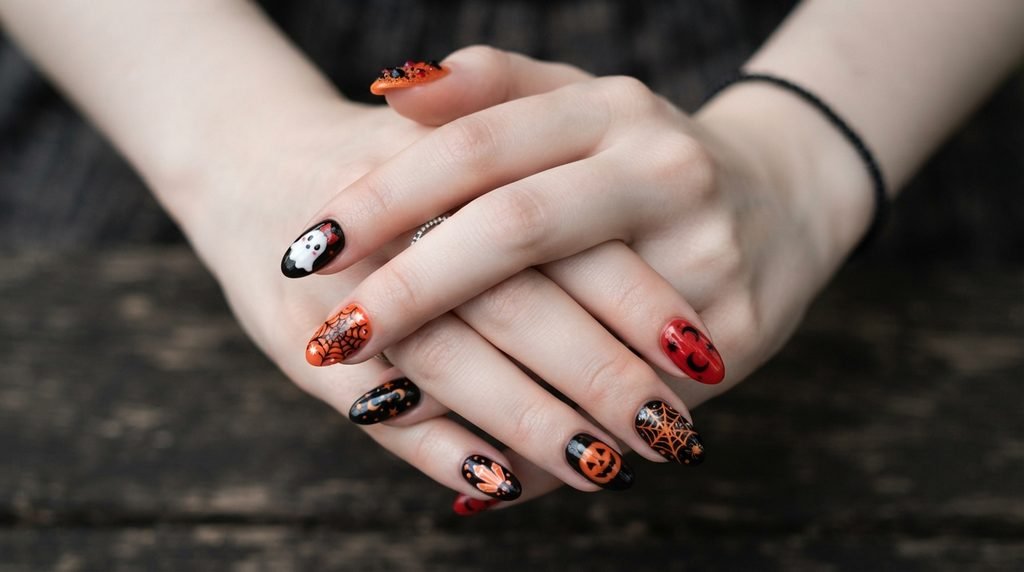
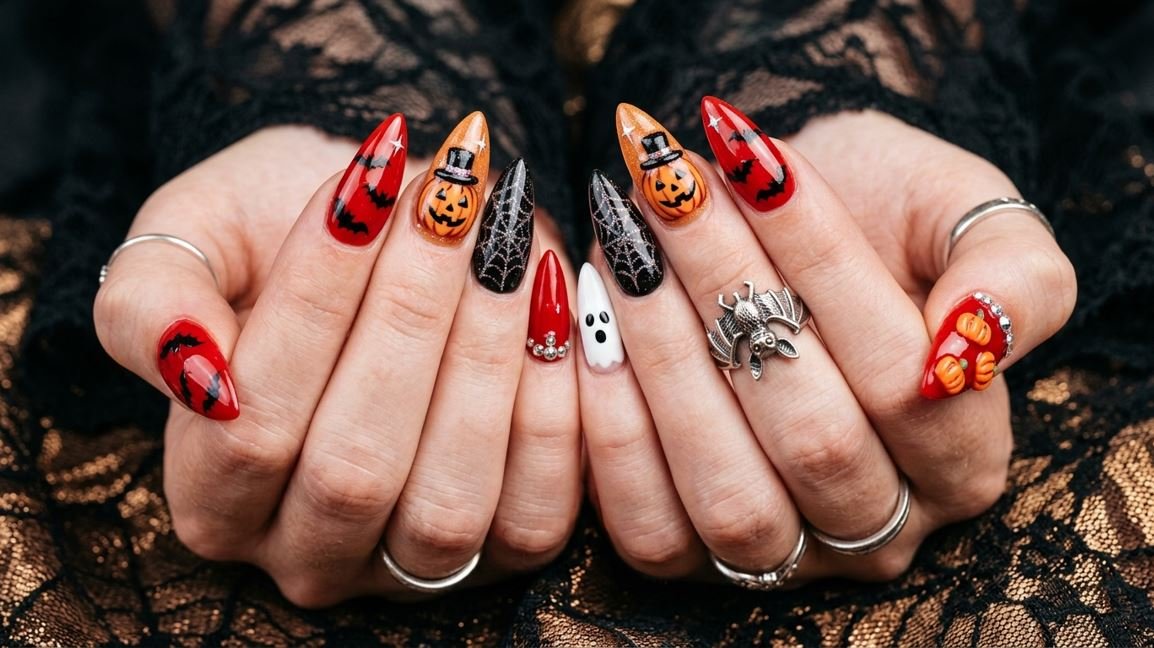
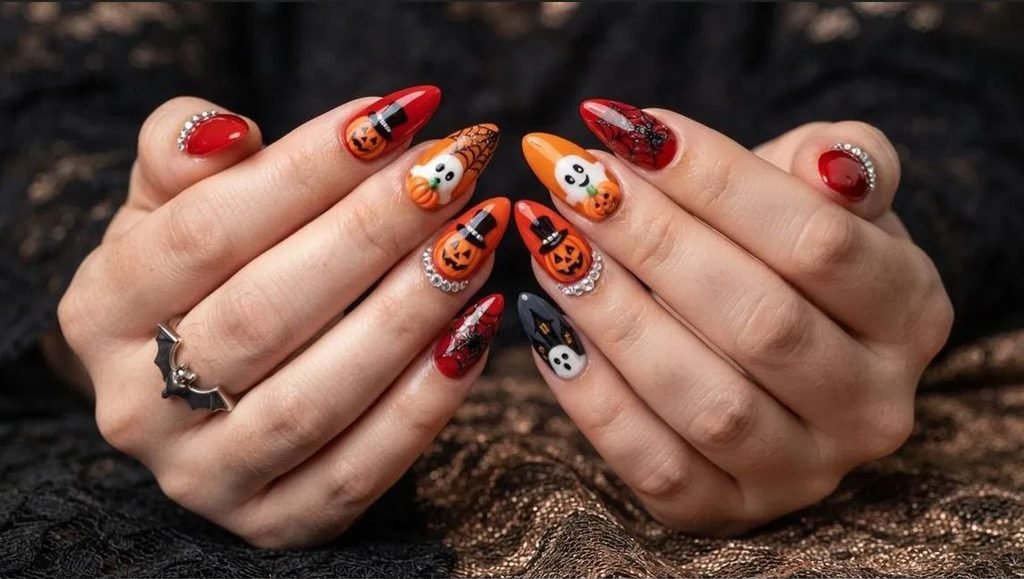
Can’t choose just one design? The mismatched halloween nails trend is made for you! Every finger gets a totally different, fun treatment in this cohesive set. Index gets spiderwebs, middle gets a jack-o’-lantern, ring gets a ghost, and pinky gets crystals. Because every nail uses the exact same orange, red, and black color scheme, it looks intentional and cool.
It shows off your creative personality while keeping your manicure looking ultra-polished.
Glam Halloween Nail Art: Blending Spooky Icons with High Shine
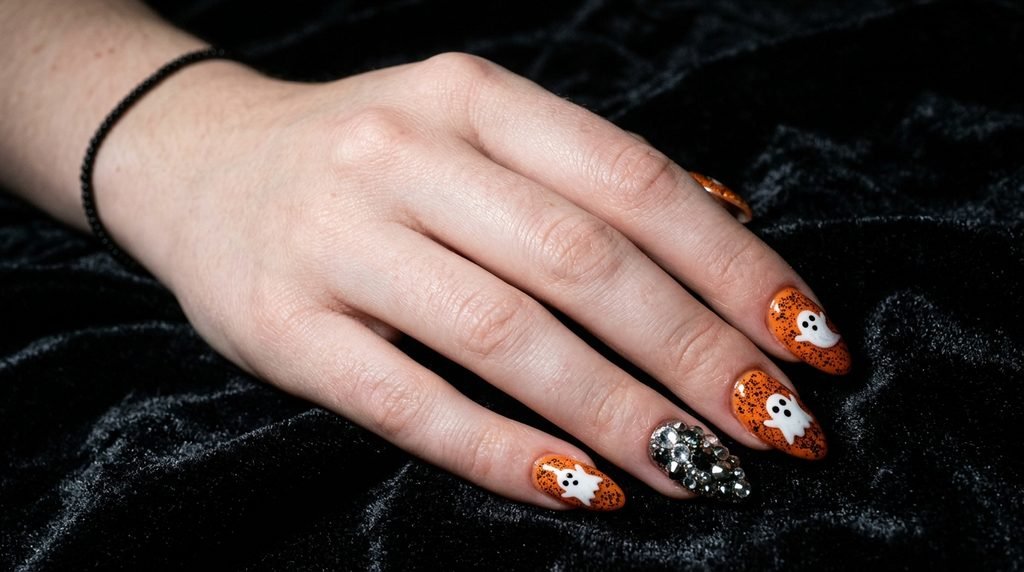
Who says spooky cannot be high fashion? You can keep your art cute while maximizing overall shine. Apply a micro-fine iridescent glitter top coat over solid black background nails. The subtle glitter looks like a starry midnight sky behind your peeking ghost characters. Adding light-reflecting elements elevates simple character art into pure glam halloween nail art.
It turns heads across the room under bright evening party lights!
The Secret to Matte and Glossy Texture Mixing
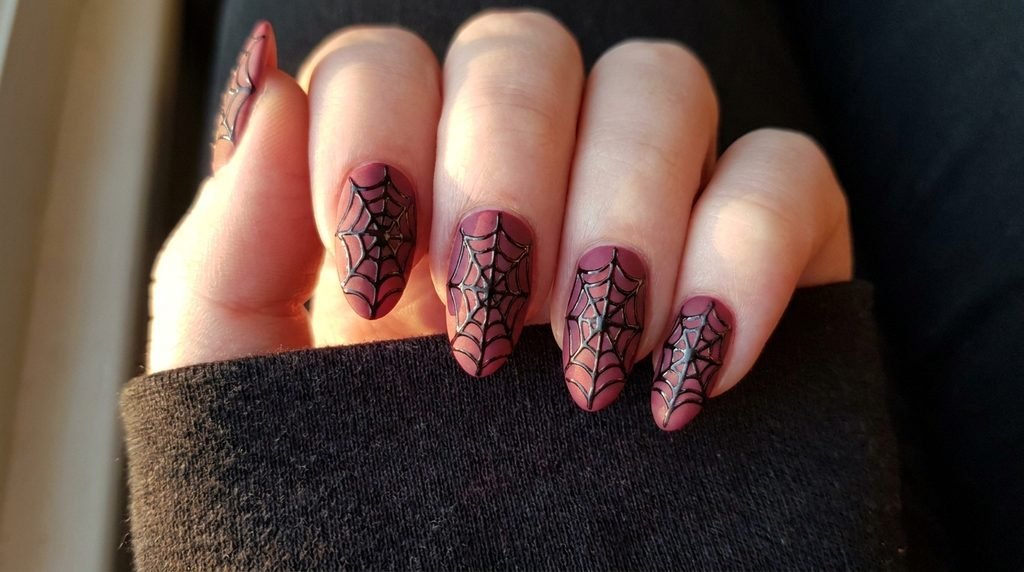
Mixing finishes adds an ultra-trendy, touchable contrast to your set. I love making black nails velvet-matte. Apply a velvety matte top coat over your black spiderweb base nail. Cure it fully under the lamp. Then, paint your spiderweb lines on top using high-gloss black gel paint. Do not top coat the web! The shiny glossy web pops off the flat matte background in a striking way.
It is a subtle, high-end technique that looks straight out of a luxury nail magazine.
Salon Communication: How to Ask for Halloween Nails Designs
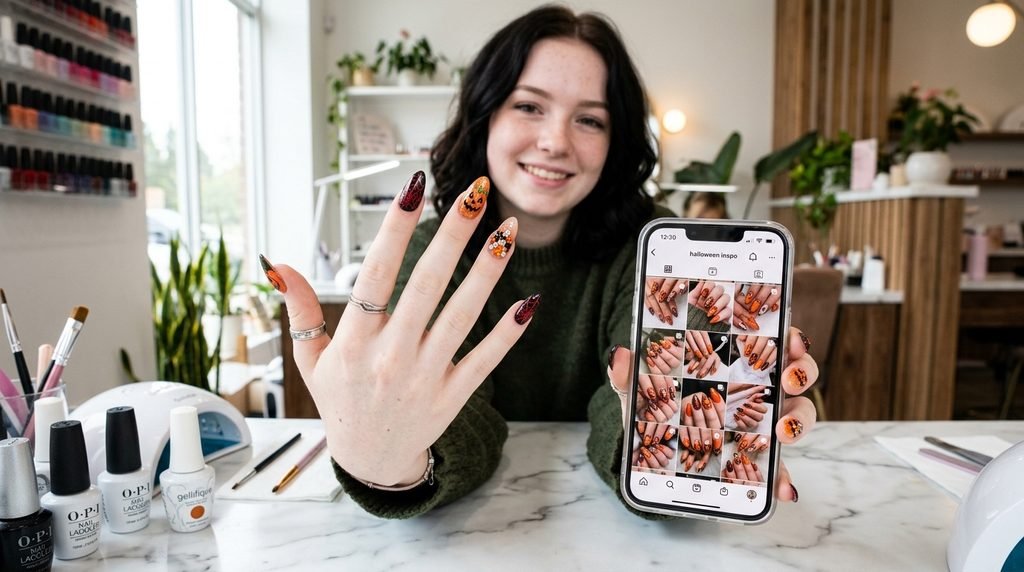
Walking into the salon unprepared leads to major nail disappointment. Show your tech clear reference photos immediately. Tell them: “I want an almond shape with a red, orange, and black color palette.” Specify: “I would like hand-painted character art on two fingers and 3D crystals cured with gem gel.” Ask if they specialize in detailed hand-painted nail art before sitting down in the chair.
Confirm pricing for extra character accents beforehand so there are zero surprises at checkout!
Shape Adaptations: Short, Square, Coffin, and Stiletto Options
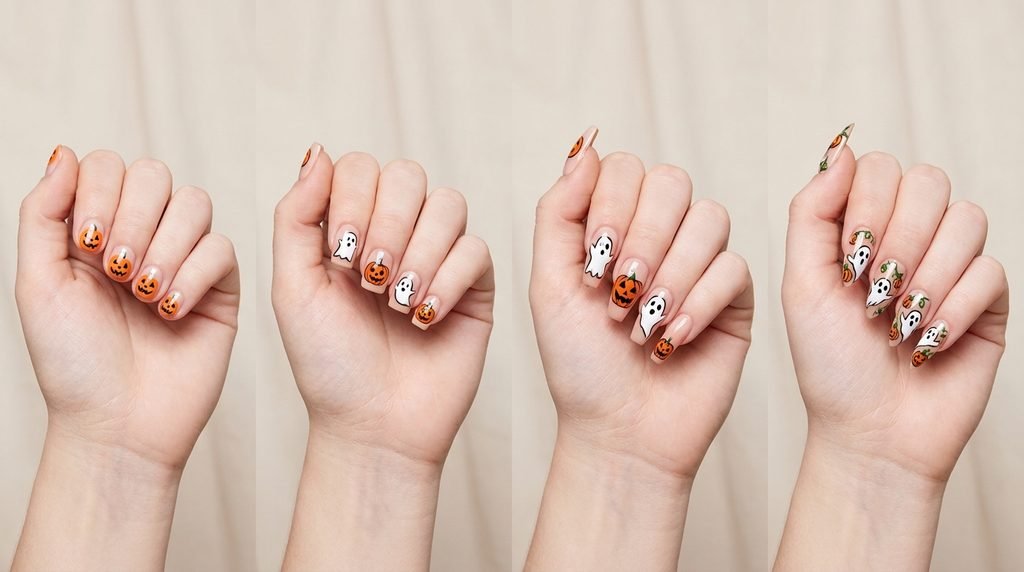
You do not need long nails to rock this cute look!
- Short Round Nails: Focus on mini ghost faces on index fingers. Keep pumpkins small near tips.
- Square Nails: Perfect for clean geometric spiderwebs. Place crystal clusters right in the flat corners.
- Coffin Nails: Great for long character scenes. Paint your ghost floating above a pumpkin on one nail!
- Stiletto Nails: Use the extreme sharp tip for dramatic spiderwebs. Place crystals along the sharp point.
Pick the shape that fits your natural lifestyle and daily routine best!
At-Home DIY vs. Professional Salon Application
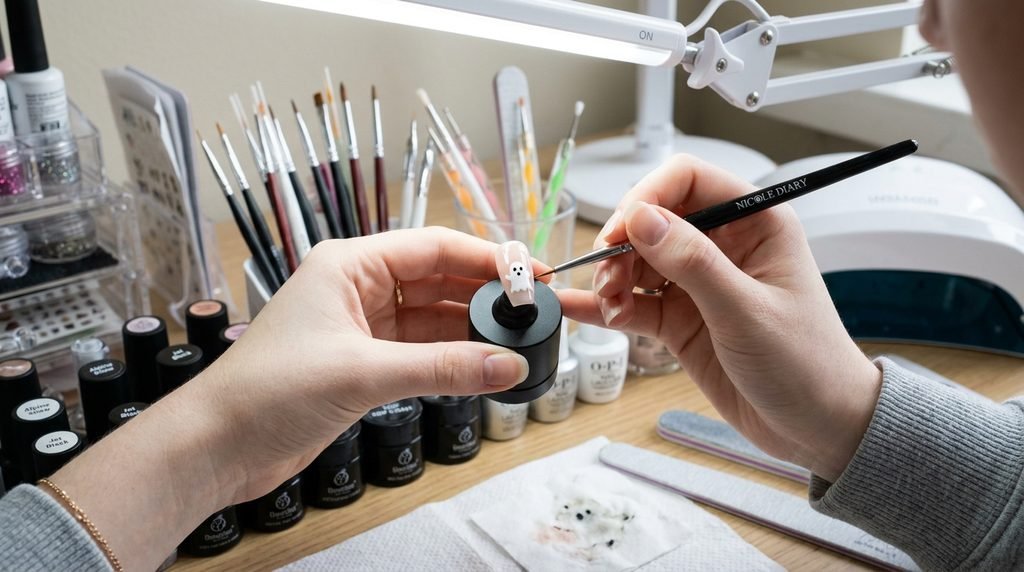
Should you paint this set yourself or book a pro? Here is the honest breakdown. If you love painting detail with tiny brushes, DIY can be super fun and rewarding! Press-ons are another amazing DIY option. You can paint designs on press-on stands comfortably before applying them. However, if you want long-lasting 3D crystal placement, book a professional gel nail tech.
Pros have commercial-grade lamps that cure thick gem gels completely for multi-week durability.
Sealing and Protecting Your 3D Halloween Nail Art Masterpiece
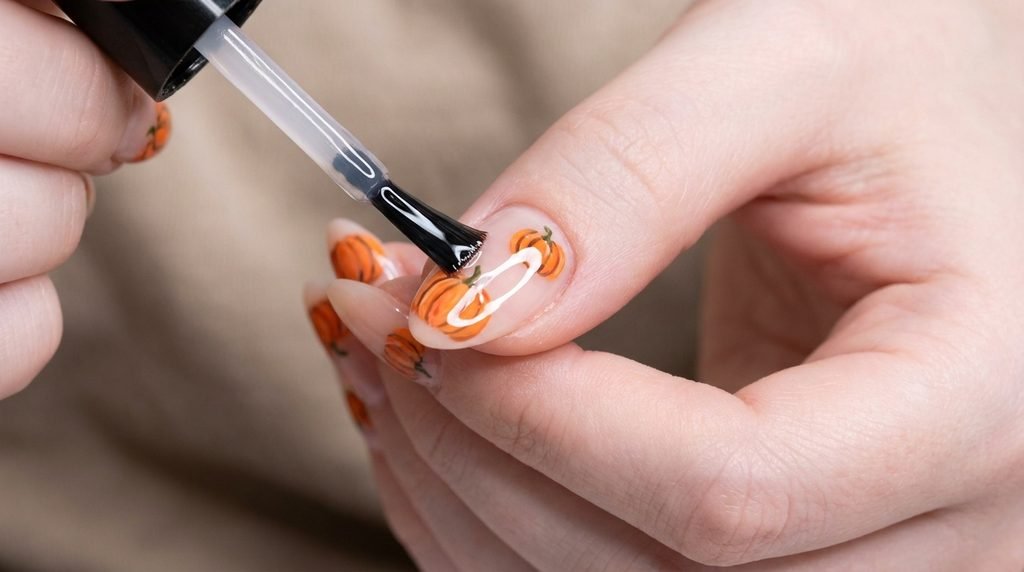
You spent time creating this beautiful art, so let’s seal it properly! Apply a non-wipe top coat over all flat artwork. Cap the free edge at the tip of every single nail carefully. This seals the polish edge against water damage. Cure under your LED lamp for a full sixty seconds. Let the nails cool for thirty seconds before touching them. Finish by rubbing a nourishing cuticle oil around every finger base.
Your ultra-cute, sparkling Halloween set is complete and ready to show off!
Choosing the Best Look for You: A Direct Comparison
Still undecided? Let’s compare some of the top looks we’ve covered to help you pick the best fit for your style, length, and maintenance preferences.
| Design Concept | Best Nail Shape | Difficulty (DIY) | Maintenance | Occasion / Vibe |
| Cute Spooky (Whimsical Ghosts/Pumpkins) | Almond, Coffin, Round | Moderate | Moderate | Playful, Daytime festive, All-October wear |
| Glam Halloween (Crystals, Glitter, Metallic) | Stiletto, Coffin, Almond | Hard (Placement is key) | High | Sophisticated Evening Events, Parties, Statement Look |
| Subtle Spooky (Spiderwebs, Small Silhouettes) | Any Shape (Looks great short!) | Easy (With practice) | Low | Workplace Appropriate, Everyday festive, Versatile |
| Detailed Character Art (Specific faces/icons) | Square, Squoval, Broader Coffin/Almond | Hard (Requires precision) | Moderate to High | Themed Parties, Dedicated Halloween Enthusiasts |
Table Note: All looks can be achieved through salon visits or high-quality press-ons, varying the actual difficulty level for the wearer.
Consider your lifestyle, the statement you want to make, and your commitment to maintenance when making your choice. A subtle look might be perfect for subtle, everyday festive vibes, while detailed character art is a dedicated expression of holiday cheer. No matter which you choose, have fun with it – it’s the season for creative expression!
Frequently Asked Questions About Cute Halloween Nails
What are cute Halloween nail designs?
Cute Halloween designs feature friendly motifs like smiling jack-o’-lanterns, peeking ghosts, candy corn stripes, and small stars. They use soft lines, cartoon features, and bright colors instead of scary, realistic gore.
How do you make pumpkin nail art with a face?
Paint a solid orange base circle or full nail. Let it cure. Use a fine liner brush and black gel polish to draw small triangles for eyes and a curved, smiling line with tiny teeth for the mouth.
What colors work best for Halloween nail art?
Classic orange, black, and crisp white are essentials. Adding deep oxblood red, matte charcoal grey, or iridescent shimmer creates a more modern, sophisticated, and cute look.
How do you add rhinestones to Halloween nails?
Press clear rhinestones into a drop of uncured gem gel over your color base. Cure fully. Then, seal around the base of each stone with top coat using a thin brush to stop hair snagging.
What’s the best nail shape for detailed Halloween character art?
Almond and squoval shapes offer the best flatter surface area. They provide plenty of canvas space for character faces while gently flattering your natural finger length.
Conclusion
Finding the perfect festive nail look should never feel stressful. By blending friendly jack-o’-lanterns, sweet ghosts, and sparkling crystals, you get a set that is spooky, sweet, and ultra-stylish. Remember to choose a flattering almond shape, anchor your 3D crystals with gem gel, and mix glossy and matte finishes for that pro look. Save this guide right now so you can show it to your nail tech at your next appointment! Which design element are you painting first—the smiling pumpkin or the glowing ghost?

Mia founded Daily Nail Idea after a decade in beauty editorial, tired of watching great nail art disappear into the scroll. She now leads the team’s editorial direction — deciding what’s worth featuring and what’s just noise — and still paints her own nails every Sunday night, no exceptions.