3D Eyeball Nails: Your Ultimate Guide to Creepy Monster Eye Halloween Nail Art
You’re scrolling Pinterest, aren’t you? Hunting for that perfect Halloween look. Something truly unique, not just pumpkins again. I get it, I’ve been there too. Looking for spooky nails that actually turn heads. Well, friend, you have absolutely found it. Get ready to meet the creepiest, coolest trend: 3D eyeball nails.
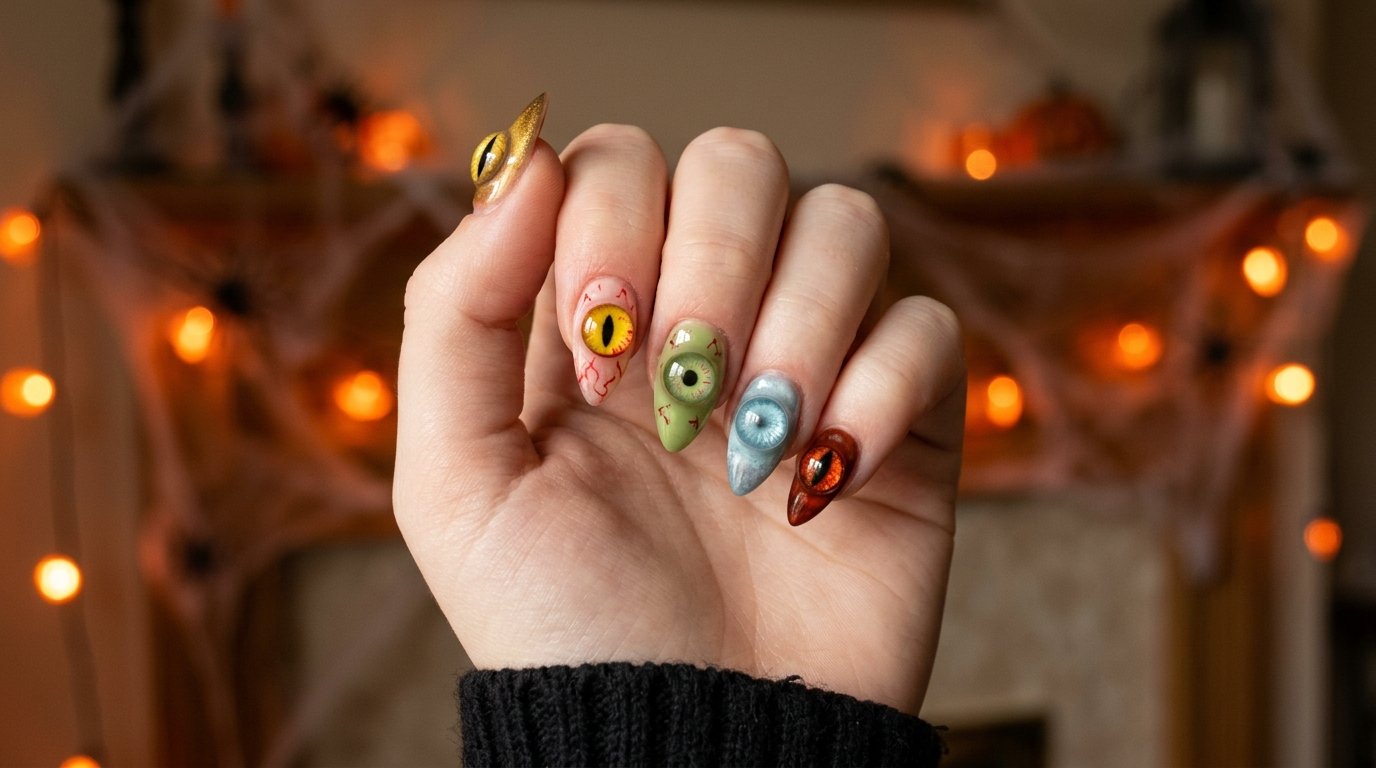
Seriously, these are taking Halloween nail art to a whole new level. We aren’t talking flat stickers here. These are dimensional, realistic, and honestly, a little unsettling. In the best way possible! Imagine tiny, glossy eyes staring back from your fingertips. It’s perfect for adding that spooky edge to any outfit. This guide has everything you need to know.
We’ll cover getting them at the salon. And how to DIY them safely at home. I’ll even share my favorite design combos. You’ll learn exactly what to ask your tech for. Or which tools to grab for yourself. So, if you’re ready for some seriously eyeball-grabbing (pun intended!) inspiration, keep reading. Let’s make your manicure unforgettable this October.
At-a-Glance: 3D Eyeball Nails Explained
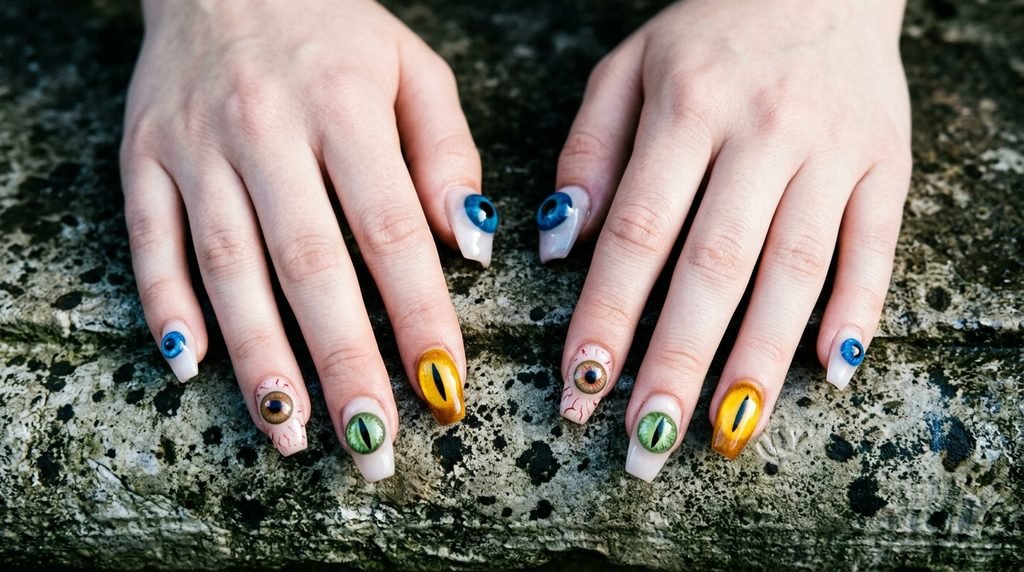
This post is your complete guide to 3D eyeball nails for Halloween. We will break down exactly what this creepy trend involves. First, we clarify what makes a nail design genuinely 3D. Next, we dive into achieving the look at the salon. I’ll give you the precise phrases your nail tech needs to hear. Then, for the adventurous, there’s a detailed at-home tutorial using either builder gel or charms. We also explore 20+ specific design variations, from classic bloodshot eyes to glowing monster peepers and subtle evil eyes. You’ll find specific recommendations for different nail shapes like almond and stiletto. Finally, an FAQ section answers your most common questions about durability and removal. It’s everything you need to decide if this spooky style is for you!
What Exactly Are 3D Eyeball Nails?
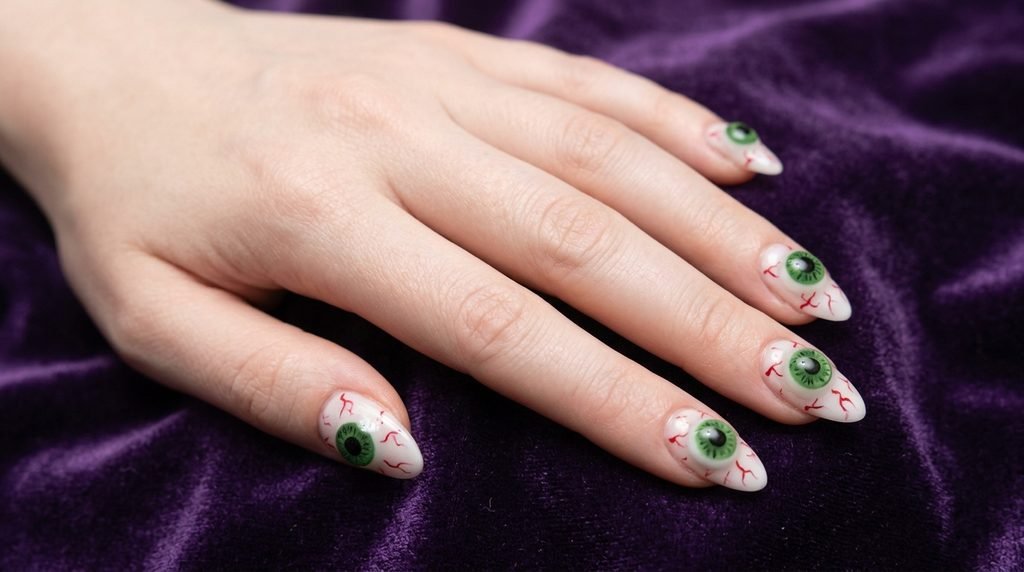
Okay, let’s define this. When we say 3D eyeball nails, we mean dimension. These aren’t just clever paintings. These designs literally pop off the nail surface. So, imagine a smooth, domed eyeball. It creates a realistic, slightly creepy effect. Often, a clear builder gel or acrylic is used. This material is sculpted into an eye shape.
Alternatively, some artists use pre-made 3D eyeball nail charms. These are small, ready-to-attach embellishments. Both methods create that awesome, raised look. They are perfect for Halloween nail ideas that go beyond the usual suspects. So, get ready for eyes that truly seem to follow you!
Why This Creepy Trend is Perfect for Halloween Nail Art
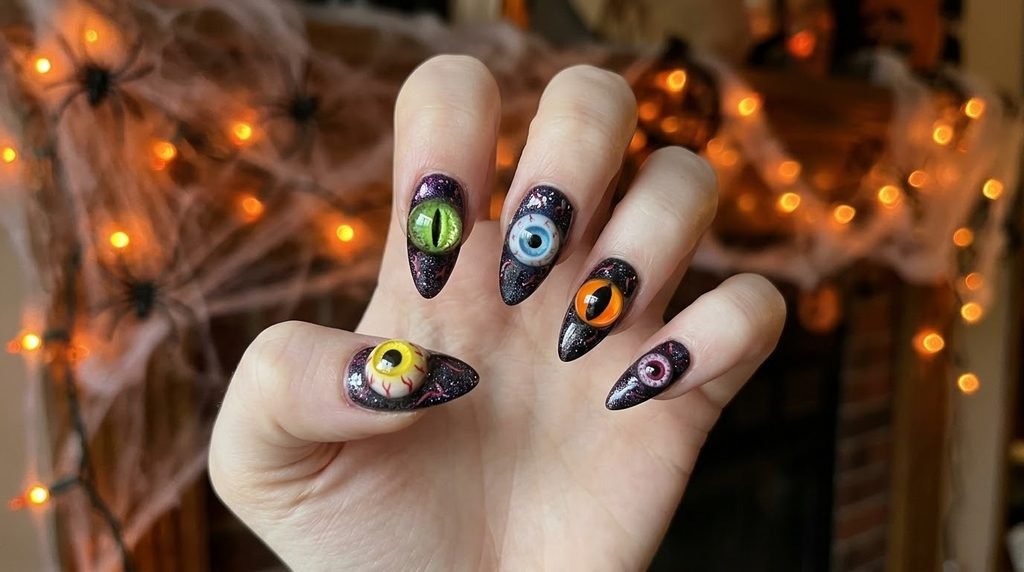
Halloween is the time to be extra, right? And 3D eyeball nails absolutely deliver. They are undeniably creepy and spooky. Yet, they can also be incredibly detailed and cool. This trend pushes the boundaries of typical Halloween nails. It shows you put real thought into your look. Unlike simple orange and black stripes, these require specific technique.
They capture the playful yet morbid spirit of the holiday perfectly. They’re a guaranteed conversation starter. And, they look amazing in photos! If you want a design that is both spooky and stylish, this is it. It’s the ultimate way to embrace the season’s eerie vibes.
Different Styles: Eyeball Nails vs. Evil Eye Nails
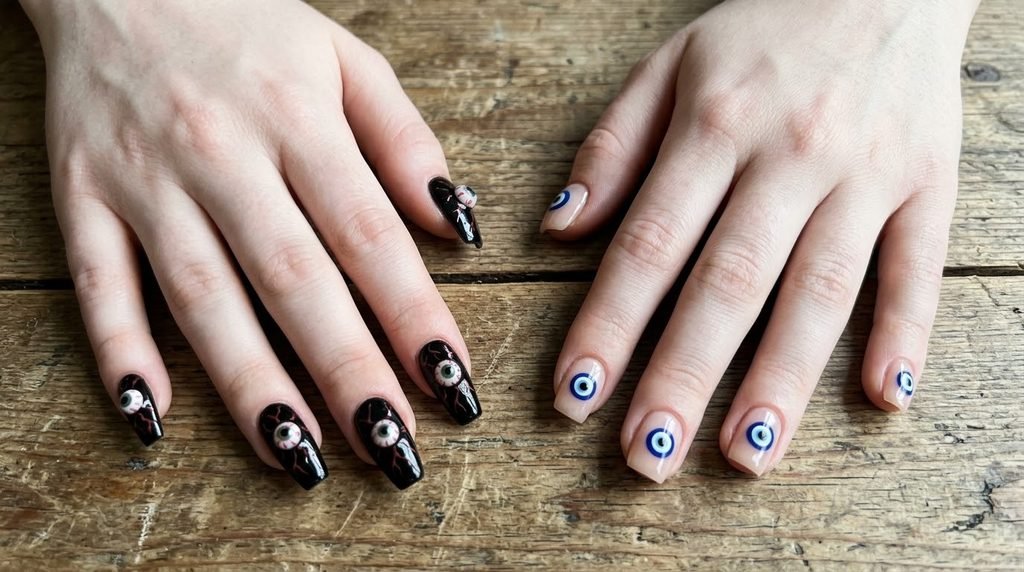
Before we get too deep, let’s clear something up. There’s a difference! 3D eyeball nails are generally creepy and realistic. They aim for that “monster eye” or “human eye” look. They’re usually specific to spooky nail designs.
However, “evil eye nails” are often different. Those designs are typically symbolic and protective. They feature a specific amulet design, usually blue and white. They are popular year-round for good luck, not just Halloween. We will show you how to give an evil eye a creepy twist, though! But generally, they serve very different vibes. One is spooky; the other is spiritual. Knowing the distinction helps you find your perfect fit.
Choosing Your Look: Realistic vs. Cartoon Monster Eyes
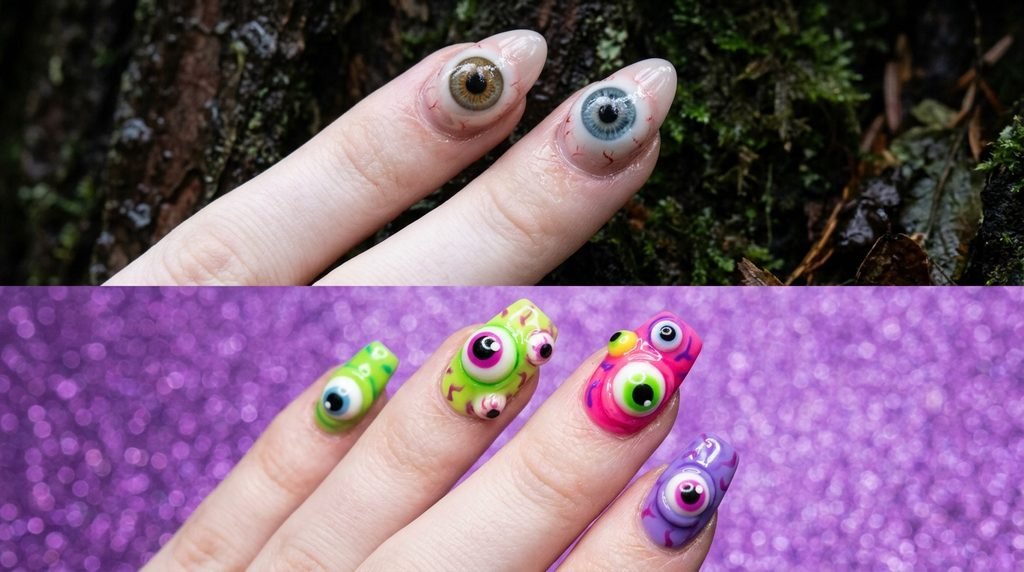
So, what’s your preference? 3D eyeballs offer amazing variety. You can go for ultra-realistic human eyes. Think visible veins and detailed irises. This style is seriously unsettling and impressive.
Or, maybe you prefer cartoonish monster eyes. These can be fun, colorful, and less graphic. Imagine bright green eyes, maybe with multiple pupils! Both looks are fantastic for Halloween. The choice depends on your personal spooky meter. Do you want pure horror or a bit of playful fright? Consider your overall costume or vibe before deciding.
The Must-Have Tool: 3D Eyeball Nail Charms Explained
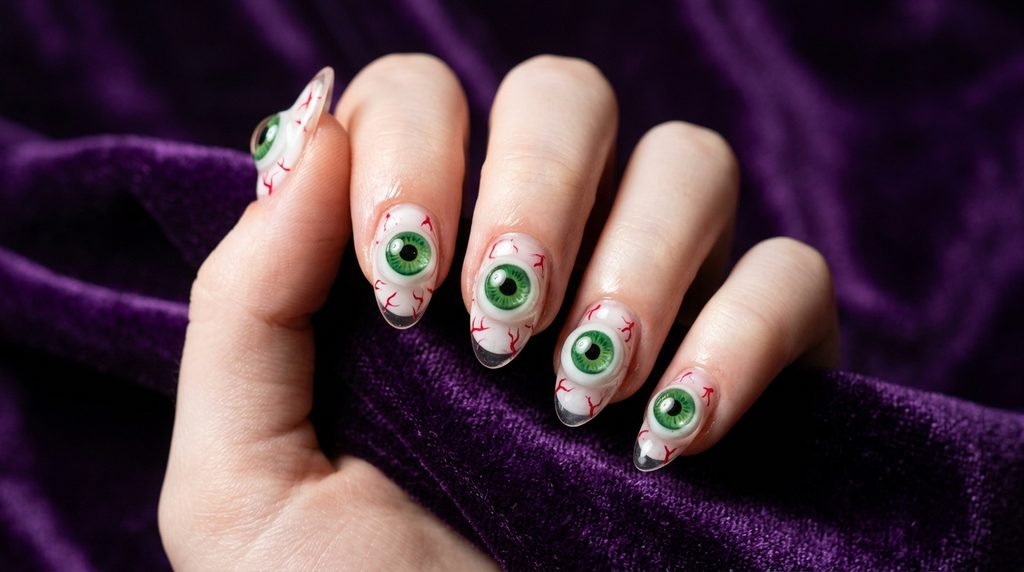
Ready to talk technique? Charms are an awesome shortcut. 3D eyeball nail charms are pre-made, dimensional eyes. They come in various sizes and styles. You can find bloodshot eyes, cat eyes, or glowing ones. They are typically made of resin or plastic.
For DIYers, these are a lifesaver. No complex sculpting needed! You simply adhere them to your nail. They offer an instant, perfectly shaped 3D effect. For salon visits, bringing your own charms can ensure you get the exact look you want. They are a game-changer for achieving high-impact spooky nails with less effort.
Salon Talk: How to Request 3D Eyeball Nails
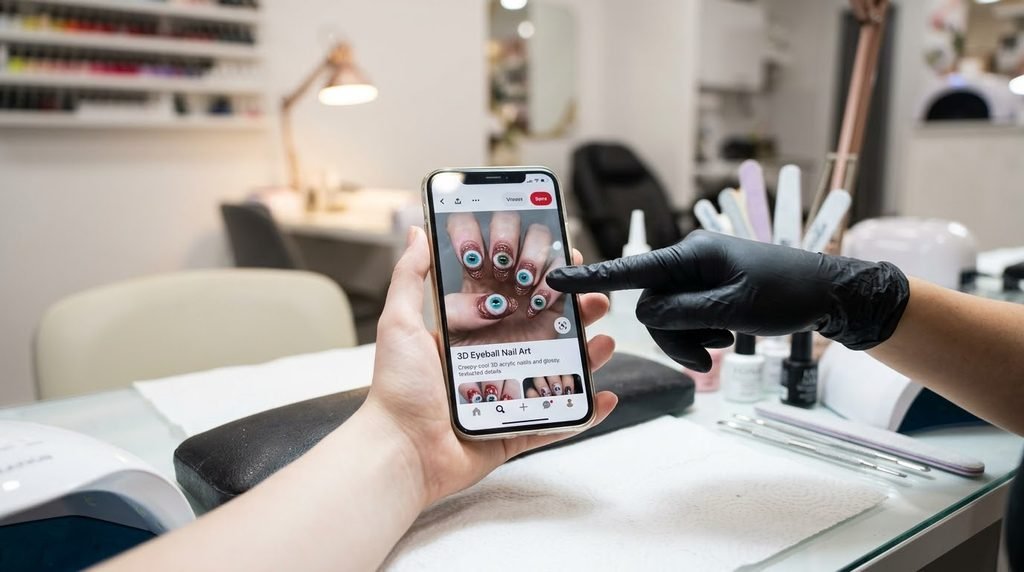
Going to a salon? Great choice for this intricate look. First, communication is key. Don’t just ask for “eyeball nails.” Show them inspiration photos. Be super specific.
Say, “I’d like a 3D eyeball design.” Explain if you want it sculpted with gel/acrylic. Or, ask if they use 3D eyeball nail charms. Mention the desired base color, like matte black or deep purple. Specify the eye details: color of the iris, pupil shape, and if you want red veins. Clear pictures really help your tech understand your vision. Booking extra time is smart, too.
Technical Tips for Salon Success
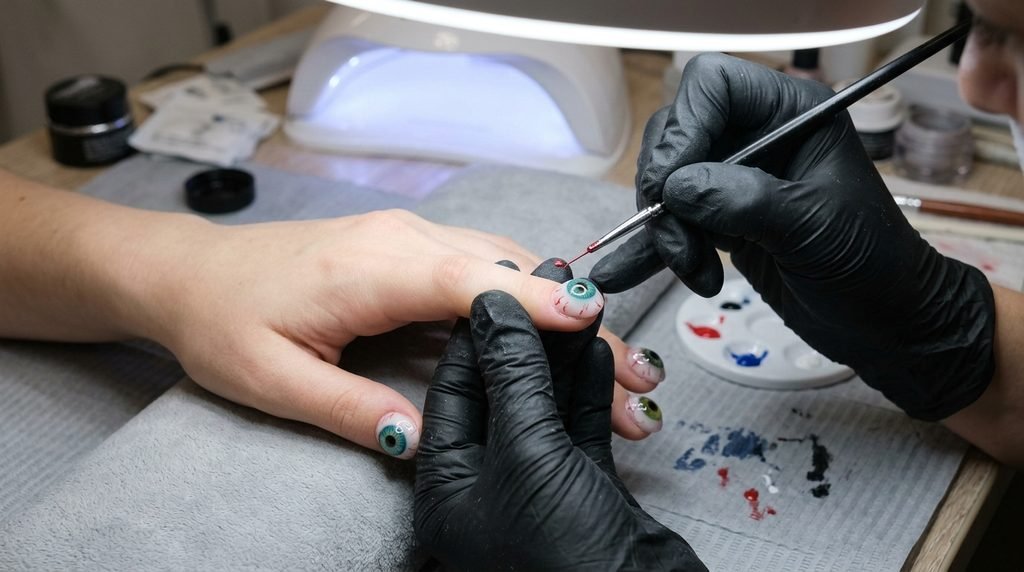
So, you’ve booked your appointment. Here are a few insider tips. First, check if your artist is comfortable with 3D work. Some specialize in detailed art more than others. Second, bring any specific 3D eyeball nail charms you love. This guarantees you get that exact style.
Third, during the appointment, watch the placement. You want the eyes looking where you want them! Mention if you prefer a subtle look on just one or two nails. Or, a full-on “all-seeing” hand. Good communication with your tech ensures you leave loving your spooky new manicure. Trust me, it makes all the difference.
DIY 3D Eyeball Nails: Your Step-by-Step Guide (Builder Gel Method)
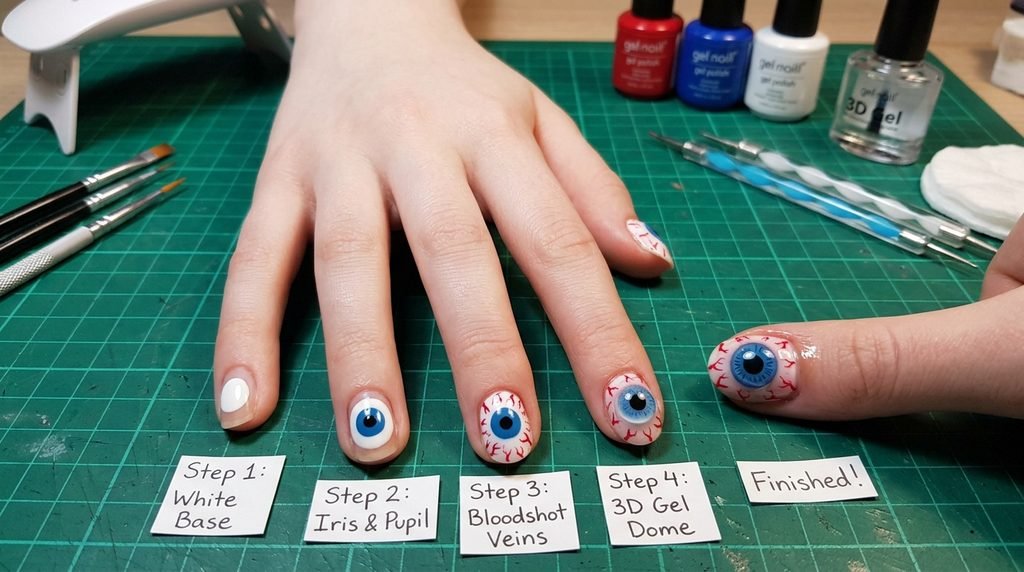
Okay, brave souls, let’s DIY. This method uses clear builder gel for sculpting. It gives you maximum control. First, prep your nails as usual: shape, buff, clean. Apply your base color (perhaps black or dark green) and cure.
Now, the 3D part. Take a large bead of clear builder gel on a dotting tool. Place it on your nail where you want the eye. Swirl slightly to create a smooth, rounded dome. Don’t worry about perfection; you can refine later. Cure this dome for at least 60 seconds. Ensure it’s fully cured! Thick gel needs more time.
DIY 3D Eyeball Nails: Refining and Painting Your Creepy Creation
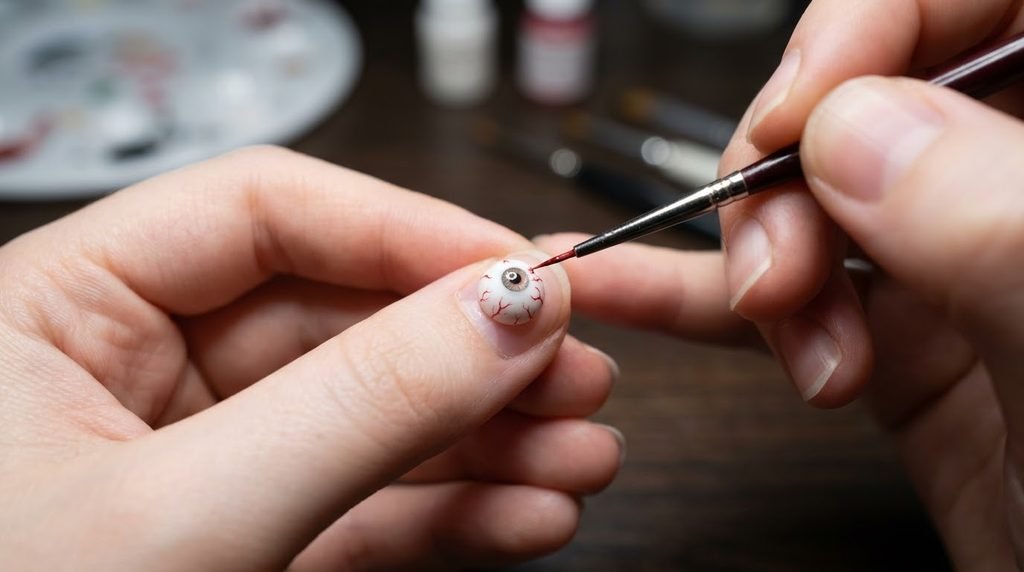
Next, refinement! Wipe away the tacky layer. Gently file any unevenness on your gel dome. Then, clean thoroughly. Now, let’s bring it to life. Use white gel polish to paint the sclera (white part). Cure.
Choose your iris color, say, vivid green. Paint it over the white, leaving an outline. Add a black pupil in the center. Cure again. For the creepy detail, use a thin brush and red polish. Paint tiny, squiggly veins branching out from the iris. Finally, seal everything with a glossy top coat, ensuring you cover the entire 3D dome.
DIY 3D Eyeball Nails: The Charm Method (Easiest Way!)
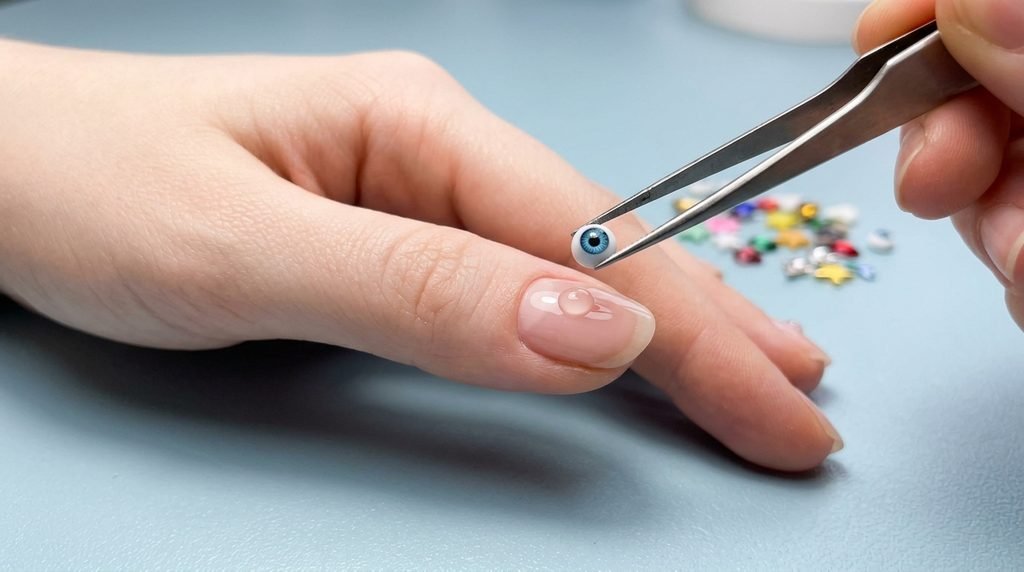
Looking for an easier DIY option? Use 3D eyeball nail charms! It’s much faster. First, complete your base manicure and let it dry or cure fully.
Next, apply a small bead of rhinestone glue or thick top coat. Place it exactly where you want the charm. Gently press the 3D eyeball charm onto the glue. Hold for a few seconds. If using gel, cure it completely. For standard glue, let it air dry fully. Ensure the edges are sealed so hair doesn’t snag. Simple, right? Instant spooky impact.
Stunning Design Inspo: Classic Bloodshot Eyeball Nails
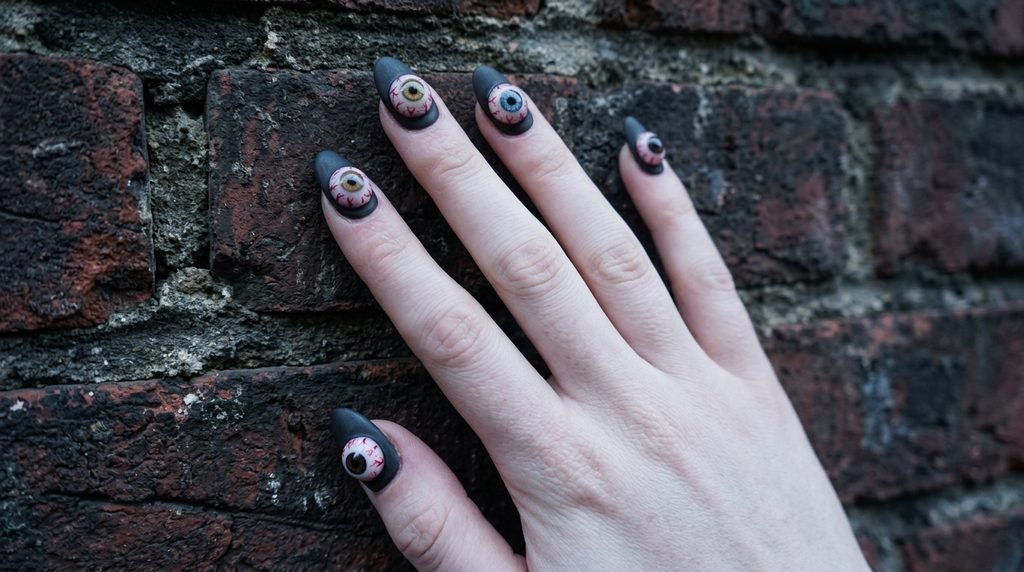
Ready for visual inspiration? Let’s start classic. This look is pure Halloween. We’re talking realistic white eyeballs. They feature detailed irises, maybe hazel or blue. But the key is the veins.
Use a super fine brush and bright red polish. Paint numerous, thin, branching veins across the white area. They should look raw and bloodshot. Set against a dark polish, like matte black, the eyes really pop. This design is effectively unsettling. It’s perfect if you want truly spooky nails that scream “horror.”
Glowing Peeper Perfection: 3D Eyes with Glow-in-the-Dark Polish
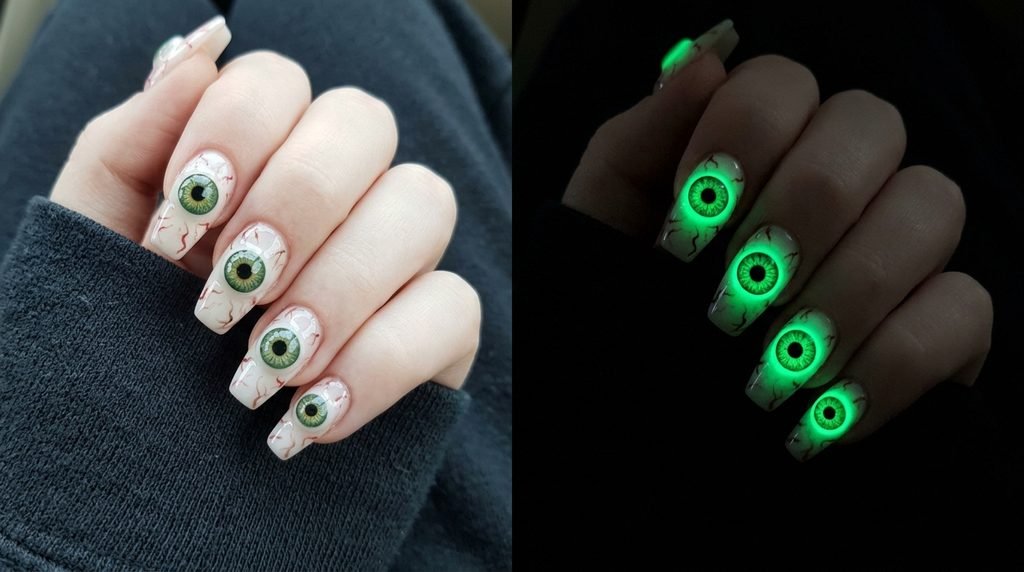
Want something that really shines? Try glowing 3D eyeballs. This design is so cool. First, create your 3D eye structure. Use white for the sclera and a color for the iris.
Then, here’s the magic. Apply a layer of glow-in-the-dark polish over the iris. Imagine walking into a dark Halloween party. Your nails will be subtle and creepy in daylight. But then, those eyes will brightly glow! It adds another layer of surprise. This look is guaranteed to get attention.
Black and Green Creepiness: Spooky Eye Nail Designs
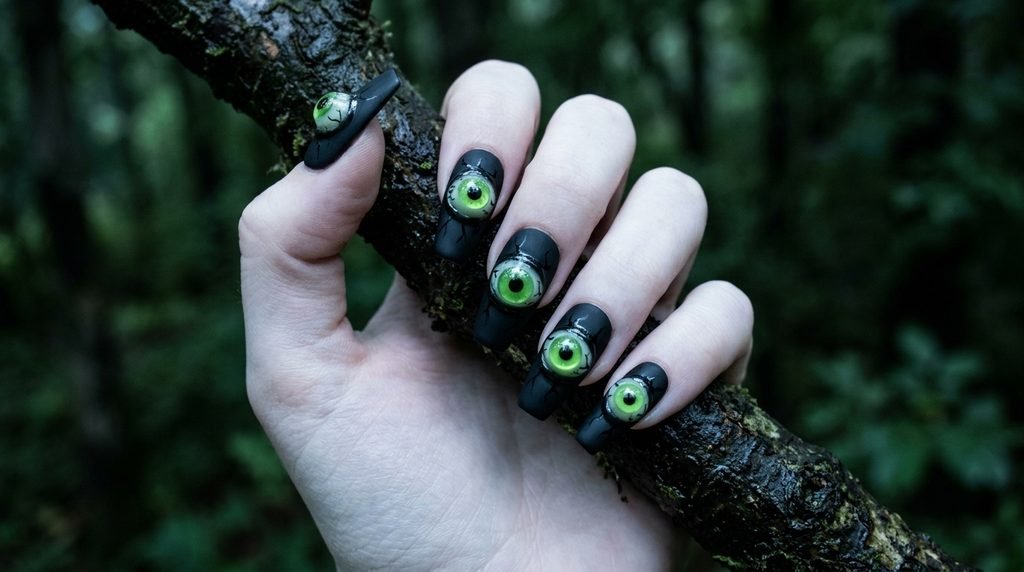
Looking for a specific color combo? Black and green are inherently spooky. Picture a deep matte black base polish. Then, add vibrant green 3D eyes. The contrast is sharp and striking.
You could make the irises slime green. Or, use multiple green eyes staring out. Add some black pupils and subtle red veins. This palette perfectly captures that eerie, monster-like vibe. It’s a classic choice for a reason. These spooky nail designs are both simple and highly effective for Halloween.
Dark Magic Vibes: Goth Eyeball Press-On Nails
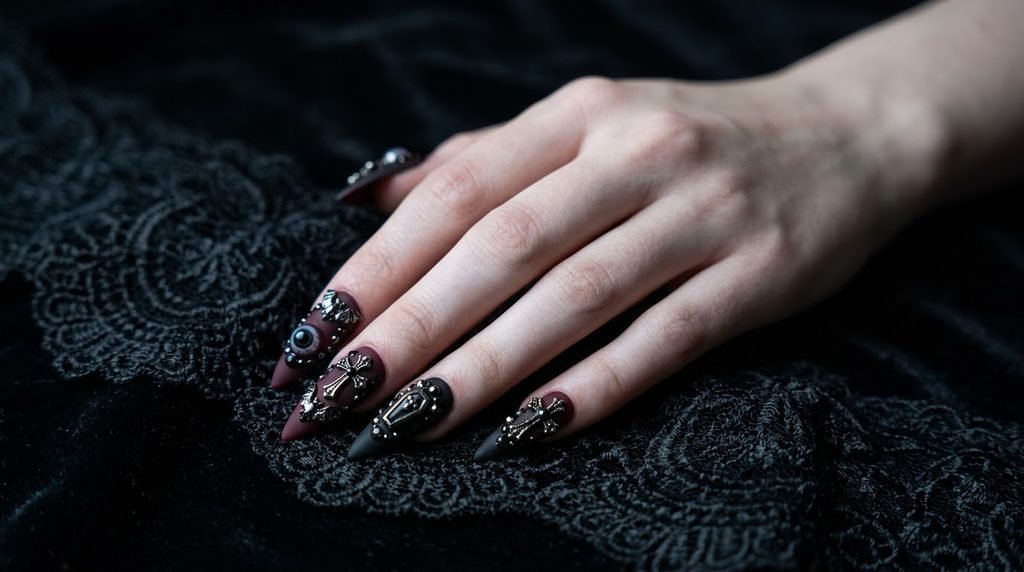
Love the look but hate the effort? Press-on nails are your answer. Look for goth-inspired 3D eyeball press-on nails. Many talented independent artists sell incredible sets online.
These often feature multiple 3D elements. Expect eyes combined with coffins, bats, or cross motifs. The base colors are usually black, deep burgundy, or gray. They offer complex, professional-looking spooky nails instantly. Press-ons are perfect for those who want a dramatic look for just the weekend. No long salon visit required!
Subtle Spookiness: Minimalist Evil Eye Nails (Halloween Edition)
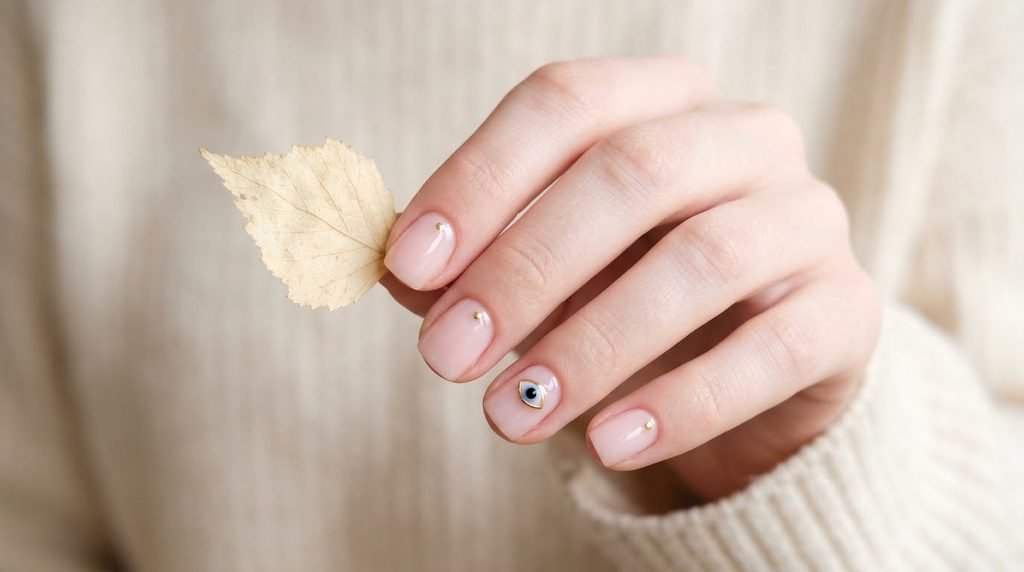
Not into full-on gore? No problem. You can do subtle Halloween. Try a minimalist evil eye design. Use a sheer nude or pale base. Then, paint a tiny, delicate evil eye on just one or two nails.
Here’s the Halloween twist. Swap the typical blue iris for a dark color like deep red, black, or even bright orange. Keep the 3D effect minimal, maybe just a slightly raised dot. It’s a chic nod to the season. This look is perfect if you need something work-appropriate but still want to participate.
The Ultimate Fright: All-Seeing Eye Nail Design
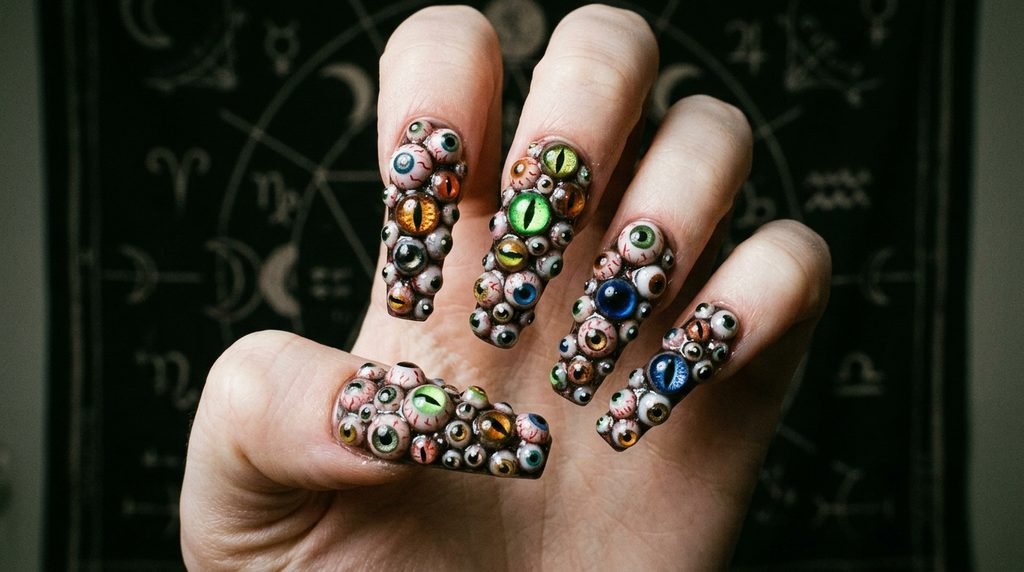
Ready to go all out? The all-seeing eye is for you. This design is maximum creepiness. Picture every nail covered in multiple 3D eyes. They look in different directions.
Some could be bloodshot. Others, reptilian or glowing green. Vary the sizes. Add some tiny hand-painted eye details, too. This look is intense, complex, and unmissable. It’s for the true Halloween enthusiast. Trust me, everyone will be doing a double-take at these unsettlingly detailed spooky nails.
Creepy Companions: Pairing Eyeballs with Slime, Blood, and More
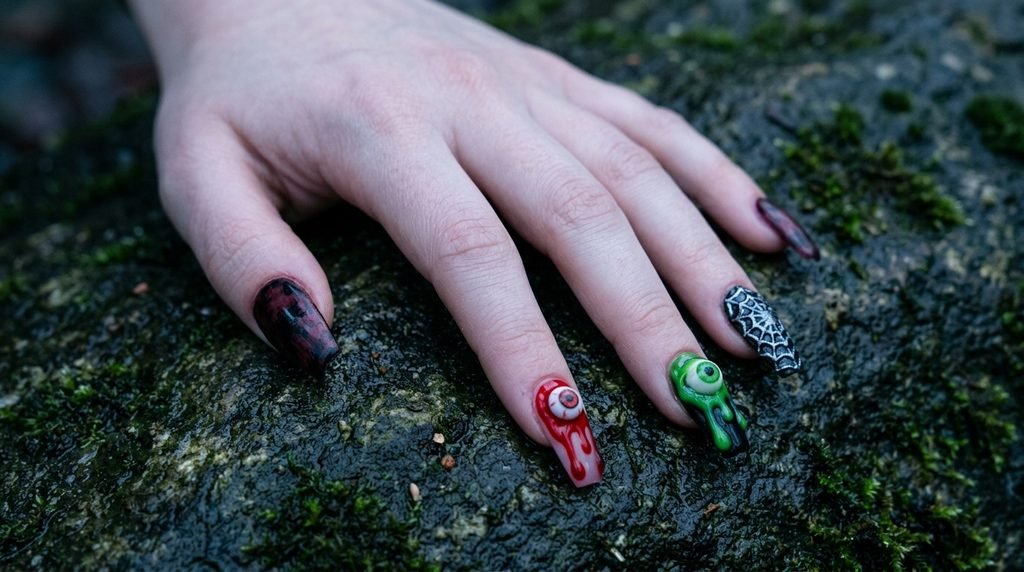
Why stop at eyes? Pair them with other spooky elements! Eyeballs look amazing with blood drips. Use red gel or polish to create realistic drips from the eye bases.
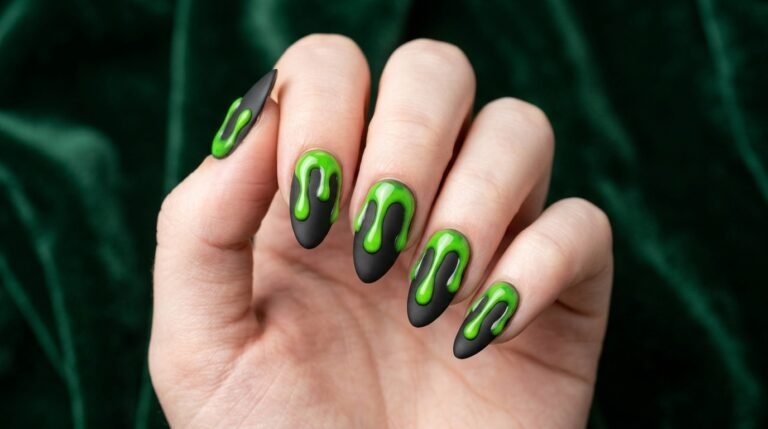
Or, try pairing them with green or purple slime drips. Add some creepy texture, like a spider web on one nail. Combining elements tells a whole spooky story on your fingertips. It makes your manicure even more creative. Think about textures and layers for maximum impact.
Perfect Pairings: Shaping Your Nails for the Look
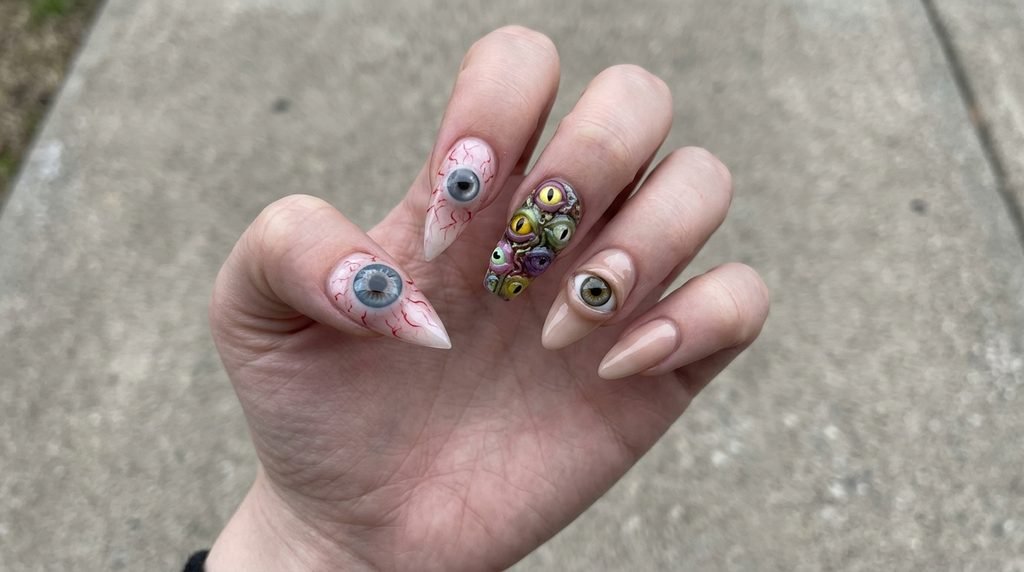
Does nail shape matter? Absolutely! Long stiletto or coffin nails offer a huge canvas. You can fit multiple large eyes. Or, really detailed ones with long veins.
However, almond nails are also fantastic. The curved shape naturally suits a single, perfectly placed 3D eye. Even shorter nails work! Just opt for smaller eyeball charms. Or, make the eyes themselves the main focus. Scale the design to fit your length for the best, most balanced look.
Beyond Halloween: Can You Rock This Trend Year-Round?
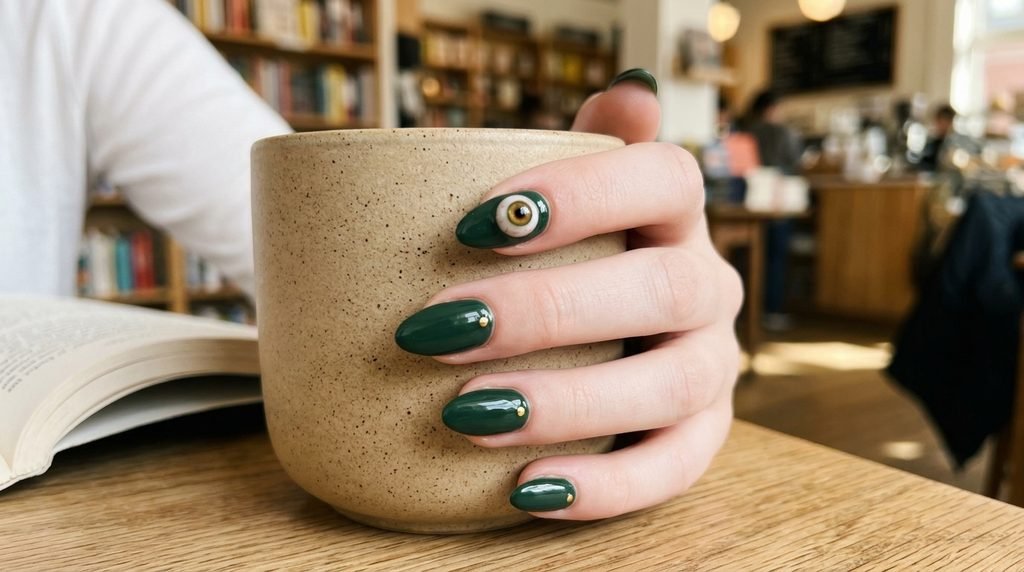
Honestly? Why not! Fashion is about expression. While 3D eyeballs are peak Halloween, they can totally fit other vibes. Think alternative, punk, or artistic styles.
For year-round wear, maybe choose subtle colors. Think realistic green or blue irises instead of glowing monster ones. Skip the heavy blood veins. A single, small 3D eye can be a very cool, slightly edgy accent nail anytime. The evil eye variation is already popular year-round. Don’t let the calendar limit your cool manicure ideas!
Your Questions Answered: 3D Eyeball Nails FAQ
You’ve got questions, I’ve got answers! This is a unique style, after all.
How long do 3D eyeball nails last?
It really depends on the method. Salon-applied gel or acrylic sculpting usually lasts 2–3 weeks, similar to a regular set. DIY gel is comparable, provided it’s prepped and cured properly. Nails using charms attached with glue may lose charms sooner, maybe after a week or two with careful hand use.
Do 3D eyeballs snag on everything?
They can! The domed shape is less likely to snag than charms with sharp edges. However, they are still raised. You will get used to them, but be mindful when zipping jackets or doing intricate tasks. Applying a thick top coat over small charms or smoothing sculpted edges helps immensely.
Are 3D eyeball nails hard to remove?
Removal is similar to other gel or acrylic extensions. Soak-off methods work. But because of the thickness of the 3D element, it may take longer. Never peel or pry them off! You will damage your natural nails. Be patient and use proper soak-off techniques. Charms attached with standard glue usually pop off more easily with acetone or gentle filing.
Can I use regular polish for the 3D effect?
Not really. Regular polish dries by air and won’t build up thickness effectively. It also lacks the strength to hold a shape or a charm. You really need the curing power of gel or the sculpting ability of acrylic for a true 3D look.
Creepy Nail Look Comparisons
Here is a look at some of the different creepy designs we talked about:
| Feature | 3D Eyeball Nails | Evil Eye Nails | Monster Eye Nails | Minimalist Eye Nails |
| Vibe | Scary, realistic | Symbolic, protective | Fun, cartoonish | Subtle, artistic |
| Technique | Sculpted gel/charms | Painted, dotting | Painted/sculpted | Small dot/painted |
| Best Length | Medium-Long | Any | Any | Shorter |
| Color Palette | Any, often realistic | Blue, white, black | Bright, mismatched | Nude, single pop |
| Snag Risk | High | Low | Medium | Very Low |
| Occasion | Halloween, edgy | Year-round, good luck | Halloween | Halloween (with twist), subtle |
Conclusion
Well, are you ready? 3D eyeball nails are truly next-level spooky nail designs. They are creepy, creative, and completely unforgettable. Whether you go for intense realism or playful monsters. At a salon or braving the DIY route. Remember to communicate clearly with your tech. Or, follow the sculpting steps carefully. Use good quality builder gel or grab those awesome charms. Don’t forget the fun pairings like blood drips or matte black. Consider your nail shape for the best balance. Most importantly, have fun with it! It’s Halloween, the perfect excuse for wild nails. Which style will you try first? Share your creepy creations with us and save this for your next salon visit!

Mia founded Daily Nail Idea after a decade in beauty editorial, tired of watching great nail art disappear into the scroll. She now leads the team’s editorial direction — deciding what’s worth featuring and what’s just noise — and still paints her own nails every Sunday night, no exceptions.