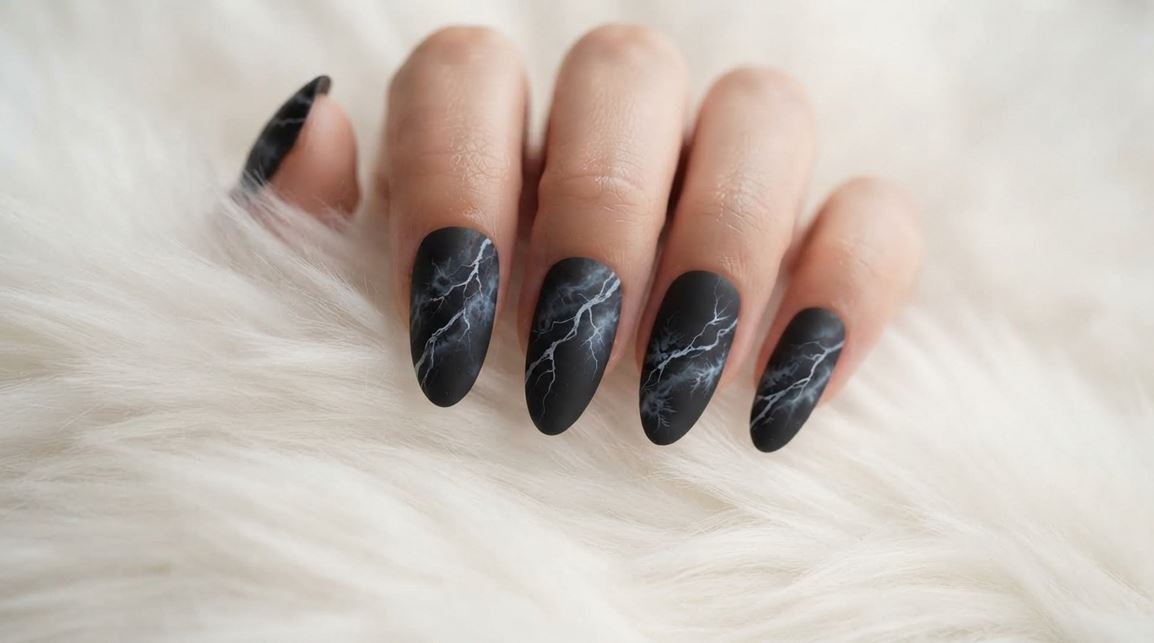
Smoky Black Marble Nails: The Spooky Elegant Halloween Look
Are you staring at your phone in the salon chair, wondering what Halloween look won’t feel costume-y? Halloween is right around the corner. Consequently, you probably want a design that feels dark, mysterious, and sophisticated. That is where smoky black marble nails come in and Smoky Black Marble Nails are trending. This trend blends dark gothic vibes with a high-end luxury finish. Smoky Black Marble Nails are popular among manicure.
| Base Layer | Smoke Effects | Detail Veining | Sealing Finish |
| Deep Opaque Black or Charcoal Gel | Sheer Grey Jelly & Blooming Gel Blend | Fine White Crackle Lines & Foil Accents | Velvet Matte OR High-Shine Topcoat |
Instead of simple pumpkin stickers, you get a foggy graveyard aesthetic right on your fingertips like Smoky Black Marble Nails. In this comprehensive guide, I will walk you through every variation, shape adaptation, and step-by-step technique to achieve this stunning style.
At-a-Glance: Smoky Marble Styling Overview
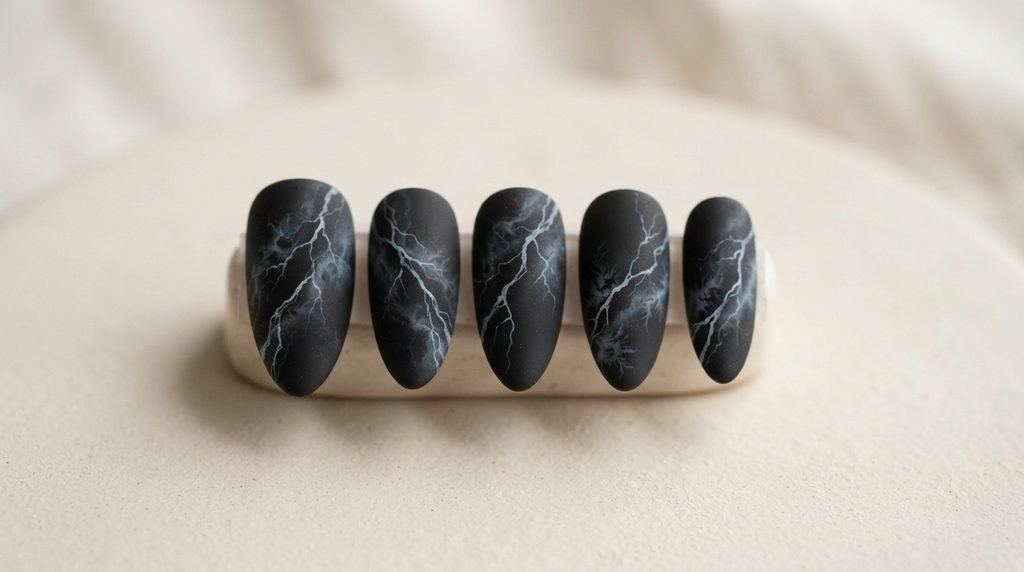
Before we dive into the deep tutorials, here is a quick look at how to tailor smoky marble nails for your personal routine:
| Attribute | Quick Recommendation | Styling Detail |
| Best Nail Shape | Medium Almond or Coffin | Lengthens the fingers and provides maximum canvas for fluid smoke veins. |
| Primary Color Palette | Jet Black, Sheer Grey, Bright White | Creates dramatic high-contrast depth that resembles foggy night skies. |
| Salon Request | “Black base with blooming gel smoke and fine white veining” | Ensures your tech uses fluid gel techniques rather than static stamp art. |
| At-Home Level | Intermediate (DIY with alcohol inks) | Achievable at home using sheer gel layers or rubbing alcohol dispersion. |
| Ideal Occasion | October Events & Nighttime Parties | Subtle enough for the office, yet perfectly atmospheric for Halloween. |
The Secrets Behind Smoky Black Marble Nails
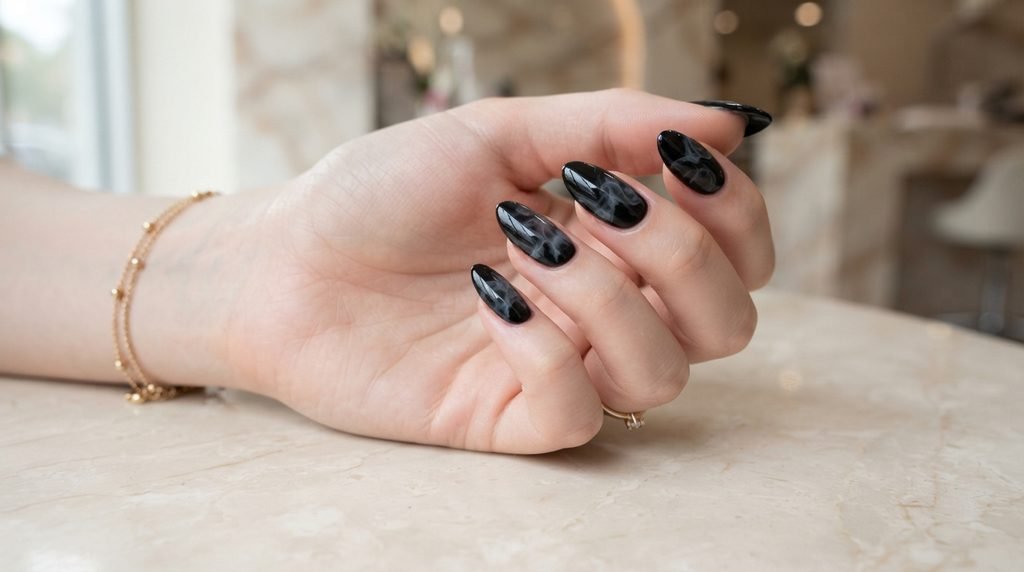
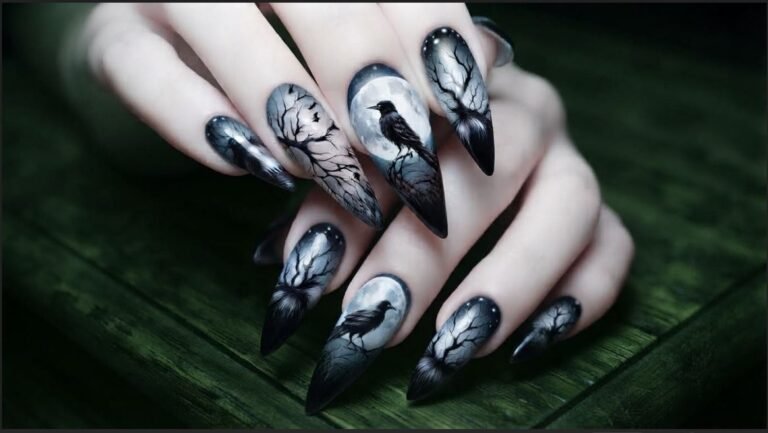
So, why are smoky black marble nails taking over Instagram and Pinterest this season? First, they offer the perfect balance between dark gothic themes and high-fashion aesthetics.
HIGH-CONTRAST DEPTHTECHNIQUE
| Layer | Technique / Material | Description |
| Layer 3 | Ultra-Fine White Veins | Top precision detailing |
| Layer 2 | Sheer Grey Fog Effect | Blooming gel effect |
| Layer 1 | Solid Jet-Black Base | Cured opaque gel |
Standard halloween nail art often relies on bright orange tones or cartoonish icons. Conversely, this style uses depth, translucent grey layers, and sharp white veins. As a result, your manicure feels mysterious, elevated, and deeply atmospheric.
Moreover, the versatility of black marble halloween nails is unmatched. You can wear them to a formal dinner or a ghostly gathering without feeling out of place. Because the marble pattern is organic, no two nails look identical. That means your set is completely custom every single time.
| Smoky Effect | Classic Stone Marble |
| Soft, sheer grey clouds | Sharp, defined quartz lines |
| Deep dimensional layers | Flat surface-level pattern |
| Fluid, atmospheric motion | Structured, geometric look |
To achieve this moody look, nail artists use sheer grey polish mixed with blooming gel. This causes the colors to spread naturally, creating a realistic foggy graveyard nail design. Therefore, you get a custom piece of art that catches the light beautifully under any setting.
Choosing the Perfect Base Tone for Spooky Nails
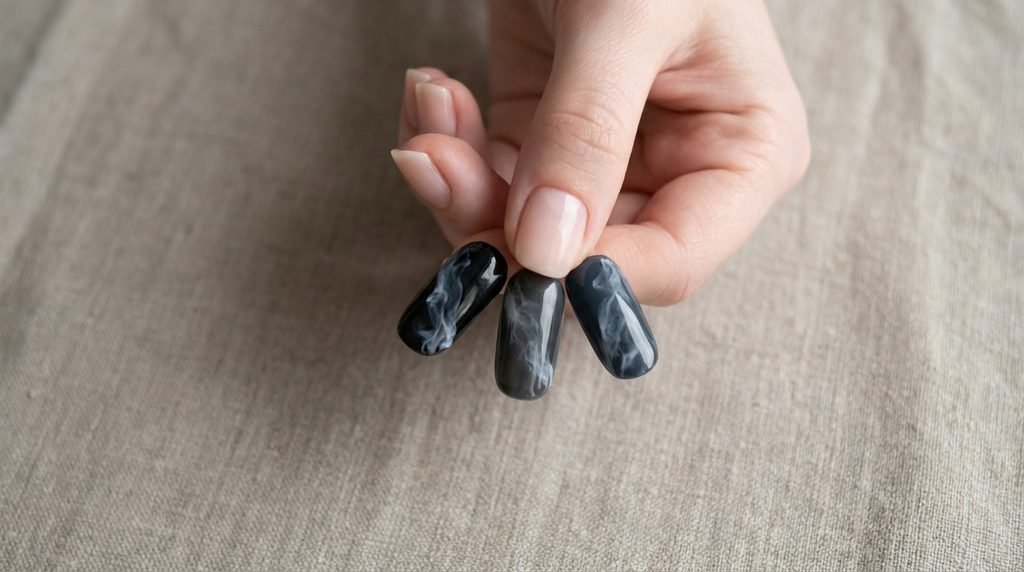
When you start your spooky nails journey, selecting the right base color sets the tone for the entire design. While classic jet black is a popular pick, deep charcoal grey or ultra-dark plum can also create an incredible background.
- Deep Jet Black: Offers maximum contrast with white veining. It creates a bold, dramatic backdrop for night events.
- Charcoal Grey: Softens the look slightly. This choice gives a softer, more realistic stone texture that mimics raw slate.
- Translucent Jelly Black: Adds a glass-like dimension. It lets light pass through the layers, making the smoke look suspended inside the nail.
| Jet Black | Charcoal Grey | Jelly Black |
| Deep, high-contrast | Soft slate finish | Glass-like 3D depth |
| Bold & dramatic | Subtle & natural | Translucent layers |
Meanwhile, choosing a rich base helps the thin marble lines pop effortlessly. If your base is too light, the smoky effect loses its haunting mood. On the other hand, if it is too dense without clear layers, the marble looks muddy. Thus, finding the sweet spot with a rich, opaque gel base is key to success.
Almond Black Marble Nails: The Ultimate Shape
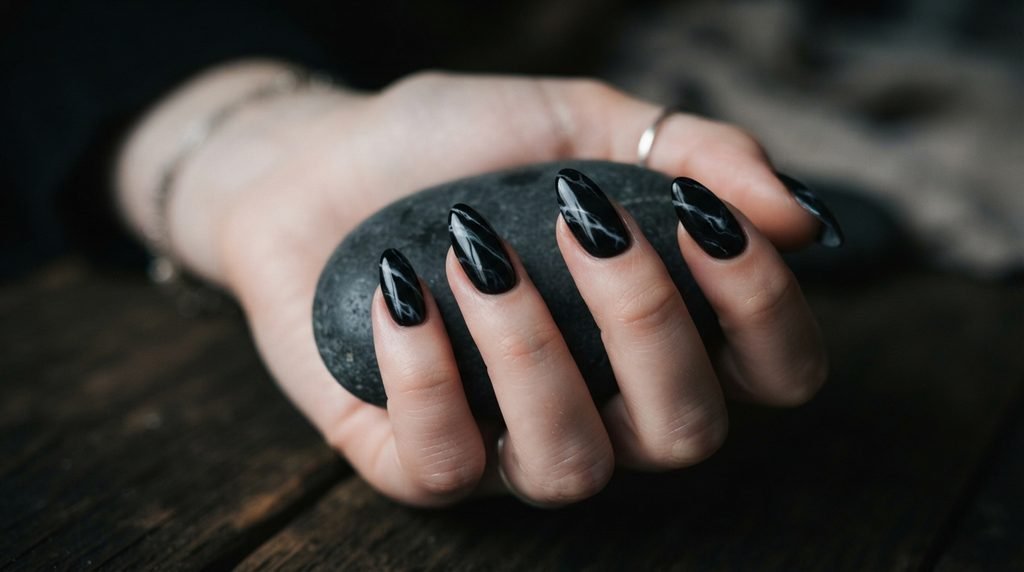
If you want an elegant spooky nails look, almond is the absolute best shape to pick. The tapered edges elongate your fingers instantly. Furthermore, the rounded tip allows the marble veins to flow naturally along the curve of the nail plate.
In my salon experience, client sets on almond shapes always showcase the best smoke movement. Because there are no sharp corners, the veining appears fluid and organic. Additionally, almond shapes are less prone to snagging during daily activities, making them as functional as they are gorgeous.
To ask for this look, tell your nail technician you want a medium-length almond shape with soft, rounded tips. Request a dark base with sheer, diagonal smoke wisps. As a result, your hands will look long, delicate, and wickedly chic.
Coffin and Square Variations for Extra Drama
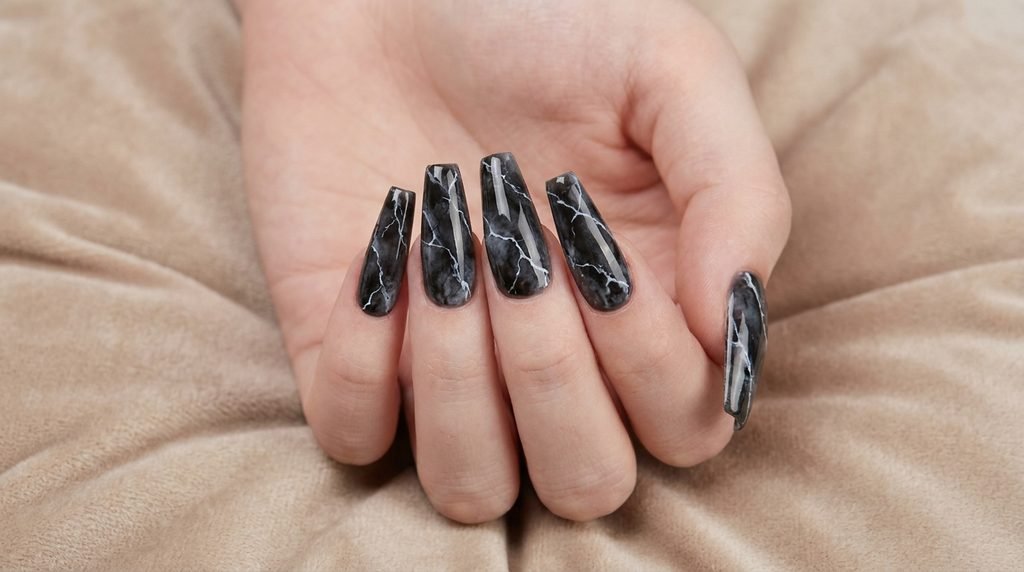
While almond is classic, coffin and square shapes offer a modern, edgy twist for your halloween nail inspo. Sharp lines contrast brilliantly with the soft, organic marble pattern inside.
COFFIN SHAPE SQUARE SHAPE
Edgy & Dramatic Canvas Bold Geometric Framing
- Coffin Nails: The flat, tapered tip provides a wide canvas for intricate crackle nail art black details.
- Square Nails: Strong side edges give a bold, geometric frame to the soft, swirling smoke beneath.
- Squoval Nails: Combines the durability of square nails with softer edges, perfect for shorter natural nails.
For coffin shapes, ask your tech to concentrate the densest marble effect near the tips. This technique draws attention to the unique shape. Meanwhile, square nails look stunning when the marble lines run diagonally from corner to corner, breaking up the straight lines of the tip.
Short Nail Hacks for Smoky Marble Designs
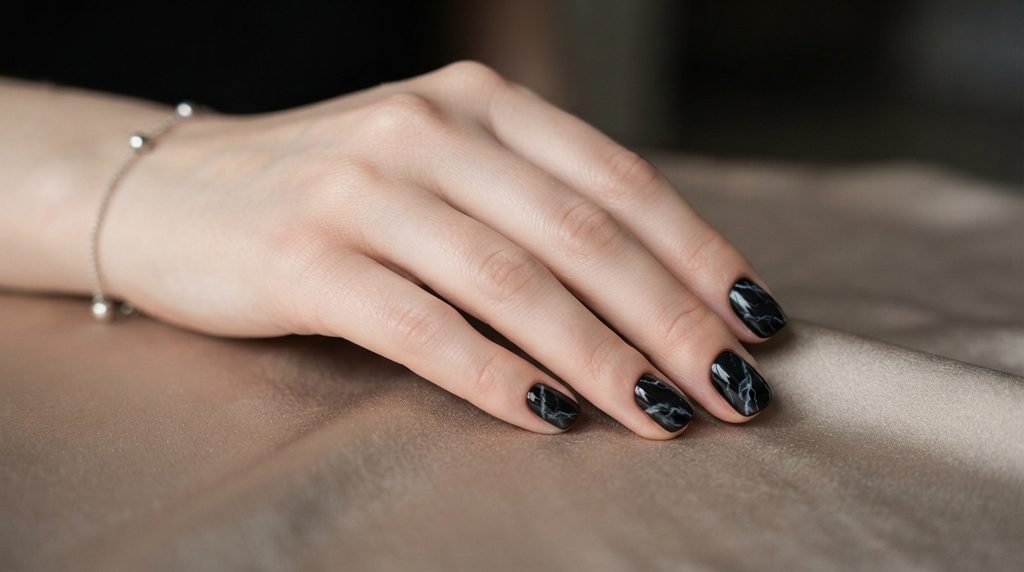
Do not worry if you keep your length natural! You can easily adapt this trend into stunning halloween nails short styles without losing any of the moody details.
SHORT NAIL VEIN PLACEMENT
INCORRECT (Overcrowded) CORRECT (Micro-Veins)
Dense, muddy pattern Diagonal, breathable lines
First, use micro-veins rather than thick clouds of grey. Because space is limited, fine white lines keep the nail from looking overcrowded. Second, leave plenty of negative space or deep black background. This keeps the look crisp and clean.
Third, place your marble diagonal wisps strategically. Running lines from the bottom corner to the opposite top corner creates an illusion of extra length. Therefore, even short natural nails look elongated, chic, and totally Halloween-ready.
DIY Smoky Effect: The Alcohol Ink Technique
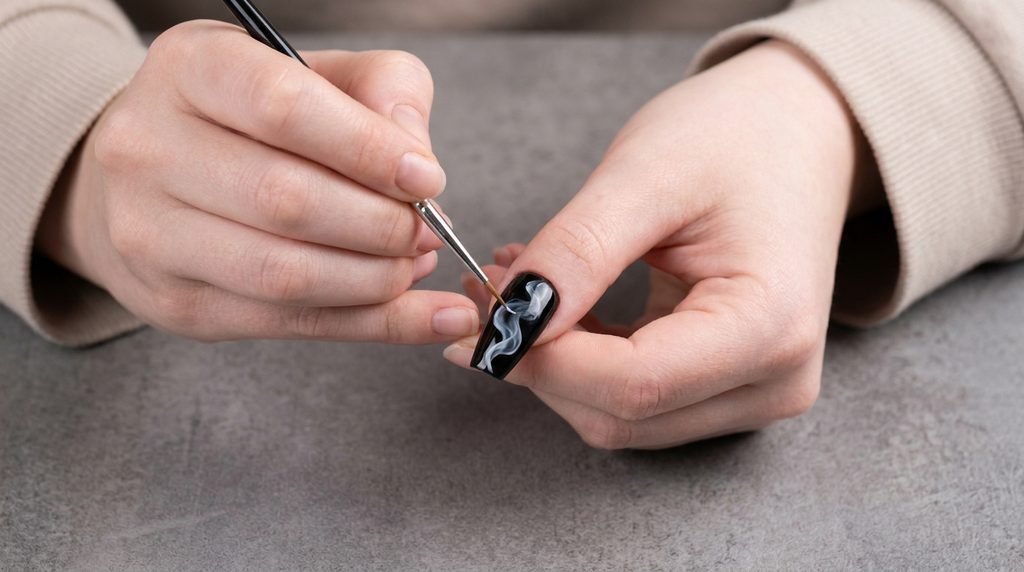
Want to try this at home? You do not need years of salon practice to create a gorgeous foggy graveyard nail design. Using alcohol inks over cured gel is an easy DIY trick.
ALCOHOL INK STEP-BY-STEP
[Step 1] Base Coat –> Apply 2 coats of black gel & cure.
[Step 2] Matte Top –> Apply matte gel top coat & cure (essential for ink grip).
[Step 3] Ink Drops –> Drip white/grey alcohol ink onto surface.
[Step 4] Disperse –> Dab rubbing alcohol with a brush to spread clouds.
[Step 5] Seal Look –> Apply glossy top coat to lock in the depth.
- Prep your nails, apply a black gel base, and cure under an LED lamp.
- Apply a layer of matte gel top coat and cure. The matte surface helps the ink spread evenly.
- Drip white or light grey alcohol ink onto the nail surface.
- Dip a fine detail brush into rubbing alcohol, then gently touch the ink drops to bloom them into smoky clouds.
- Allow it to dry for 30 seconds, then seal with your favorite shiny or matte top coat.
This technique creates instant, realistic depth with minimal effort. Consequently, you get professional-looking gothic marble nail art right from the comfort of your couch.
Blooming Gel Magic: Step-by-Step Tutorial
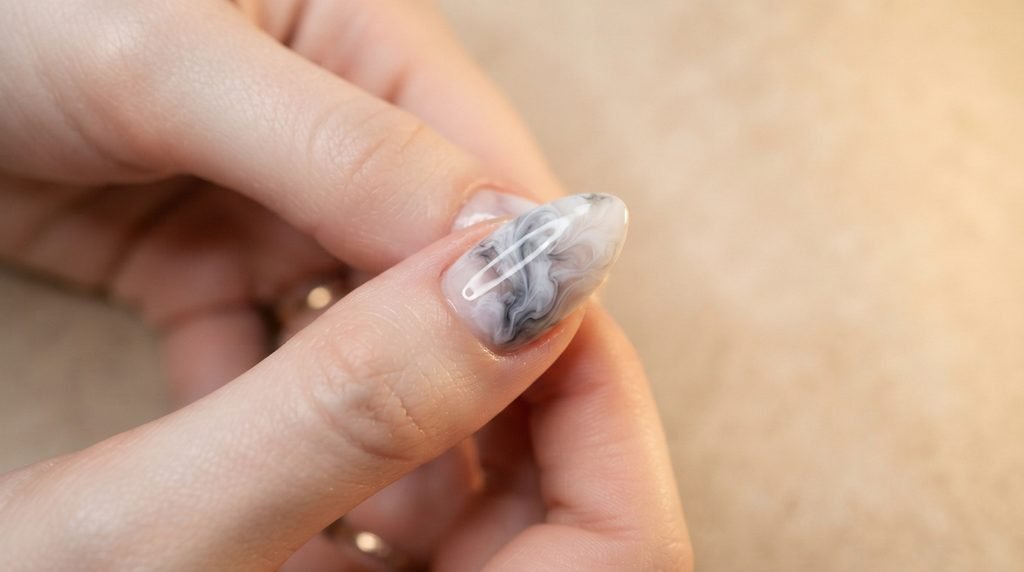
For a true salon-quality smoky marble nail design, blooming gel is the ultimate professional secret weapon. It disperses wet polish automatically, creating realistic fog effects.
First, apply your dark base coat and cure completely. Next, brush on a thin layer of clear blooming gel, but do not cure it yet. While the gel is still wet, paint thin, wavy lines of white and light grey polish across the surface using a fine liner brush.
Watch closely as the blooming gel spreads the wet polish outward! Once the wisps reach your desired smoky look, flash cure under your lamp immediately to freeze the pattern in place. Finish with a layer of top coat to lock in the incredible dimensional depth.
Adding Crackle & Lightning-Vein Accents
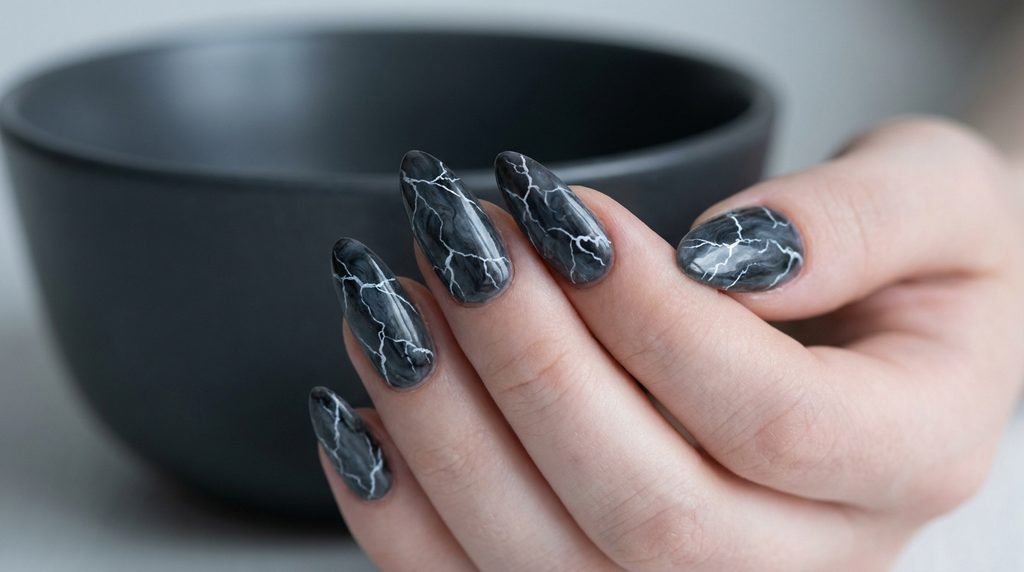
To elevate your set from simple smoke to a dramatic halloween nail art masterpiece, consider adding fine crackle lines. These lines resemble jagged lightning or cracked ancient marble.
SMOKE BASE VS. LIGHTNING ACCENTS
| Soft Smoke | Lightning Veins |
| Broad, diffused fog | Ultra-sharp, jagged lines |
| Low-contrast opacity | High-contrast, crisp white |
| Sits in the background | Sits on the top layer |
Use an ultra-thin 7mm or 9mm liner brush dipped in pigmented white gel art paint. Draw thin, shaky, diagonal lines across the foggy base. Remember, human hands naturally shake a bit, and that is actually perfect for this look! Shaky movements make the veins look realistic.
Branch the lines off into smaller, delicate offshoots, just like lightning striking across a dark sky. This adds texture and a subtle spooky vibe. [Internal link opportunity: → Metallic & Chrome Accent Tutorials]
Matte vs. Glossy: Choosing Your Final Finish
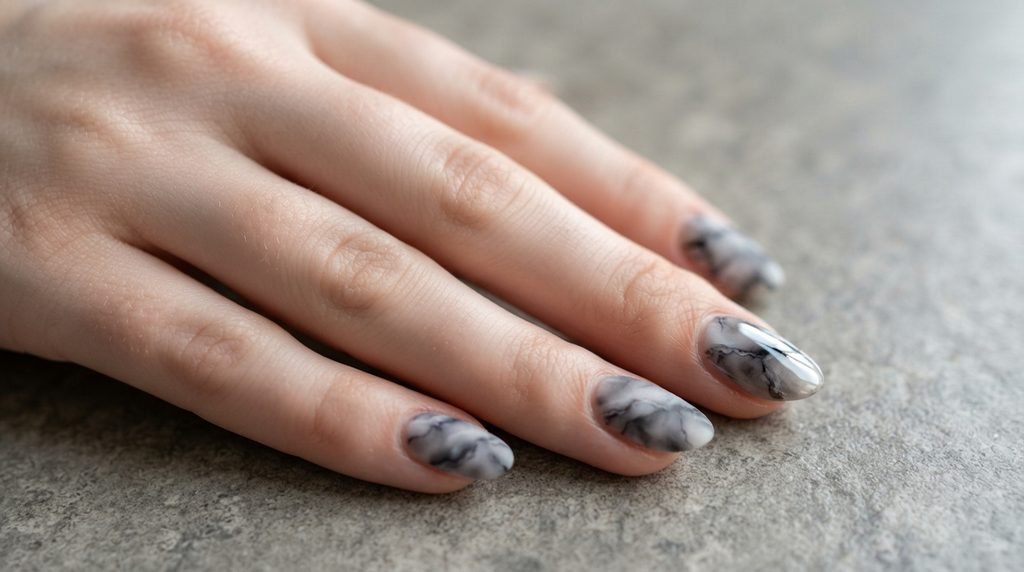
The finish you choose can completely alter the personality of your halloween nails designs. Both matte and glossy top coats offer distinct advantages.
FINISH COMPARISON MATRIX
| Matte Velvet Finish | High-Shine Gloss |
| Soft, moody slate texture | Glass-like, polished depth |
| Absorbs light for a cozy feel | Maximizes 3D gel layers |
| Feels modern and artistic | Creates a classic luxury stone look |
Matte Velvet Finish: Gives a moody, frosted appearance resembling cold winter stone or soft fog. It absorbs reflections, highlighting fine detail work.
- High-Shine Gloss Finish: Mimics polished marble counter tops or dark volcanic glass. It enhances depth, making translucent layers pop.
- Hybrid Combination: Matte overall with selective glossy marble veins on top for a striking tactile contrast.
If you want a cozy, gothic atmosphere, go with a velvet matte top coat. On the other hand, if you prefer high-glamour polished nails, stick to a crystal-clear high-shine gel.
Accent Nails & Gold Foil Enhancements
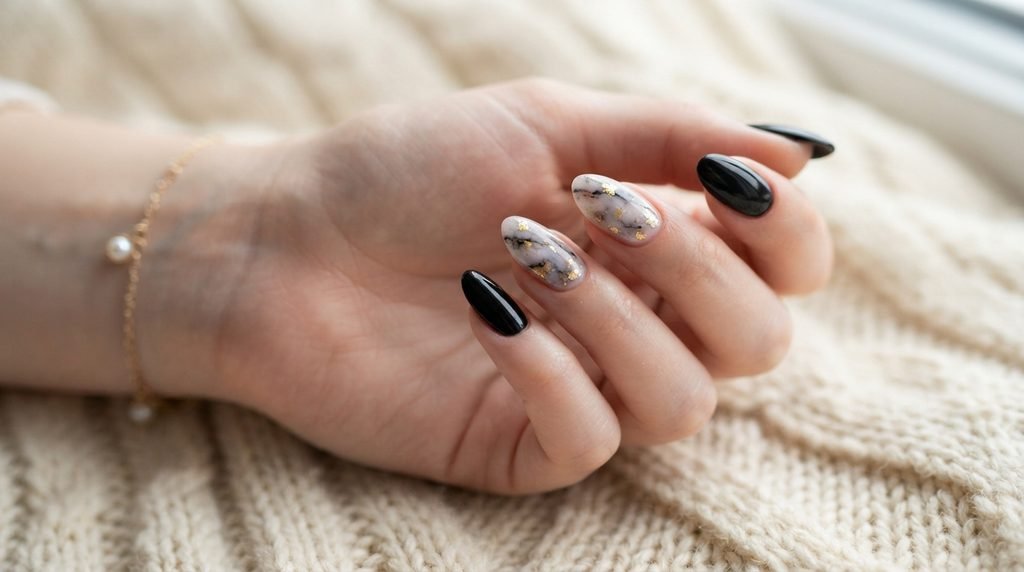
If you feel ten full marble nails might be overwhelming, try using accent nails! Painting three nails solid black while applying marble art to two fingers creates a balanced look.
To add extra luxury, embed tiny flecks of gold or silver foil into the dispersion layer before sealing. Golden veins running through dark marble give a chic black manicure halloween aesthetic that feels expensive.
Alternatively, use chrome powder along the edges for a metallic border. This frames the smoky marble centers, adding a touch of modern drama.
Salon Communication: Exactly What to Ask For
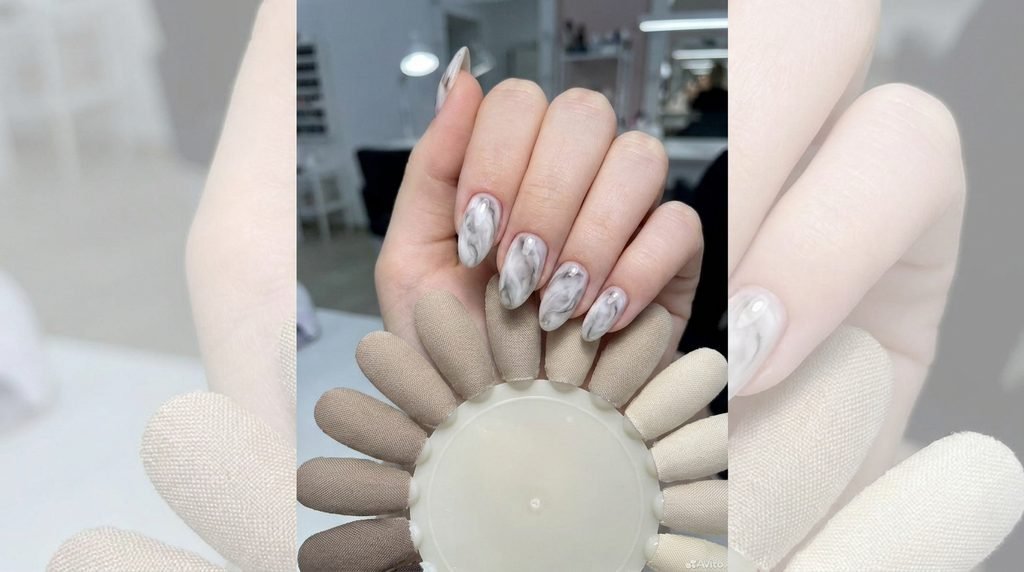
Nothing is worse than leaving the salon with nails that look nothing like your reference photo. Here is your exact script for your nail tech:
SALON REQUEST CHECKLIST
[ ] Base Shape: Medium Almond or Coffin
[ ] Base Color: Jet Black or Charcoal Jelly
[ ] Technique: Blooming Gel Smoke Effect (Not Stamped)
[ ] Accents: Ultra-fine White Diagonal Veins
[ ] Finish: Matte Velvet OR High-Shine Gel Top Coat
Show them a clear photo of smoky black marble nails. Specify that you want fluid, hand-painted smoke effects using blooming gel, rather than stamped or printed graphics. Mention whether you prefer a sheer grey fog or bright, crisp white veining.
Confirm the total cost beforehand, as blooming gel and hand-painted art often carry an add-on fee. Clear communication ensures you walk out with the spooky, elegant set of your dreams.
Halloween Costumes That Pair Perfectly
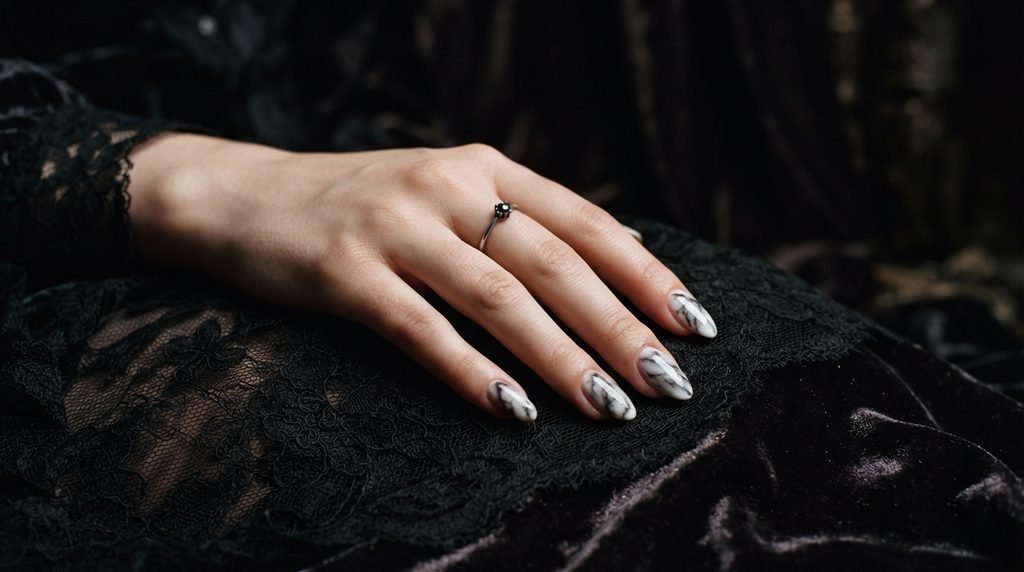
Your manicure is the ultimate accessory for October outfits! Smoky marble nails pair easily with many Halloween costumes and fall fashion looks.
Classic Witch: Adds a refined, magical touch without looking like a cartoon.
- Gothic Victorian: Mirrors delicate dark lace patterns and velvet textures.
- High-Fashion Vampire: Pairs brilliantly with dark red lipstick and sleek leather coats.
- Everyday Fall Knits: Elevates simple chunky beige or black cozy sweaters effortlessly.
Because this design relies on neutral tones, it complements almost any outfit color. Consequently, you will not have to worry about your nails clashing with your weekend wardrobe.
Transitioning Black Marble from October to Winter
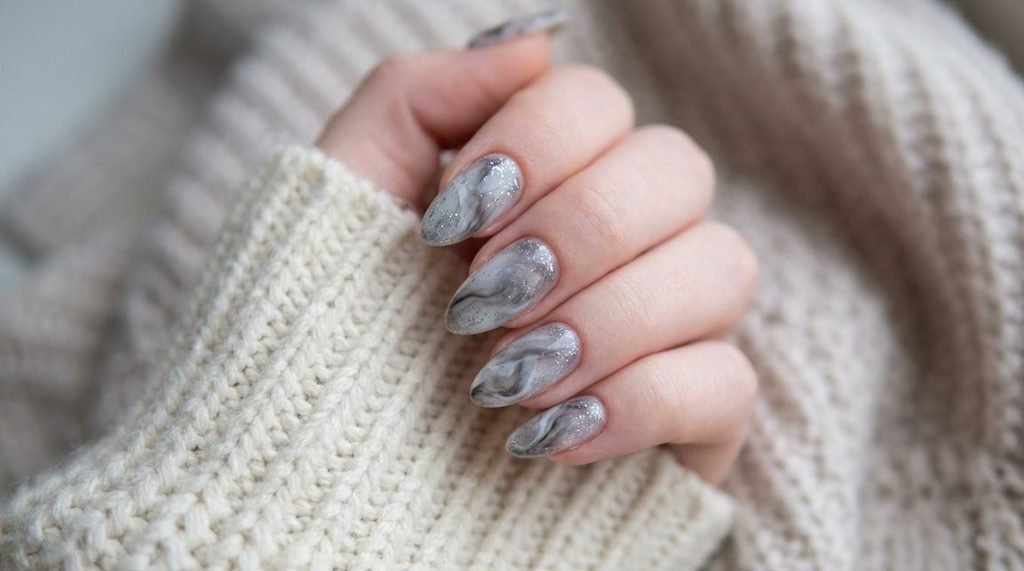
One huge benefit of chic black manicure halloween designs is their longevity beyond October 31st. Unlike pumpkin art, marble nails transition seamlessly into November and winter.
SEASONAL STYLE TRANSITION
| October – Spooky Vibe | November – Gothic Glamour | December – Winter Slate |
| Add spider-web accents or matte finishes. | Pair with dark plum knits and gold rings. | Add silver chrome and icy glitter. |
To update your look for winter, simply swap white veining for metallic silver or gold accents. You can also layer fine glitter over the smoke to mimic winter frost or falling snow.
Thus, your investment in a quality set lasts through multiple seasonal shifts. You get high style that remains trendy throughout the colder months.
Maintenance & Longevity Tips for Gel Marble Sets
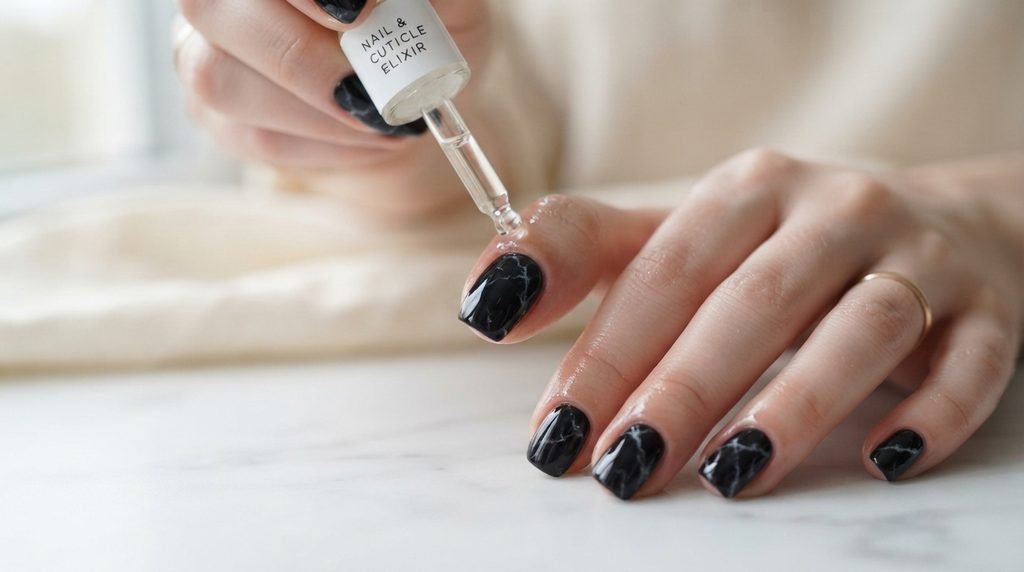
To keep your marble elegance nail design looking fresh for weeks, proper daily nail care is essential. Gel polish requires protection to prevent lifting or chipping.
DAILY CARE ROUTINE
Morning: Apply cuticle oil around base & massage in.
Mid-Day: Wear gloves when cleaning or doing dishes.
Night: Re-apply cuticle oil & hand cream before bed.
First, apply cuticle oil twice daily. This keeps the skin around your nails hydrated, preventing lifting along the edges. Second, wear protective gloves when doing household chores or washing dishes.
Third, never use your nails as tools to open cans or peel off tape. If you experience minor dulling on matte sets, wipe the nails clean with rubbing alcohol to restore their velvety look instantly.
DIY vs. Salon Cost & Time Comparison
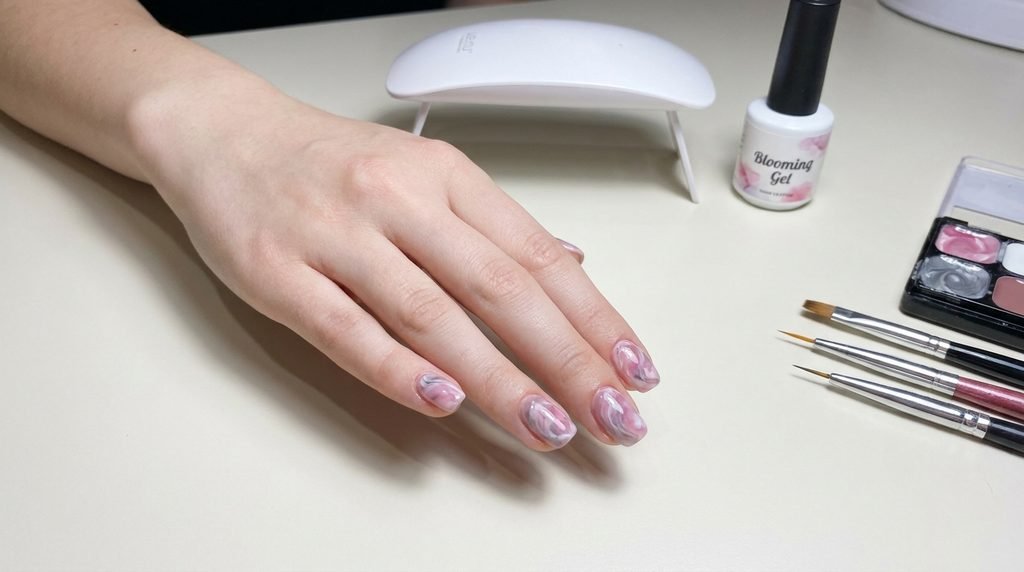
Deciding whether to visit a salon or try a DIY project depends on your budget, time, and skill level. Here is how both options compare:
| Consideration | Salon Professional Application | At-Home DIY Kit |
| Average Cost | $65 – $110 (including art fees) | $20 – $40 (initial kit investment) |
| Time Required | 1.5 to 2 hours | 1 to 1.5 hours |
| Skill Needed | None (sit back and relax) | Intermediate (requires steady hand) |
| Longevity | 3 to 4 weeks without chipping | 1 to 2 weeks (depending on prep) |
| Tools Required | Professional LED lamps & gel systems | Gel polish, blooming gel, liner brushes |
If you love sitting back and getting pampered, book a salon appointment with a skilled nail artist. However, if you enjoy nail crafting at home, ordering blooming gel and liner brushes is a rewarding, budget-friendly alternative.
Troubleshooting Common Marble Nail Mistakes
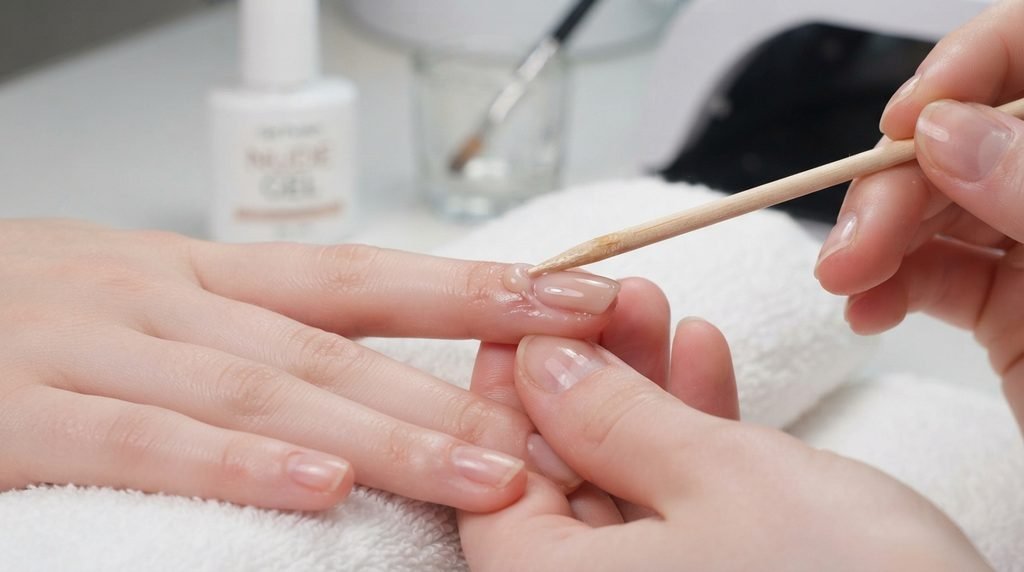
When painting marble nails, a few common issues can occur. Here is how to fix them easily:
TROUBLESHOOTING GUIDE
| Problem | Cause | Fix |
| Lines look too thick | Too much paint | Wipe brush thin |
| Marble looks muddy | Gels mixed too much | Flash cure faster |
| Polish bleeds to skin | Overfilled sides | Clean prior to curing |
- Muddy Swirls: This happens when you mix the paint too much. Keep your brush strokes light and brief.
- Thick, Unnatural Lines: Your brush carries too much gel paint. Wipe your brush on a lint-free pad before drawing fine veins.
- Flooded Cuticles: You applied blooming gel too heavily near the edges. Leave a small border around cuticles clear of wet gel.
By keeping your layers thin and working on one nail at a time, you avoid messy bleeds. Practice on display tips first to build up your confidence!
Press-On Alternatives for Instant Halloween Glam
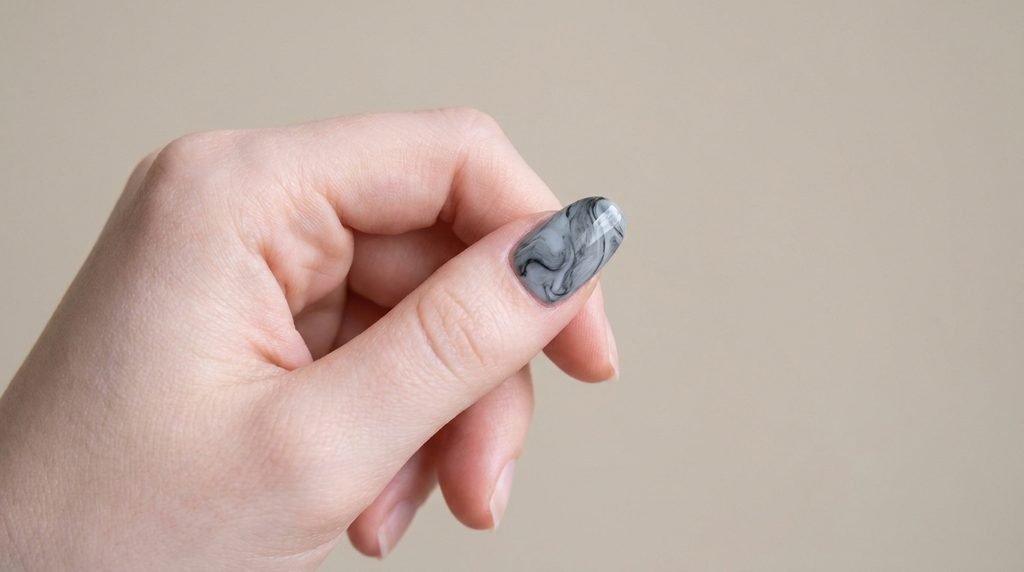
Short on time before a Halloween party? High-quality press-on nails offer instant gratification without hours in a salon chair.
PRESS-ON APPLICATION
[Prep] Clean natural nails with alcohol prep pad.
[Size] Match each press-on tip to correct nail width.
[Glue] Apply glue to both natural nail & press-on back.
[Press] Hold firmly for 15 seconds at a 45-degree angle.
Many indie nail artists sell custom, hand-painted smoky black marble press-ons on platforms like Etsy. They use gel polish, so you get exact salon quality at home.
To make press-ons last, etch the inside of the fake nail and your natural nail surface gently with a file. Use high-quality nail glue and avoid water for two hours after applying. Consequently, your temporary set can last up to two full weeks!
Creative Color Variations Beyond Black and White
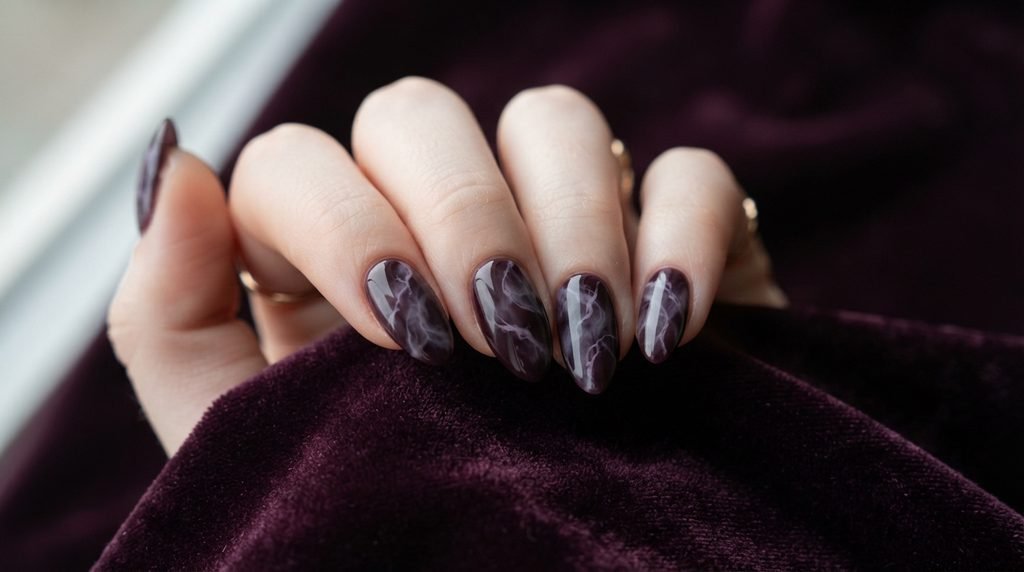
While black and white is classic, you can tweak the color palette to match your personal mood or Halloween theme.
ALTERNATIVE PALETTES
| Palette | Mood / Aesthetic |
| Deep Plum & Smoke | Moody, romantic witchy vibes |
| Emerald & Black | Enchanted forest & toxic potion look |
| Crimson & Charcoal | Vampiric contrast with high drama |
- Deep Plum & White: Adds a subtle purple tone that feels romantic and witchy.
- Emerald & Black: Gives an enchanted, toxic potion aesthetic that stands out.
- Crimson & Charcoal: Combines blood-red veins with dark grey smoke for ultimate vampire drama.
Trying unique color pairs keeps your manicures fresh and exciting. Do not hesitate to mix your favorite dark shades for a custom finish!
Frequently Asked Questions (PAA)
How do you create a black marble nail effect?
You create a black marble effect by painting a solid black base and curing it. Next, layer clear blooming gel or wet top coat over top without curing. Paint fine lines of white or grey gel into the wet layer, letting them bloom into clouds. Finally, add crisp thin white line accents and cure under an LED lamp.
What makes marble nails look “spooky” for Halloween?
Deep black bases, sheer grey smoke clouds, and sharp lightning-like white veins give marble nails a dark, moody atmosphere. This mimics misty graveyards, dark storm clouds, or ancient gothic stone, making them perfect for Halloween without needing cartoon icons.
SPOOKY MARBLE FORMULA
[Deep Black Base] + [Foggy Grey Smoke] + [Sharp White Lines]
= Spooky Halloween Aura
What nail shape works best for smoky marble designs?
Medium almond and long coffin shapes work best for smoky marble patterns. Their elongated canvases allow the fluid, diagonal smoke veins to flow naturally, maximizing depth and visual impact.
Is black marble a good everyday nail design outside Halloween?
Yes! Black marble is a classic, neutral design that works year-round. It is sophisticated enough for professional work environments and dark enough to satisfy gothic aesthetics outside October.
Conclusion: Ready to Wear Your Smoky Marble Look?
Smoky black marble nails provide the ideal mix of dark Halloween atmosphere and high-end elegance. Whether you choose almond shapes with shiny top coats or short coffin nails with velvet matte finishes, this moody style makes a chic statement.
So, save your favorite design ideas, book your appointment, or grab your liner brushes at home! Which smoky marble style will you try for your next manicure?

Mia founded Daily Nail Idea after a decade in beauty editorial, tired of watching great nail art disappear into the scroll. She now leads the team’s editorial direction — deciding what’s worth featuring and what’s just noise — and still paints her own nails every Sunday night, no exceptions.