Glowing in the Dark: The Ultimate UV Blacklight Halloween Nail Art Guide 2026
Sitting in my salon chair every October, I hear the exact same dilemma from my clients. You saved twenty different Pinterest boards filled with ghost motifs, spiderwebs, and neon skulls. Halloween nail art is very popular among fashion lovers. Yet, you are sitting there wondering if the look will actually stand out when the party lights go down. You want something spooky, striking, and vibrant under club backlights without looking like a messy neon blob during the day.
Look no further than glow-in-the-dark Halloween nail art. As an editorial director with years of hands-on salon experience, I can tell you that working with UV-reactive pigments is one of the most exciting seasonal requests. However, it requires specific layering techniques to execute cleanly. If you apply luminous polish incorrectly, it turns streaky, dull, or fails to charge properly.
This comprehensive guide takes you step-by-step from raw nail prep to high-gloss sealing. You will learn the science behind UV blacklight vs. classic phosphorescent pigments, exact shape adaptations for short to coffin lengths, and practical salon communication notes. Get ready to elevate your spooky nails with professional, show-stopping designs that glow brightly all night.
At-a-Glance: What’s Ahead
Planning your spooky season manicure should feel fun, not overwhelming. Here is a fast breakdown of what this ultimate guide covers to help you curate your perfect Halloween look:
- Foundational Techniques: Key differences between dark-glow phosphorescence and UV blacklight reactivity, plus exact base layer choices.
- Full Step-by-Step Tutorial: Comprehensive prep, pigment application, precision line work, and flash-curing methods to prevent pooling.
- Shape & Length Adaptations: Customizing luminous art for Short Square, Almond, Coffin, and Stiletto shapes.
- 21 Design Subheadings: Specific, actionable aesthetic ideas ranging from neon drip French tips to radioactive spiderwebs.
- Troubleshooting & Expert FAQs: How to avoid cuticle flooding, charge your polish effectively, and communicate clearly with your nail tech.
The Science of Spooky: Glow-in-the-Dark vs. UV Blacklight Reactivity
Before painting, you must understand how luminous pigments function on the nail plate. Many clients assume all glowing polishes work identically, but they rely on completely different photoluminescent properties.
Classic glow-in-the-dark pigments use phosphorescence. These formulations absorb natural or artificial ambient light, store the energy, and slowly emit a soft glow in total darkness. They require charging under a lamp or phone flashlight. Conversely, UV-reactive or blacklight polishes use fluorescence. They instantly convert invisible ultraviolet light into brilliant, visible neon colors under dedicated blacklight fixtures.
| Feature | Classic Glow (Phosphorescent) | UV Blacklight (Fluorescent) |
| Light Requirement | Charges under visible light | Requires continuous UV light |
| Daytime Appearance | Milky white, pale green/yellow | Vibrant neon hues |
| Darkness Effect | Soft ambient glow in pure dark | High-contrast electric luminescence |
| Best Halloween Setting | Trick-or-treating, dark rooms | Clubs, concerts, blacklight parties |
When you combine both formulations, you achieve a versatile manicure. Your design shines like vivid neon at indoor events and glows soft, eerie green when you step into the dark.
Complete Step-by-Step Prep: Building a Flawless Foundation
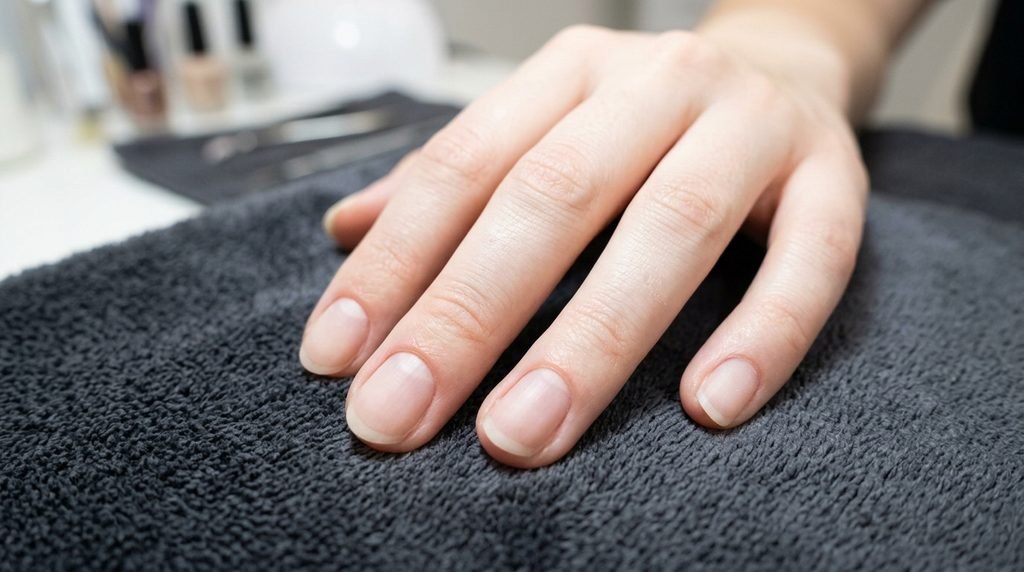
Long-lasting halloween nail art depends heavily on initial prep work. Luminous gel formulations are often thicker than standard gel polishes because of encapsulated glow powders. If your prep is rushed, thick gel will lift quickly along the lateral walls.
Dry Prep & Cuticle Care
Start by gently pushing back the eponychium using a sterile metal pusher. Do not soak the hands in water before applying gel, as the nail plate absorbs moisture and expands, causing premature lifting once dry. Lightly buff the shine off the natural nail plate using a 240-grit buffer. Pay close attention to the proximal nail fold. Remove all trace oils using a lint-free wipe soaked in 99% isopropyl alcohol.
Dehydration & Acid-Free Primer
Apply a high-grade dehydrator across the entire surface. Follow with an acid-free primer to create a tacky layer that bonds the gel to the natural keratin. Allow this layer to air-dry for thirty seconds until it looks matte.
Base Gel Selection & Curing
Apply a thin layer of rubber base gel or clear builder gel. Rubber base provides flexibility, preventing thick decorative top layers from cracking under pressure. Scrub the base coat into the micro-scratches of the nail plate with a short gel brush. Cure under an LED lamp for 60 seconds.
Essential Base Color Tactics: The Opaque Black Contrast Method
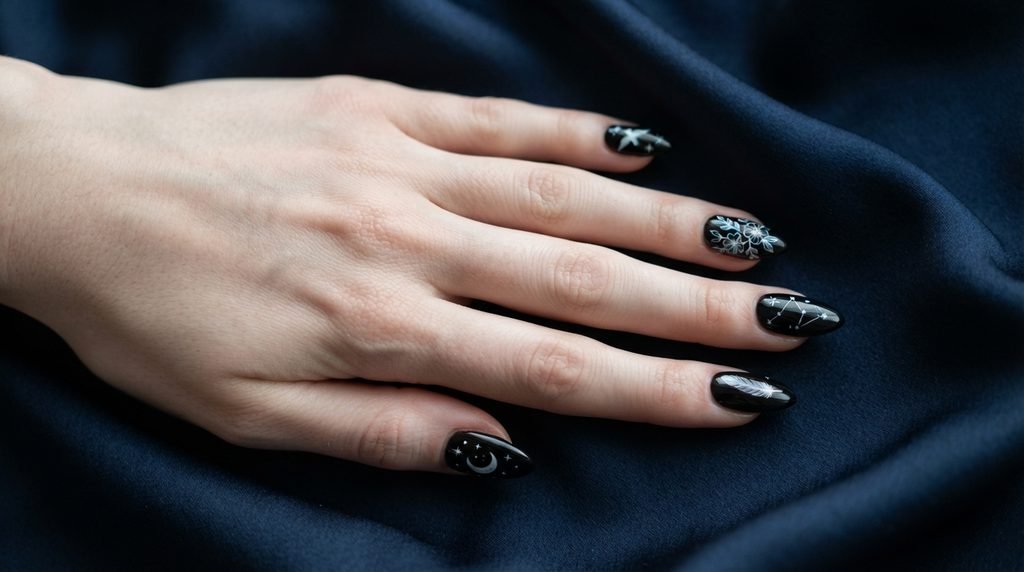
The secret to high-impact neon glow halloween nails lies in your base color. Placing glow pigments over a clear nail gives a soft, sheer effect. However, layering them over an ultra-opaque black base creates dramatic, professional contrast.
Why White Underlays Matter
If you apply green glow polish directly onto an intense black surface, the dark base eats the luminescent intensity. To maximize brightness, sketch your art first using an opaque white gel paint.
- Paint your entire nail plate with two thin coats of jet-black gel polish. Cure each layer completely for 60 seconds.
- Paint your design silhouettes (ghosts, webs, dripping French tips) using a highly pigmented white art gel.
- Cure the white line work for 30 seconds.
- Layer your glow pigment or UV blacklight gel directly over the white shapes.
By securing white gel under your neon glow pigment, you block the dark base from absorbing the neon intensity. This step ensures bright, electric visibility under blacklight.
Detailed Step-by-Step Application Tutorial
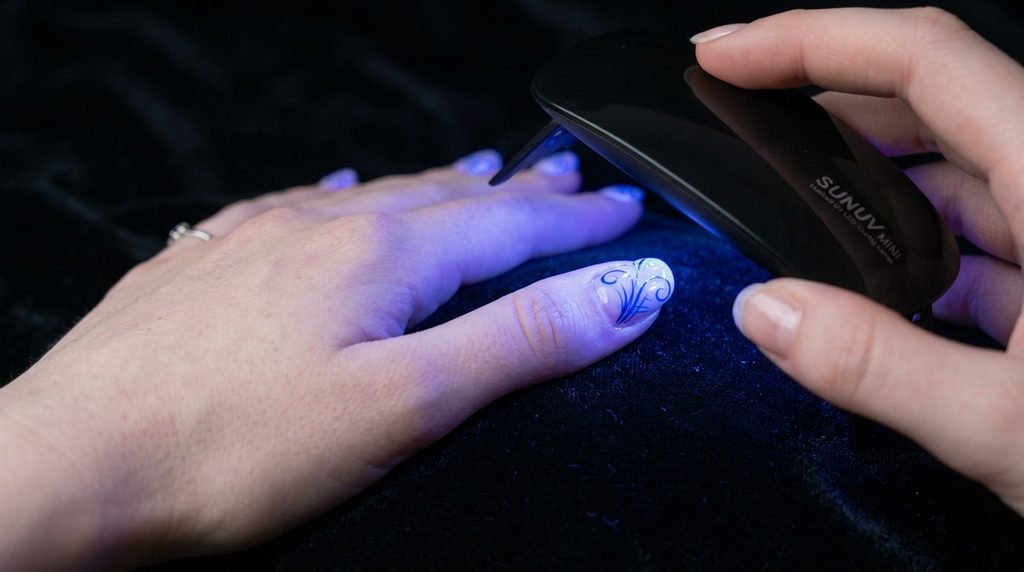
Executing clean luminous nail art requires controlling gel viscosity. Glow gels can run quickly into the cuticle folds if applied too thick. Follow this step-by-step method for flawless execution.
| Step | Phase | Product Used | Cure Time (LED) |
| 01 | Surface Prep | 99% Isopropyl Alcohol & Primer | Air Dry (30s) |
| 02 | Flexible Foundation | Rubber Base Coat | 60 Seconds |
| 03 | High-Contrast Base | Jet-Black Gel Polish (2 Coats) | 60s per coat |
| 04 | Silhouette Art | Opaque White Precision Gel | 30 Seconds |
| 05 | Luminescent Layering | Glow-in-the-Dark / UV Art Paint | 60 Seconds |
| 06 | Protective Sealing | Non-Wipe Glossy Top Coat | 90 Seconds |
Step 1: Base Coat & Canvas Preparation
Apply your rubber base coat, cure, and apply two thin coats of jet-black gel polish. Ensure every layer cures fully so no uncured pigment bleeds into subsequent details.
Step 2: Precision White Under-Painting
Using a long 9mm liner brush, map out your chosen halloween nail designs in opaque white paint. Keep lines thin and controlled. Flash-cure for 10 seconds per finger to lock the lines in place without spreading.
Step 3: Layering the Luminous Pigment
Apply your glow polish or UV pigment over the cured white art. Work in thin layers to ensure full UV light penetration during curing. Thick coats of glow gel can trap uncured gel underneath, causing air pockets.
Step 4: Flash Curing & Gel Management
To prevent cuticle flooding, flash cure each finger under a handheld mini-UV lamp for 5 to 10 seconds immediately after painting its detail. Once all five fingers are completed, perform a full 60-second LED cure.
Step 5: Encapsulation & Sealing
Glow powders create a slightly textured surface. Seal your design with a non-wipe glass-finish top coat. Float the top coat over the art without pressing down hard, ensuring a smooth, level finish. Cure for 90 seconds.
Adaptations Across Nail Shapes and Lengths
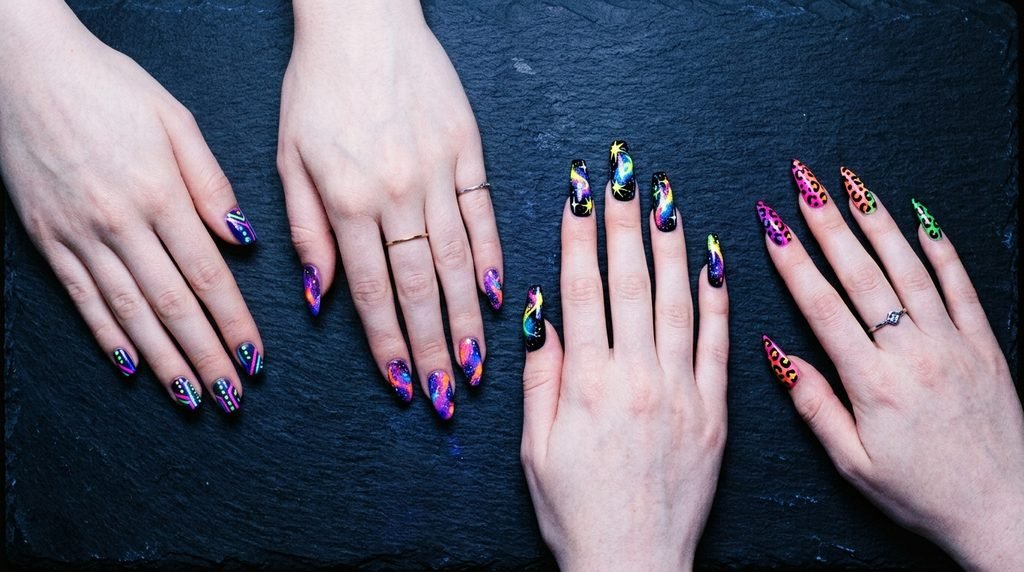
Halloween art looks completely different across various nail extensions. Here is how to adapt luminous designs for optimal proportions and structural stability.
Short Square Nails
Short lengths need crisp, simple designs to prevent a cluttered appearance. Focus on micro-details like fine-line radioactive webs, mini ghost accents, or luminous tip outlines. Keep black borders crisp to maximize visual length.
Medium Almond Nails
Almond shapes offer balanced real estate that flatters almost every hand structure. Use the tapered tip for fluid drip designs, creeping vines, or glowing smoke effects that follow the natural curve toward the point.
Long Coffin (Ballerina) Nails
Long coffin nails provide an expansive canvas perfect for complex, multi-layered artwork. Utilize the wide square tip for dark gradient ombre transitions that shift into intense fluorescent glowing ends.
Stiletto Nails
The sharp tip of a stiletto nail is ideal for edgy, aggressive aesthetics. Paint glowing sharp drip tips, luminous cat-eye streaks, or radioactive potion effects that converge at the razor-sharp point.
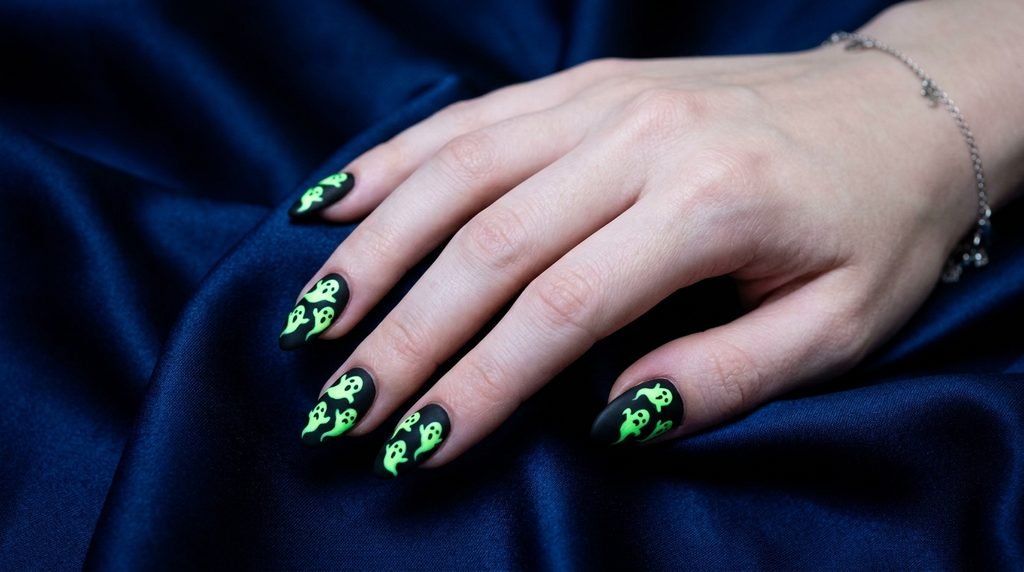
Electric Neon Glow Ghost Silhouettes
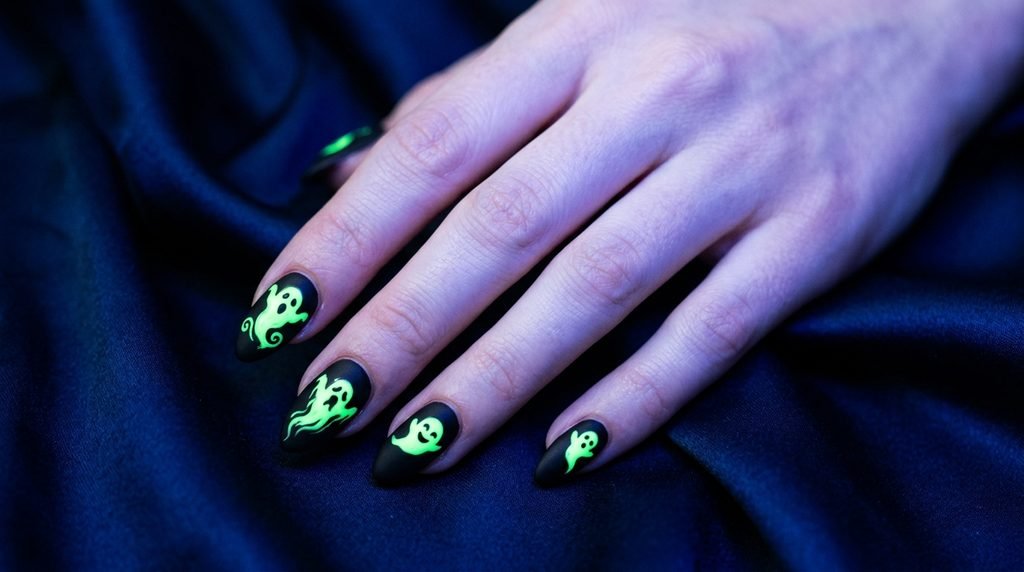
Cute halloween nails do not have to feel childish. You can create adorable, high-contrast ghost figures that look bright white by day and emit a vivid neon green glow under blacklight.
Start with a matte black base layer to set a moody tone. Paint soft, floating ghost silhouettes across the center of your nails using white gel. Layer your green phosphorescent polish cleanly over the bodies. Add microscopic black gel dots for eyes and open mouths using a small dotting tool.
When you transition into a blacklight room, the floating ghosts pop off the matte dark backdrop instantly.
Radioactive Slime Dripping French Tips
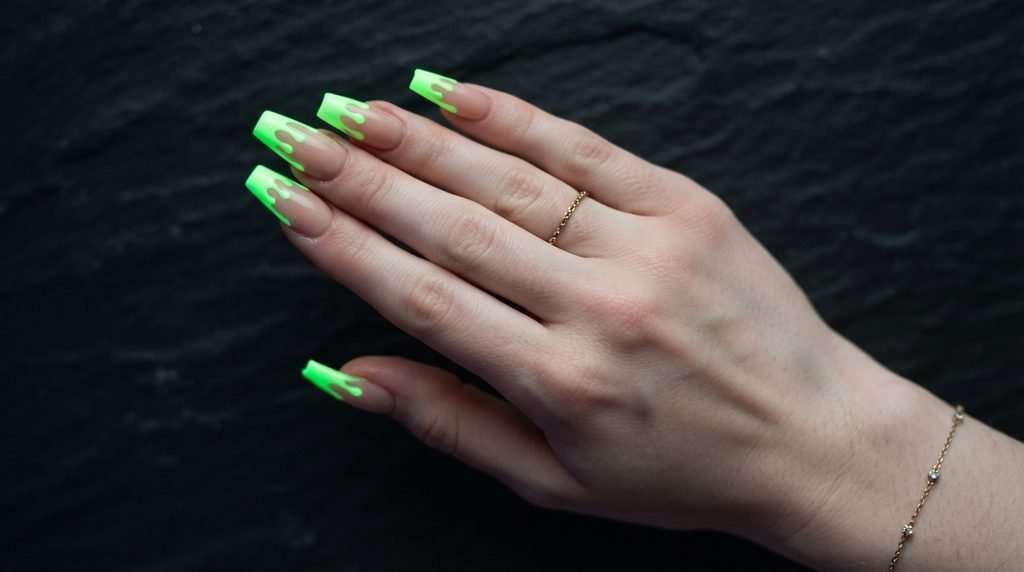
Upgrade the classic French manicure into a spooky look with neon slime drips. This style looks striking on long coffin or almond nails.
Paint the nail bed with a sheer, nude gel base to elongate your fingers. Using a fine detail brush, map out curved drip lines across the free edge with white paint. Fill the tips with neon yellow-green UV-reactive gel polish.
Add a small drop of dark gel art paint inside the thickest part of each drip to create a 3D depth illusion. Under blacklight, the tips radiate an intense toxic-green light while the nude base remains subtle.
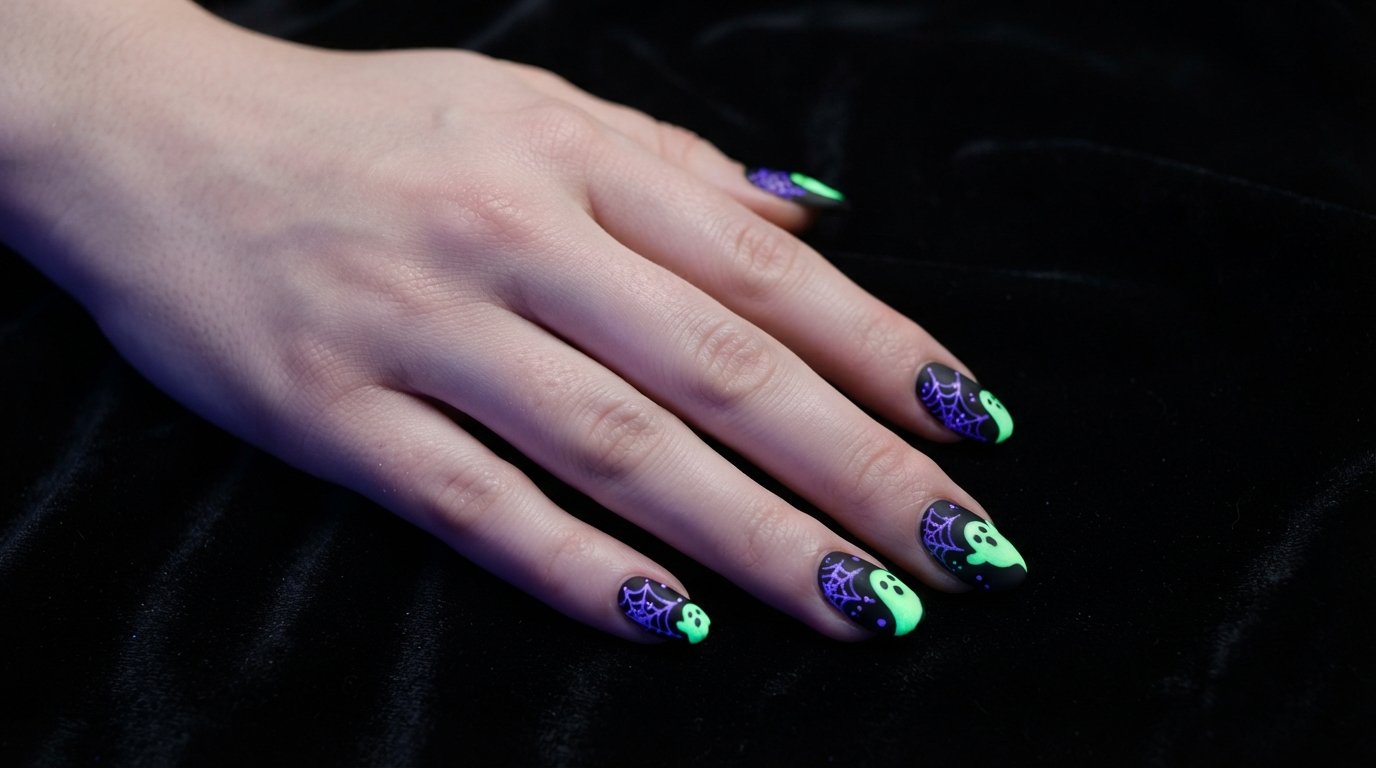
Blacklight Reactive Spiderweb Accent Nails
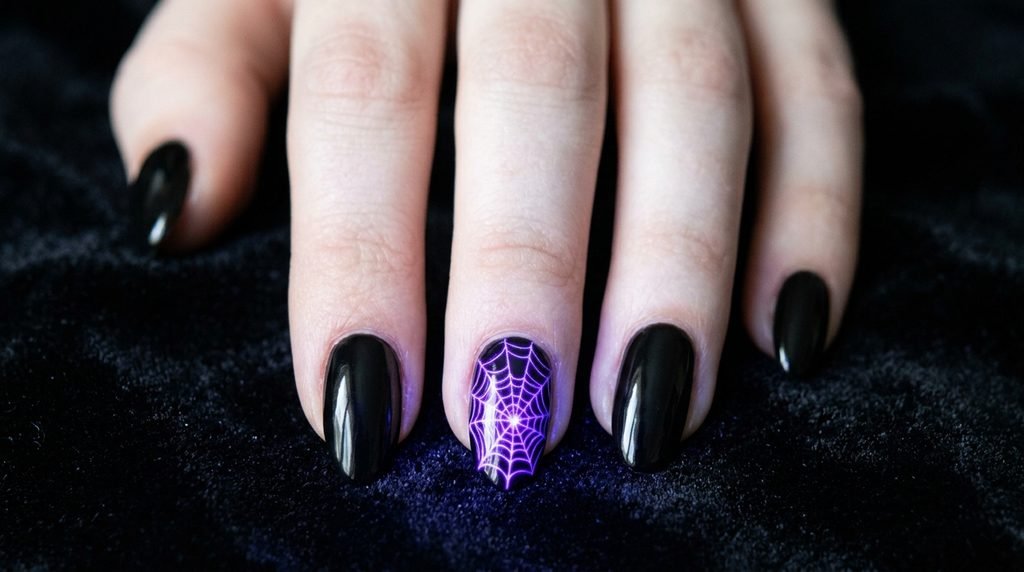
Spiderwebs are a timeless choice for spooky nails, but adding UV-reactive gel brings modern drama to the classic motif.
Keep three nails solid midnight black and save your ring finger for the accent web design. Draw fine lines radiating from the corner of the nail plate toward the opposite edge. Connect the spokes with gentle, inward-curving web arches.
Use an electric purple UV-reactive paint over white guide lines. Under natural light, the purple web looks chic and understated. Under UV blacklight, it glows like an electric violet spiderweb caught in motion.
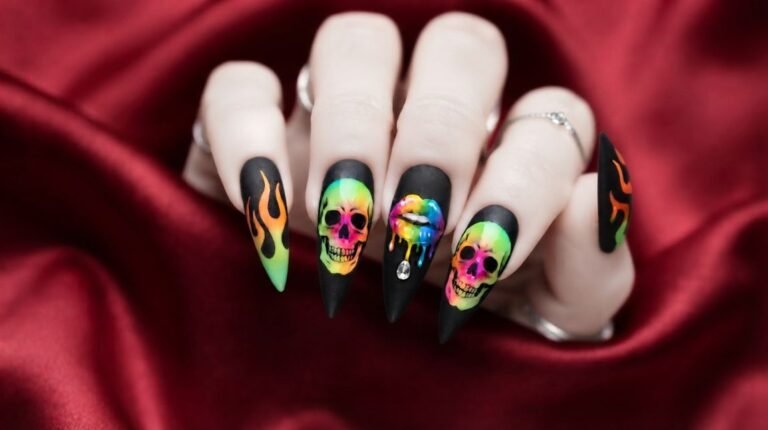
Glowing Neon Skull Nail Art
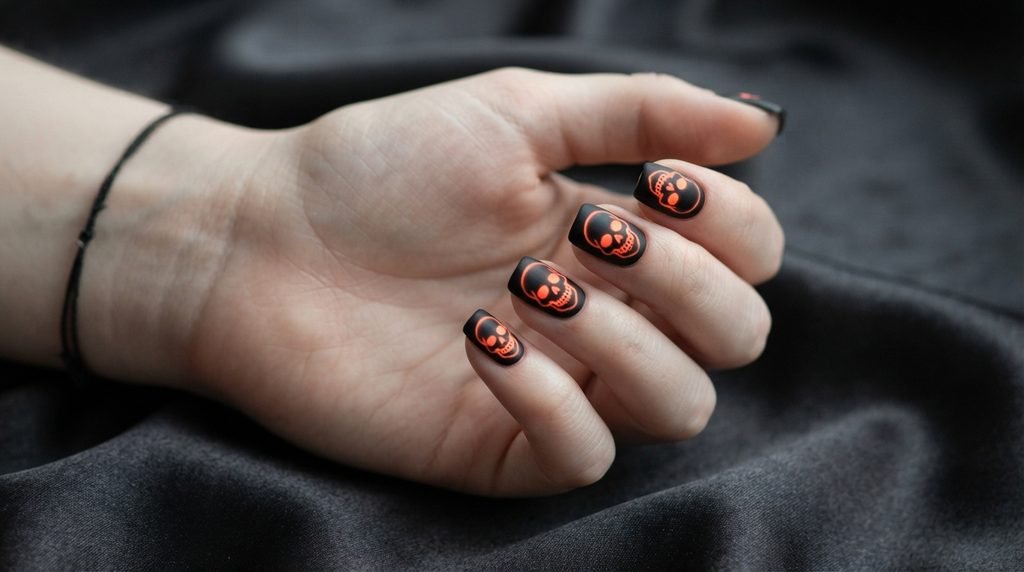
Neon skulls offer a sharp, modern edge for anyone seeking bold halloween nail ideas. This look pairs exceptionally well with short or medium square shapes.
Paint your base coat black, then map out anatomical skull shapes in white gel. Focus on crisp jaw outlines, dark eye sockets, and hollow nose cavities. Fill the white bone structural areas with orange UV-reactive pigment.
Keep lines thin so the facial features remain distinct from a distance. The intense neon orange glow creates a striking contrast against the dark base when party blacklights switch on.
Luminous Ombre Gradient Halloween Nails
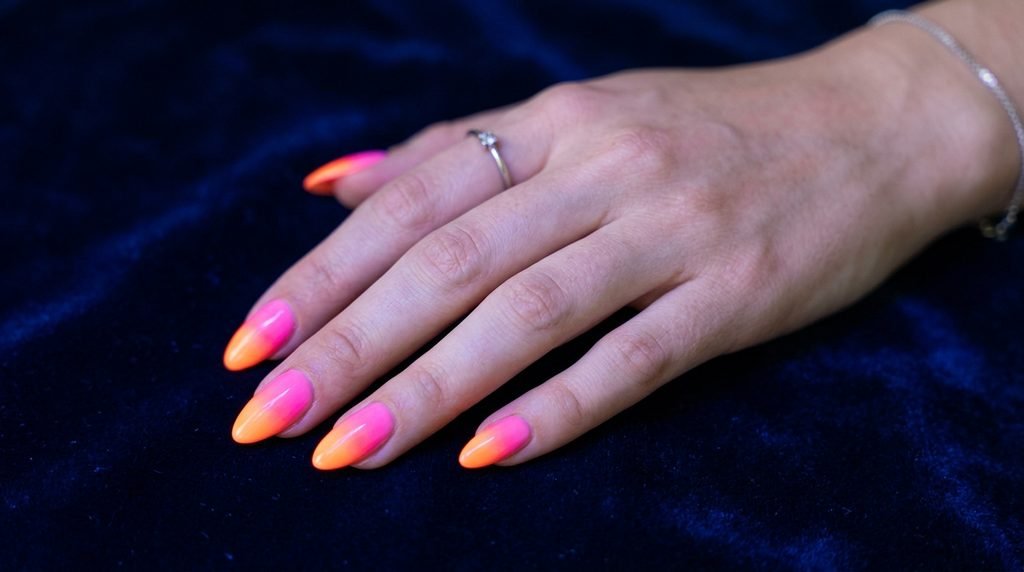
Gradient nail art provides a soft, atmospheric background that glows beautifully in low-light environments.
Sponge a vibrant neon pink and bright orange gel gradient over a cured white base coat. Use a damp ombre brush to blend the transition line smoothly before curing. Dust phosphorescent glow powder onto the tacky inhibition layer of the gel to lock in luminescence.
Seal the gradient under a high-shine top coat. The result is a smooth, sunset-hued glow that transitions seamlessly into electric pink-orange under UV light.
UV Reactive Pumpkin Face Designs
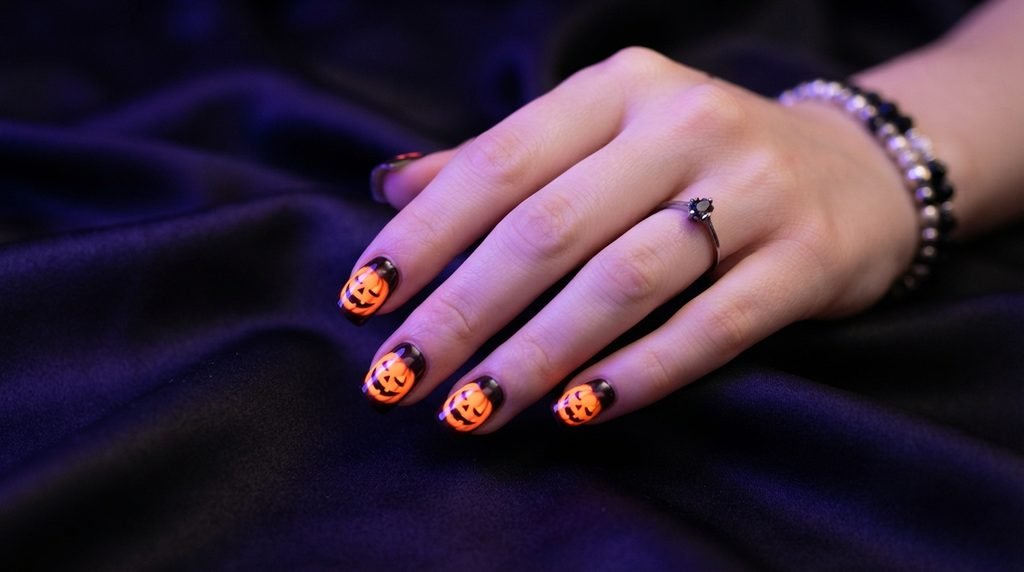
Jack-o’-lantern faces are a seasonal classic. Using UV-reactive orange gel gives this traditional design an unexpected night-out upgrade.
Apply two coats of bright orange cream polish over all nails as your foundation. Use a dense glow-in-the-dark orange gel to outline and fill the pumpkin surface. With a fine liner brush and black gel, paint sharp triangular eyes, jagged smiles, and stem accents across the center.
The black features stay completely dark, creating sharp, sinister cutouts while the orange pumpkin skin glows around them under blacklight.
Biohazard Radioactive Toxic Waste Art
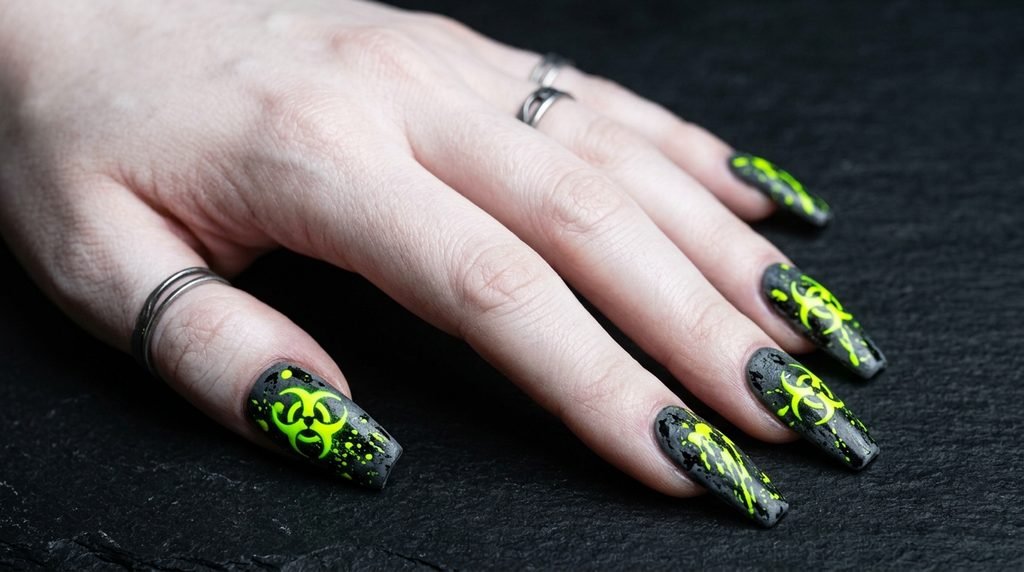
For a bold, industrial aesthetic, biohazard motifs deliver high visual impact with electric green luminescence.
Create a distressed base by sponging gray and charcoal gel over black polish to mimic concrete. Paint bright lime green biohazard symbols on the center of accent nails using UV-reactive gel over white underlays. Add splatter marks by flicking a stiff fan brush dipped in luminous yellow gel.
This design creates an edgy, hazardous vibe that lights up under blacklights at parties.
Neon Glow Moon and Stars Celestial Art
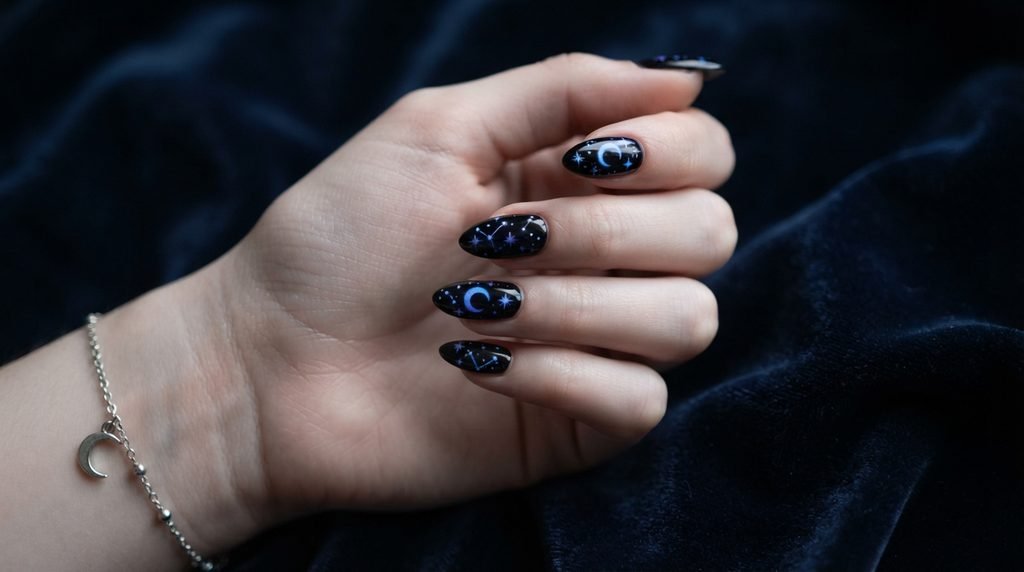
Celestial themes offer an elegant, magical approach to halloween nails designs without leaning entirely into horror.
Paint your nails in a deep midnight blue or rich black shade. Outline thin crescent moons, tiny eight-point stars, and subtle dot constellations with white gel paint. Fill these delicate celestial shapes with blue and purple glow polish.
Under daylight, you get a clean, starry night sky. Once under UV lighting, the moon and stars light up like brilliant galaxies on your fingertips.
Glowing Blood Drips on Matte Black
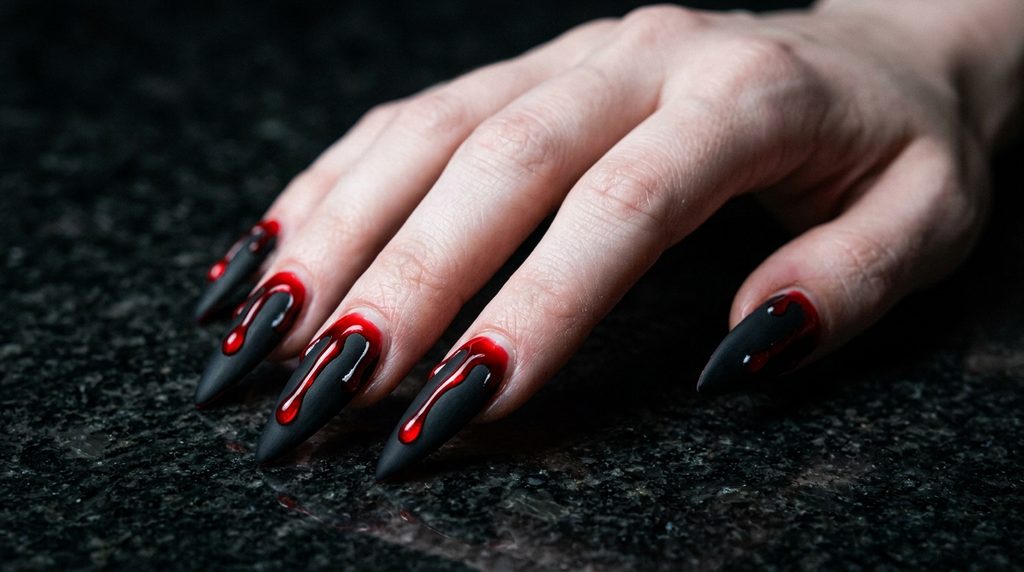
Dripping blood accents take on an eerie, futuristic aesthetic when executed with UV-reactive neon red gel over a velvety matte background.
Apply matte top coat over a deep jet-black base and cure completely. Using a high-gloss, neon-red UV gel, paint heavy blood drips extending down from the cuticle line toward the free edge. Leave the dark base matte while keeping the glowing red drips glossy.
The contrast between the soft matte black canvas and the glowing, raised red drips adds incredible tactile and visual texture.
Luminous Cat-Eye Spooky Aura Nails
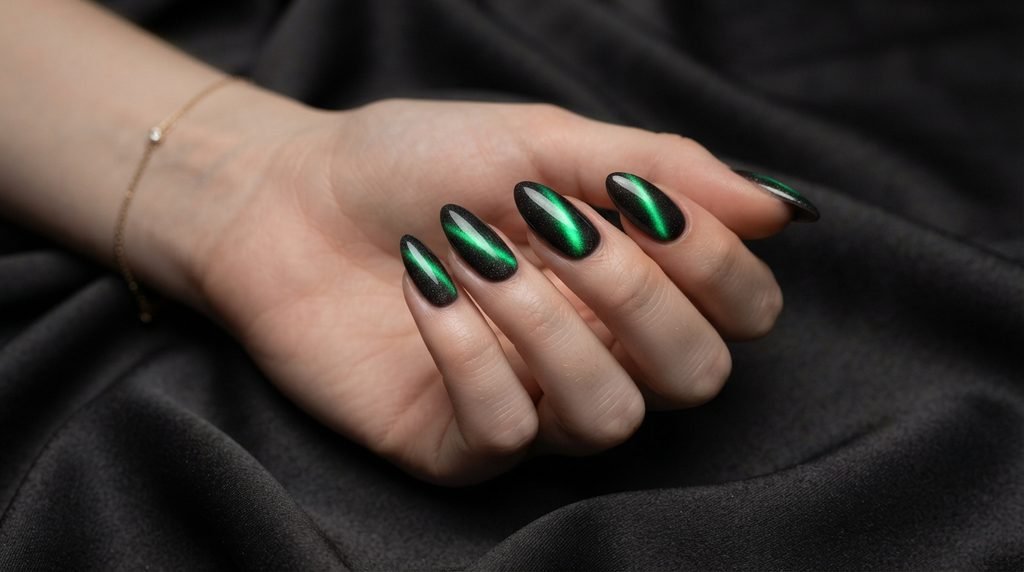
Magnetic cat-eye polish offers depth, but combining it with phosphorescent pigments creates a hypnotic aura effect.
Apply a black base layer, then paint a layer of velvet magnetic gel mixed with glow pigment. Hold your magnet diagonally across the nail for ten seconds to pull the metallic particles into a central, shimmering beam. Flash cure immediately.
In normal light, you see a sleek metallic shimmer. In total darkness, the magnetic center band emits a soft, misty aura light.
Glow-in-the-Dark Mummy Wrap Nail Design
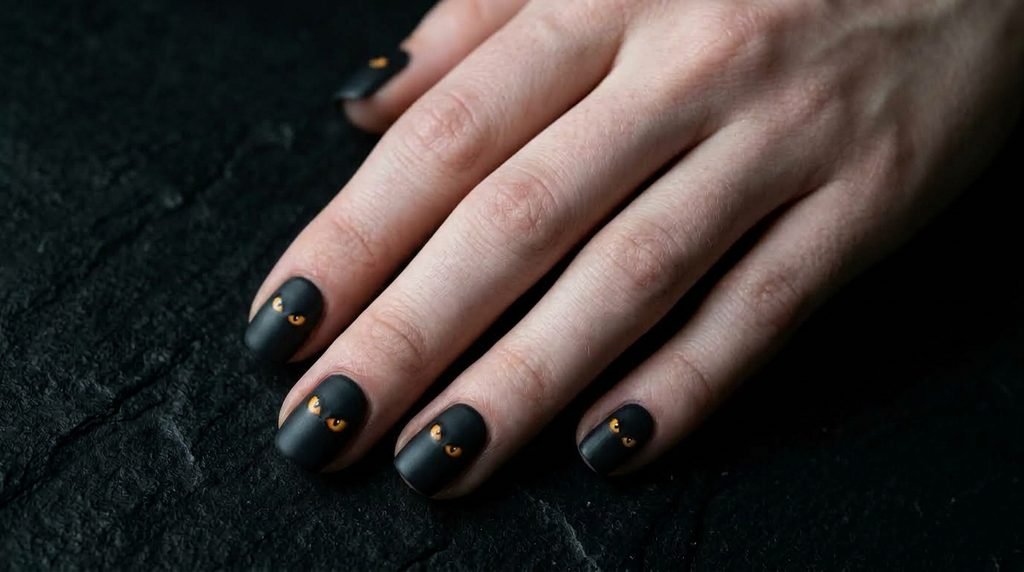
Mummy designs are simple halloween nail designs that offer fantastic texture and high visual contrast.
Start with an opaque black base coat. Using a flat gel striping brush, crisscross textured off-white gel lines across the nail to mimic wrapped fabric bandages. Layer green glow polish over select bandage strips. Paint two small yellow dots peaking out from a dark gap, adding micro black pupils inside.
The textured mummy wraps glow vibrantly under blacklight, revealing spooky eyes peering out from the dark.
UV Reactive Acid Snake Skin Texture
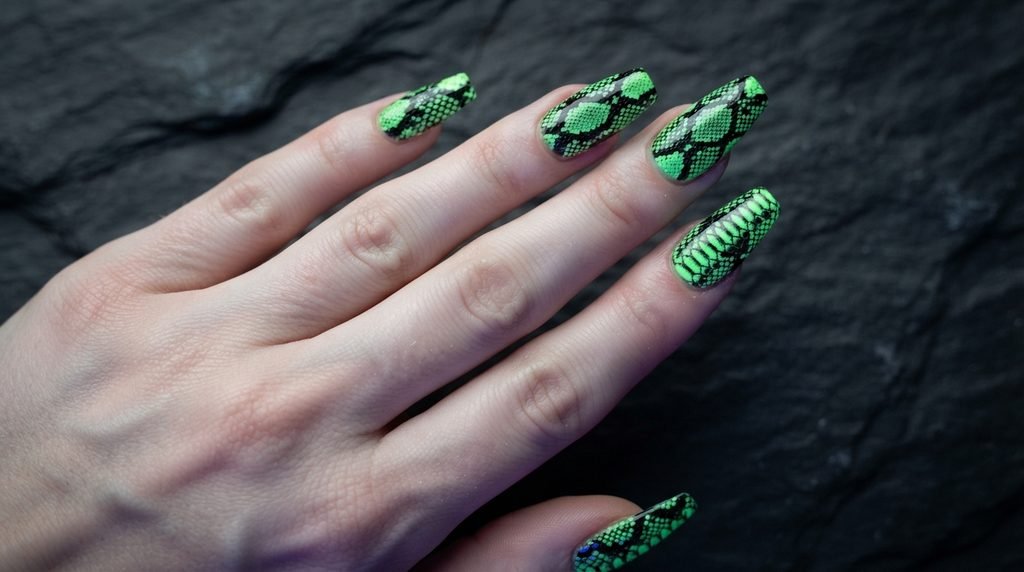
Snakeskin prints are trending heavily for fall, and adding UV-reactive accents gives them an eerie seasonal twist.
Paint a bright neon-green base layer and cure. Place a thin netting or mesh stencil firmly over the nail plate. Sponge black gel polish over the netting to create crisp scale patterns, then remove the stencil carefully. Apply phosphorescent clear gel over the green scale centers before sealing.
The contrast between opaque black scale borders and glowing neon centers creates an exotic reptile effect.
Electric Purple Luminous Witchy Magic
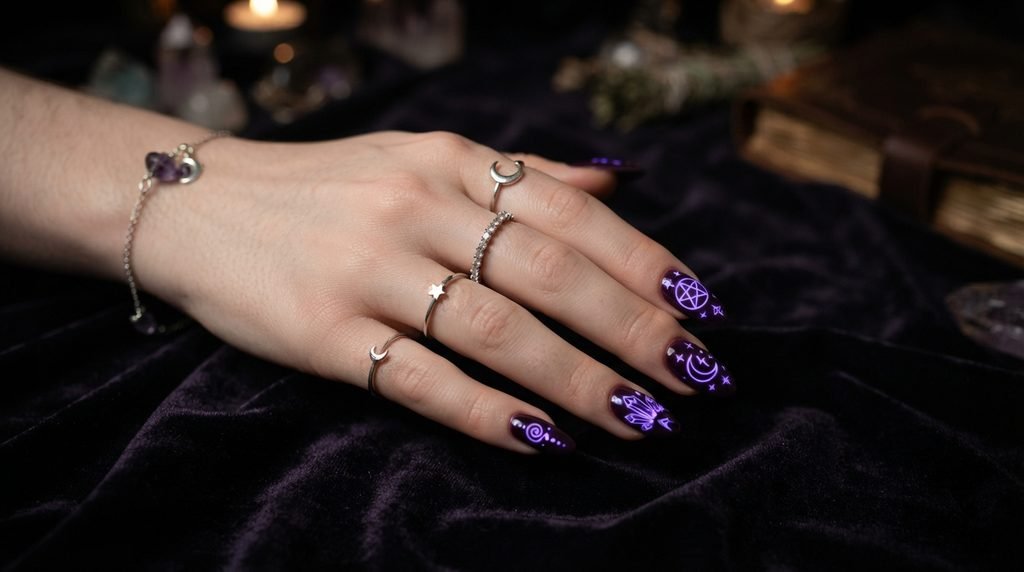
Capture a mystical, witchy mood using deep violet tones paired with vibrant purple UV-reactive paint.
Paint a dark plum or black base coat across all five nails. Sketch magical symbols—such as planchette outlines, crystal shapes, and potion bottles—using fine white detail paint. Layer fluorescent purple paint over the artwork to make it pop.
This design looks mysterious by day and converts into an electric, glowing spell kit under UV party lights.
Neon Flame Halloween Nail Art
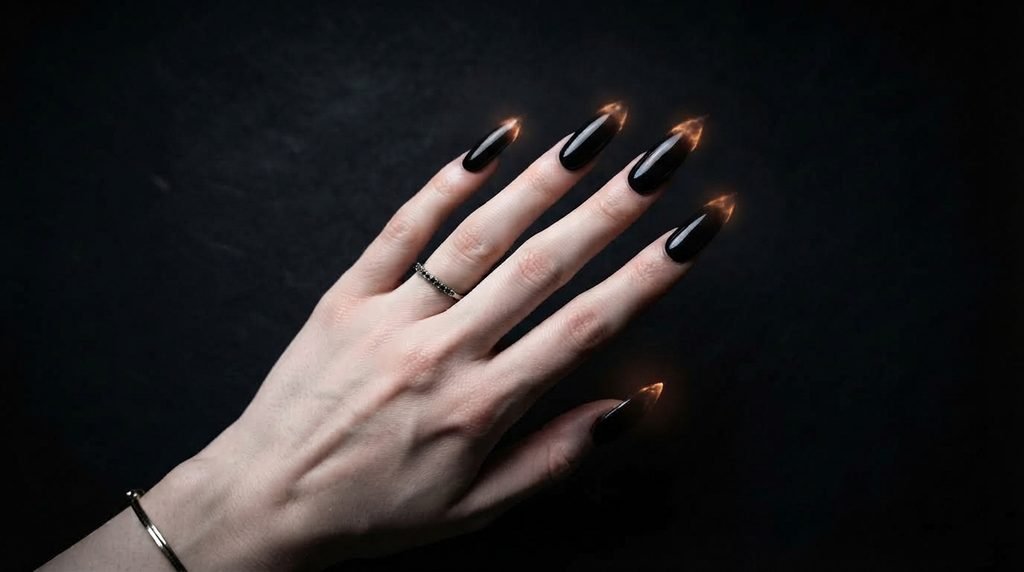
Fire designs gain incredible energy when painted with fluorescent glow pigments that ignite under blacklight.
Apply a solid black gel base for optimal contrast. Map out fluid flame shapes rising up from the free edges toward the cuticle using a detail brush and white art paint. Layer fluorescent yellow at the base of the flames, blending into neon orange and red at the tips.
The fiery tips appear light and bright in daylight, but turn into blazing light sources under UV blacklight.
Glow-in-the-Dark Frankenstein Stitches
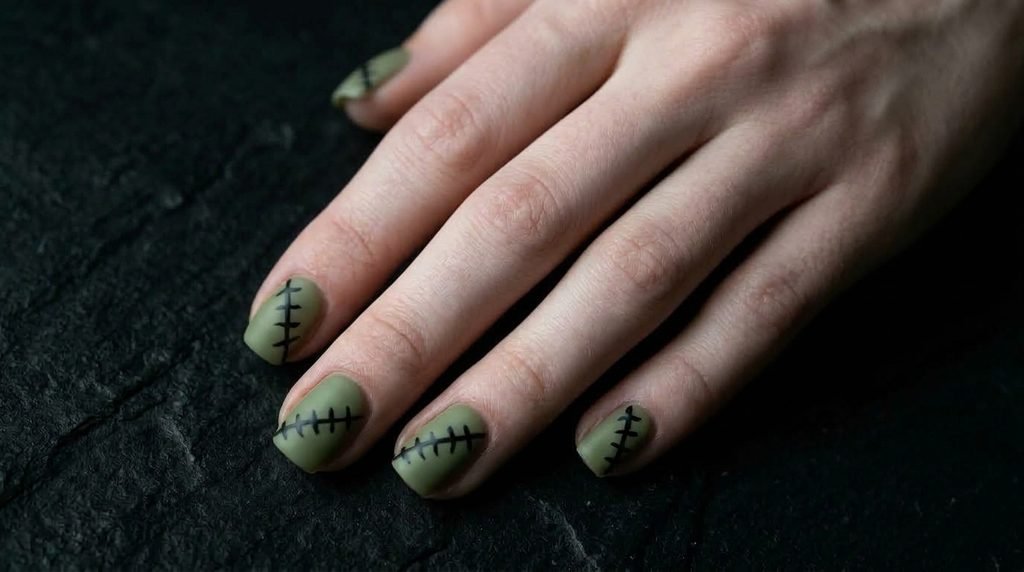
Frankenstein-inspired nail designs offer fun, patchwork aesthetics that work exceptionally well on short square nails.
Paint two coats of muted olive green or bright sage polish as your canvas. Draw jagged black stitch lines crisscrossing the corners and sides of the nail plate. Accent the green skin sections with clear phosphorescent top gel to create an all-over radioactive glow.
The dark stitch marks cut through the luminous green surface, giving your manicure a classic monster look.
Spooky Eyeball Pattern Luminous Art
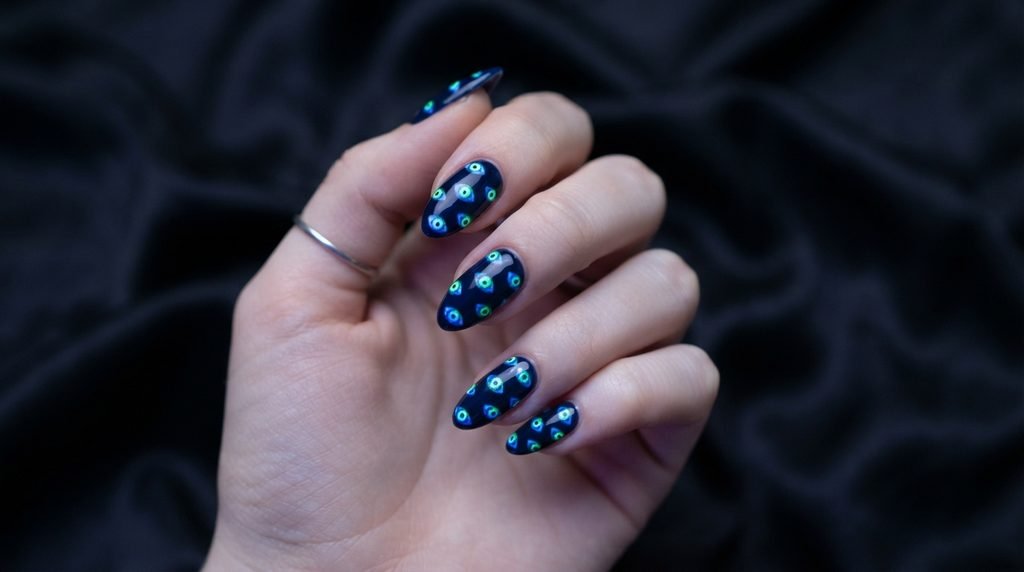
Eyeball patterns provide a surreal, edgy vibe that feels playful and bold for Halloween events.
Paint a dark navy or black background. Use a dotting tool to place white gel circles scattered across the nail plate. Fill the center of each white circle with electric green or blue UV-reactive iris dots, then add a tiny black pupil in the center.
Under ambient blacklight, dozens of tiny luminous eyes appear to stare out from your fingertips.
UV Blacklight Candy Corn Gradient
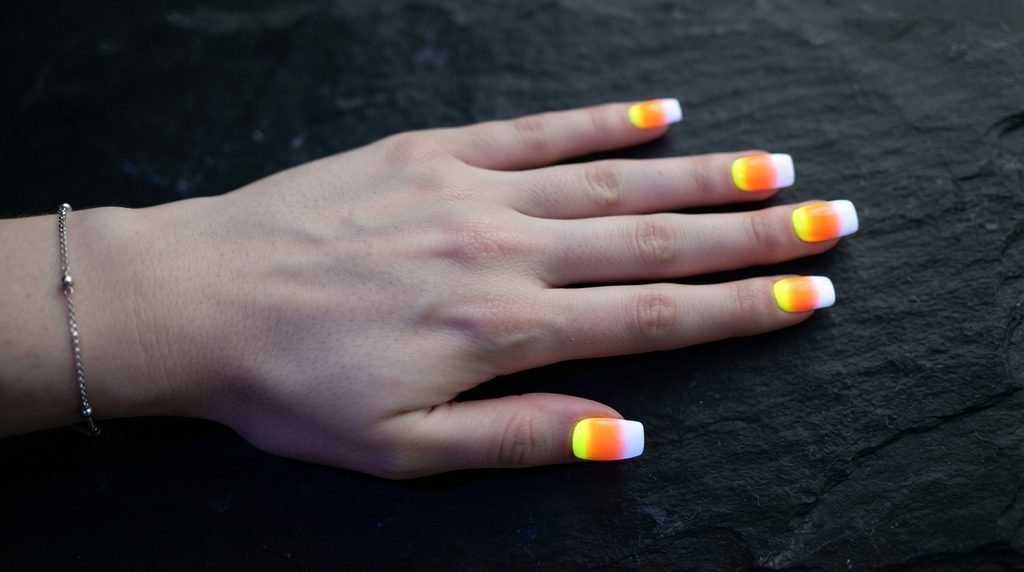
Candy corn colors are a seasonal mainstay, and using neon formulations gives this sweet look a bright makeover.
Sponge a smooth tri-color gradient onto a white base layer: bright yellow at the cuticle, vibrant orange in the middle, and crisp white at the free edge. Use UV-reactive formulations for both the yellow and orange sections.
This bright approach keeps the iconic candy pattern recognizable while giving it an intense fluorescent pop at night.
Luminous Poison Apple Drip Nails
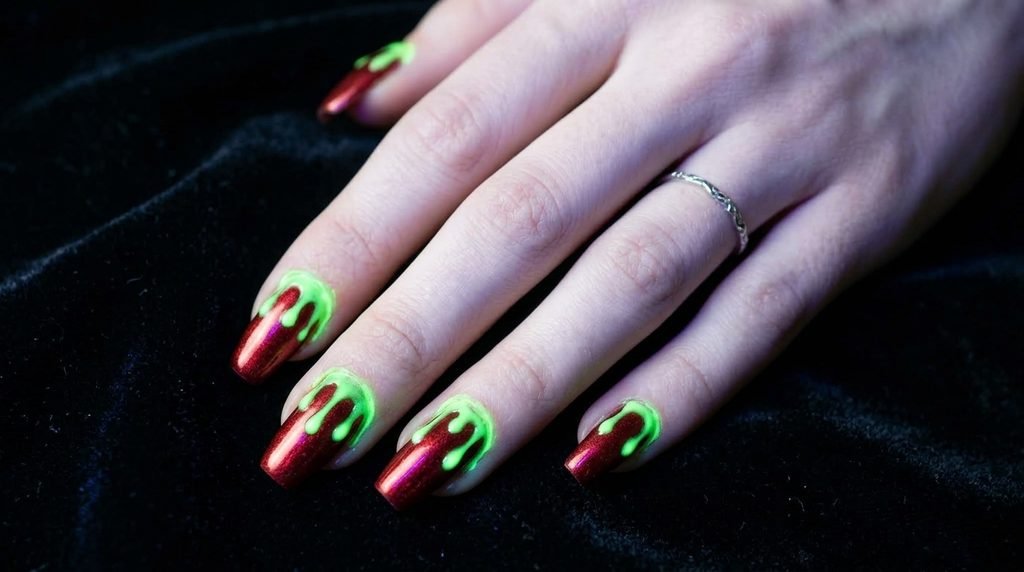
Inspired by fairy-tale villains, poison apple designs pair rich crimson shimmer with toxic neon green glow drips.
Apply a deep metallic red or ruby cat-eye polish across all nails. Over the top half of the nail, paint dramatic, thick green drips oozing down from the cuticle using neon UV-reactive gel over a white underlay.
The contrast between the deep metallic red base and the radioactive green glow creates an instantly recognizable, villainous look.
Glowing Spider and Cobweb Combo
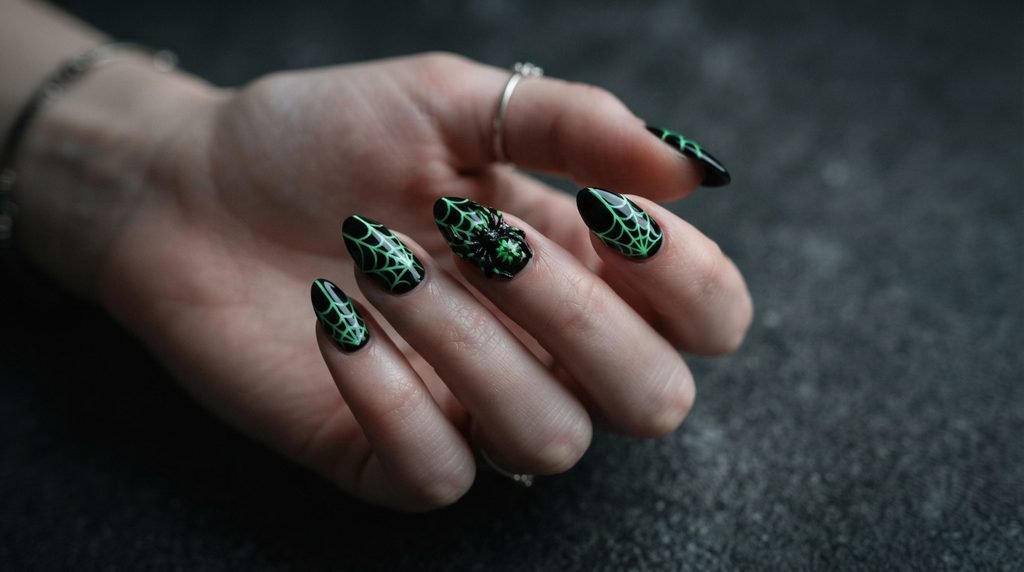
Combining realistic spider art with luminous webs creates depth and drama across your hand.
Paint all nails in a glossy jet-black shade. Draw ultra-fine glowing webs over the index and pinky fingers using luminous white-green polish. On the accent middle finger, paint a detailed 3D spider body using black builder gel, and highlight its legs with tiny neon glow dots.
The bright webs surround the dark 3D spider, making the spider look like it is floating over glowing threads.
Neon Glow Haunted House Silhouette
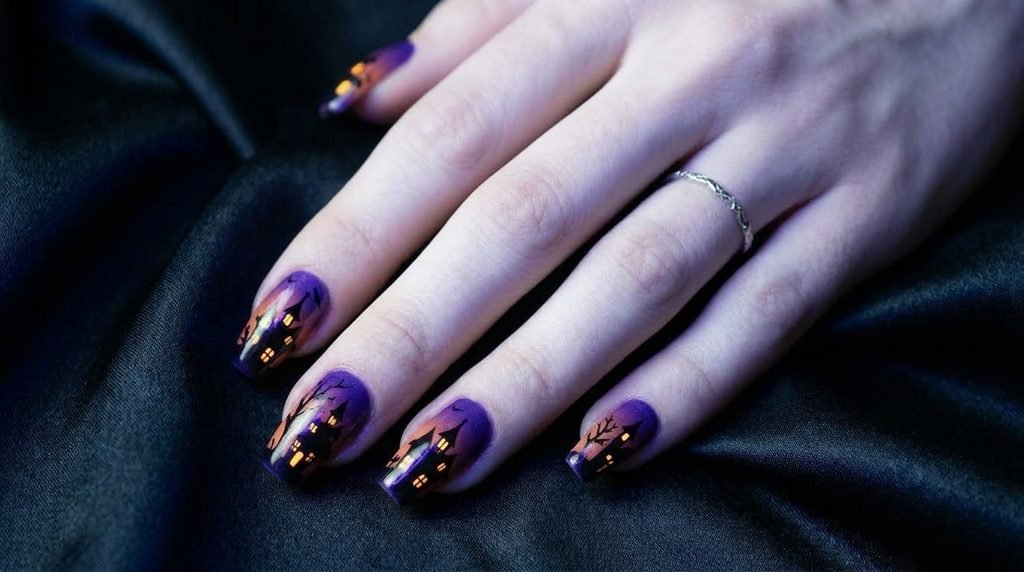
Haunted house silhouettes look breathtaking on long almond or coffin nails where you have space for detailed landscape art.
Create a smooth purple-to-orange twilight gradient across the nail plate. Draw precise black silhouettes over the gradient: crooked house roofs, bare trees, flying bats, and broken fences. Paint small house windows with bright yellow UV-reactive paint.
The glowing windows shine like lit lanterns inside dark, spooky houses under UV light.
Abstract Glow Splatter Halloween Nails
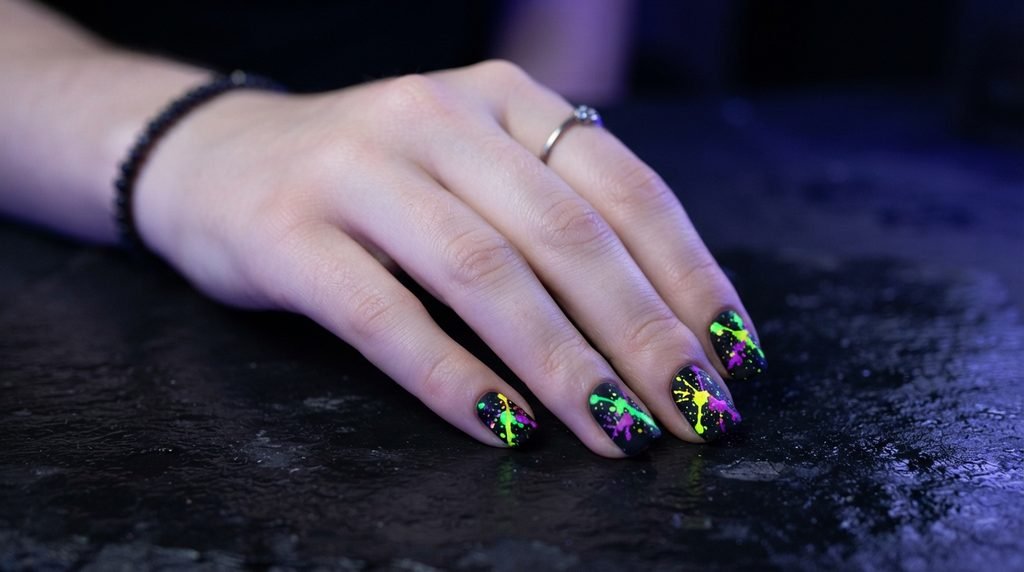
If detailed hand-painting feels intimidating, abstract splatter art delivers a trendy look with minimal precision needed.
Paint your nails with two coats of velvety matte black polish. Dip a short, stiff nail art brush into bright neon glow gel mixed with a tiny bit of alcohol to thin it out. Flick the bristles over your nails from a few inches away to create randomized, artistic splatter lines. Flash cure immediately.
This technique creates a high-energy, Jackson Pollock-inspired neon look that lights up effortlessly under blacklight.
Salon Communication: How to Ask Your Tech for Glow Art
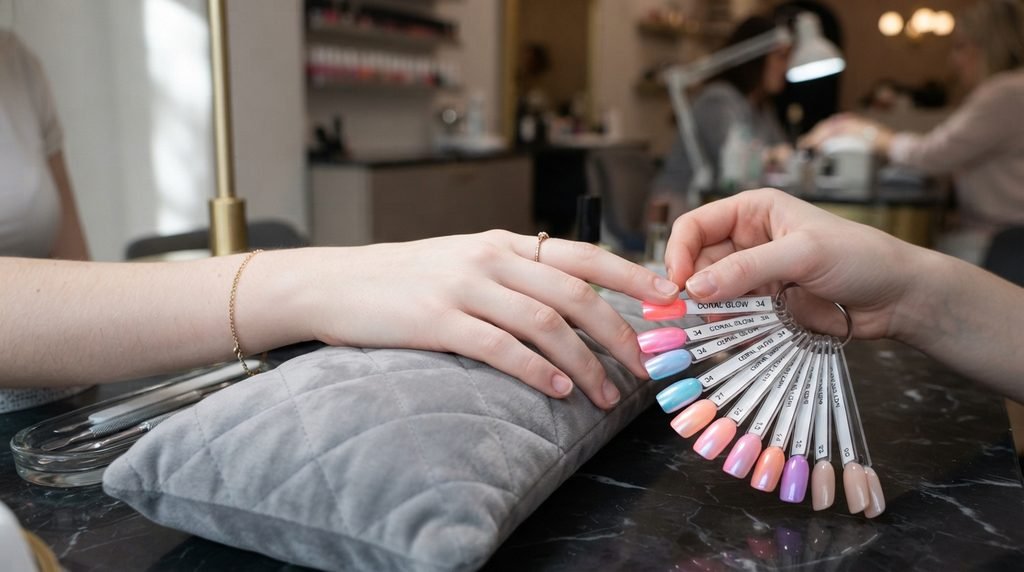
Getting exact nail art results requires clear communication with your nail technician before they begin painting.
- Specify Pigment Type Early: Tell your tech if you want standard darkness-glowing polish (phosphorescent) or blacklight-reactive neon polish (fluorescent). Many salons keep these in different gel drawers.
- Request a White Base: Ask your tech to use a white underlay beneath neon pigments over dark colors. You can say: “Could we sketch the shapes in opaque white gel first so the neon glow stays bright over the black base?”
- Budget & Time Planning: Glowing layered art requires extra flash-curing steps. Expect to add 20 to 30 minutes to a standard set time, with price upgrades typically ranging from $15 to $35 depending on art complexity.
Frequently Asked Questions
Does glow-in-the-dark nail polish actually work?
Yes, high-quality glow-in-the-dark nail polish works exceptionally well when applied correctly over an opaque base coat. Phosphorescent polishes absorb light energy from natural sunlight, UV lamps, or phone flashlights and slowly re-emit that light in dark settings. For maximum brightness, charge your nails under a light source for 30 seconds.
How long does glow-in-the-dark nail polish last?
When executed using professional gel polish and properly flash-cured under LED lamps, luminous nail art lasts between 2 to 3 weeks without losing its light-emitting capability. The encapsulated luminescent powders do not degrade quickly, meaning your nails will glow just as brightly on day 14 as they did on day 1.
What’s the difference between glow-in-the-dark and UV blacklight polish?
Glow-in-the-dark polish stores ambient light energy and glows soft green or blue in complete darkness without any light source present. UV blacklight polish requires continuous exposure to ultraviolet light fixtures to glow, producing intense, saturated neon colors that pop instantly in club environments.
What base color works best under glow polish?
Opaque white is the absolute best base color for maximizing luminosity. Applying glow polish over a white base reflects emitted light outward. If you want a black background, paint the black base coat first, sketch your design silhouettes in white gel, and layer your glow polish directly on top of the white paint.
Is glow-in-the-dark nail polish safe?
Modern professional glow-in-the-dark gel polishes and nail lacquers are completely safe to use. They utilize non-toxic, cosmetic-grade strontium aluminate or zinc sulfide pigments to capture and emit light. Always ensure you purchase cosmetic-certified nail products rather than craft powders to avoid skin irritation.
Conclusion
Creating show-stopping halloween nail art is all about strategic layering, contrast, and proper curing. By combining opaque black bases with white silhouette underlays and high-grade luminescent pigments, your spooky nails will look incredible in daylight and electrifying under blacklight.
Save this guide to your Pinterest board for your upcoming salon appointment, or test out these flash-curing techniques during your next DIY nail night. Which luminous design are you trying first?

Mia founded Daily Nail Idea after a decade in beauty editorial, tired of watching great nail art disappear into the scroll. She now leads the team’s editorial direction — deciding what’s worth featuring and what’s just noise — and still paints her own nails every Sunday night, no exceptions.