Burnt Orange & Black Halloween Mani-Pedi 2026: The Two-Color Set That Still Works on November 1
It happens every single autumn search for orange and black halloween nails. You get a spooky manicure on October 25th, and by November 1st, your bright pumpkin orange nails suddenly feel completely out of place.
If you are stuck on what to ask your nail tech for this week, I have the ultimate fix. You want a set that feels dark and festive for Halloween night, but transitions seamlessly into late autumn.
The secret lies in balancing dark burnt orange and glossy black. By keeping jet black as your dominant anchor color and using rich rust orange as a moody accent, you create orange and black halloween nails that look intentionally chic all through November.
In this guide, I am breaking down 25 high-end, two-color designs, step-by-step application guides, and shape guides to keep your nails looking fresh for weeks.
At-a-Glance: The November-Proof Strategy
Here is a quick preview of what is ahead in this ultimate styling guide. We are sticking to a strict two-color rule: deep, glossy jet black combined with a rich, burnt orange accent.
| Element | Color / Proportion | Effect |
| Dominant Color | Jet Black (70%) | Spooky and dramatic |
| Accent Color | Dark Burnt Orange (30%) | Warm and seasonal |
| Overall Color Combination | 70% Jet Black + 30% Dark Burnt Orange | Spooky for Oct 31 → Chic & Cozy for Nov 1 |
- The Color Ratio: Keep black as 70% of your set and burnt orange as 30% to avoid a plastic costume look.
- Zero White or Metallic: Skipping bright white, gold, or chrome prevents the design from looking busy or overly holiday-specific.
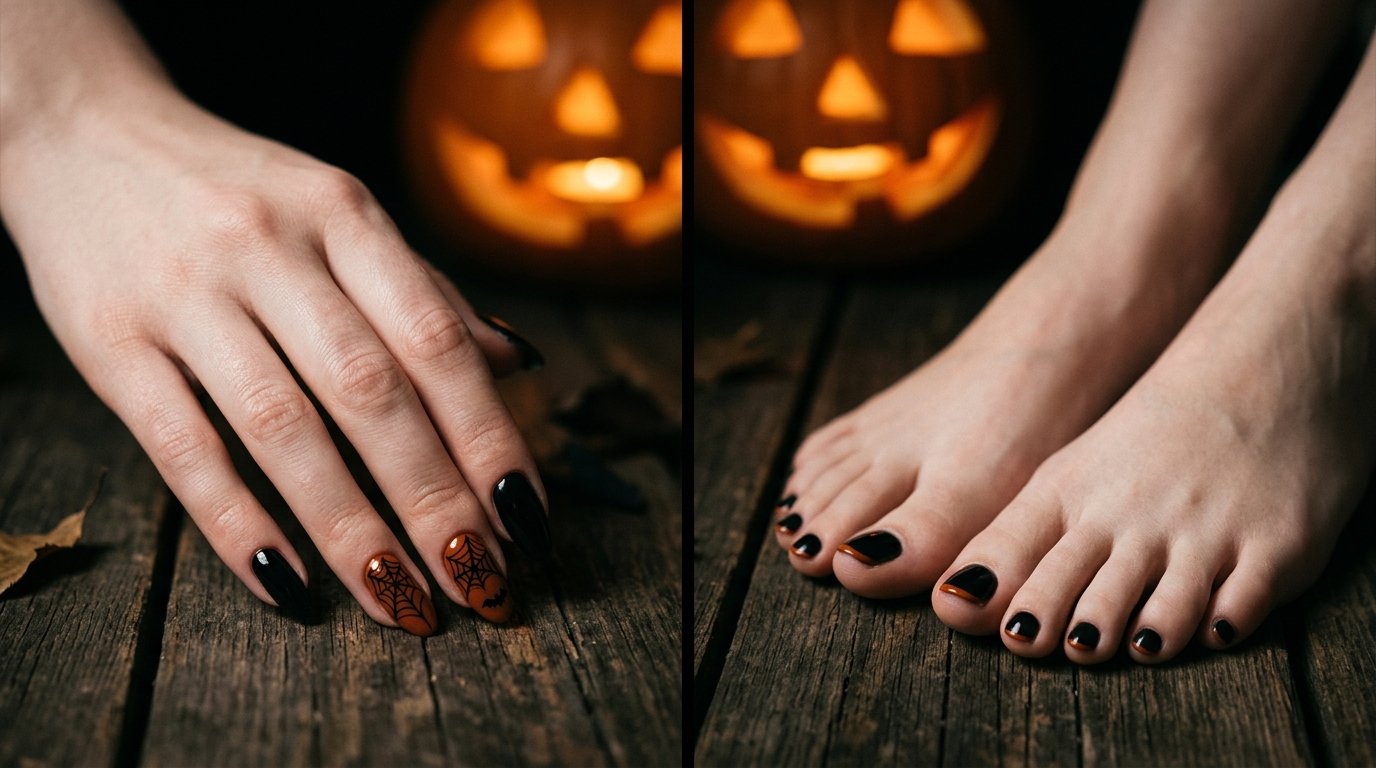
- Mani-Pedi Harmony: Anchor your toes in deep glossy black with minimalist rust tips, while playing with fine line art on your hands.
- Versatile Shapes: From short natural squares to long dramatic almonds, this dark palette flatters every length.
Why Deep Burnt Orange and Jet Black Work Past October
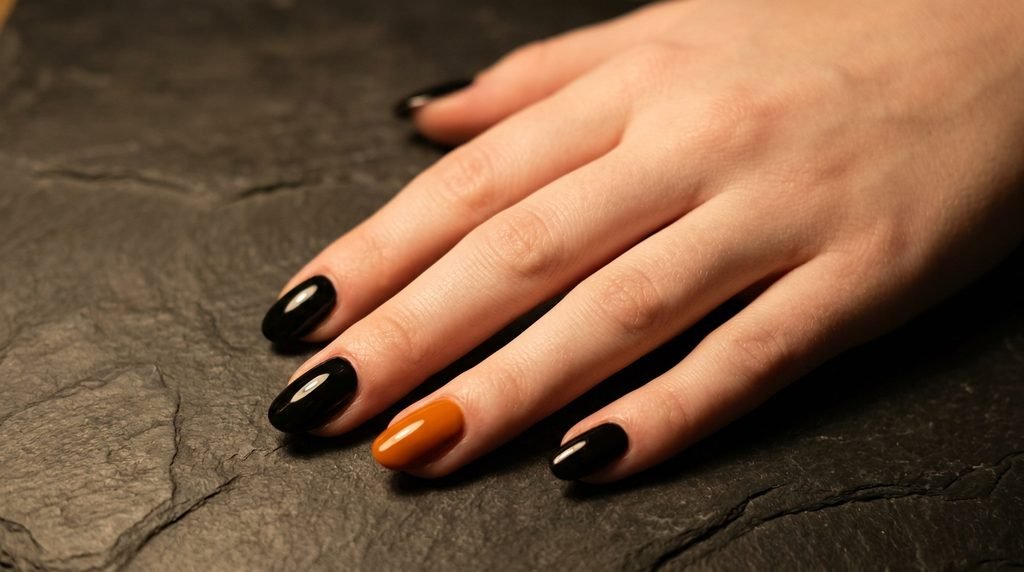
Bright neon orange instantly screams trick-or-treat. However, when you shift to a rich, deep burnt orange, the entire mood changes.
Burnt orange carries undertones of terracotta, rust, and warm amber. When paired with high-shine jet black, it creates a moody, luxurious contrast.
Black acts as a grounding neutral. On November 1st, a glossy black nail with a subtle rust accent simply looks like high-fashion fall art.
The 70/30 Color Ratio Strategy for Longevity
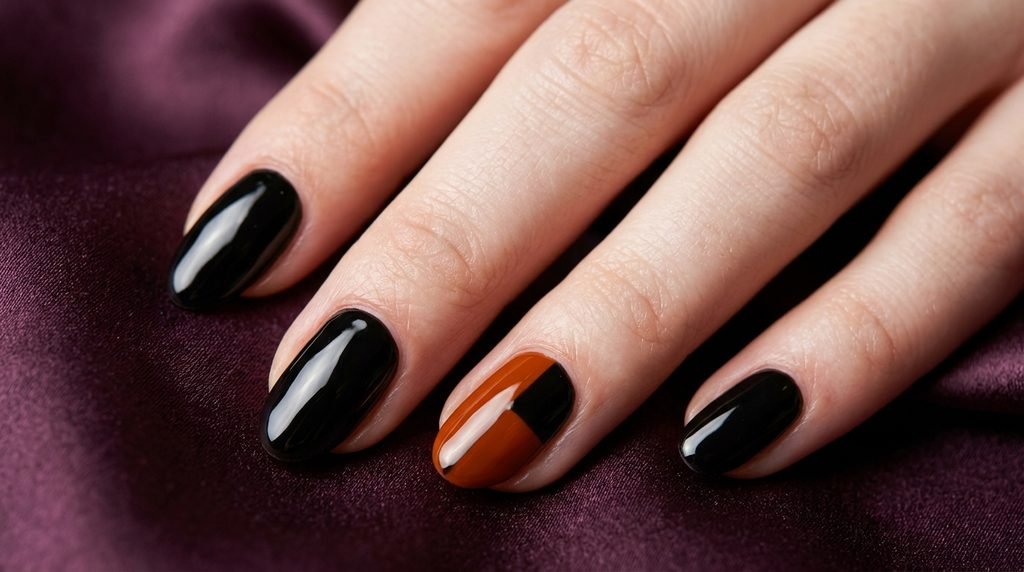
The biggest mistake people make with Halloween nails is using equal amounts of orange and black. Equal distribution creates a harsh grid effect.
Instead, apply the 70/30 rule. Make jet black your base on seven or eight nails across both hands.
Use burnt orange strictly for two accent nails or fine detail lines. This keeps the look elevated, modern, and versatile.
Two-Tone Pumpkin Tip Nails for Beginners
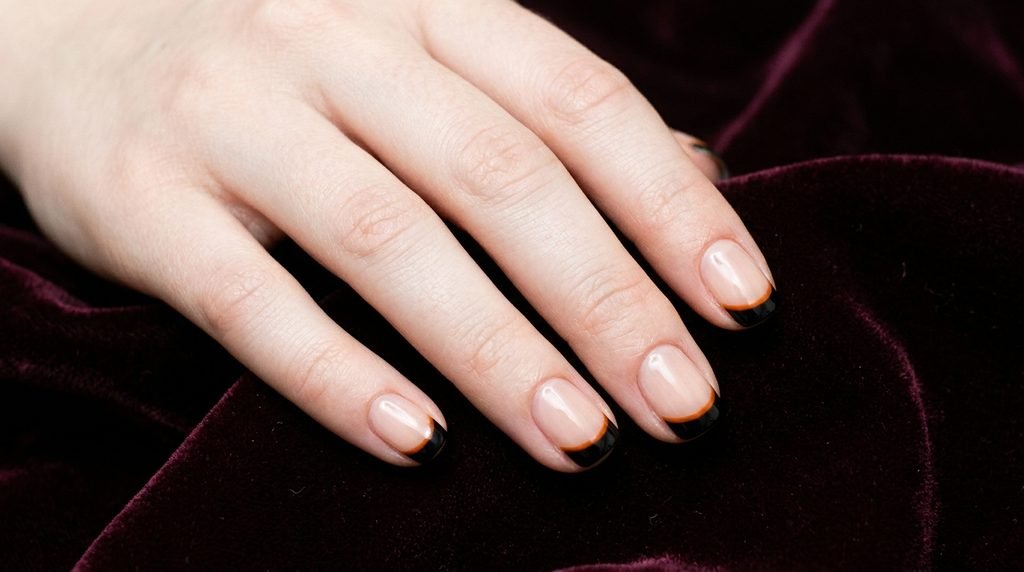
If you want a simple DIY look, two-tone pumpkin tips are exceptionally easy to create. Start with a clear or sheer nude base.
Paint the lower half of your nail tip with a thick line of glossy black. Then, add a curved burnt orange arch right along the top edge.
This double French design adds dimension without feeling overwhelming. It offers a subtle nod to spooky season while remaining understated.
Burnt Orange & Black French Tip Nails
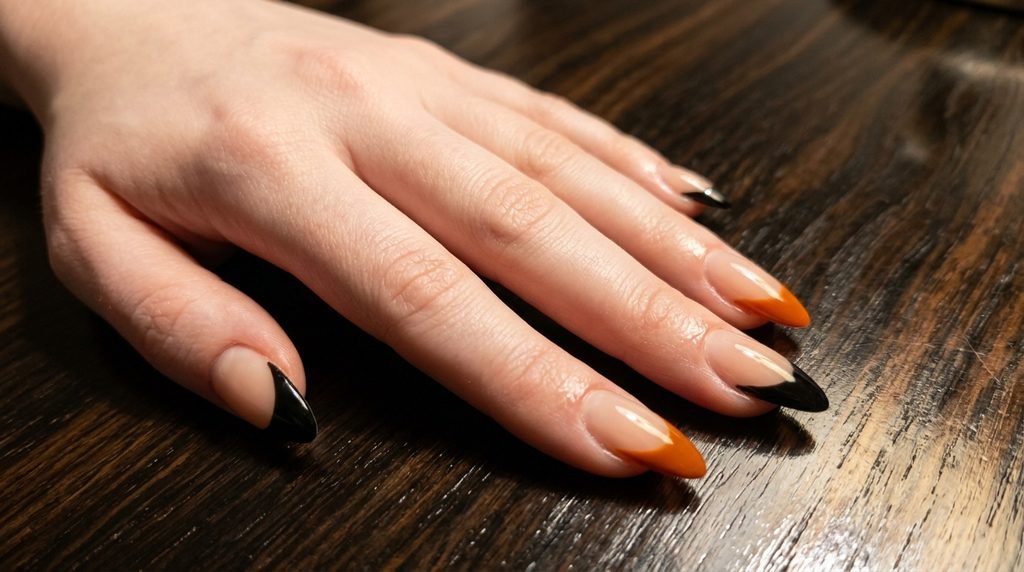
French tips never go out of style, but swapping classic white for dark tones creates instant drama.
Try alternating your tips. Paint four fingers in deep glossy black tips, and feature a warm burnt orange tip on your ring finger.
To keep lines crisp, use a thin detail brush. Smooth out the smile line before curing under your lamp.
Negative Space Crescent Moon Accents
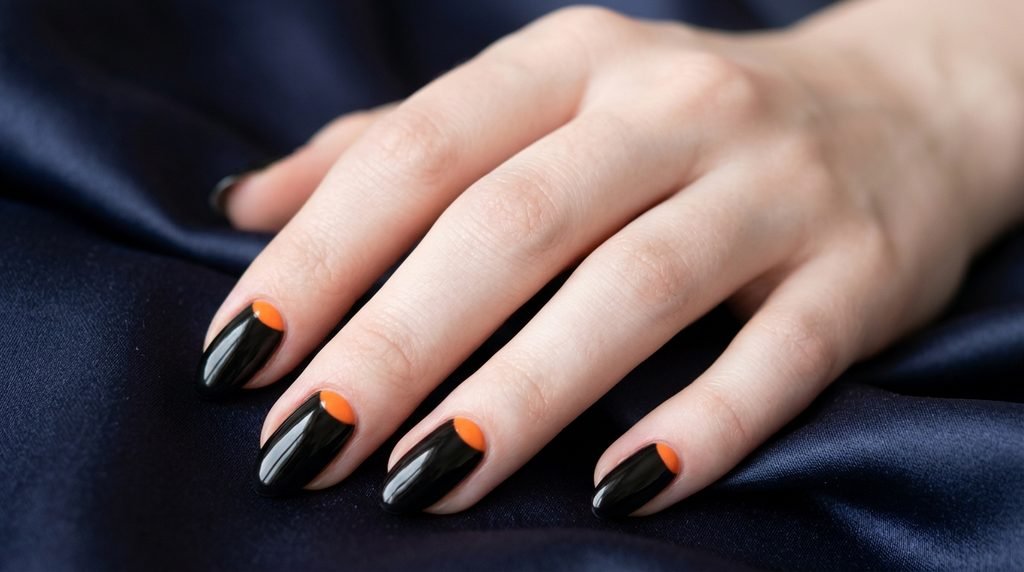
Negative space designs grow out beautifully, making them ideal if you want your manicure to last three to four weeks.
Paint your entire nail in jet black, leaving a tiny crescent moon shape bare near your cuticle bed. Fill that tiny crescent with burnt orange.
This subtle moon detail gives a gentle nod to witchy Halloween vibes. Yet, it looks like abstract minimalist art once November arrives.
Fine Black Spiderwebs over Burnt Orange Bases
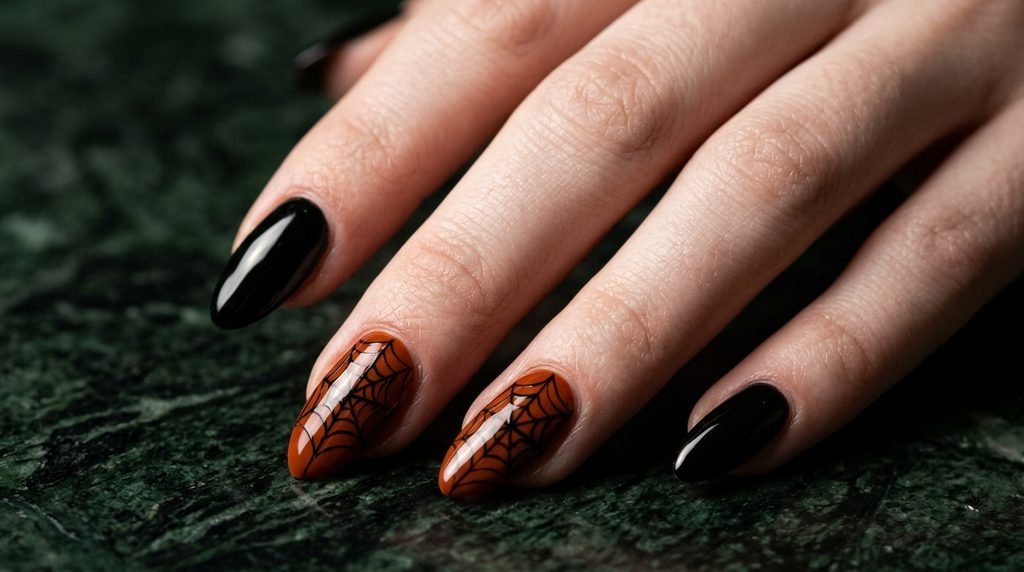
If you love nail art, spiderwebs are a classic choice. However, white spiderwebs can look stark and bright.
Instead, paint your accent nail in two coats of rich burnt orange. Once cured, use a long liner brush and jet black gel to draw delicate web lines.
Keep the lines ultra-thin. Delicate black linework against a dark rust backdrop looks intricate, moody, and sophisticated.
Minimalist Black Cat Silhouette Accent
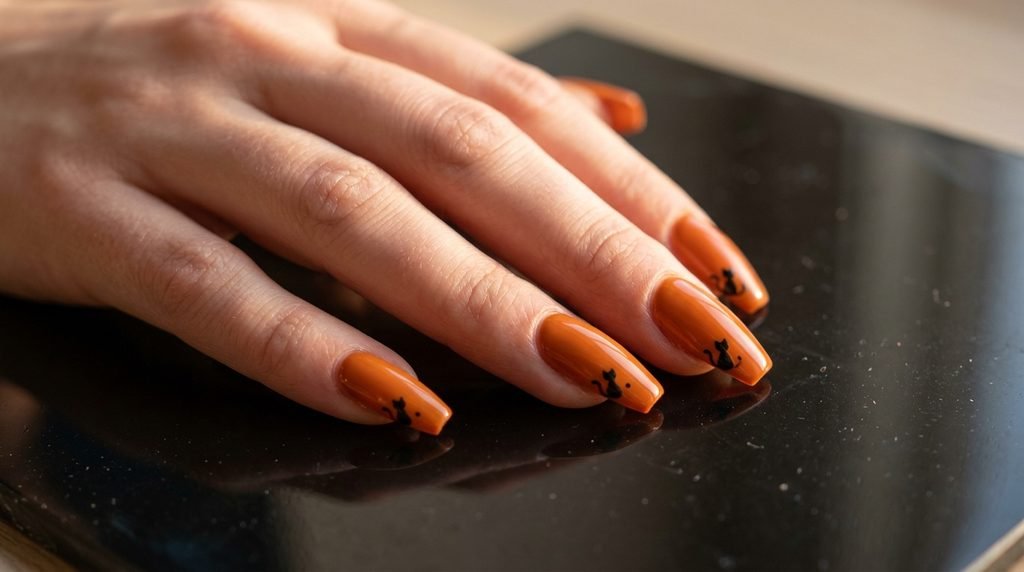
Black cat nail art does not have to look cartoonish. The key is placement and scale.
Apply a smooth coat of dark burnt orange as your base color. Near the sidewall of your nail, paint a tiny black circle with two sharp ears and a curved tail.
Leaving plenty of open orange space around the silhouette keeps the look refined rather than cluttered.
Gothic Micro Bat Line Art on Rust Bases
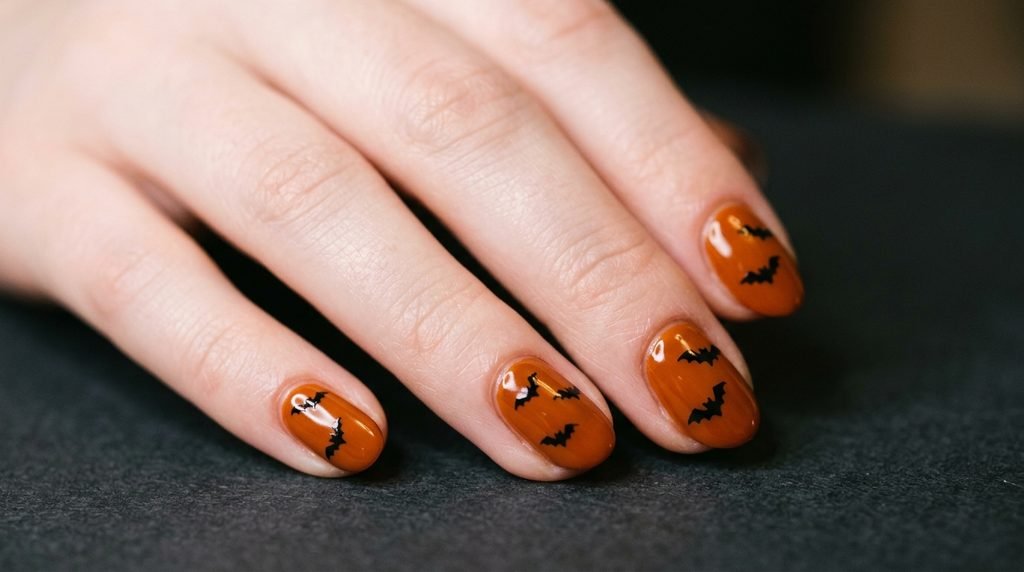
Tiny bat silhouettes offer a playful touch while maintaining an elegant aesthetic.
Paint one or two nails in dark burnt orange. Using your smallest detailing tool, place three tiny black dots in a horizontal line, then swoop thin wings outward.
Because the bats are tiny micro-accents, they appear as delicate dark specks from a distance. Up close, they reveal a charming seasonal detail.
Matte Black vs. Ultra-Glossy Finishes
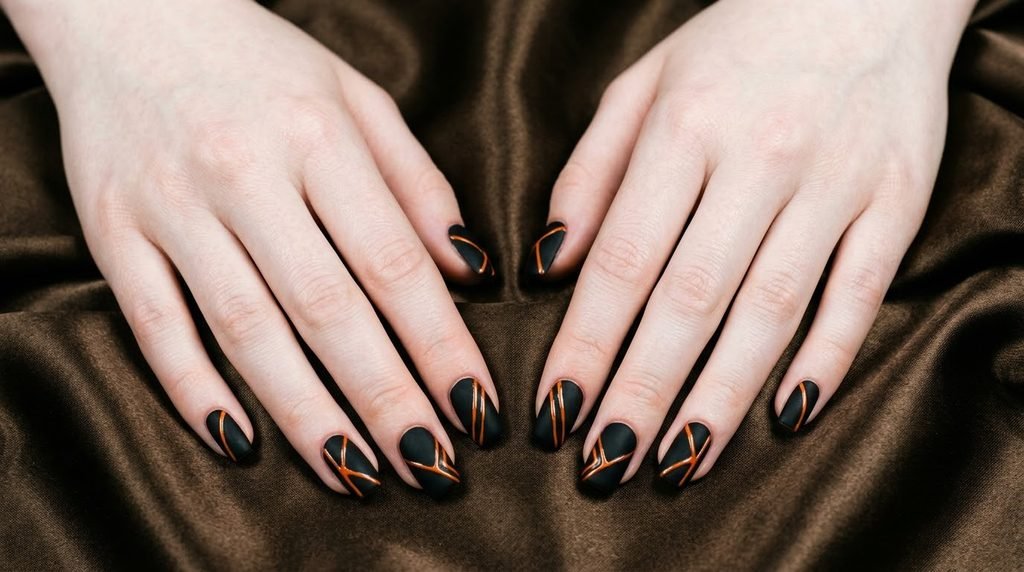
Choosing the right finish dramatically changes the vibe of your dark two-color set.
- Ultra-Glossy Finish: Reflects light, makes black look like polished onyx, and gives burnt orange a juicy, gem-like depth.
- Matte Finish: Dampens contrast, creating a smooth velvet texture that feels dark, moody, and cozy.
- Hybrid Combination: Matte black base nails paired with high-gloss burnt orange line art create striking tactile contrast.
For maximum durability into November, a glossy top coat typically resists scratches and daily wear better than matte options.
Shape Adaptation: Short Square & Squoval Nails
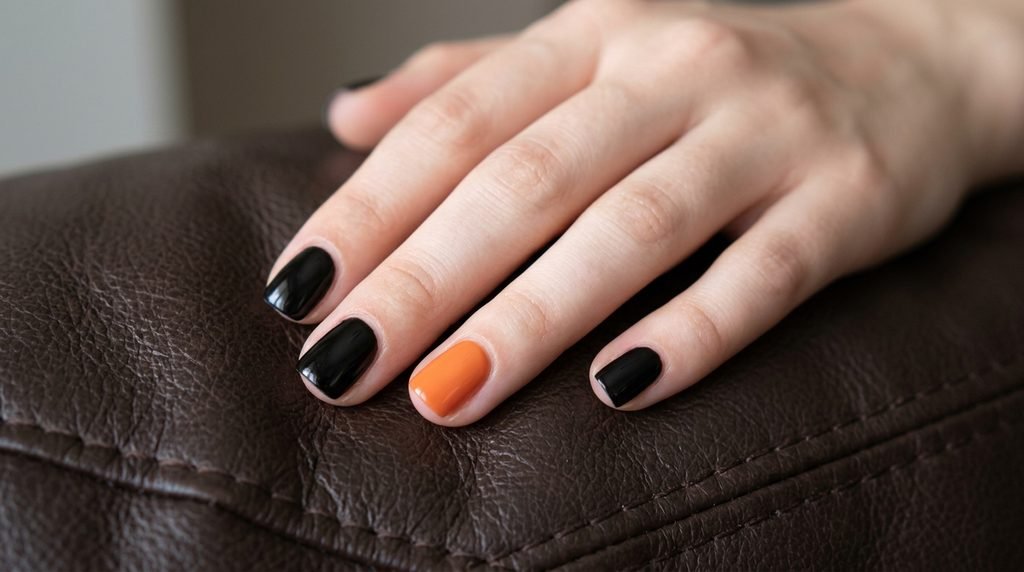
Short nails look incredibly chic in dark shades. They prevent deep colors from feeling overly theatrical for everyday wear.
| Nail Shape | Key Feature | Main Benefit |
| Short Square | Sharp, clean corners | Bold color block |
| Short Squoval | Softened edge contour | Minimal chipping risk |
On short square or squoval shapes, keep designs clean. A solid black set with one full burnt orange accent nail creates a neat, polished look.
Ensure you cap the free edge of short nails carefully with black polish to prevent premature tip wear.
Shape Adaptation: Almond & Oval Nails
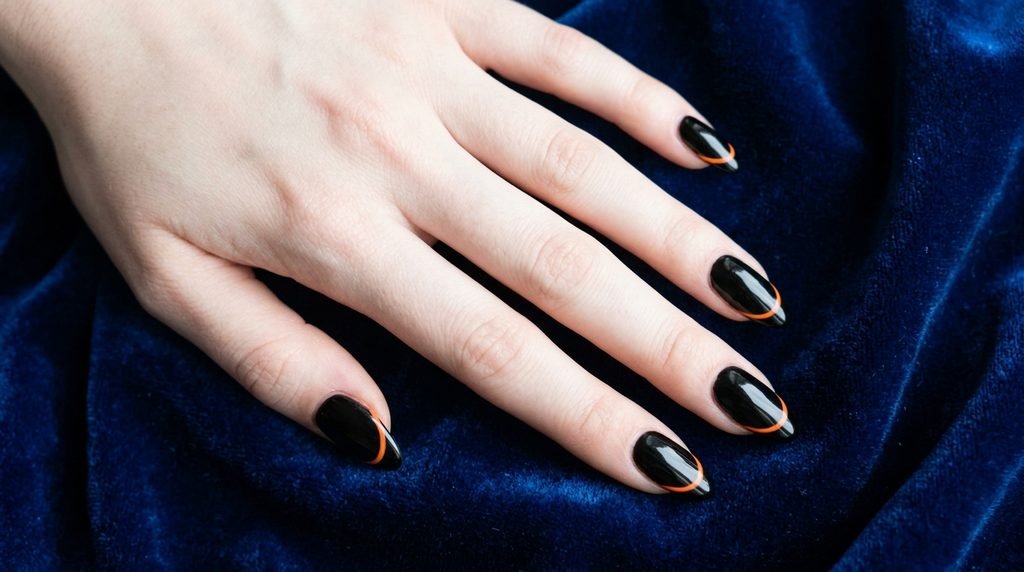
Almond and oval shapes elongate your fingers, making them the perfect canvas for fluid line art.
Use the elongated tip of an almond nail to frame sweeping black French arches. Alternatively, paint delicate spiderwebs starting right at the pointed tip.
The soft curves of almond nails balance the stark contrast of jet black and rust orange.
Shape Adaptation: Coffin & Ballerina Nails
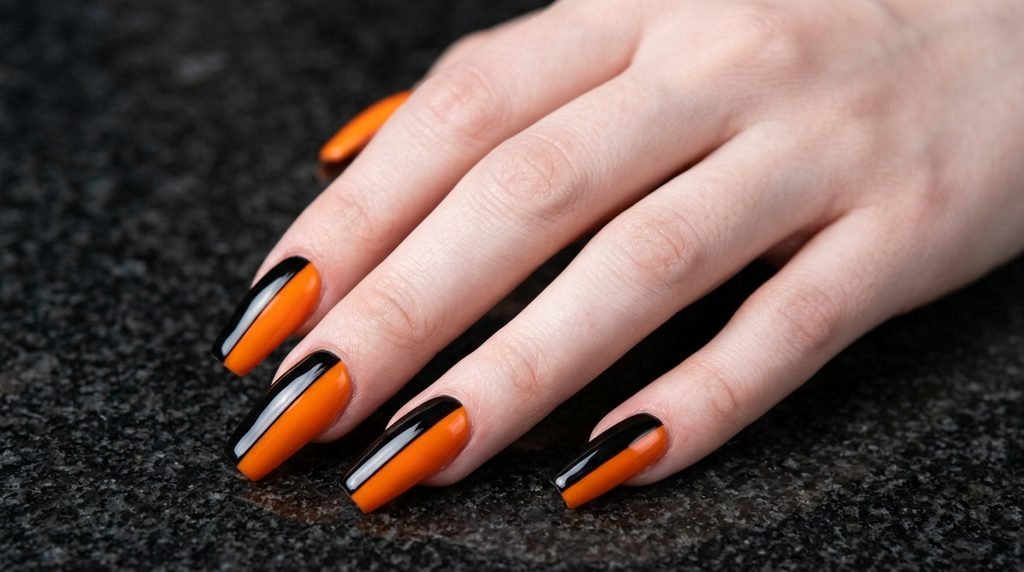
Coffin nails feature flat, squared-off tips with tapered sides, providing ample surface area for bold color blocking.
Try a vertical split design on coffin nails. Paint the left half in glossy black and the right half in deep burnt orange.
Place a crisp, straight black line down the center join to lock in a striking geometric contrast.
Shape Adaptation: Stiletto Nails
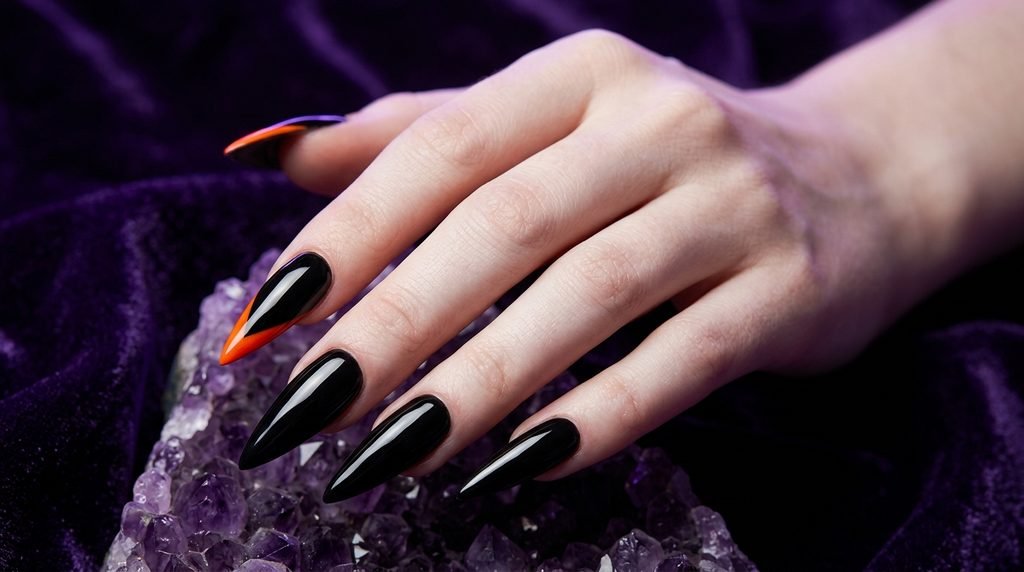
Stiletto nails offer maximum drama and sharp lines, perfect for edge-driven Halloween styles.
Keep stiletto designs minimalist to prevent the set from looking cluttered. Solid jet black on four fingers with a single burnt orange accent works best.
Add a delicate black micro-bat at the very base of the orange accent nail for a sleek finishing touch.
Step-by-Step DIY Prep Routine for Dark Polish
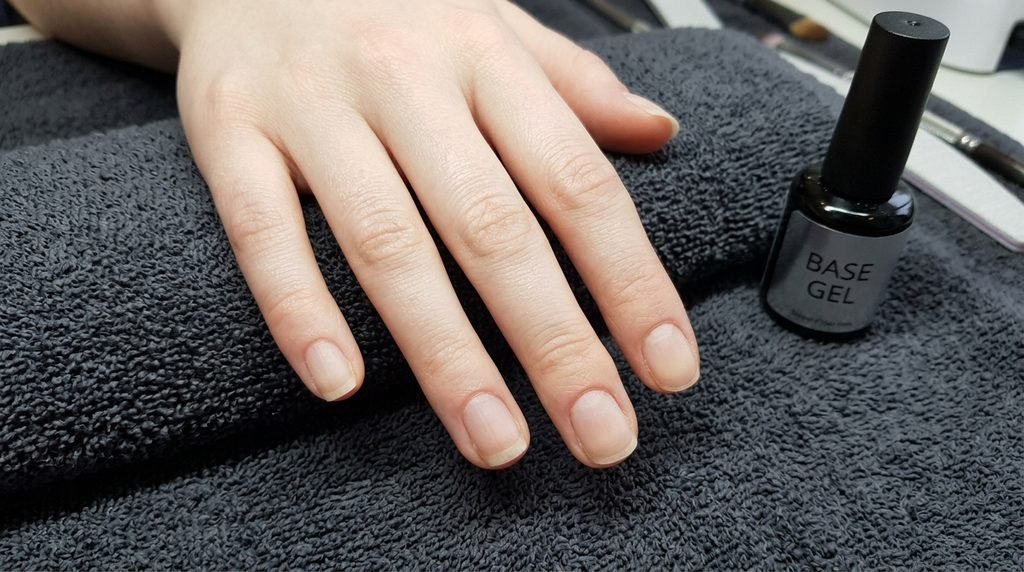
Dark polish reveals every flaw, cuticle tear, or uneven surface. Proper prep is essential before applying black pigment.
- Gently Push Cuticles: Apply a liquid cuticle remover, wait sixty seconds, then gently push back cuticles with a wooden stick.
- Buff Tone & Surface: Softly buff the natural nail surface with a 240-grit buffer to eliminate surface oils.
- Dehydrate Natural Nail: Wipe each nail thoroughly with 99% isopropyl alcohol to remove lingering dust and oils.
- Apply Base Coat: Coat the nail with a thin layer of sticky base gel and cure for sixty seconds.
Taking time on prep prevents edge lifting and ensures your deep tones stay smooth for weeks.
Mastering Dark Gel Management & Curing
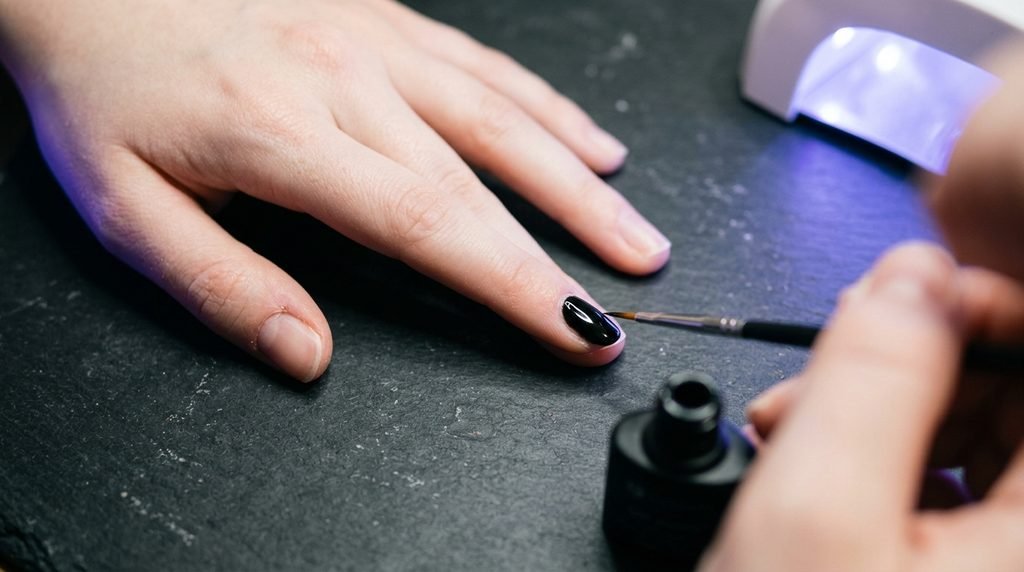
Dark gels contain high pigment density. If applied too thick, the light cannot penetrate, leaving uncured, wrinkled polish underneath.
Always apply jet black gel in paper-thin layers. It is better to paint three wafer-thin coats than two thick ones.
Cure each thin layer for a full sixty to ninety seconds in a high-power LED lamp to ensure total hardening.
Preventing Cuticle Flooding with Black Pigment
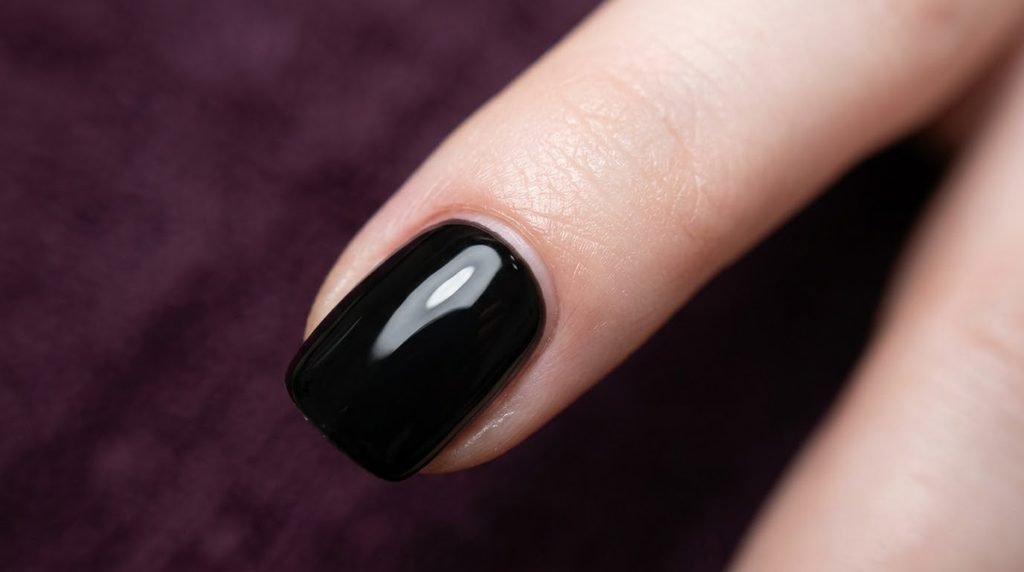
Black gel polish stains cuticles instantly if it runs into your side walls. Cleaning it up after curing is exceptionally difficult.
Leave a tiny hair-width gap between your polish line and the cuticle edge. This prevents pooling and maintains a clean boundary.
If polish touches your skin before curing, dip a tight angled brush in pure acetone and clean the area immediately.
The Ideal Black Halloween Pedicure Strategy
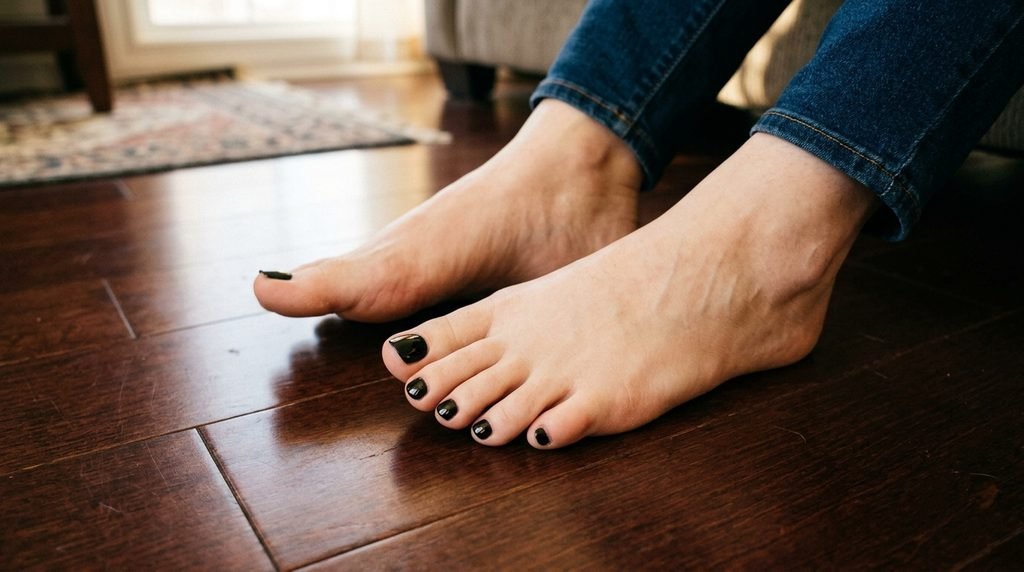
A black pedicure is one of the sleekest options for fall 2026. It looks clean, sophisticated, and pairs easily with cozy autumn footwear.
Keep your small toes solid glossy black. Reserve your big toe for a subtle burnt orange accent design.
Black pedicures hide shoe scuffs effortlessly, making them low-maintenance throughout late autumn.
Orange & Black Halloween Toe Nails: Matching Sets
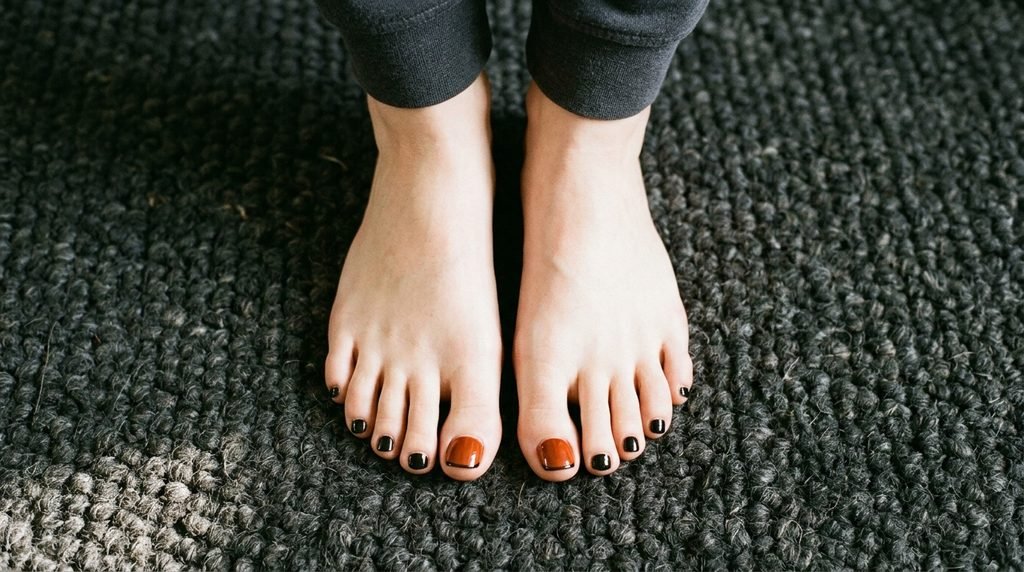
Should your manicure and pedicure match exactly? The professional rule is harmony over identical copying.
| Balanced Mani-Pedi Set | Design Details |
| Manicure | Burnt Orange accents + Black linework (Detailed) |
| Pedicure | Glossy Black base + Burnt Orange tips (Clean) |
Mirror the exact color shades on hands and feet, but keep the pedicure design simpler than your manicure.
If your hands feature fine spiderweb art, keep your toes to a solid glossy black base with a slim burnt orange tip line.
How to Request This Look at the Salon
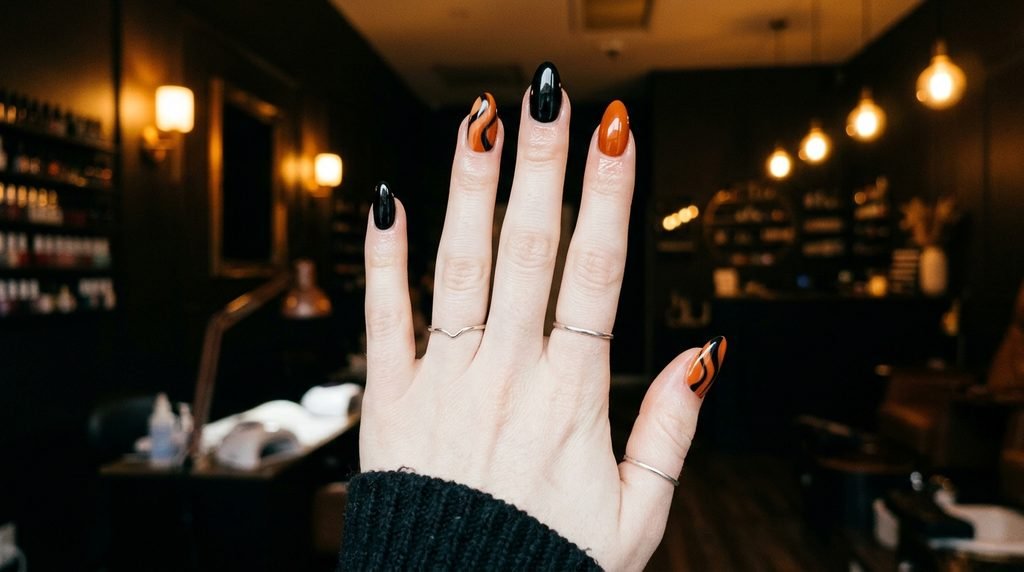
When communicating with your nail technician, clear descriptions ensure you get the exact design you want.
- Specify the Orange: Ask for “a deep burnt rust or terracotta orange,” not bright safety orange.
- Define Color Placement: State clearly, “I want black to be my main color on most nails, with orange only as a small accent.”
- Discuss Line Art: Show reference photos for line art and request thin, precise black linework using a detail brush.
Confirming these choices before polish application prevents miscommunication and ensures a polished result.
Essential Color & Design Comparison
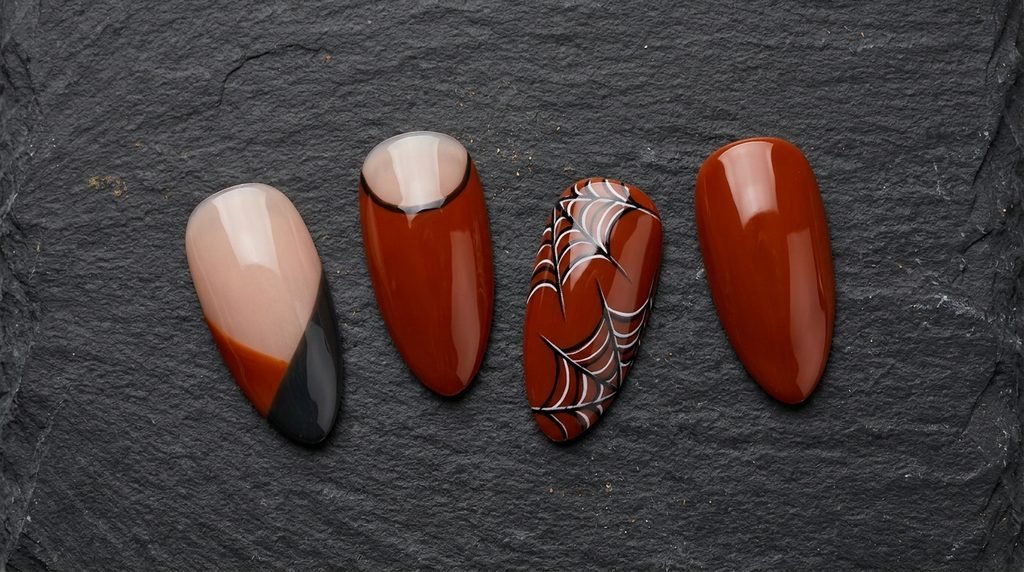
To help you choose the best configuration for your lifestyle, review this overview of key design approaches:
| Design Style | Primary Base | Accent Detail | Difficulty Level | Wearability in Nov |
| Two-Tone Pumpkin Tip | Clear/Nude | Black & Rust French Tips | Easy (DIY Friendly) | Very High |
| Minimalist Crescent Moon | Jet Black | Rust Cuticle Crescent | Moderate | High |
| Fine Line Spiderweb | Burnt Orange | Black Linework | Advanced | Moderate |
| Solid Black with Rust Accent | Jet Black | One Solid Rust Nail | Easy | Extremely High |
Material & Tool Comparison for DIY vs. Salon

Whether you prefer press-ons, standard lacquer, or salon gel, here is how options compare for dark two-color sets:
| Application Method | Average Cost | Durability | Removal Effort | Best For |
| DIY Gel Polish | Low–Medium | 2–3 Weeks | Moderate Soak-off | Detailed Line Art |
| Press-On Nails | Low | 1–2 Weeks | Quick & Easy | Instant Length |
| Salon Gel / Acrylic | Medium–High | 3–4 Weeks | Professional Needed | Long-Term Wear |
| Standard Lacquer | Very Low | 4–7 Days | Easy Acetone Wipe | Weekend Events |
Transitioning Halloween Nails to Thanksgiving Moods
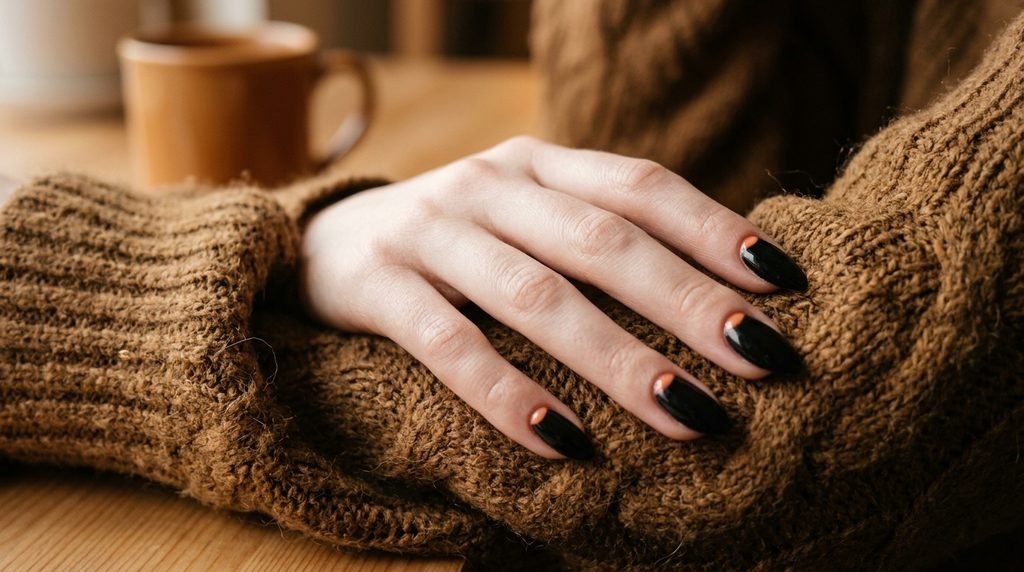
By November 5th, your focus naturally shifts toward cozy sweaters and Thanksgiving prep.
Because you avoided bright white, bats, or cartoon ghosts, your dark burnt orange and black set naturally fits late fall aesthetics.
Burnt orange pairs seamlessly with cozy brown knits, warm camel coats, and dark denim throughout November.
Troubleshooting Dark Polish Chipping & Wear
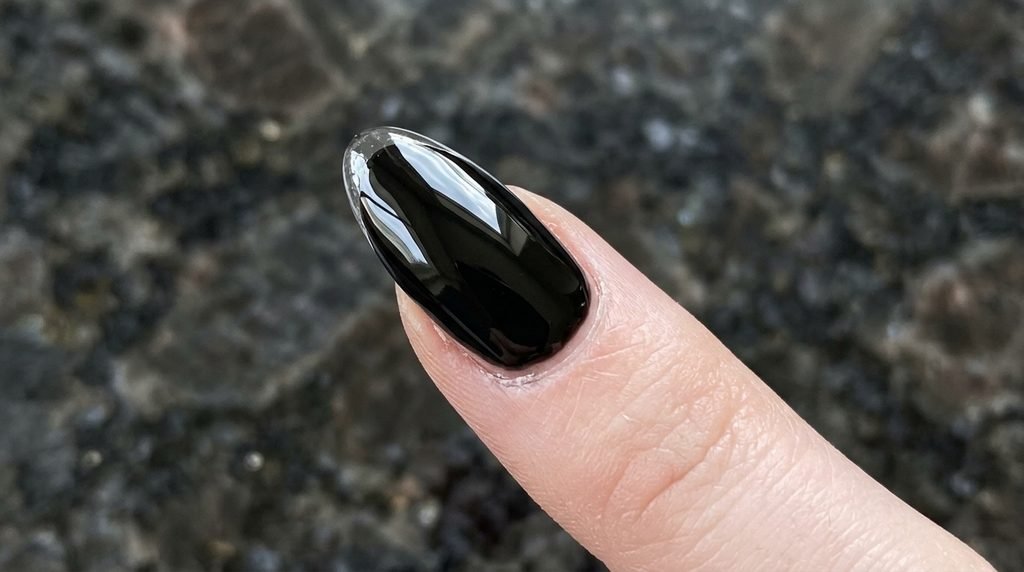
Dark polish shows chips along the free edge much faster than nude shades.
To extend the life of your manicure, apply a fresh thin layer of glossy top coat every four days.
Always cap the front edge of the nail during application to lock pigment beneath a protective shield.
Frequently Asked Questions (PAA)
What are the best orange and black Halloween nail designs?
The most versatile designs use high-gloss black as the primary base color with deep burnt orange accents. French tips, negative space crescent moons, and fine black linework over rust bases offer a sophisticated, modern look.
What shade of orange is trending for Halloween nails in 2026?
Dark burnt orange, rust, and amber tones are trending over bright neon orange. These deeper shades offer a rich, seasonal look that transitions seamlessly into late autumn.
Can you wear Halloween nails after Halloween?
Yes, provided you choose deep tones and minimalist designs. Using burnt orange and glossy black without cartoon motifs allows your manicure to look stylish well into November.
How do you make a Halloween pedicure last into November?
Start with thorough cuticle prep, apply thin gel layers, and seal edges with a durable glossy top coat. Choosing a dark black base keeps toes looking tidy and resists shoe scuffs.
What is an orange and black French tip?
An orange and black French tip features a clear or nude nail bed topped with dual-colored tips. You can split the tip down the center or layer a thin rust curve over a black base tip.
Final Verdict: Your November-Proof Set
You do not have to remove your Halloween manicure the moment October ends. By keeping jet black dominant and choosing a deep burnt orange accent, you create a chic, lasting style.
Whether you prefer short natural square nails or long elegant almonds, this moody two-color combination delivers the perfect blend of seasonal spirit and everyday sophistication.
Save this guide for your next appointment, or try creating these minimalist line art accents at home this weekend!

Mia founded Daily Nail Idea after a decade in beauty editorial, tired of watching great nail art disappear into the scroll. She now leads the team’s editorial direction — deciding what’s worth featuring and what’s just noise — and still paints her own nails every Sunday night, no exceptions.