20Black, White and Gold Glitter Ombré Nails: The Ultimate 2026 Glam Guide
Sitting in the salon chair scrolling for inspo, or holding your sponge at home wondering how to blend jet-black polish without creating a muddy mess? We have all been there. You want high-contrast drama, but you also want it to look expensive, not chaotic. The black and gold ombre nails look is the ultimate glam solution. Combining dark obsidian bases with sparkling metallic fades, this style gives your hands instant luxury energy for party season, date nights, or special events. Let’s break down exactly how to wear, customize, and request this high-impact manicure.
At-a-Glance
Here is what we are covering in this complete glam guide:
- Core Color Formula: Balancing jet black, rich gold glitter, and subtle silver or clear transitions.
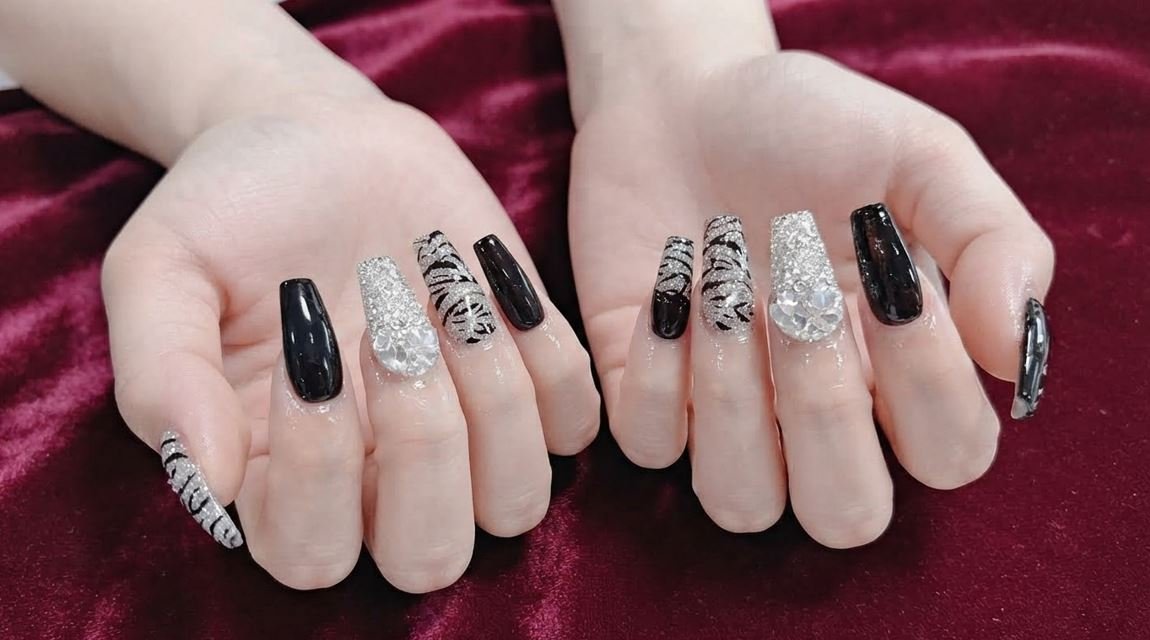
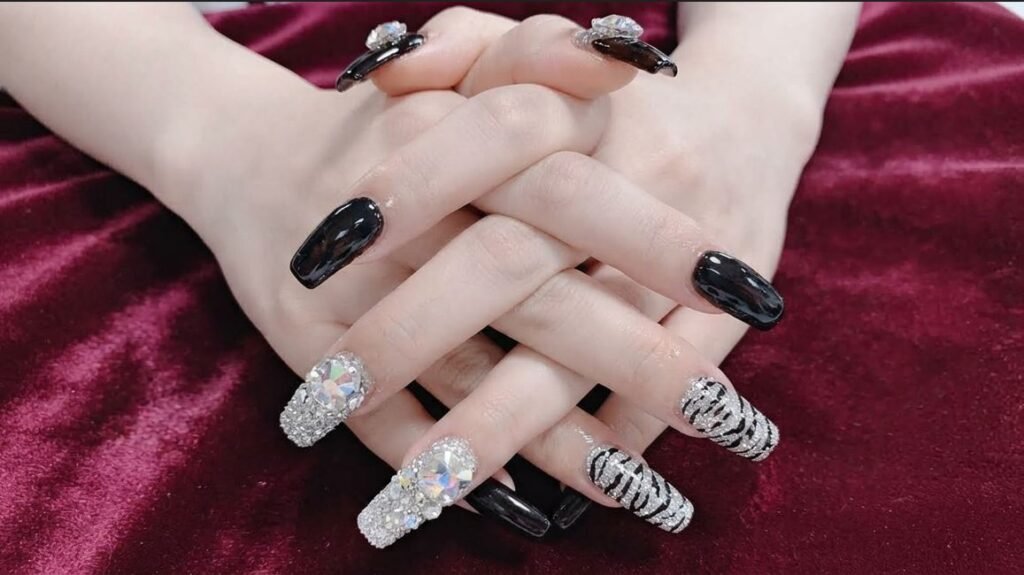
- Design Variations: Everything from matte black transitions and gold foil overlays to 3D rhinestone accents and tiger stripe patterns.
- Salon & DIY Prep: Exact phrasing to tell your nail tech, plus step-by-step sponge techniques for home manicures.
- Shape & Length Pairings: How almond, coffin, stiletto, and short square shapes hold gradient glitter.
- Maintenance & Care: Keeping your dark polish ultra-glossy and prevent glitter lifting.
High-Contrast Jet Black Base with Dense Gold Glitter Fade
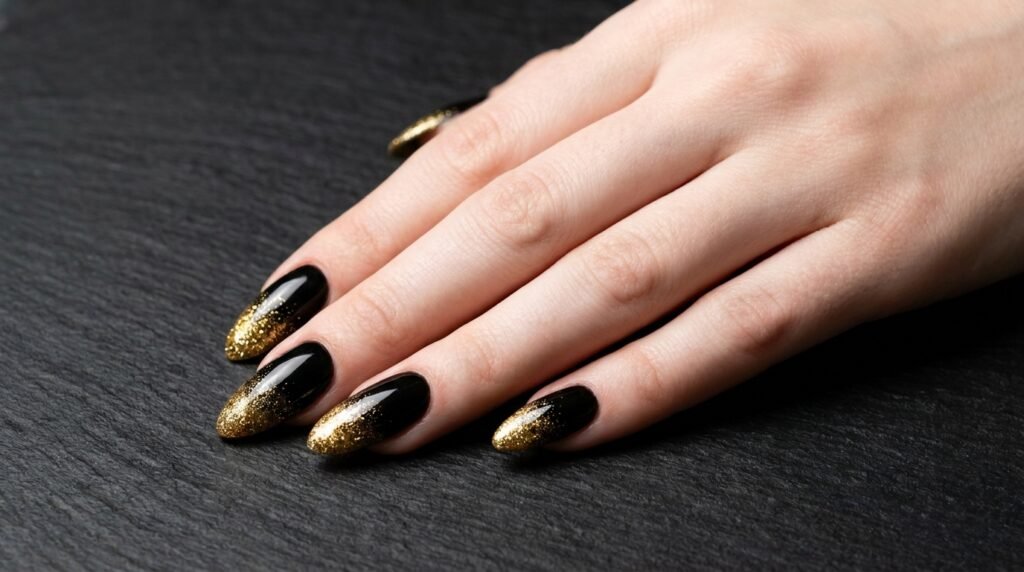
The classic black and gold ombré relies on pure contrast. A fully opaque, jet-black gel base creates a dark background that allows metallic gold glitter particles to reflect light maximumly.
When planning this look, ask for a high-shine black gel. The gold glitter should begin densely at the tip and taper smoothly down toward the mid-nail.
- Best Shape: Long almond or tapered coffin.
- How to Ask: “Opaque black base with a dense gold glitter ombré fading from the tip down to the center.”
- Wearability: Ideal for formal galas or weekend events.
Glossy Black with Tiger Stripe Accents and Gold Shimmer
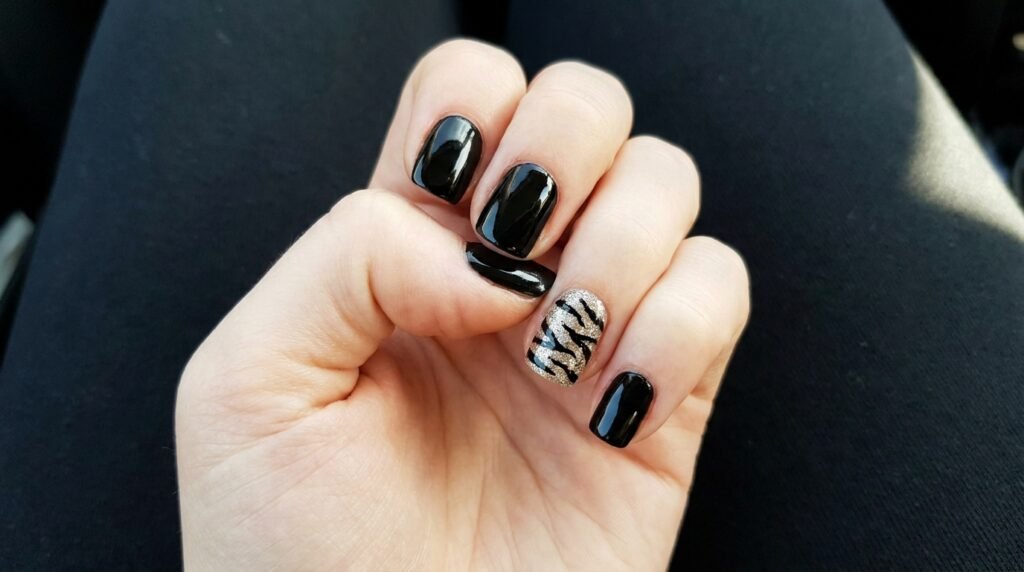
Adding animal print overlay takes standard ombré to a higher editorial level. This variation features glossy black outer nails paired with a zebra or tiger pattern accent nail over shimmering silver-gold glitter. To execute this, the glitter layer goes down first, followed by hand-painted black striping using a thin detail brush.
Base Layer: Gold/Silver Fine Glitte – Detailing: Hand-painted Black Tiger Stripes- Finish: High-Gloss Top Coat
- At-Home Tip: Use a nail striping tape or a 000-size liner brush for sharp stripes.
- Budget Tier: Medium-priced salon gel set or custom press-ons ($25–$45).
3D Rhinestone Clusters over Gold Glitter Ombré
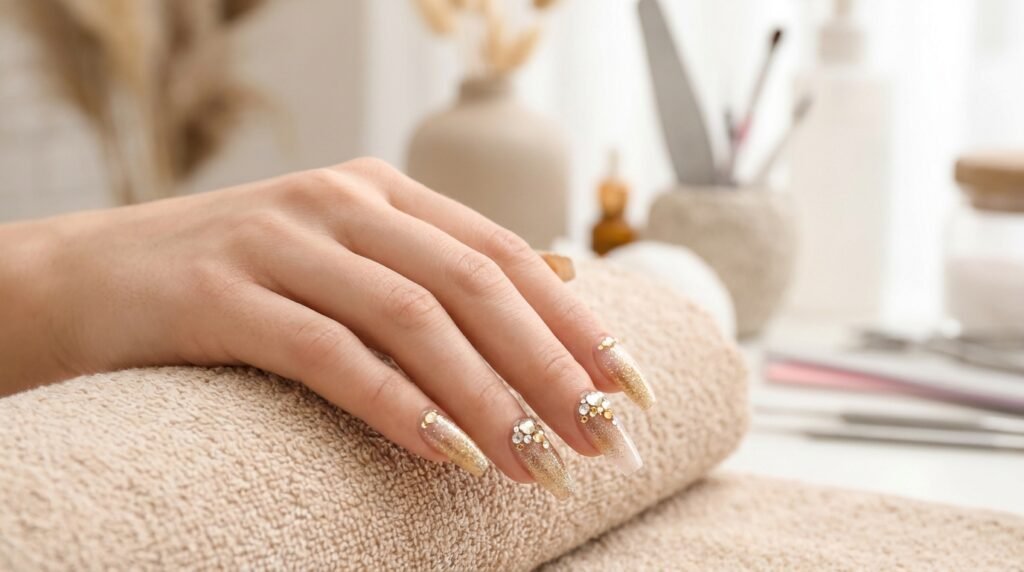
For ultimate party drama, crown your ombré with textured embellishments. Sparkling 3D rhinestones placement at the cuticle line creates a reverse gradient effect against gold glitter tips. Choose multi-faceted glass crystals over plastic gems for real depth. Secure them using a dedicated builder gel glue to ensure they stay locked in place for weeks.
- Occasion Fit: New Year’s Eve, milestone birthdays, or red-carpet style events.
- Salon Prep: Mention you want “3D charm placement with builder gel” so your tech schedules enough time.
Matte Black Base with Burnished Gold Glitter Tips
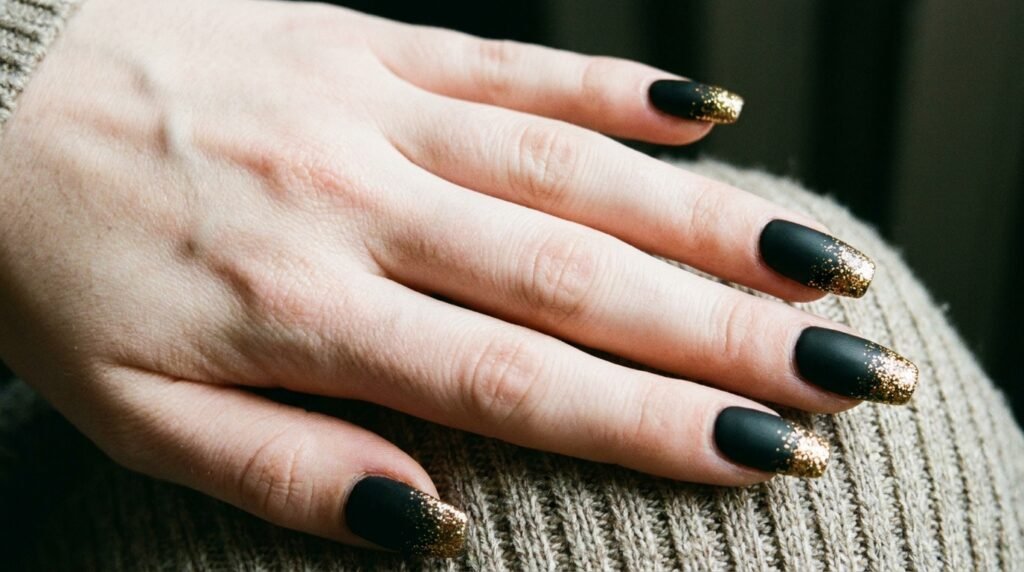
Switching the finish changes the entire mood of the manicure. A velvety matte black background absorbs light, making the metallic gold glitter tips pop with dramatic contrast. To get this look, apply a matte top coat over the black base first, then apply gold glitter gel on top and seal only the glittered tips with a glossy top coat.
Step 1: Opaque Black Gel
Step 2: Full-Nail Matte Top Coat (Cure)
Step 3: Dab Gold Glitter on Tips
Step 4: Glossy Top Coat on Tips Only (Cure)
Black French Tips with Floating Gold Shimmer Lines
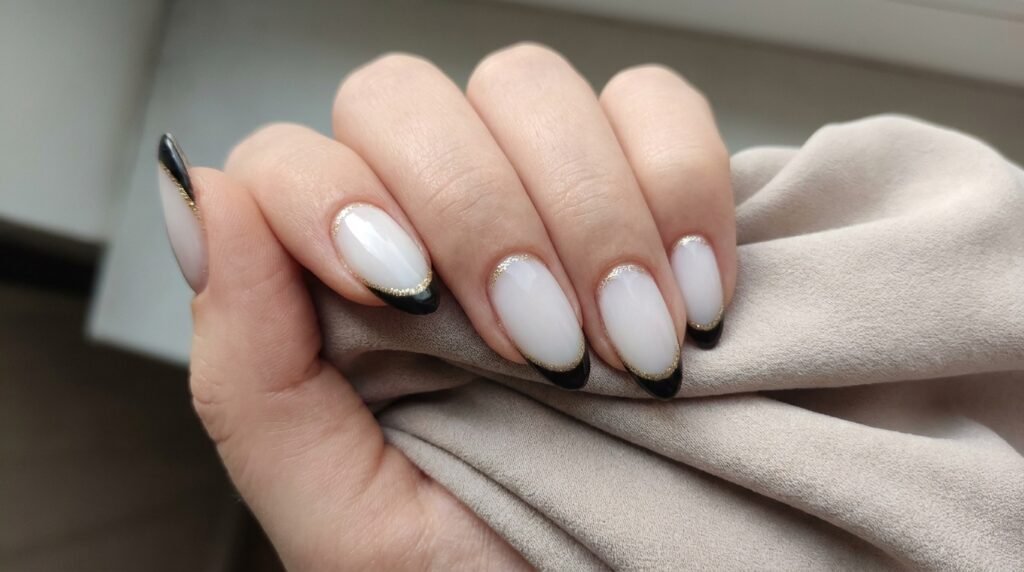
If full coverage feels too heavy, try a negative-space design. This modern twist uses a clear or milky nude base, sharp black French tips, and thin gold glitter lines along the smile curve. It offers an elongated, clean aesthetic that works exceptionally well on medium length oval or almond nails.
- How to Ask: “Milky nude base, crisp black French tips, framed with a thin gold glitter accent line.”
- At-Home Difficulty: Intermediate (requires steady hand for line art).
Chunky Flake Gold Foil over Obsidian Gradient
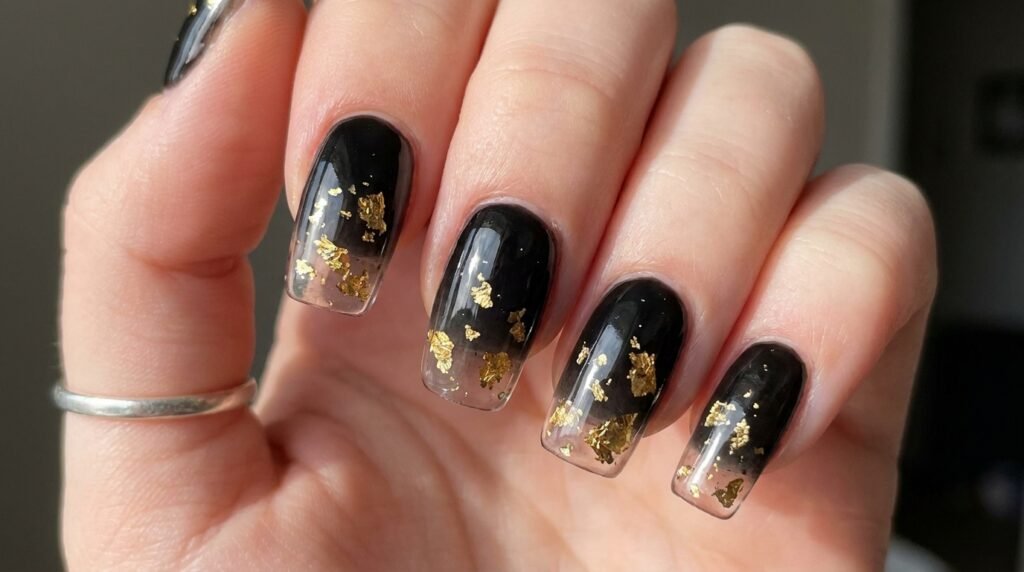
Instead of micro-fine glitter particles, use raw gold foil flakes suspended over a sheer-to-opaque black fade. Foil gives an organic, gilded metal finish that looks like liquid gold dripping down the nail. Apply the black polish with a makeup sponge, press gold foil flakes into the tacky inhibition layer, and encapsulate everything under a thick layer of builder gel.
- Best Finishes: Ultra-glossy glass finish.
- Pro Tip: Encapsulating foil prevents rough edges from catching on clothing.
Short Square Black and Gold Glitter Minimalist Fade
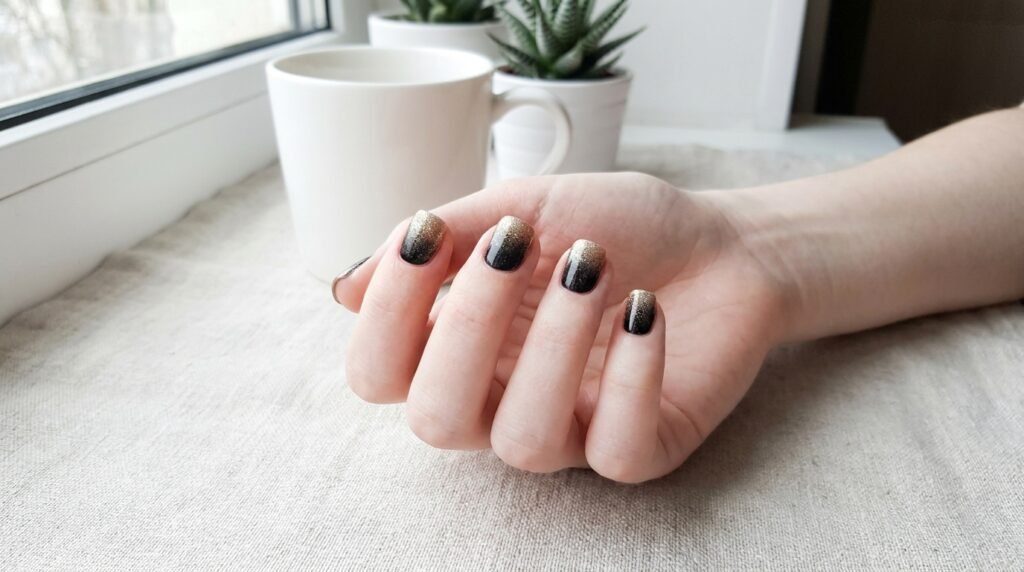
Short nails can wear dark colors comfortably without looking overpowering. A short square or squoval shape provides a clean frame for a subtle gold glitter gradient. Keep the black gradient soft, letting the natural nail bed show slightly near the cuticle to keep the overall look light and wearable for daily life.
- Occasion: Office-friendly glam or low-maintenance daily wear.
- DIY Friendly: Very easy to recreate with regular polish and a cosmetic sponge.
Stiletto Black & Gold Chrome Metallic Ombré
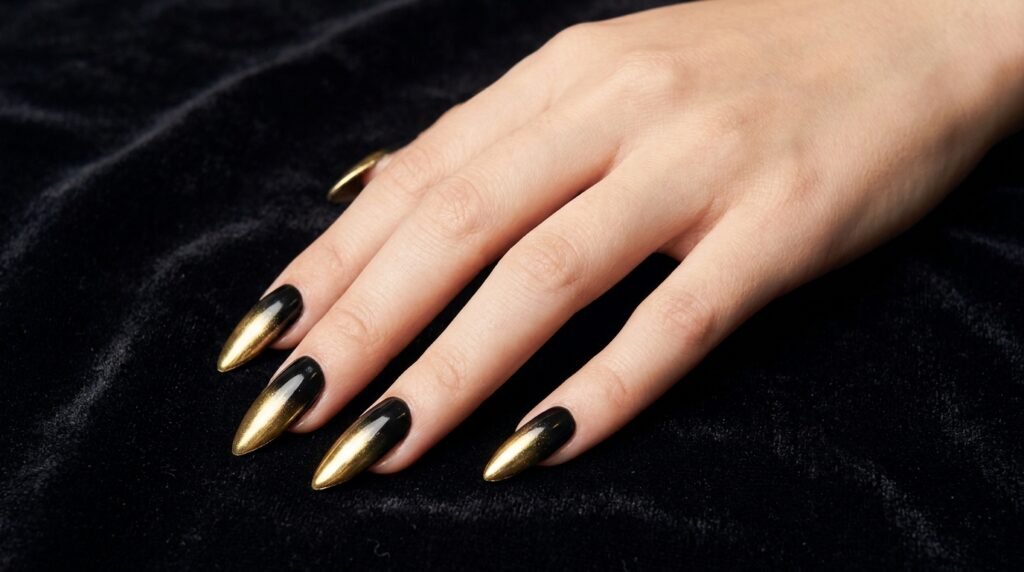
Stiletto nails amplify drama instantly. Combine a sharp point with liquid gold chrome powder faded into a jet-black base for a sleek, futuristic aesthetic. Chrome powder requires a non-wipe gel top coat cured for 30 seconds before buffing the pigment powder directly onto the tip.
- Best For: Bold fashion statements, concerts, or night outs.
- Maintenance Note: Chrome requires double top-coating to prevent tip-wear chipping.
Soft Charcoal to Warm Gold Micro-Glitter Transition
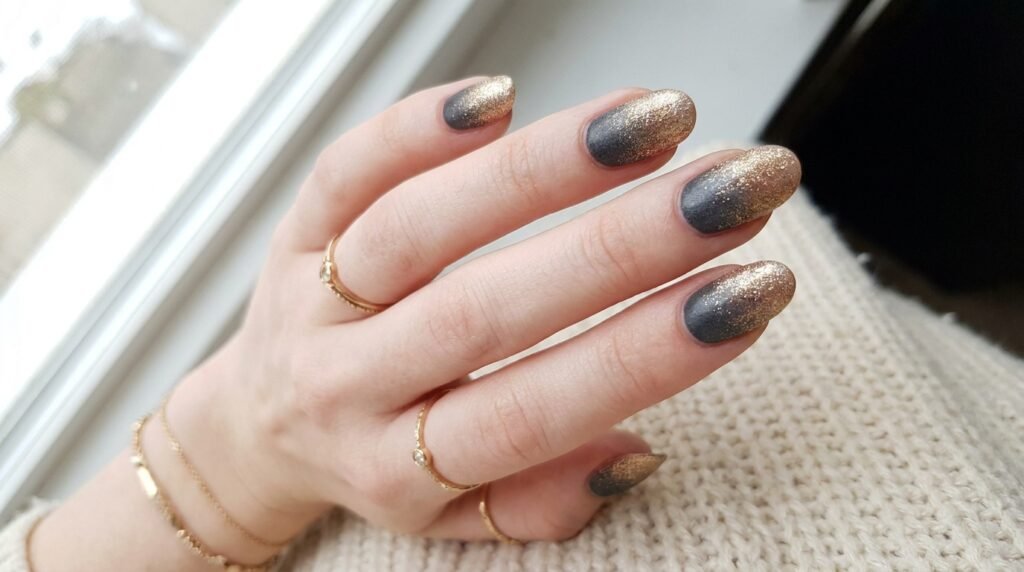
If pitch-black feels too harsh against your skin tone, substitute soft charcoal or deep onyx. The softer base shade creates a smoother transition into warm 24k gold micro-glitter. This soft gradient works beautifully across all skin tones and offers a sophisticated approach to dark nail art.
- Pairings: Warm gold jewelry and neutral cozy knits.
- Finish: High-shine gel top coat.
Milky Nude to Black Tip with Floating Gold Flakes
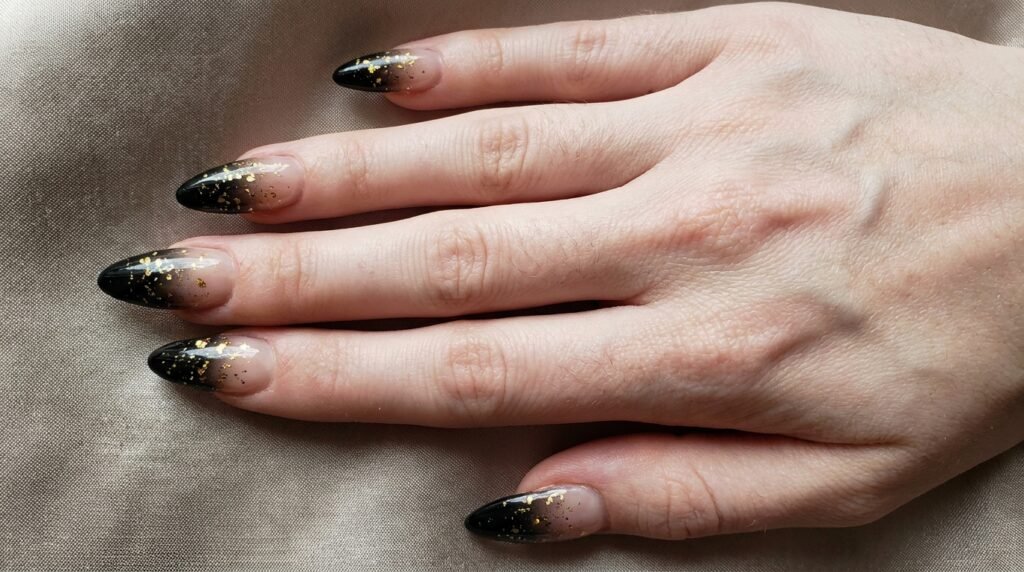
Flip the traditional gradient order. Start with a milky nude base near the cuticle, fade into a deep black tip, and scatter light gold glitter flakes across the center transition zone. This lengthens the appearance of the fingers while keeping the cuticle area clean as the manicure grows out.
Coffin-Shaped Black and Gold Velvet Cat-Eye Ombré
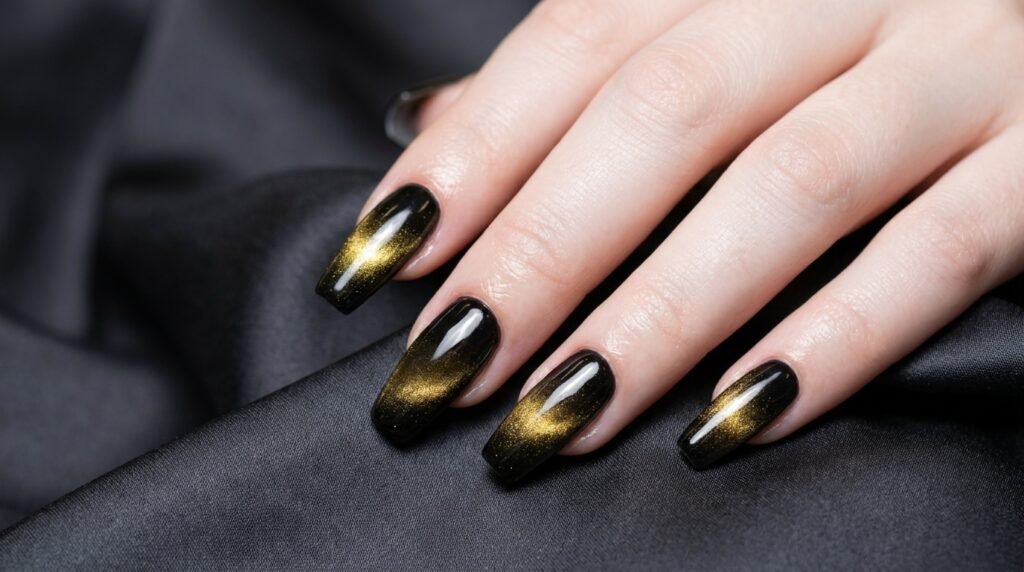
Magnetic cat-eye polish adds 3D depth to a traditional gradient. Using a black base coat, layer a gold magnetic gel polish over top and hold a magnet diagonally across the nail tip before curing. The light shifts dynamically as you move your hands, creating a velvet-like texture.
- Tech Spec: Ask for “Magnetic gold cat-eye over black gel base.”
- Duration: Lasts up to 3 weeks with proper gel prep.
Geometric Line Art over Gold Glitter Base
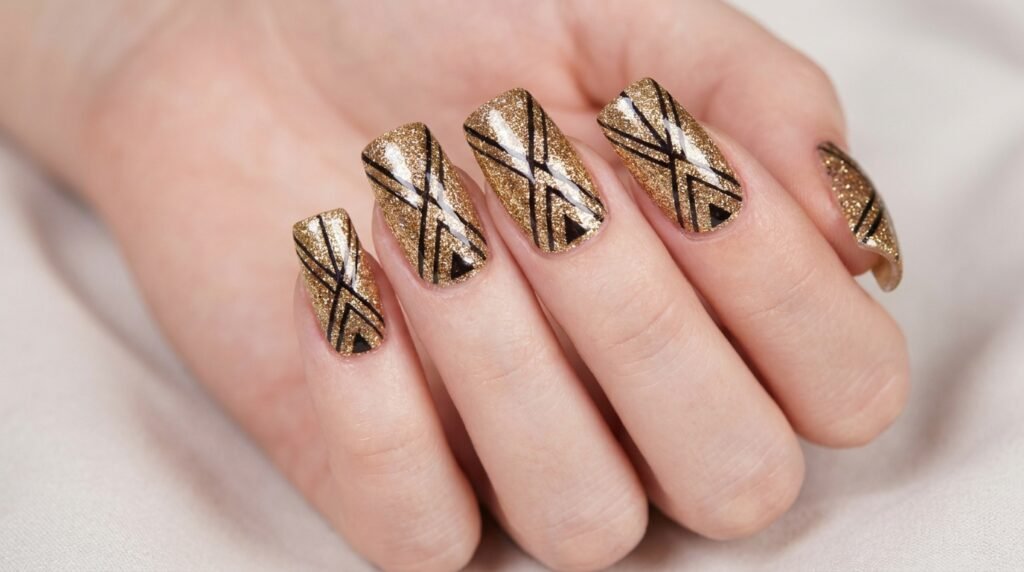
For a modern artistic look, paint a full gold glitter base first, then overlay sharp geometric black lines, angles, or negative space triangles across each nail. The contrast between structured black lines and freeform glitter gives a structured, modern art feel.
- Best Shape: Square or coffin.
- DIY Tool: Use striping tape to create crisp, clean geometric boundaries.
Deep Emerald, Black, and Gold Tri-Color Blend
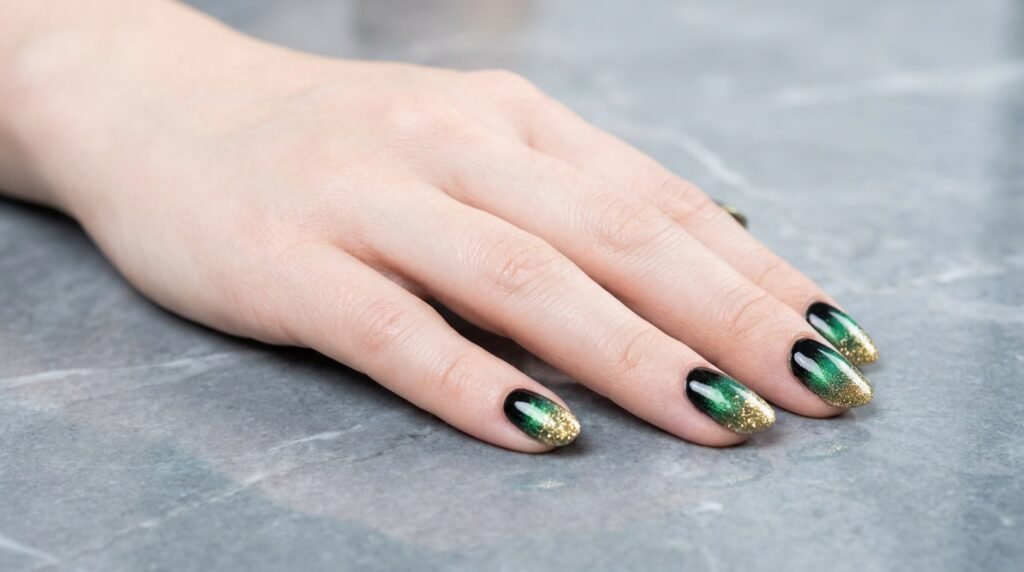
Introduce a third color to elevate the gradient depth. A deep emerald green blended between black and gold creates a luxurious peacock or jewel-tone aesthetic.
Cuticle: Opaque Jet Black- Middle: Deep Emerald Green Shimmer- Tip: Dense Gold Glitter
- Seasonality: Perfect for autumn and winter holiday sets.
Diagonal Angular Ombré with Gold Accent Framing
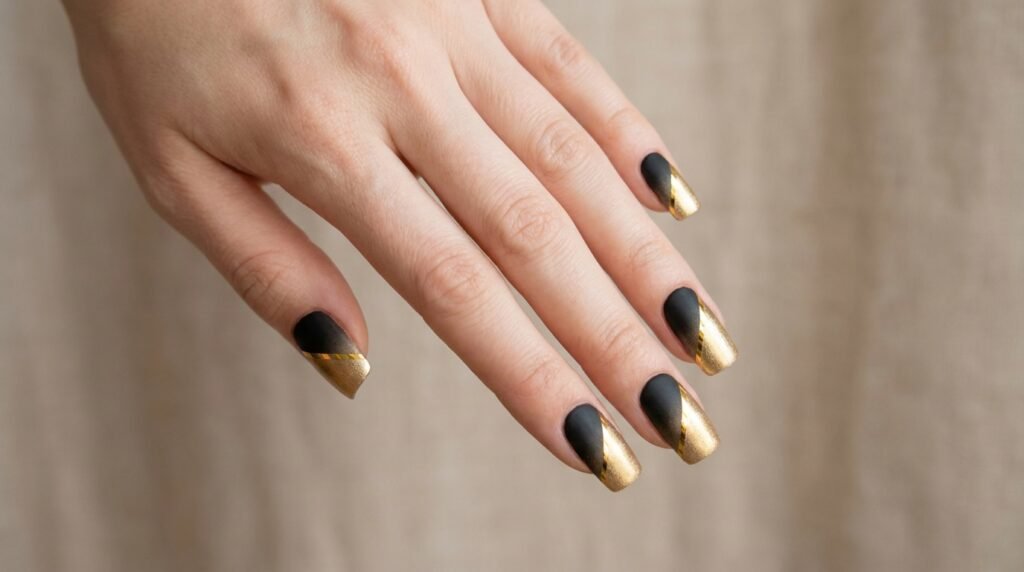
Instead of a horizontal fade, run the black to gold gradient diagonally across the nail plate. Frame the edge of the diagonal line with a crisp gold chrome tape or hand-painted foil line. This asymmetrical line creates an optical illusion that makes short or wide nail beds look instantly longer.
- How to Ask: “Diagonal black to gold gradient with gold line framing.”
- Visual Impact: High-fashion, structured aesthetic.
Black Lace Pattern Over Sheer Gold Glitter Backdrop
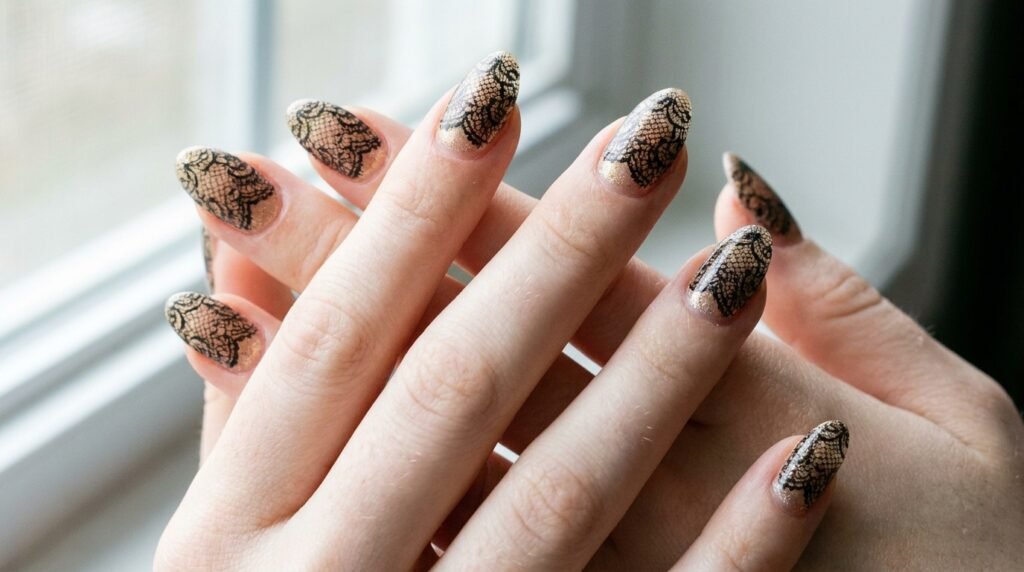
Stamping or hand-painting intricate black lace detailing over a sheer gold shimmer base yields a delicate, vintage-inspired manicure. This style provides high-level visual interest without relying solely on heavy color blocking or thick glitter layers.
- At-Home Note: Nail stamping plates make detailed lace patterns accessible to beginners.
- Finish: Semi-matte or satin finish complements the fabric-like design.
Chunky Hexagon Gold Sequins on Sheer Black Base
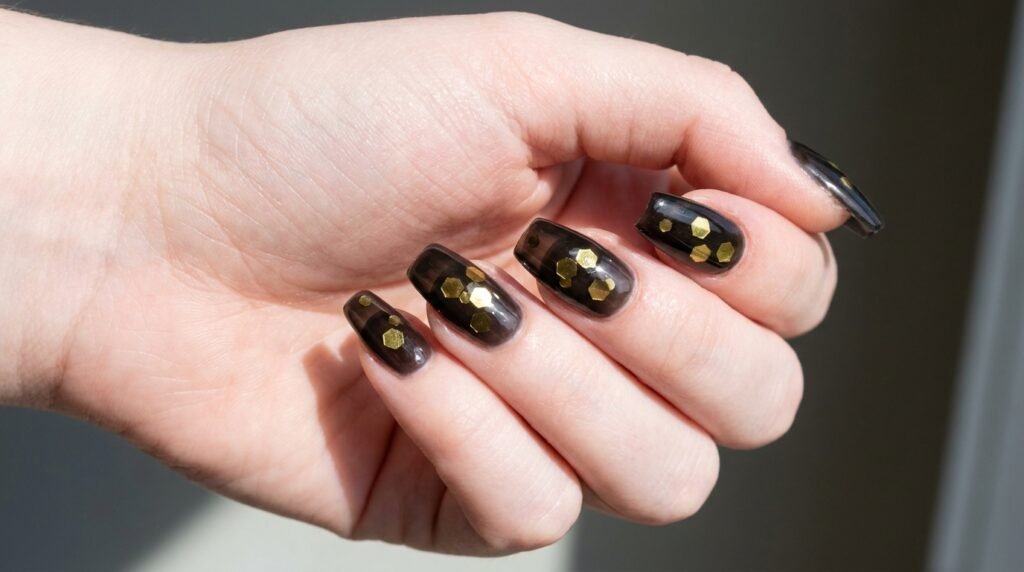
Sheer “jelly” black polish mixed with chunky hexagon gold glitter creates a smoky, floating sequin effect. The translucent black backdrop lets gold sequins shine through at multiple depth layers. Apply one coat of sheer black, place loose glitter sequins, and seal with a second coat of sheer black before applying top coat.
- Required Materials: Sheer black jelly gel, loose gold hexagon glitter sequins.
Gold Leaf Stars on Midnight Black Ombré
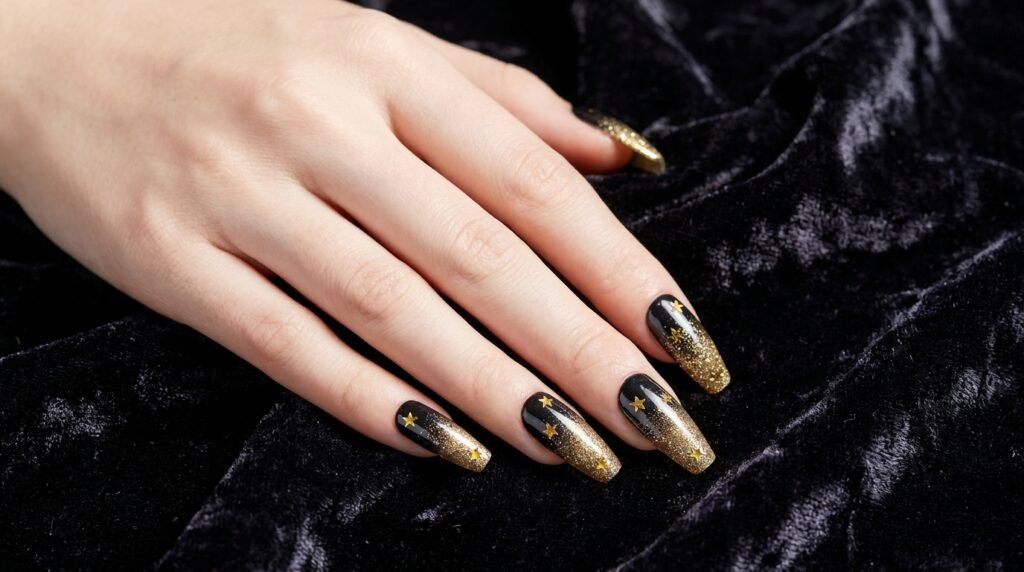
Add whimsical detail by placing small gold chrome or foil star cutouts across a black-to-gold micro-glitter transition. The stars catch light individually, creating a night-sky effect that feels playful yet glamorous.
- Occasion: Evening events, holiday parties, or seasonal winter wear.
- Placement Tip: Concentrate star decals near the tip to emphasize the gradient.
Mismatched Accent Set: Black Polish, Gold Foil, and Glitter
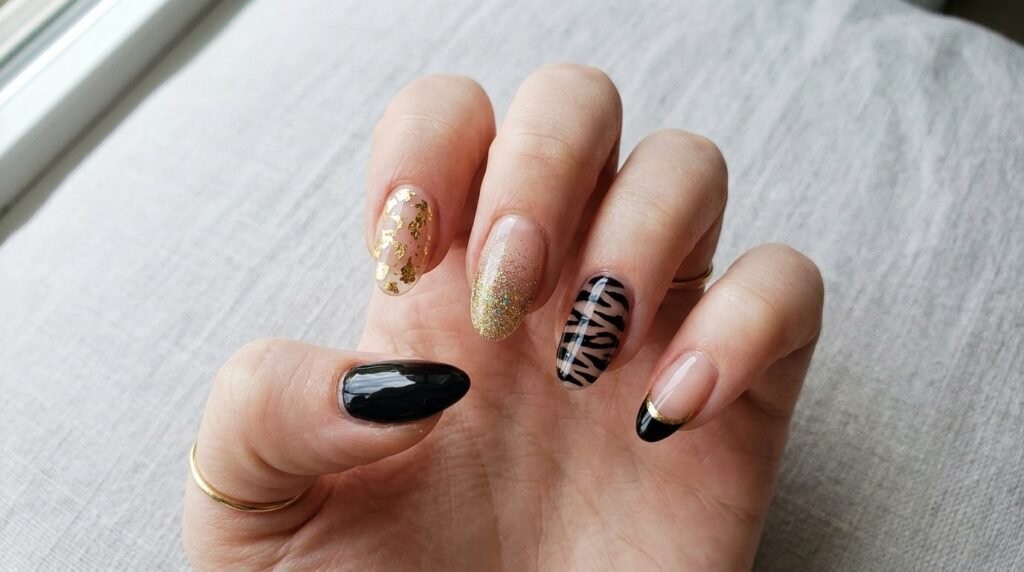
If you prefer variety across your hands, try a coordinated mismatched set. Keep the color story strictly black and gold, but vary the execution across each finger.
Thumb: Solid Glossy Black
Index: Gold Foil Flake Overlay
Middle: Black & Gold Glitter Ombré
Ring: Tiger Stripe Pattern
Pinky: Black French Tip with Gold Accent
Rose Gold and Black Ombré Alternative
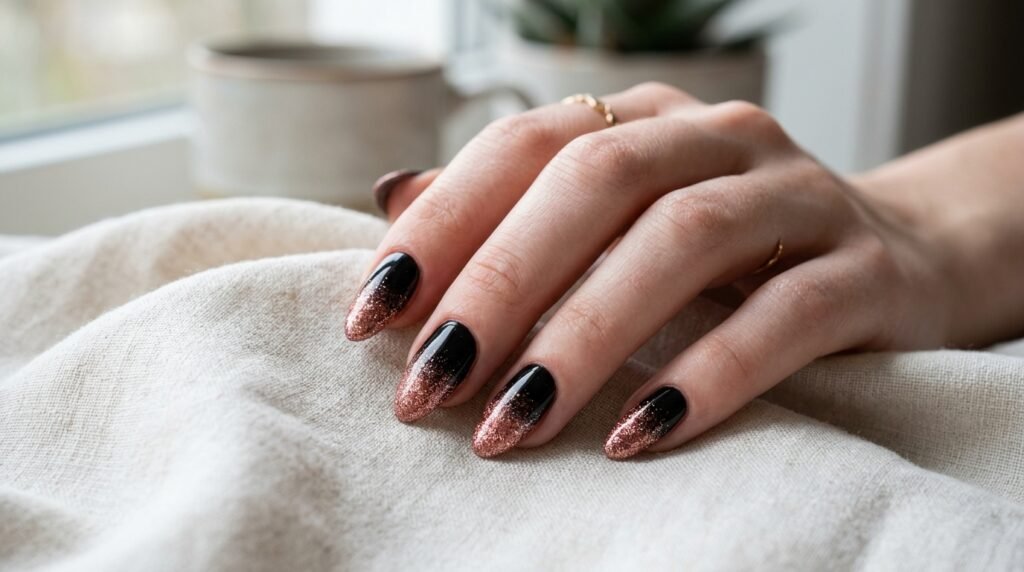
For a softer metallic tone, swap classic yellow gold for warm rose gold glitter. Rose gold brings a romantic, pink-copper shimmer that softens the harshness of jet-black polish.
- Skin Tone Match: Especially flattering on cool and neutral undertones.
- Finish Options: Ultra-glossy high-shine top coat works best.
FAQ: Everything You Need to Know Before Your Appointment
How do I stop my black and gold ombré nails from looking messy at home?
Use a latex barrier or liquid peel-off tape around your cuticles before sponging. Apply polish to a damp makeup sponge and dab gently in thin layers rather than dragging the sponge.
What nail length works best for glitter ombré?
Medium to long lengths (like almond or coffin) provide the most canvas space for a smooth color transition, but short square nails also look fantastic with micro-glitter fades.
How do I ask my nail tech for this exact design?
Bring a reference picture! Express clearly whether you want fine micro-glitter, chunky flakes, or gold foil, and clarify if you prefer a glossy or matte finish.
How long does a black and gold gel ombré manicure last?
A professionally applied gel or acrylic set lasts 2 to 3 weeks without chipping, provided you apply cuticle oil daily and wear gloves during household cleaning.
Conclusion- Wrapping Up Your Next Glam Manicure
Black and gold glitter ombré nails deliver timeless, high-contrast style that works for almost any evening event or season. Whether you opt for a sleek matte finish, bold tiger stripe accents, or 3D rhinestone embellishments, this color pair never fails to look polished and intentional. Save your favorite variation to your Pinterest board now so you have it ready to show your nail tech at your next appointment. Which look are you trying first?

Mia founded Daily Nail Idea after a decade in beauty editorial, tired of watching great nail art disappear into the scroll. She now leads the team’s editorial direction — deciding what’s worth featuring and what’s just noise — and still paints her own nails every Sunday night, no exceptions.