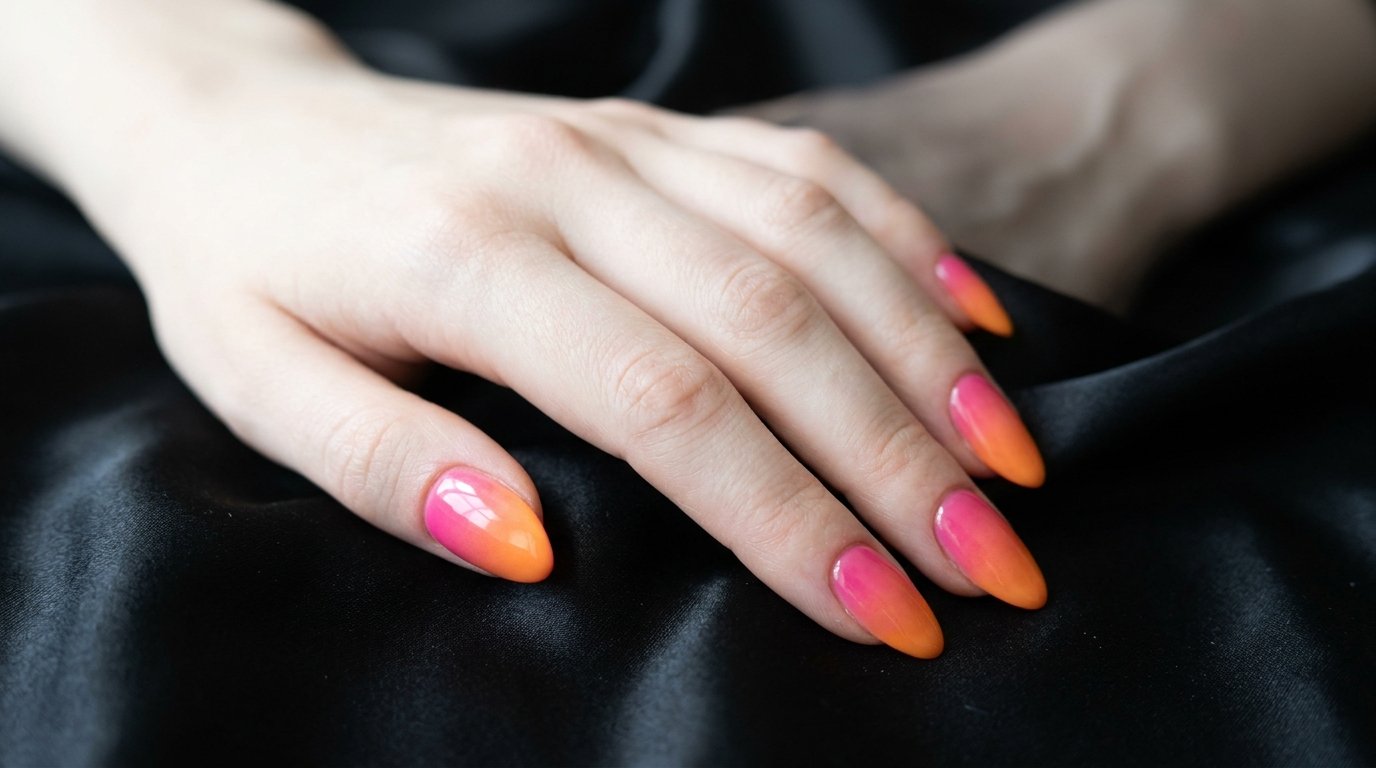
Sunset Ombré Nails: 25 Easy Vibrant Jelly Color-Melt Designs for Beginners
You are sitting in the salon chair, staring at a sea of polish swatches, completely unsure of what to ask for next. You saved a dozen glowing Pinterest photos on your phone, but every tutorial online looks impossibly complicated for a beginner. If you have ever felt overwhelmed trying to blend bright polishes without creating a muddy mess, you are in the right place.
Getting a smooth, professional color melt does not require decades of nail tech experience. I remember my early days working behind the table, constantly battling cuticle flooding and streaky gradients until I mastered the right prep techniques and sponge dampening tricks.
In this guide, I break down 25 stunning sunset ombré designs into clear, actionable methods. You will learn exact salon communication phrases, color pairings, shape adaptations, and step-by-step tutorials to get flawless results every single time.
At-a-Glance: What’s Ahead
Before diving into the detailed step-by-step instructions, here is a quick look at the five distinct design categories we will explore in this comprehensive masterclass. Each section uses a specific blend style to help you pick the right technique for your skill level.
- Classic Sunset Melts: Vibrant pinks, tangerines, and marigolds blended using a damp makeup sponge for high-impact warmth.
- Fade to Clear (Jelly Color Melts): Juicy raspberry, coral, and magenta jelly polishes layered over sheer bases for a seamless glass finish.
- Reverse and Clash Ombré: Striking neon cuticles and high-contrast color pairings that push modern nail boundaries.
- Skittle, Aura, and Rainbow Gradients: Playful multi-color transitions, halo aura dabs, and sleek striping details for maximum visual pop.
- Cool Accents and Short-Nail Minis: Fresh seafoam, turquoise, lilac, and orchid tones designed specifically to flatter shorter lengths.
The Master Sunset Prep & Seal Guide
A flawless ombré blend relies heavily on proper nail preparation. If your base canvas is bumpy or dehydrated, your gradient polishes will puddle, streak, or lift off the nail plate prematurely.
Follow this sequential prep routine before starting any of the design sections below:
- Prep the Cuticle Line: Gently push back your cuticles using a wooden stick. Lightly buff away any dead micro-skin adhering to the nail plate with a fine-grit buffer.
- Shape and Dehydrate: File your natural nails into your preferred shape. Wipe each nail thoroughly with a lint-free wipe soaked in 99% isopropyl alcohol to remove natural surface oils.
- Apply Anchor Base Coat: Sweep a thin layer of sticky base coat across the entire nail, ensuring you cap the free edge. Cure or let dry completely.
- Protect surrounding skin: Apply a liquid latex barrier or heavy cuticle oil around the skin of each finger. This prevents messy cleanup after dabbing gradient sponges.
- Seal and Level: Always finish your designs with a generous layer of high-shine quick-dry top coat or gel top coat to melt any sponge textures into a glossy glass finish.
Technical Comparison: Sponge vs. Jelly Layering Methods
Choosing the right technique depends entirely on your polish formula and desired opacity level. The table below outlines the core differences between the traditional sponge method and the sheer jelly layering method.
| Feature / Metric | Sponge Blending Method | Sheer Jelly Layering Method |
| Best Polish Type | Opaque Cream & Gel Polishes | Translucent & Glass-Finish Jelly Polishes |
| Required Tools | Latex-free Makeup Wedge, Latex Barrier | Flat Gel Brush or Original Polish Brush |
| Drying Time / Cure | Quick, thin layers dry rapidly between dabs | Requires patient drying or UV LED curing |
| Blend Softness | Soft diffuse transition, micro-stippled texture | Super glossy liquid melt, seamless fade |
| Mess Factor | High around skin (requires barrier) | Low (direct brush application over nail) |
| Skill Level | Beginner-friendly with quick setup | Intermediate (requires brush pressure control) |
Classic Sunset Melts
Classic sunset melts capture the warm, glowing transitions of dusk. By pairing bright electric pinks with soft corals and sunlit oranges, these designs deliver instant summer energy across all nail lengths.
Design 1: Electric Pink to Tangerine Melt
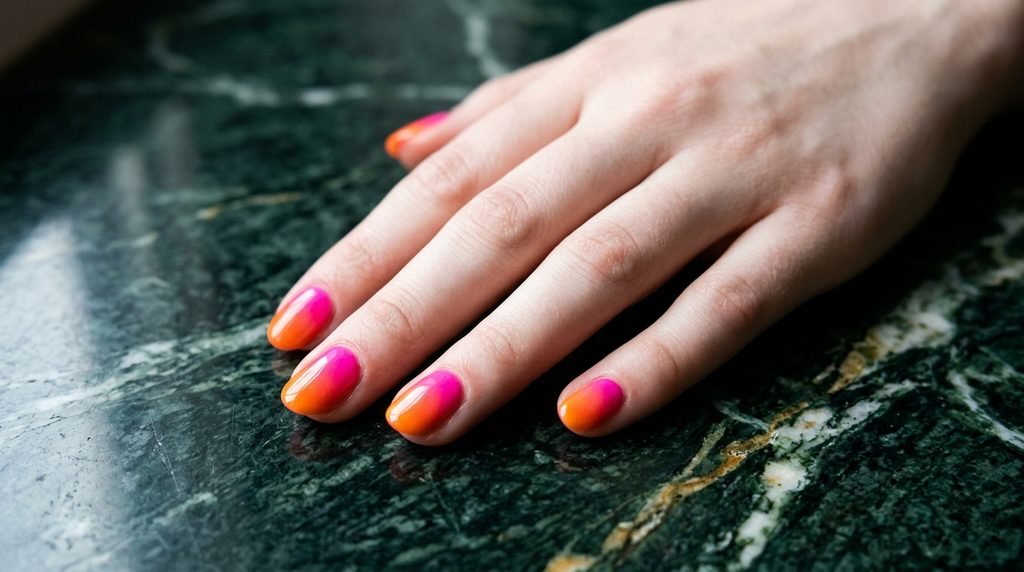
Electric pink fades seamlessly into a fiery tangerine tip. This look creates a high-energy contrast that pops against warm skin tones.
- Nail Shape: Almond or Coffin.
- Salon Communication: Ask for a two-color horizontal gradient with electric neon pink at the base melting into tangerine orange at the tips.
- DIY Technique: Stripe pink and tangerine polish directly onto a damp latex-free wedge sponge. Lightly dab onto the nail, building opacity over two passes.
- Budget Tier: DIY cream polish or press-ons.
Design 2: Sunset Ombré Classic

A rich tri-tone feel using orange, coral, and hot pink. It brings a balanced, glowing sunset directly to your fingertips without feeling overwhelming.
- Nail Shape: Oval or Medium Square.
- Salon Communication: Request a classic three-shade sunset blend featuring hot pink at the cuticle, coral in the middle, and vivid orange tips.
- DIY Technique: Layer the three shades onto a sponge, letting them overlap slightly on the foam before stippling onto your dried base coat.
- Budget Tier: Salon gel manicure.
Design 3: Tri-Color Warm Fade

This design transitions smoothly from hot pink through bright orange, ending in a sunny yellow tip. It maximizes length on medium to long nails.
- Nail Shape: Long Coffin or Stiletto.
- Salon Communication: Ask for a vertical or horizontal tri-color gradient from magenta pink down to bright yellow tips.
- DIY Technique: Use a bright white base coat first to make the sheer yellow pop at the tip. Dab the sponge three times, curing or drying between layers.
- Budget Tier: Gel-X extension overlay.
Design 4: Sunny Marigold to Orange
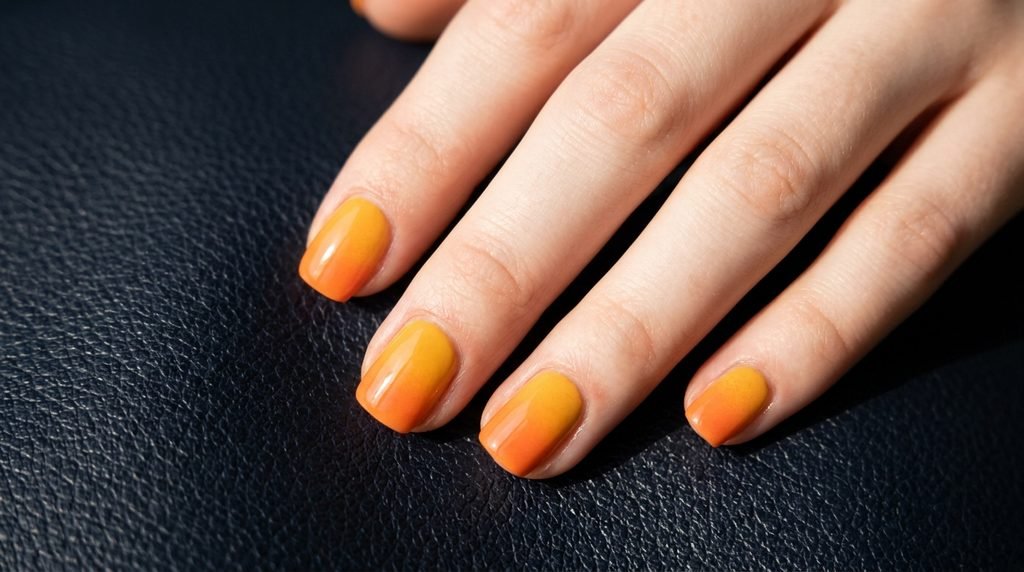
Warm marigold yellow melts gracefully into a deep, punchy orange tip. It offers a golden-hour glow perfect for late summer days.
- Nail Shape: Short Round or Squoval.
- Salon Communication: Ask for a soft marigold yellow fading into a rich citrus orange gradient.
- DIY Technique: Apply marigold to the bottom half of the sponge and orange to the top. Keep the dabbing light to avoid harsh lines.
- Budget Tier: DIY lacquer.
Design 5: Soft Coral-Pink to Sunlit Orange Tips

A delicate take featuring a sheer nude base that transitions gently into soft coral-pink and sunlit orange tips.
- Nail Shape: Short Almond.
- Salon Communication: Request a sheer pink nude base with a soft coral-to-orange ombré localized at the top third of the nail.
- DIY Technique: Keep your sponge dabs restricted strictly to the free edge of the nail, leaving the bottom half bare and neutral.
- Budget Tier: Press-on nails.
Fade to Clear (Jelly Color Melts)
Jelly polishes feature translucent pigments that naturally melt into clear or nude bases. They offer a glass-like finish that looks effortless and modern.
Design 6: Neon Raspberry into Clear

Rich neon raspberry jelly color concentrated at the cuticle, fading into a completely clear free edge.
- Nail Shape: Clear Acrylic or Gel-X Extensions.
- Salon Communication: Ask for a neon raspberry jelly polish ombre over transparent clear extensions, fading out toward the tip.
- DIY Technique: Paint the raspberry jelly at the cuticle, then take a clean gel brush dipped in alcohol to pull the polish down toward the clear tip.
- Budget Tier: Salon clear gel extensions.
Design 7: Tangerine into Clear Iridescent Glitter

A juicy tangerine jelly base that dissolves into a clear tip, topped with micro iridescent glitter shimmers.
- Nail Shape: Almond.
- Salon Communication: Request a tangerine jelly gradient over a neutral base, topped with fine iridescent glitter polish.
- DIY Technique: Blend your tangerine jelly downwards, let it dry, then sweep a light coat of fine glitter polish over the entire nail surface.
- Budget Tier: DIY gel polish kit.
Design 8: Hot Pink Tips Over a Sheer Milky Base
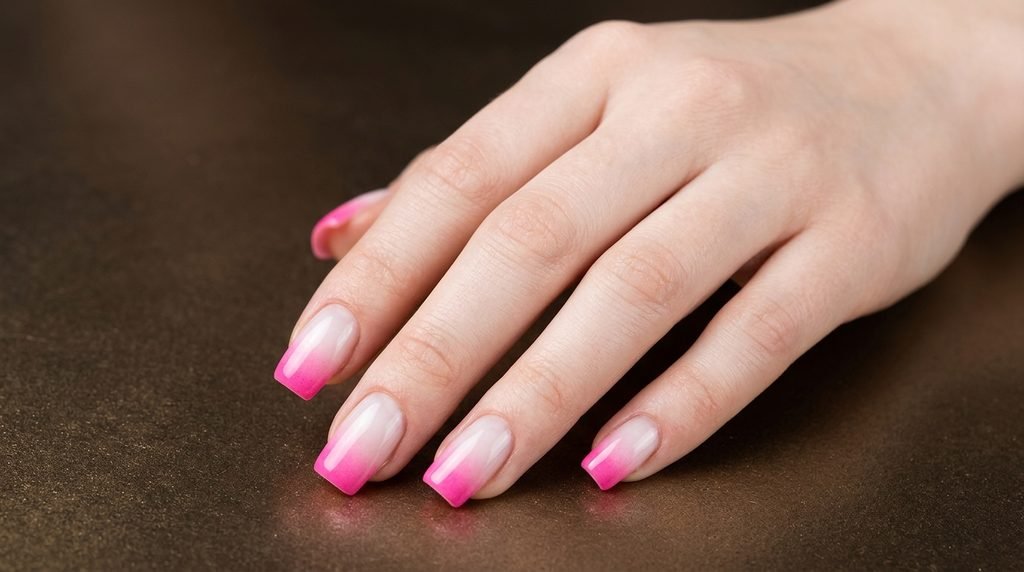
A fresh twist on the French tip using a soft, cloudy milky white base topped with a blended hot pink sponge ombré at the ends.
- Nail Shape: Medium Square.
- Salon Communication: Ask for a milky white translucent base coat with hot pink ombré French tips.
- DIY Technique: Apply two coats of milky nude base. Once dry, sponge hot pink polish onto the top half of the nail only.
- Budget Tier: DIY cream polish.
Design 9: Coral Tips Dissolving into a Nude Base

Warm coral jelly color painted at the tip and feather-brushed upward into a sleek, skin-tone matching nude base.
- Nail Shape: Short Coffin.
- Salon Communication: Request a warm nude base with a coral ombre micro-tip.
- DIY Technique: Use a dry ombre fan brush to lightly stroke the wet coral polish backward into the sticky nude base coat.
- Budget Tier: Press-ons.
Design 10: Magenta Jelly Over a Purple Base
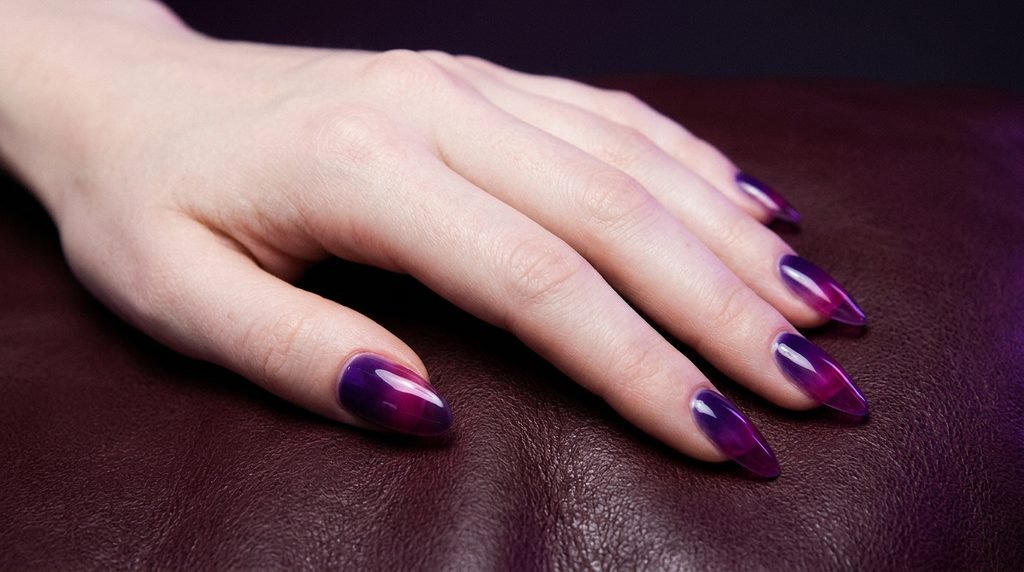
Deep purple layered under a vivid magenta jelly creates a rich, glowing twilight sunset tone with high visual depth.
- Nail Shape: Long Almond.
- Salon Communication: Request a deep violet base coat layered under a bright magenta jelly gradient.
- DIY Technique: Apply your violet base, then layer two coats of translucent magenta jelly over the upper two-thirds of the nail.
- Budget Tier: Salon gel manicure.
Comprehensive Color Palette Guide
Finding the perfect color combinations is essential for achieving a balanced sunset effect without muddying your tones. The table below lists tested palette recipes and their ideal skin undertone pairings.
| Design Palette | Primary Base Shade | Transition Shade | Accent Tip Shade | Recommended Skin Undertone |
| Classic Dusk | Electric Magenta Pink | Warm Coral | Sunlit Gold | All Undertones |
| Citrus Flare | Neon Tangerine | Bright Peach | Lemon Marigold | Warm & Golden Undertones |
| Twilight Punch | Deep Plum Violet | Neon Raspberry | Soft Apricot | Cool & Neutral Undertones |
| Tropical Breeze | Soft Coral Pink | Sunny Yellow | Mint Seafoam | Neutral Undertones |
| Pastel Horizon | Creamy Lavender | Soft Lilac | Milky White | Cool Undertones |
Reverse and Clash Ombré
Reverse and clash ombrés subvert traditional gradient designs by placing bright colors at the cuticle line or pairing unexpected complementary tones together.
Design 11: Reverse Ombré, Neon Green Cuticle Fading to Sage
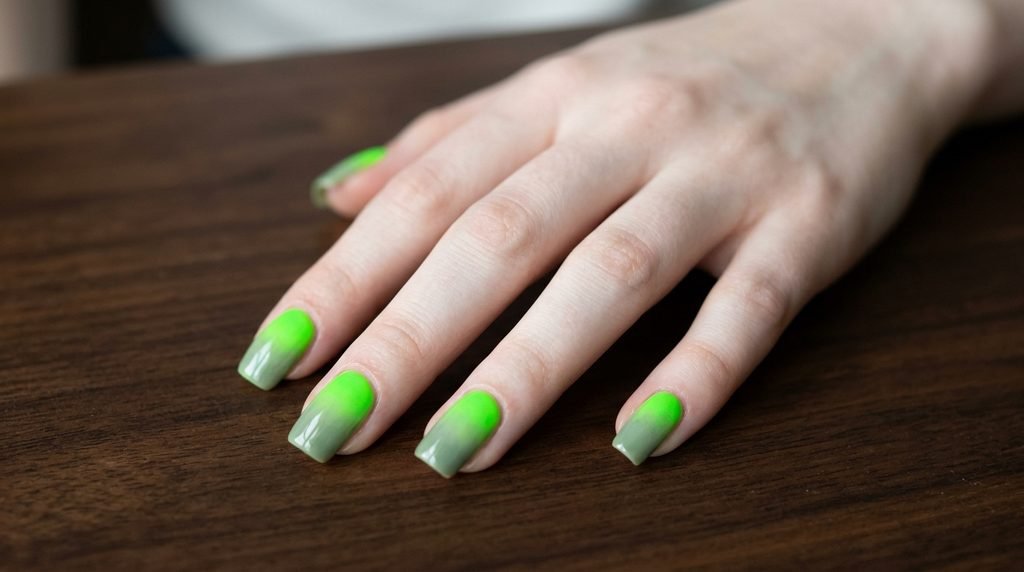
Neon green at the cuticle line softly fades down into a muted, sophisticated sage green tip.
- Nail Shape: Square or Squoval.
- Salon Communication: Ask for a reverse gradient with high-visibility neon green at the cuticle fading into a muted sage tip.
- DIY Technique: Sponge the bright neon shade precisely near the cuticle line using a micro cosmetic wedge, blending downward.
- Budget Tier: DIY lacquer.
Design 12: Reverse Sunset, Tangerine Cuticle to Hot Pink Tip
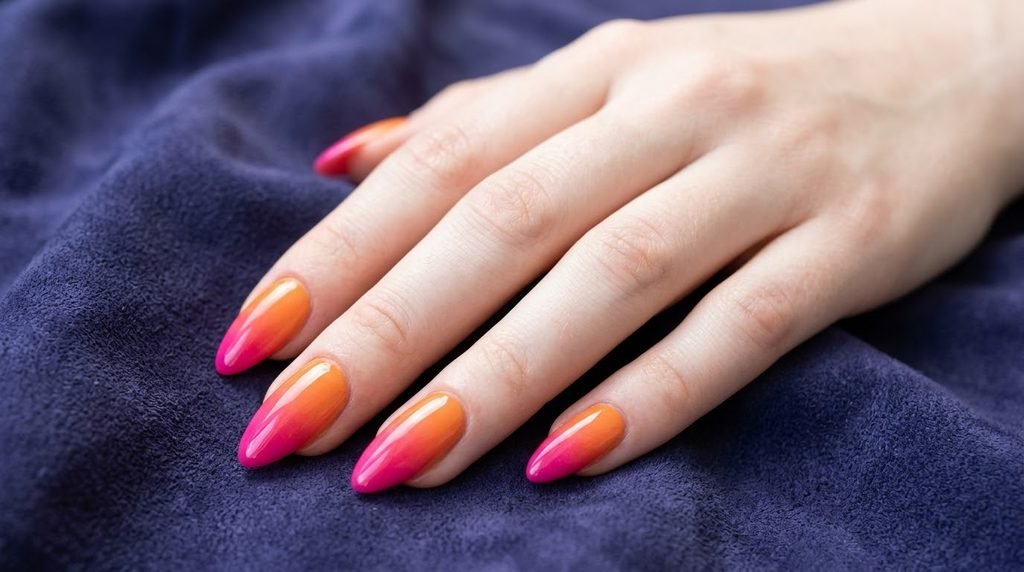
Flipping the classic sunset by starting with glowing tangerine at the base and ending in a deep hot pink at the free edge.
- Nail Shape: Almond.
- Salon Communication: Request a reverse sunset gradient—orange at the cuticle, hot pink at the tip.
- DIY Technique: Load your sponge with orange on top and pink on the bottom, placing the orange edge tight against the cuticle barrier.
- Budget Tier: Press-ons.
Design 13: Lime into Neon Yellow

An ultra-bright citrus combination featuring lime green at the cuticle melting into a blinding neon yellow tip over a solid white base.
- Nail Shape: Short Coffin.
- Salon Communication: Request an opaque white base coat topped with a lime green to neon yellow ombré gradient.
- DIY Technique: Lay down a full coat of opaque white polish first. This gives neon lime and yellow pigments maximum vibrancy.
- Budget Tier: DIY cream polish.
Design 14: Smoky Gray-Green into Citrus Yellow

A moody, edgy contrast where cool smoky gray-green transitions rapidly into a vibrant citrus yellow tip.
- Nail Shape: Stiletto or Long Oval.
- Salon Communication: Ask for a dark smoky gray-green at the cuticle fading into a bright citrus yellow tip.
- DIY Technique: Blend in thin coats. Dark gray polish easily overwhelms yellow, so apply minimal gray pigment to your sponge.
- Budget Tier: Salon gel manicure.
Design 15: Orange Meets Neon Lime Clash

A high-impact clash pairing fiery orange with bright neon lime green for an eye-catching retro aesthetic.
- Nail Shape: Medium Coffin.
- Salon Communication: Request a high-contrast ombre gradient featuring orange at the base and neon lime green at the tip.
- DIY Technique: Dab light layers to avoid a muddy brown overlap line where orange and lime green meet in the center.
- Budget Tier: Gel-X extensions.
Skittle, Aura and Rainbow
Skittle and aura styles play with multi-tonal layouts across different fingers. These designs bring an artistic, dreamy feel to classic sunset gradients.
Design 16: Skittle Ombré Jelly, Two Sheer Colors Per Nail

Every nail features a unique two-tone blend using sheer jelly polishes, creating a cohesive yet varied sunset spectrum across your hand.
- Nail Shape: Almond.
- Salon Communication: Request a skittle manicure where each finger gets a different pair of blending jelly polishes.
- DIY Technique: Pair adjacent colors on each finger—pink/orange on thumb, orange/yellow on index, yellow/green on middle, and so on.
- Budget Tier: DIY jelly polish set.
Design 17: Skittle Aura on a Sheer Base
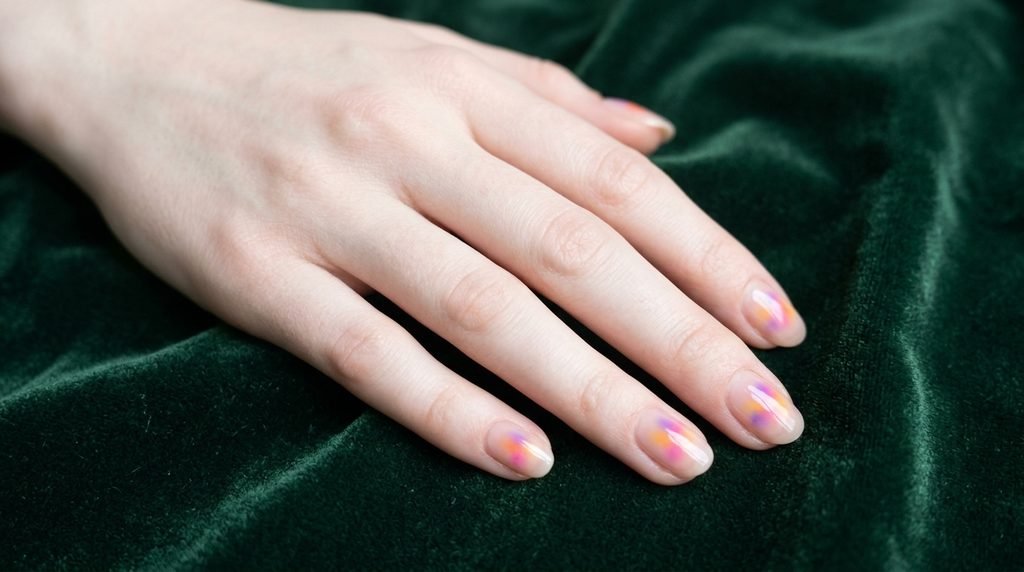
Soft halo circles of pink, orange, yellow, teal, and purple dabbed into the centers of each nail over a nude background.
- Nail Shape: Oval or Round.
- Salon Communication: Ask for a sheer neutral base coat with colorful aura halos centered on each finger.
- DIY Technique: Cut a small round makeup sponge tip, apply color, and press directly into the center of the nail plate.
- Budget Tier: Press-ons.
Design 18: Pastel Rainbow Ombré

A delicate sunset option featuring yellow, pink, mint, peach, and lavender blending horizontally across the nails.
- Nail Shape: Short Squoval.
- Salon Communication: Request a soft pastel rainbow gradient horizontally blended across each nail.
- DIY Technique: Use light pastel cream polishes on a damp sponge, working in three thin coats to prevent streaking.
- Budget Tier: DIY lacquer.
Design 19: Rainbow Ombré with a Silver Stripe
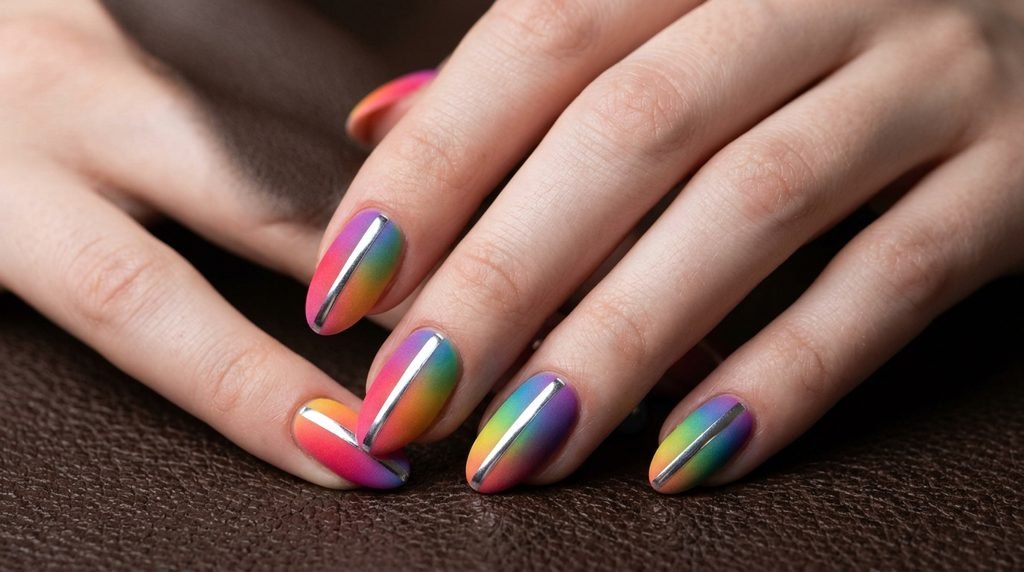
A vivid rainbow gradient topped with a ultra-crisp metallic silver striping line placed horizontally across the color transition.
- Nail Shape: Matte Almond.
- Salon Communication: Ask for a full rainbow gradient with a matte topcoat, accented by a shiny metallic silver stripe through the middle.
- DIY Technique: Sponge your rainbow, apply a matte topcoat, let dry, then apply metallic silver striping tape across the center.
- Budget Tier: Salon acrylics with nail art.
Design 20: Linear Rainbow Gradient
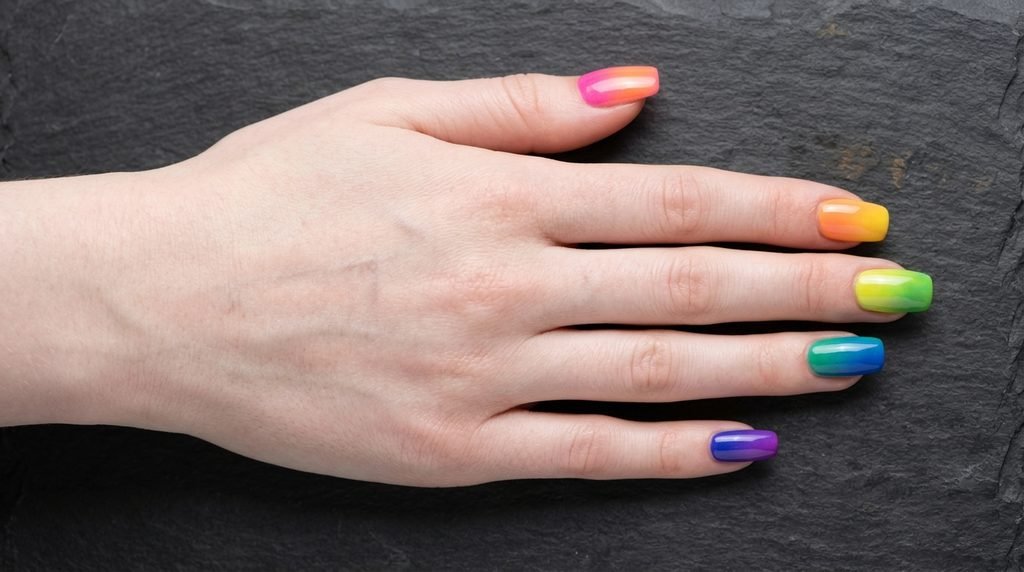
A continuous rainbow transition that spans across all five fingers, starting with red-pink on the thumb and ending with purple on the pinky.
- Nail Shape: Square.
- Salon Communication: Request a continuous five-finger gradient where the ombré flows from pink on the thumb across to purple on the pinky.
- DIY Technique: Treat all five nails as one continuous canvas, shifting your polish colors slightly across each individual nail.
- Budget Tier: DIY cream polish.
Cool Accents and Short-Nail Minis
Cool sunset accents prove that color melts look exceptional on short nails. By using soft blues, seafoam tones, and cool purples, these designs offer a refreshing twist on classic warmth.
Design 21: Seafoam Tips Over Blush

Cool seafoam green softly blended onto the tips of a delicate blush pink base coat.
- Nail Shape: Short Round.
- Salon Communication: Request a light blush pink base with a subtle seafoam green ombré tip.
- DIY Technique: Sponge seafoam green only on the top third of a dried blush base, blending upward lightly.
- Budget Tier: DIY lacquer.
Design 22: Turquoise into Lime Accent Nail

Bright turquoise dissolving into electric lime green, featured on the ring finger while other nails remain solid turquoise.
- Nail Shape: Short Oval.
- Salon Communication: Ask for full-coverage turquoise nails with a turquoise-to-lime green ombré accent nail.
- DIY Technique: Paint four nails turquoise. On the accent nail, sponge a lime green gradient starting from the middle down to the tip.
- Budget Tier: DIY gel kit.
Design 23: Radiant Orchid to Nude
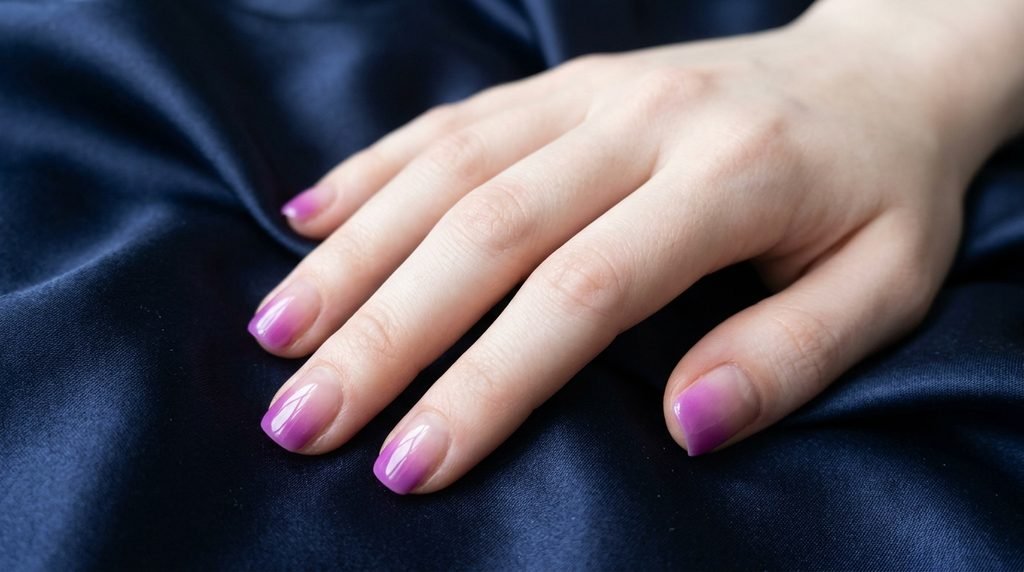
Vivid orchid purple fading upward into a soft, neutral nude nail bed.
- Nail Shape: Short Squoval.
- Salon Communication: Request a clean nude base with a radiant orchid purple ombré on the outer half of the nail.
- DIY Technique: Layer an orchid jelly polish over the free edge using a soft tapping motion with a silicone brush.
- Budget Tier: Press-ons.
Design 24: Soft Lilac into Milky White

Dreamy soft lilac purple blending downward into a cloud-like milky white base.
- Nail Shape: Short Almond.
- Salon Communication: Ask for a milky white base coat with a soft lilac ombré starting from the cuticles.
- DIY Technique: Apply milky white base. Sponge soft lilac polish from the cuticle to the mid-point of the nail.
- Budget Tier: DIY cream polish.
Design 25: Hot Pink to Orange on Short Square Nails

A compact, punchy sunset melt designed specifically to maximize visual impact on short, clean square nails.
- Nail Shape: Short Square.
- Salon Communication: Request a hot pink to orange horizontal ombré tailored for short square nails.
- DIY Technique: Use tight, vertical sponge dabs to keep the transition sharp without overflowing short side walls.
- Budget Tier: DIY gel polish kit.
Frequently Asked Questions
How do I prevent my sponge from leaving texture on my ombré nails?
Dampen your makeup sponge with water first and squeeze out every excess drop until it is merely damp. A bone-dry sponge absorbs too much liquid polish, leaving micro-air bubbles and rough foam textures on your nail bed. Always finish with a thick layer of quick-dry top coat to melt any tiny ridges into a smooth surface.
Why do my sunset ombré colors look muddy when blending?
Muddy blends happen when you mix colors that sit opposite each other on the color wheel without an intermediary transition shade. For example, blending green directly into red or purple into yellow creates a dull brown line. Always place a buffer shade in the middle, such as orange between red and yellow, to keep your sunset gradients vibrant.
Can I create sunset ombré nails using regular polish instead of gel?
Yes, regular polish works exceptionally well for sponge ombré designs. The key is working quickly before the lacquer dries on the sponge. Apply thin layers of polish directly to the wedge, stipple onto the nail, and seal immediately with a wet-look top coat while the gradient layer is slightly tacky.
How do I keep gel ombré polish from flooding my cuticles?
Cuticle flooding occurs when too much liquid gel product is loaded onto the brush or sponge near the skin wall. Always apply a liquid latex barrier around your finger skin before starting. Additionally, keep your initial stippling dabs focused 1 millimeter away from the skin, gently pushing product toward the edge rather than flooding it directly.
Conclusion
Sunset ombré nails offer an effortless way to express vibrant color, whether you prefer glowing tropical creams or ultra-glossy jelly finishes. By selecting the right shape, preparing your nail plate correctly, and using dampened sponges or feather-brushing techniques, you can achieve salon-quality results right at home. Save this guide on Pinterest to bring to your next appointment, and pick your favorite palette to try this week!

Mia founded Daily Nail Idea after a decade in beauty editorial, tired of watching great nail art disappear into the scroll. She now leads the team’s editorial direction — deciding what’s worth featuring and what’s just noise — and still paints her own nails every Sunday night, no exceptions.