X-Ray Skeleton Nails: Easy Bone Line Art on Short Black Nails for Halloween
Not sure what to ask your nail tech for this Halloween? Maybe you saved a detailed skeleton look on Pinterest but you’re worried your short nails can’t handle it. Trust me, I get it. Detailed art on shorter lengths can feel impossible, like trying to paint a masterpiece on a postage stamp.
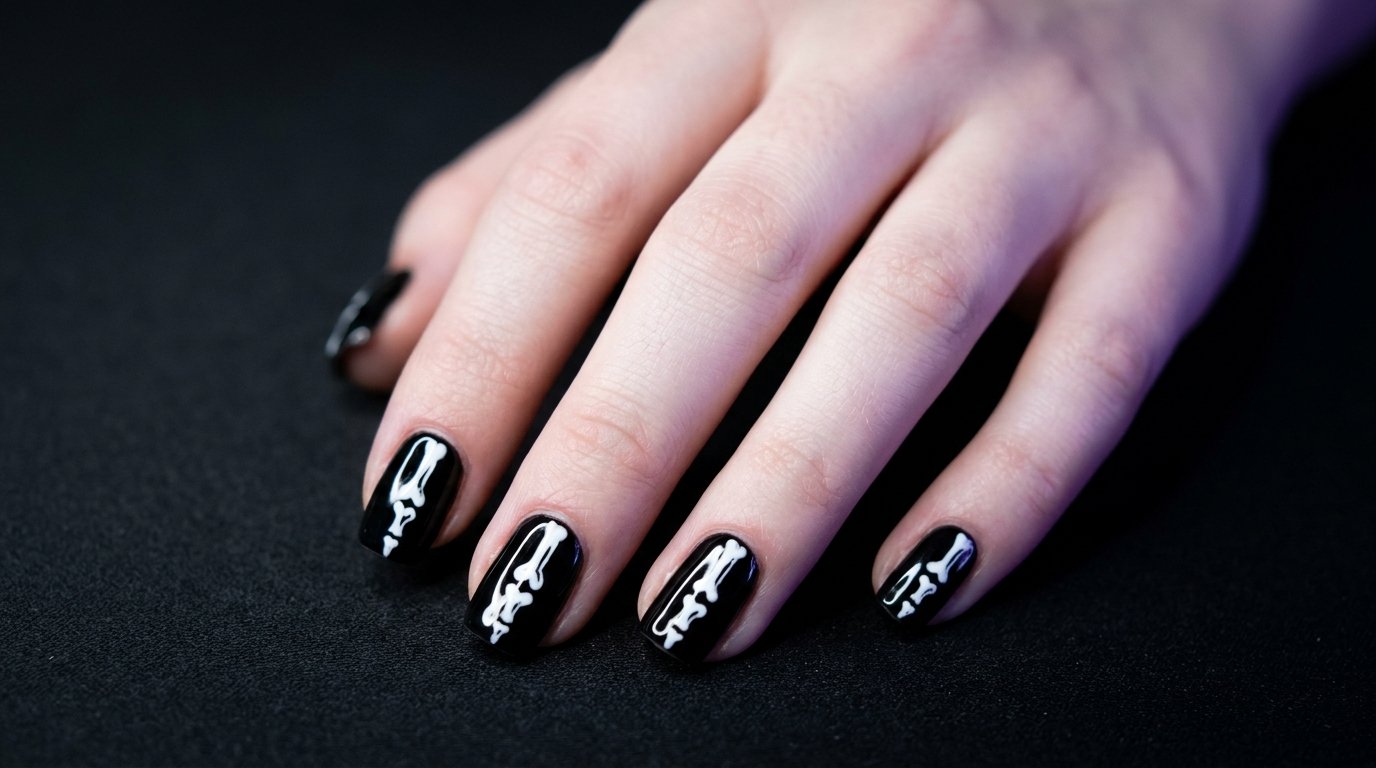
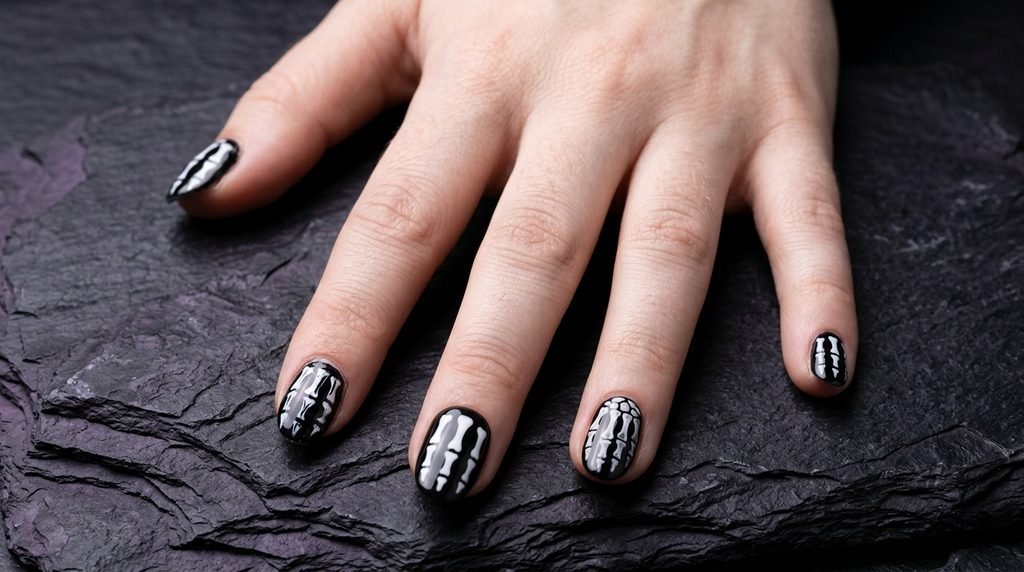
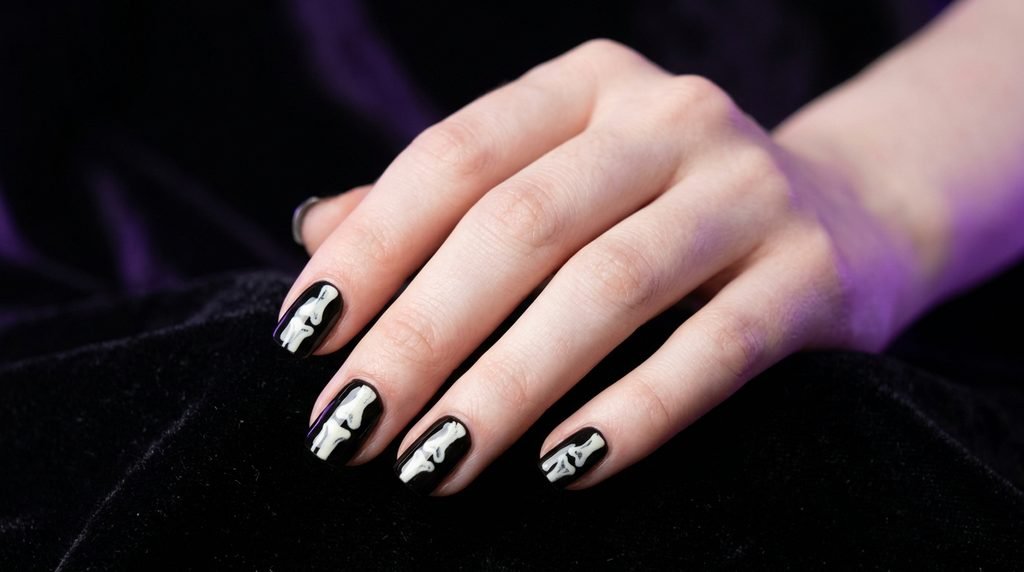
But you absolutely can rock spooky nails without needing inch-long acrylics. That’s exactly why I love this x-ray skeleton nails look. It uses very simple white bone lines on a black base. The slightly rough, imperfect lines actually add to the cool, moody x-ray scan vibe.
You don’t need fancy skills, either. This design is focused purely on being easy halloween nails that work specifically on short lengths. So, if you’re scrolling for inspo right before your salon appointment or thinking about trying this at home, you are in the right place. Let’s make your short nails the spookiest ones in the room.
At-a-Glance: The X-Ray Bone Nail Look
We are about to cover exactly how to achieve this spooky, simplified skeleton art. I’ll guide you through making simple white lines look like an official “bone line art” design, especially optimized for short black nails. We will explore variations like the skeleton French tip and full hand placements, ensuring every tip is actionable for your next manicure. Expect detailed steps and technical advice directly from salon experience to avert any messy mistakes.
Why Short Black Nails are Perfect for Halloween
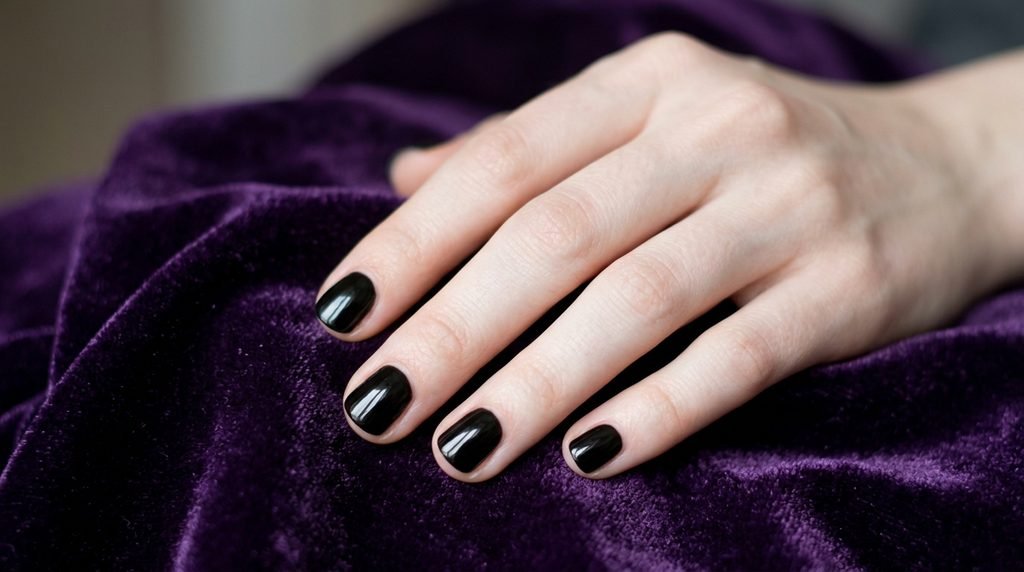
Look, sometimes long nails are just a hassle. Short nails are practical, and they actually make dark colors like black look incredibly chic and tidy. For Halloween, a short black nail offers the ultimate high-contrast canvas for any white art, especially spooky nails.
The short length keeps the dark polish from looking overwhelming or messy. When we add the white bone lines, the limited space actually helps you. You can’t fit a complex, hyper-realistic skeleton hand on a short nail, nor should you try. Instead, you focus on key minimalist lines that represent bones, which is much easier to do neatly. This contrast is the entire point, making it one of the easiest halloween nail ideas for shorter lengths.
Unpacking the “X-Ray” Skeleton Aesthetic
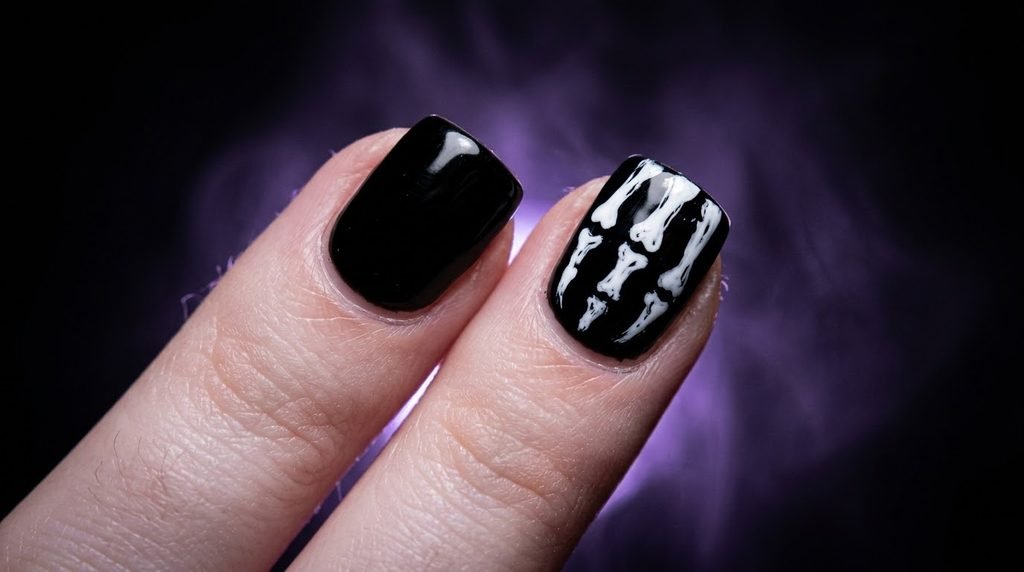
So, what exactly are x-ray nails? This isn’t just about drawing a cartoon skull. The “x-ray” vibe is all about that stark, negative-print look: bright white structures glowing against a deep, dark void. In our case, the void is your black polish.
We are aiming for minimalist bone line art, not a full medical illustration. The lines shouldn’t be perfect; they should look slightly raw, perhaps a little blurry or hazy around the edges, mimicking how an actual x-ray scan appears. This is why white bone lines on black nails work so well—it instantly signals “bone structure” to the eye without needing complex shading or texture.
Prepping Short Nails for a Dark Manicure
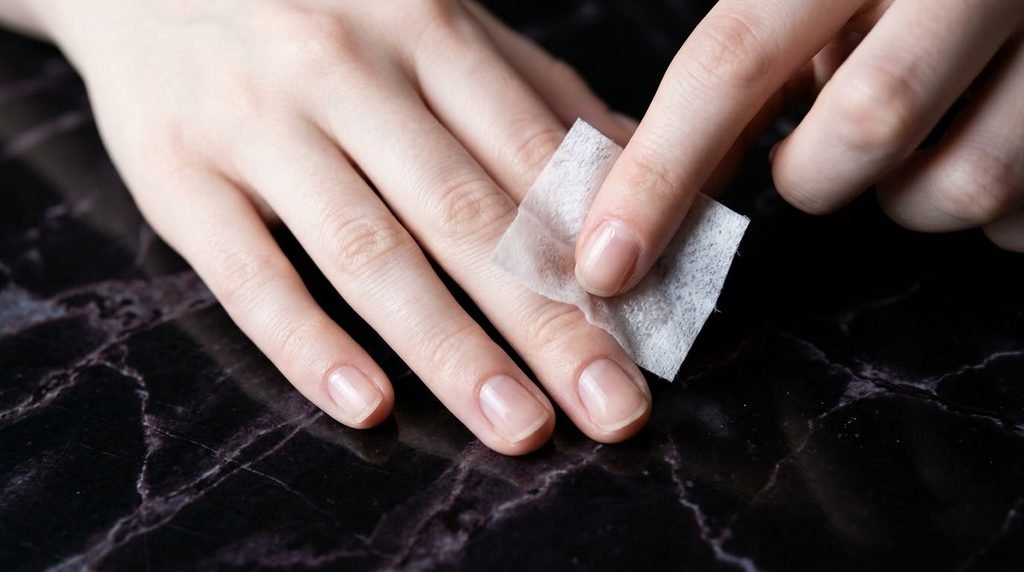
Listen, nothing ruins a dark mani faster than sloppy prep. Before you even touch the black polish, you must ensure your nails are clean. Dark polish highlights every single flaw, including invisible oils on your nail plate.
- Shape and Length: File your short nails neatly, making sure all the free edges are smooth. A rounded or neat square shape looks great.
- Cleanse: Use a lint-free wipe soaked in 99% alcohol to thoroughly clean your nail plate, removing all natural oils or lotion residue. This step is non-negotiable for prevention of lifting.
- Cuticle Care: Gently push back your cuticles. Do not flood them with prep oils or water right before polishing. We want the nail plate totally dry. This ensures your base coat sticks like glue.
The Salon Secret to Perfect Opaque Black
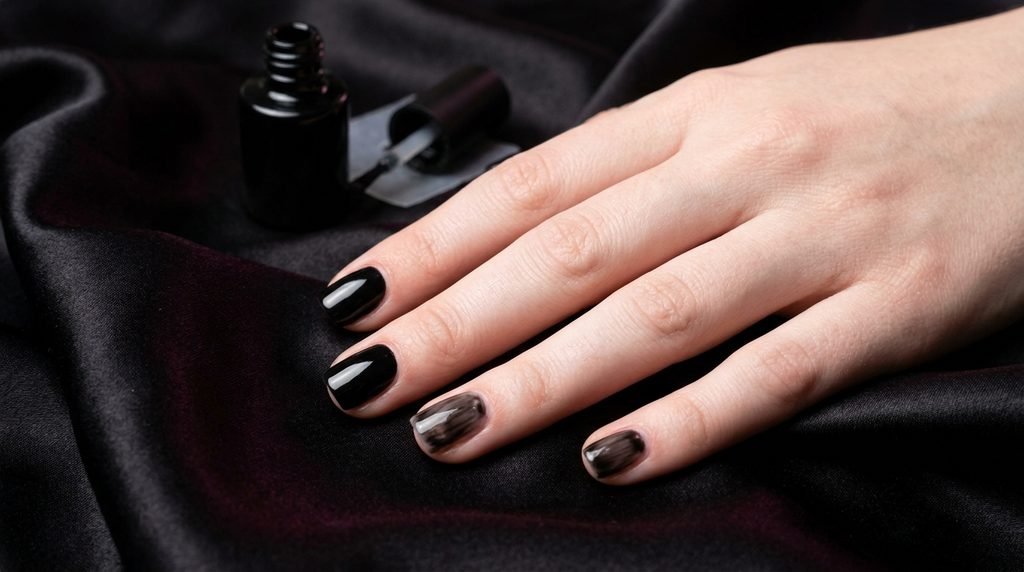
You’ve probably experienced streaky black polish that requires five coats. Nobody has time for that. For this look, a solid, opaque black base is essential. I always recommend finding a professional-grade single-coat black polish, or at least one that guarantees full opacity in two thin, even coats.
My best technical tip from the salon? Apply thin coats. It’s better to do two paper-thin coats than one thick, gloopy one that will never cure properly in the center. A thick layer is the #1 cause of soft, dent-prone polish or “wrinkling” under a UV lamp if you are using gel. When you apply thinly, you have far more control, preventing messy cuticles.
Tools of the Trade: Fine Liner Brushes for Bone Art
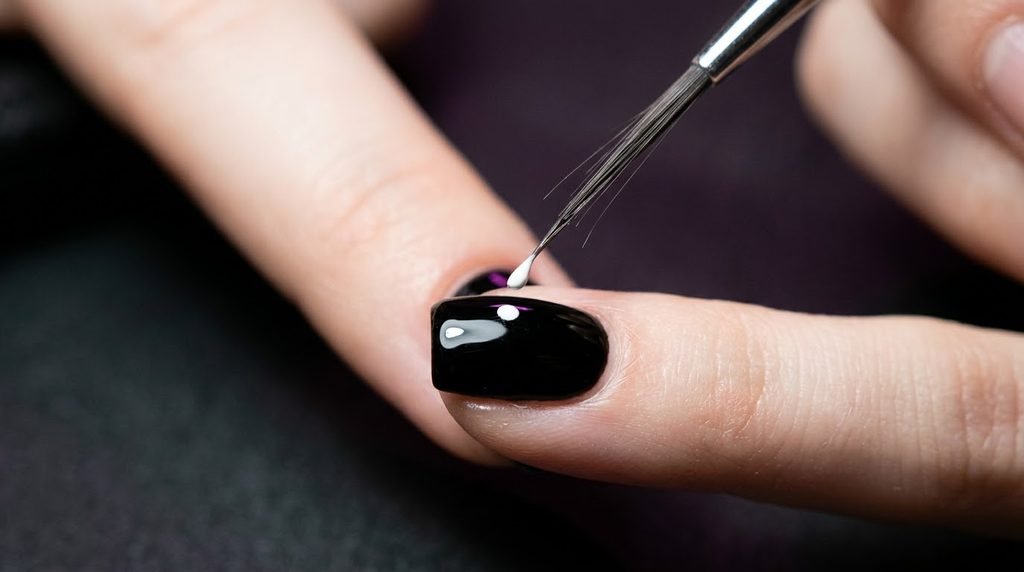
When we say “easy halloween nails,” we mean it, but you do need the right simple tool. You cannot achieve delicate bone lines with the chunky brush that comes in the polish bottle. You need a dedicated art brush.
- Liner Brush: Look for a very long, very thin liner brush. The long bristles hold more paint, which allows you to draw a longer, continuous line without stopping, crucial for the ‘long bones.’
- Detail Brush: A tiny, short detail brush is useful for smaller, precise connections, like the small cross lines for the joints.
- Palette: Use a palette (or even a piece of foil) to place a drop of your white polish or gel. Never double-dip your brush directly into the main polish bottle.
Your First Bone: Mastering the Central “Long Bone”
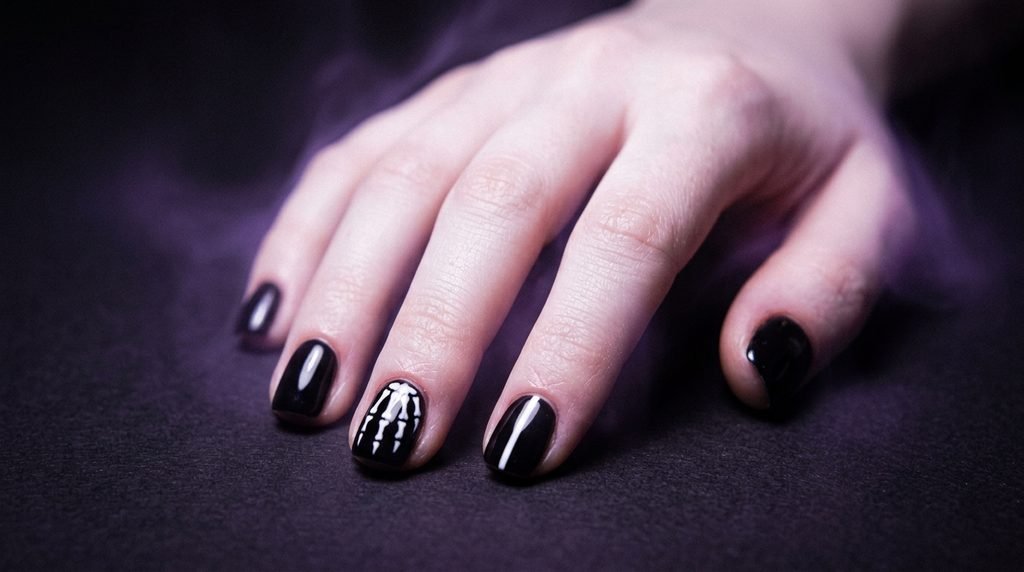
Let’s break down the actual art. This simple skeleton nail design starts with just one line. For each nail that is getting art, this first central white line is your foundation.
- Load the Brush: Dip your long liner brush into the white paint on your palette. Wipe off most of the paint on the edge of the palette. You want the brush loaded, but not so full that it drips. A gloopy brush will create blobs, not lines.
- The Technique: Imagine you are drawing an x-ray scan. Place your brush near the cuticle area (leave a tiny gap) and apply gentle, even pressure. Pull the brush in one slow, smooth motion down the center of your nail toward the tip. Don’t worry if it’s not perfectly straight—it’s organic. Just focus on a single, continuous stroke.
How to Add Spooky Joint and “Finger Bone” Details
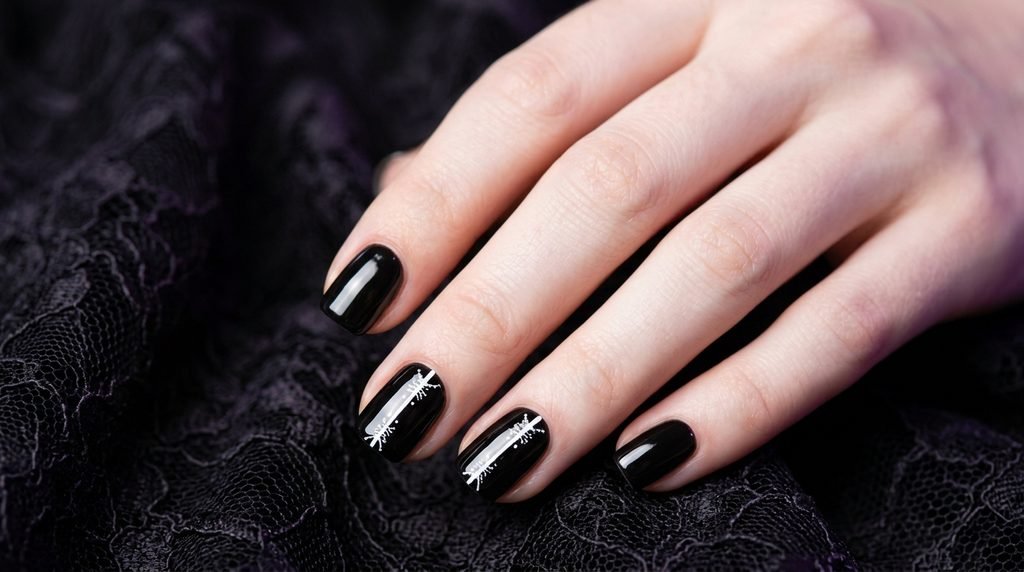
Once you have your central vertical line, it’s time to make it look like actual white bone lines on black nails. We will add very short cross lines to represent joints or multiple segments.
- Switch Brushes (Optional): This is where a slightly shorter, finer detail brush can be easier to control.
- The Cross Lines: Looking at your central vertical line, decide where you want the “joints” to be.
- The Application: Use the tip of your brush to paint 2-3 very short, fine, horizontal lines that cross directly over your main vertical line. For a pointer finger, you might do two sets, simulating two finger knuckles. For a thumb, maybe just one. Keep these connections simple. You aren’t drawing anatomical accuracy; you are drawing the impression of joints.
Making Your Bones Look Like an X-Ray Scan (Technical Tip)
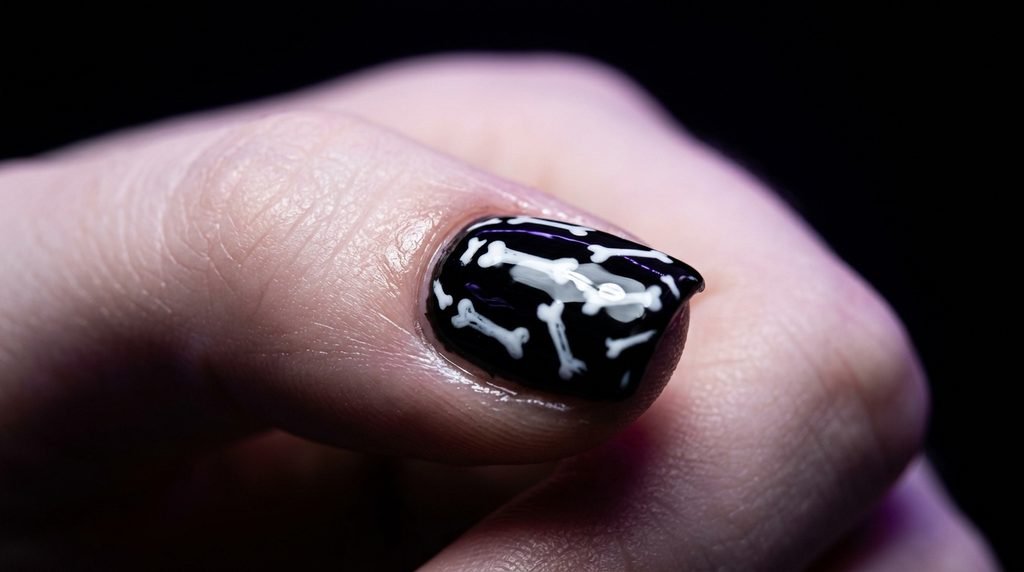
Here’s the real salon secret that elevates this from “simple line art” to “x-ray nails.” You need to soften the look slightly. A freshly painted, crisp white line can sometimes look too stark and cartoonish against the black.
Before your white lines are fully cured (if using gel) or dried (if using regular polish), we are going to add a haze. You can try one of two methods:
- The Wipe Method (Gel Only): Lightly dampen your brush with a tiny bit of alcohol, then very softly trace near (not over) the edge of the white lines you just painted. This dissolves the edge slightly, creating a soft, blurry halo that perfectly mimics a light-based scan.
- The Dry Brush Method (Regular/Gel): Take a small, dry, fluffy brush (like an eyeshadow brush) and very lightly tap or dust over the white lines before they dry/cure. This gently smudges and softens the sharpness, creating that glowing, airy effect. Be very careful not to smear the base color.
Creating a Simple Skeleton French Tip Variation
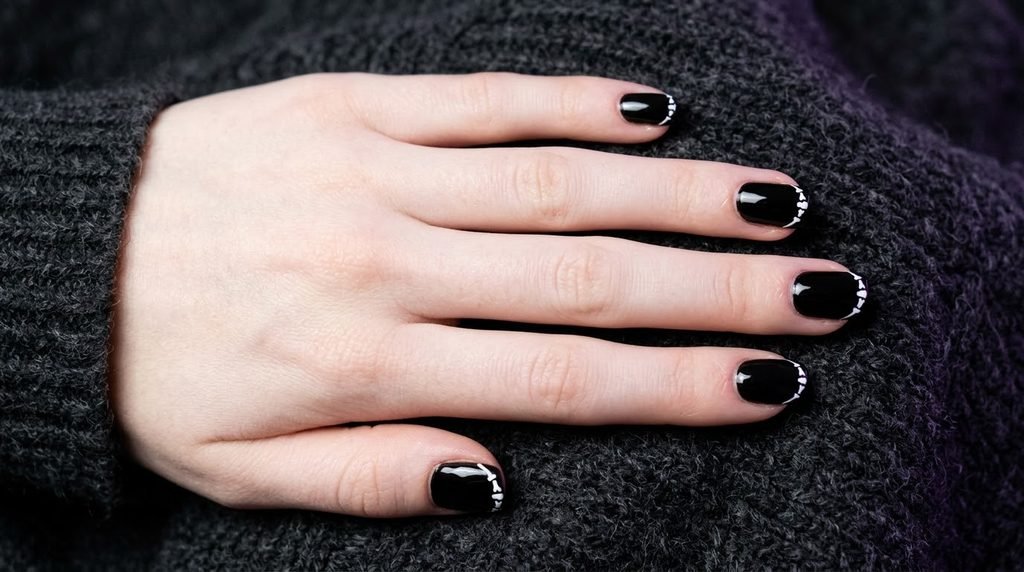
Not everyone wants full bone line art on every nail. A fantastic, lighter alternative is the skeleton french tip nails. This looks amazing on short nails, especially short square or squoval shapes.
- Black Base: Paint all your nails with your opaque black base.
- The Smile Line: Instead of a traditional white “smile line,” we will paint a very thin, horizontal white bone line right across the free edge tip of your nail.
- Details: Add 2-3 tiny, fine vertical white dots or very short segments crossing through that horizontal tip line. It’s like a tiny ‘bone pattern’ along the edge. The focus is purely on the tip, leaving the main nail black.
The Ultimate High-Contrast Finish: Gloss vs. Matte Top Coat
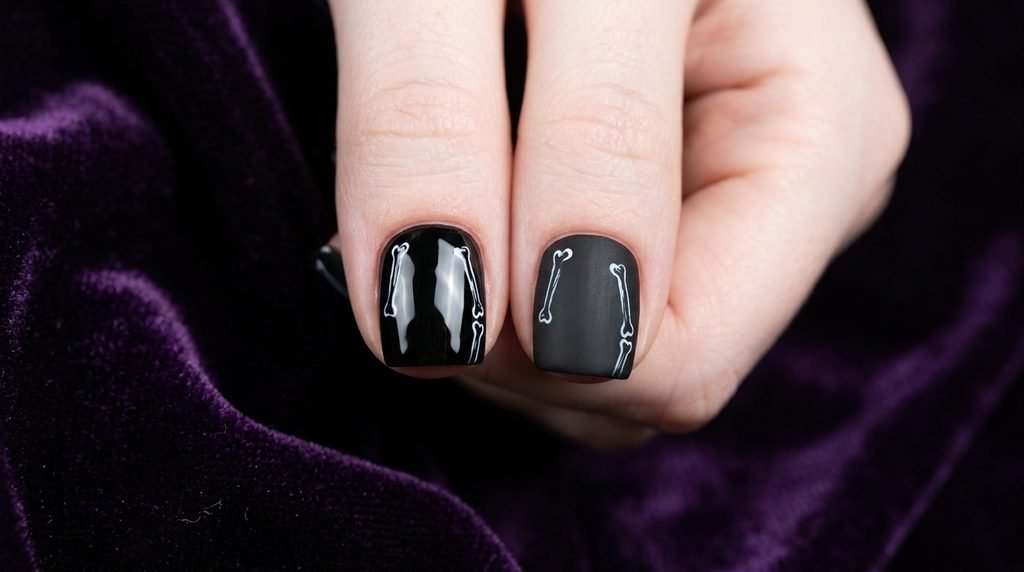
You’ve done the work, now you must seal it. A final top coat is critical for protecting that delicate bone line art and achieving the right finish. For this look, you have two great options.
- High-Gloss (Traditional X-Ray): A super shiny, high-gloss top coat will make your black base deep and reflective, maximizing the contrast with the white lines. The art will appear incredibly sharp. This is my go-to recommendation for a dramatic effect.
- Matte (Spooky/Gothic): A matte top coat will remove all reflections from the black. This can make the black look more like a dark void, and the white lines will pop in a very neat, chalky way. It has a slightly more gothic, artistic feel.
Whichever you choose, ensure you cap the free edge with your top coat to prevent chipping.
Adapting Skeleton Nails for Short Square Shapes
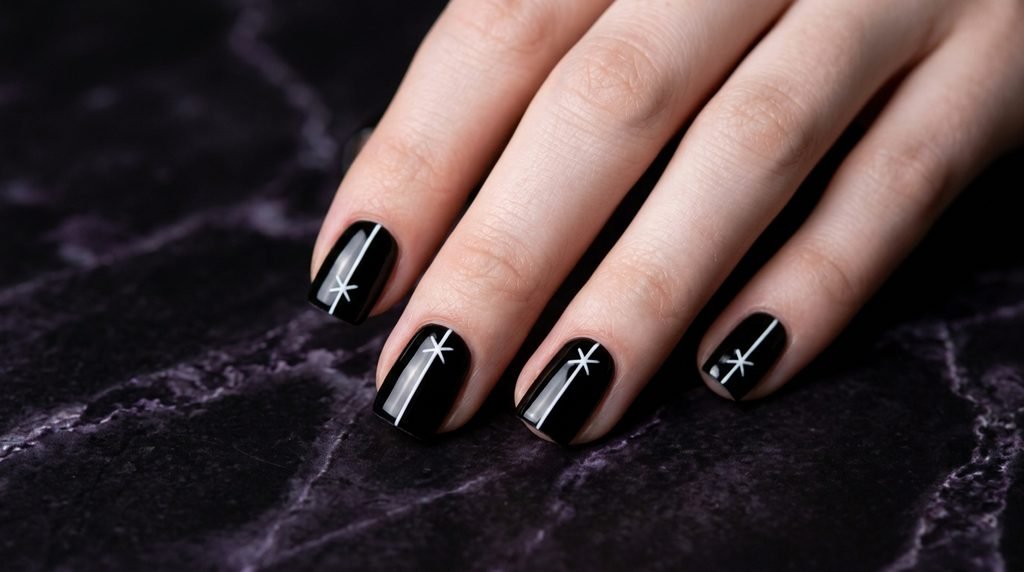
This x-ray style works perfectly on short square or squoval (square-oval) nails. The straight, strong lines of the nail shape echo the geometric, linear nature of the simple white lines we are painting.
For a short square, try a minimalist full-nail bone: one single vertical line right down the center, with maybe two small cross lines. This layout perfectly utilizes the vertical space without cramping the short width. Alternatively, the skeleton french tip nails (from section 9) look particularly sharp and structured on short, square-filed tips.
Adapting Skeleton Nails for Short Round or Oval Shapes
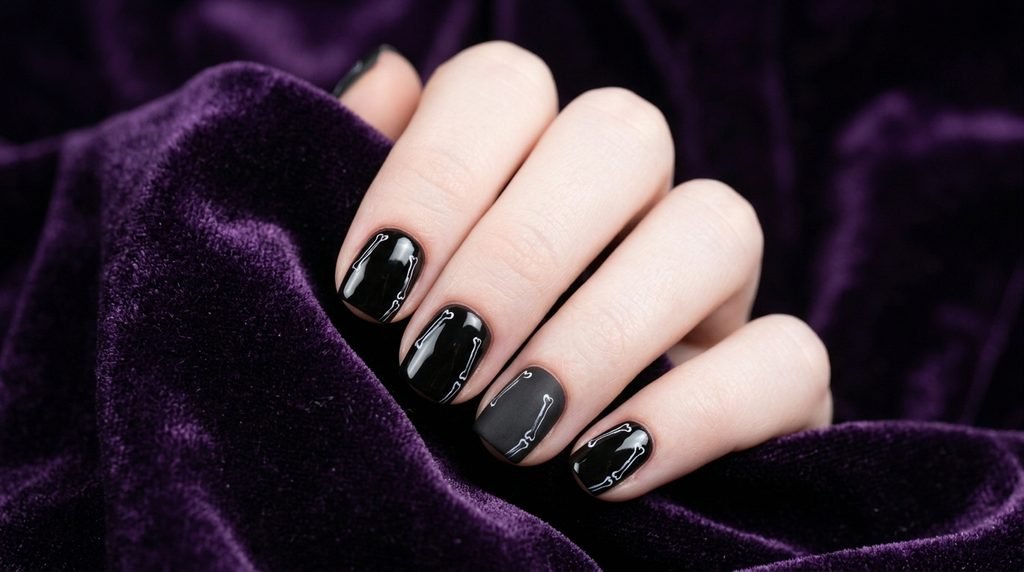
If your short nails are filed into a softer, rounded or oval shape, you will want to adjust your art placement to flatter that curve. Stiff, perfectly straight lines can sometimes look odd on a rounded canvas.
- Go Off-Center: Instead of one line right down the middle, try placing a slightly diagonal or gently curved main bone line that follows the natural curve of one side of your nail.
- Soft Joints: Ensure your “joint” cross lines (from section 7) are also applied with a very slight curve to echo the nail shape, rather than being hard, horizontal lines. This small adjustment keeps the art integrated with your hand’s natural flow, which is a great tip for any type of halloween nail inspo on shorter shapes.
Placement Theory: Accent Nails vs. Full Set
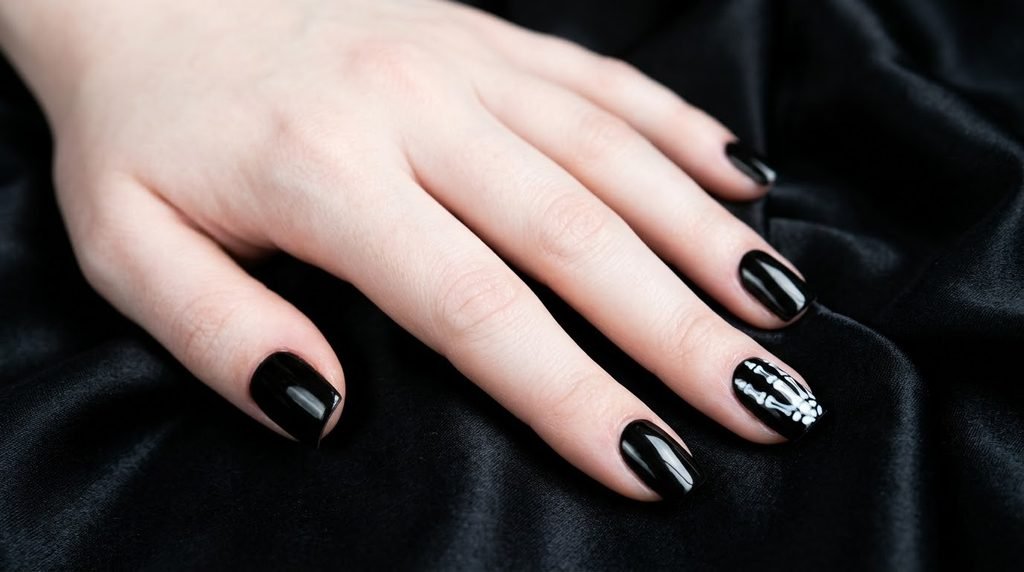
You can wear your skeleton hand nail art in different ways. Do you want it on every finger, or just as a special detail?
- The Full Set: Doing the white bone lines on black nails on every finger creates a dramatic, cohesive statement that looks like an entire hand’s x-ray. It’s bold.
- The Accent Nail: For something more subtle, paint all nails with your opaque black, and reserve the x-ray bone art for just one nail on each hand, typically the ring finger. This “accent nail” is still high-impact but is less intimidating to DIY and doesn’t feel as intense for everyday wear. This is a perfect strategy if you’re trying a trickier part like a complete hand.
Troubleshooting: Averting Cuticle Flooding with White Art
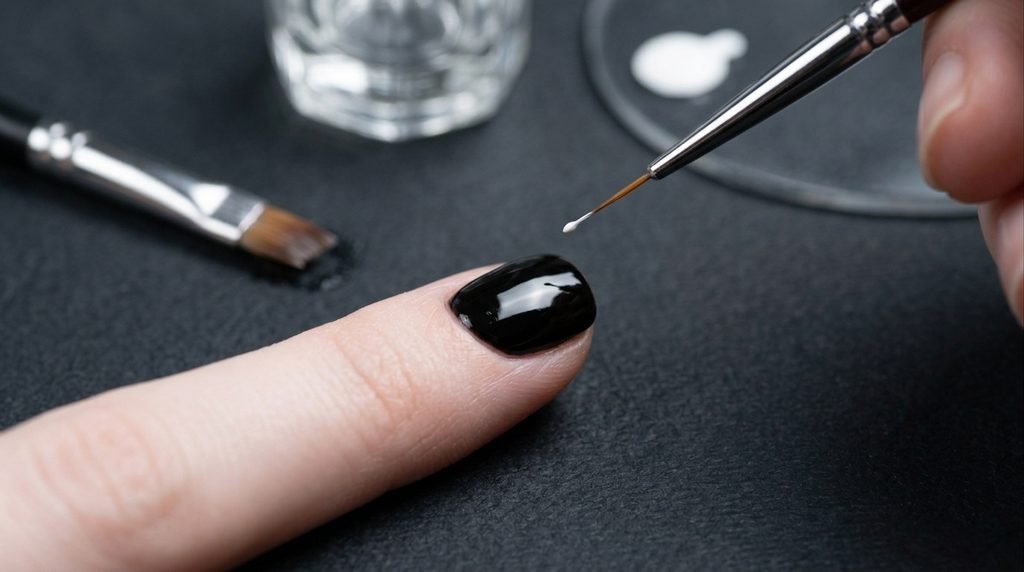
This is a key salon tip for any art, especially white paint on a dark background. You need to avert “flooding” the cuticle with your messy art lines.
- Dry Brush: When loading your liner brush (from section 6), make sure there is no white paint at all right near the ferrule (the metal part that holds the bristles). You only want paint near the tip of the brush. If paint is too high up, it can easily flow down and connect with your cuticle or side walls.
- Use a Cleanup Brush: Have a small, flat or angled cleanup brush, dampened slightly with pure acetone or 99% alcohol, ready to go before you start painting. If a white line does get too close to the cuticle, you can instantly swipe it away, achieving a clean salon finish without messing up the surrounding area.
Technical Gel Notes for Long-Lasting Spooky Nails
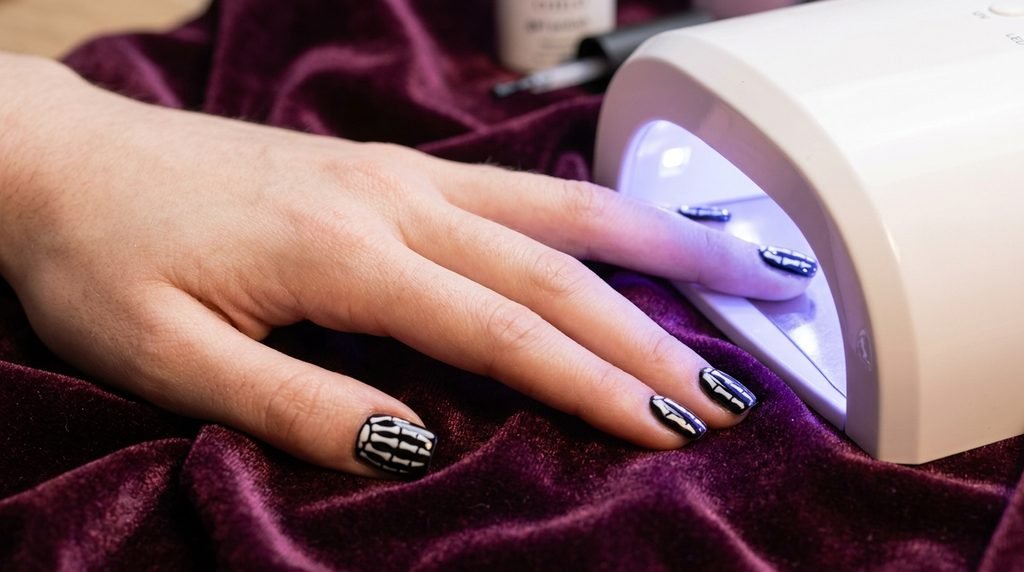
If you are using gel polish (which I recommend for crisp art), there are specific things to keep in mind. We already discussed prevention of lifting through proper prep (section 3) and thin coats (section 4). Here are two more technical notes.
- Gel vs. Art Gel: While you can use a regular white gel polish, a dedicated white “painting gel” or “art gel” is much thicker and has far more pigment. This means you can get opaque white bone lines in a single stroke, without them spreading out or self-leveling into blobs before you can cure them. This is essential for the sharp lines of a design like this.
- Curing the Lines: Cure your black base fully. Then paint your white bone art. Do a full cure again before applying your top coat. If you put wet top coat over wet white art, you will smear it instantly, ruining all your hard work. This process of sealing each layer is essential.
Salon Communication: How to Ask for X-Ray Nails
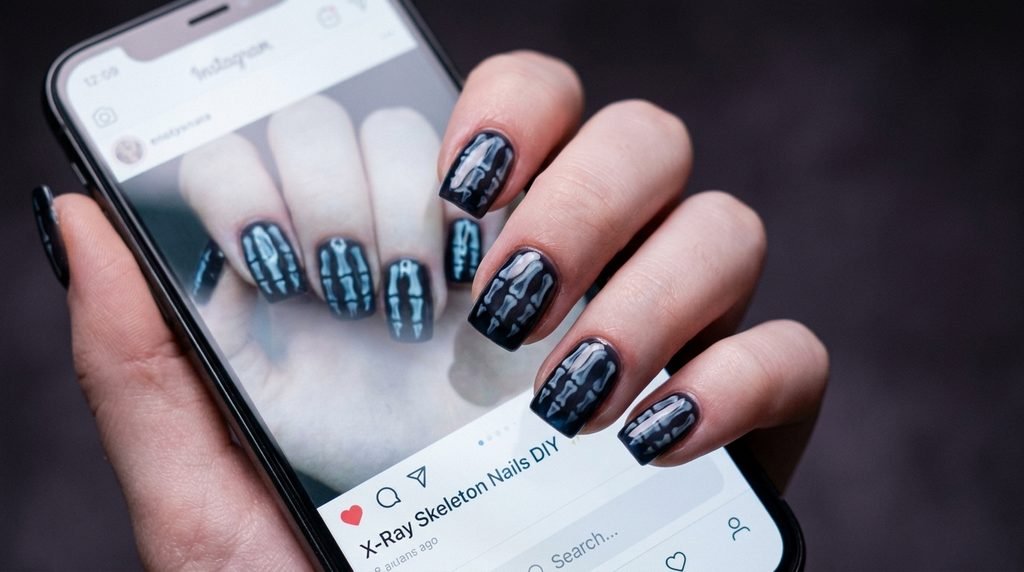
You’re sitting in the chair, and you want to ensure you don’t walk out with generic halloween nails designs. To get this look, use specific descriptors and have a visual:
- Show the Image: Bring this post or a Pinterest screen grab. Visuals are #1.
- The Keywords: Use phrases like: “I want an x-ray effect, not just a skull.”
- Specify Color: “Opaque black base with very simple, slightly rough white bone line art.”
- Describe the Lines: “Can you make the lines look soft or a little blurry, like a real x-ray scan, instead of hard, sharp lines?” This tells your tech you want that organic, high-contrast glow. They might even suggest a sheer, smoky layer to achieve the look.
Budget Options: Press-Ons vs. DIY vs. Salon
You don’t need a professional to get this look, but your approach can differ by budget.
- DIY ($): With an opaque black, a white polish, and a cheap $5 fine liner brush, you can achieve this exact look. It offers the best value but requires practice.
- Press-Ons ($$): Many indie and major nail brands release pre-designed, high-quality press-on x-ray nails for Halloween. They are fast, guarantee a perfect result, are reusable, and usually cost under $20 per set.
- Salon ($$$): A professional will achieve a perfectly clean black base, prevent lifting, and can use tricks like sheer smoky layers (as mentioned in section 16) for a hyper-realistic result. It is the most expensive option, but you will know it’s done correctly.
Easy Skeleton Nails: Recreating this with Press-Ons
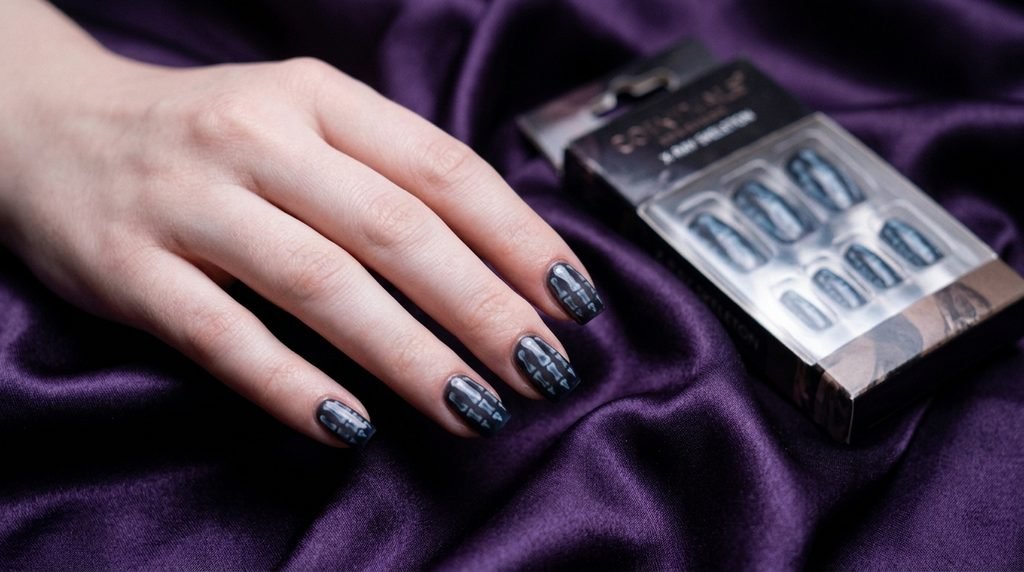
If you are going the press-on route, you can get the x-ray skeleton nails look easily, but prep is still key. Many pre-designed kits exist for the season. Look specifically for kits offering white bone lines on black nails.
When applying press-ons, follow the brand’s prep steps exactly. Typically, this includes a light buff, a thorough alcohol wipe, and choosing the correct glue. Do not take shortcuts on the prep step; it’s the #1 reason press-ons fall off prematurely. Press-ons are an incredibly fast way to get a complex art look without any skill required, making them one of the easiest halloween nail options available.
DIY Checklist: Everything You Need to Recreate this Look
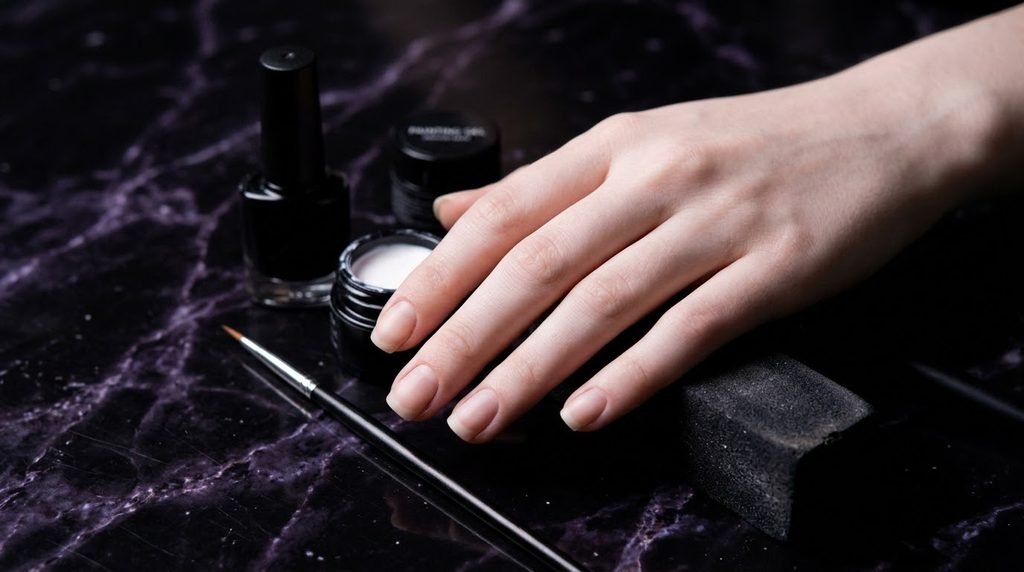
If you are committing to doing this simple skeleton nail design yourself, here is your essential supply list. Gather everything before you start so you aren’t scrambling with wet polish.
- File/Buffer
- Alcohol Wipes (99%)
- Lint-Free Wipes
- Base Coat
- Opaque Black Polish
- White Art Polish or Painting Gel (or very pigmented standard white)
- Fine Liner Brush (Section 5)
- Makeup Sponge or Fluffy Brush (Optional, for creating the x-ray haze)
- Cleanup Brush & Acetone
- High-Gloss or Matte Top Coat
Seasonal Inspo: Beyond Halloween (Wearing Skeleton Art All Year)
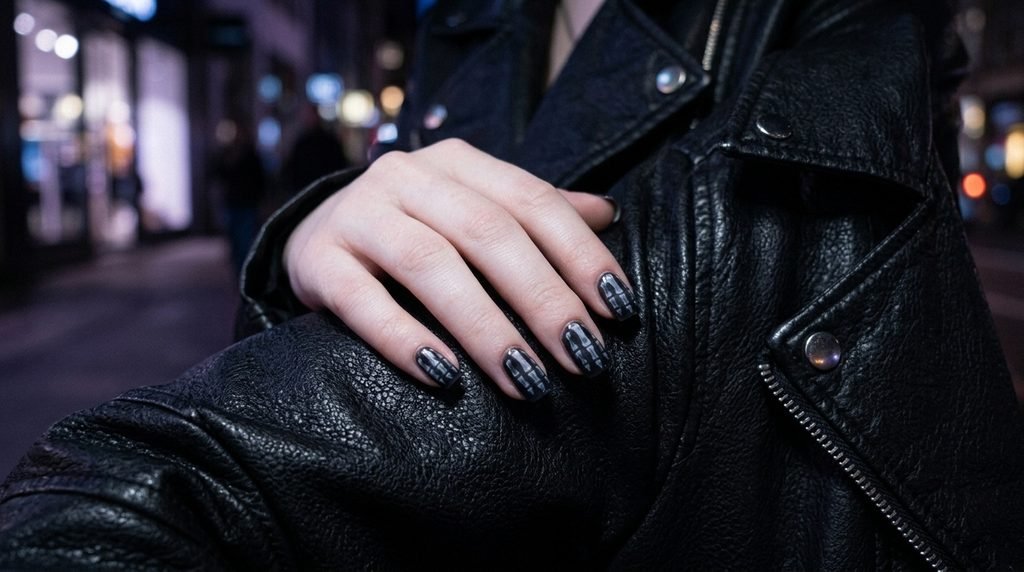
Can you wear this outside of October? This particular design is so minimalist and abstract that it can absolutely be styled for all year round. The stark black and white is a classic.
- Style with Leather: This look is incredibly chic paired with an all-black leather outfit for a concert or a night out.
- Edgy Corporate: If you work in a less traditional environment, this minimalist bone line art is subtle enough that it reads as edgy rather than purely ‘seasonal.’
- Gothic/Dark Aesthetic: If your style leans towards gothic or alternative fashion, this simple skeleton hand nail art is on-brand every single day of the year.
Your Next Halloween Manicure: Save This X-Ray Look!
Don’t let your next salon visit be stressful. You don’t have to choose between generic “50 nail ideas” lists and impossible-to-recreate art. You now have everything you need to know about getting or doing this x-ray skeleton nails look. This guide has shown you that stark white bone line art is one of the easiest halloween nail designs, and it works perfectly on short black nails. So, save this post to your phone for your next appointment, or get your tools ready and try this step-by-step tutorial at home. I can’t wait for you to try it.
Which version are you leaning toward—full set or just an accent? Let me know!
Conclusion
This x-ray bone look is all about that beautiful, spooky contrast. You can absolutely achieve these spooky nails with minimal skill, especially on your short black nails. Remember that the white bone lines don’t need to be perfect; their rough nature is what makes them feel organic and scan-like. I’ve given you technical tips directly from salon experience to ensure your base is clean, preventing messy cuticles. So whether you are getting this simple skeleton hand nail art done or trying it at home with our step-by-step breakdown, I hope you feel ready. This design is focused on being easy, so which one will you try—the accent nail or the skeleton French tip?

Mia founded Daily Nail Idea after a decade in beauty editorial, tired of watching great nail art disappear into the scroll. She now leads the team’s editorial direction — deciding what’s worth featuring and what’s just noise — and still paints her own nails every Sunday night, no exceptions.