Spooky Ouija Board Nails: Easy Spirit Board Halloween Nail Art with Planchette Accent
Are you staring at your phone in the salon chair right now? Or maybe you are sitting at your desk with your gel kit, trying to pick a Halloween look that feels dark, mystical, and completely unique. We have all been there! You want something spooky, but you definitely do not want basic orange pumpkins again this year.
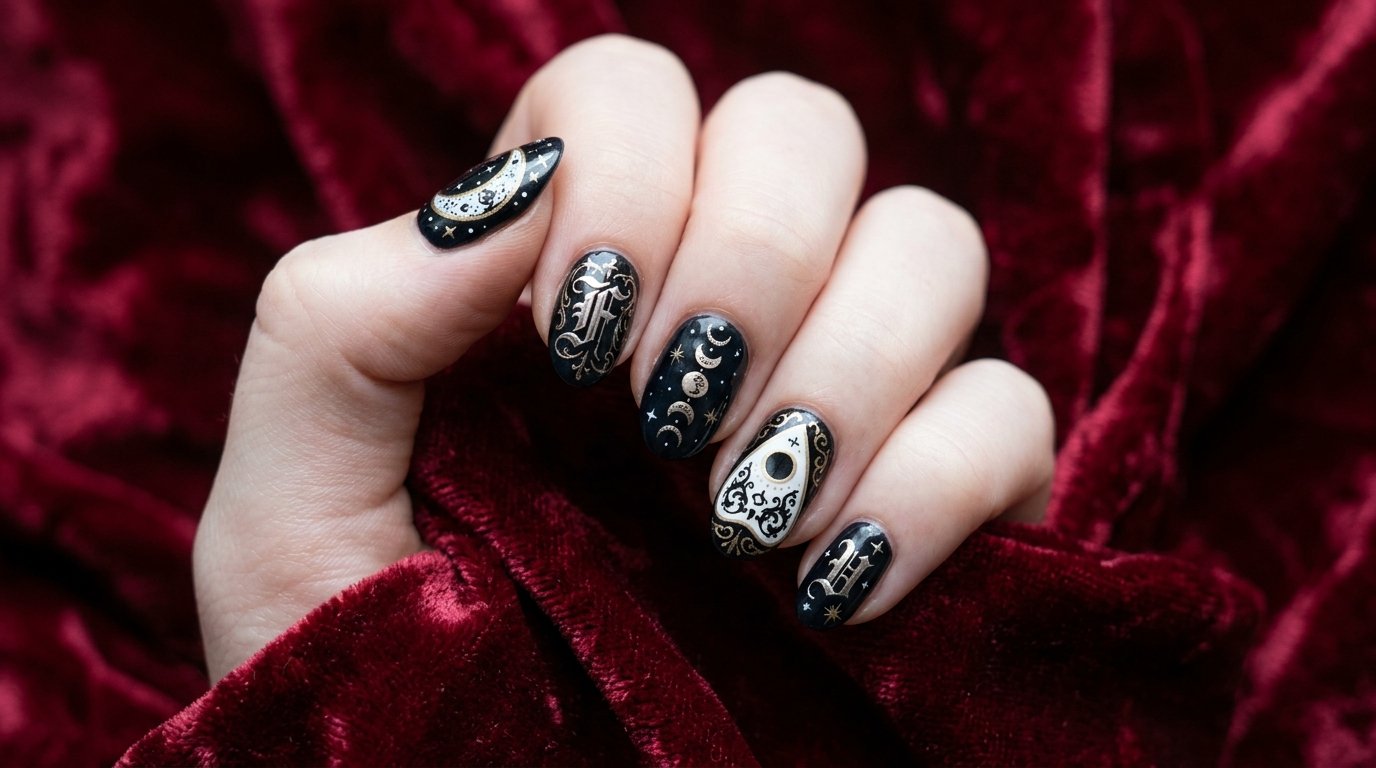
Enter ouija board nails the ultimate dark aesthetic for spooky season. This witchy halloween nails style blends vintage gothic lettering, glowing crescent moons, and detailed planchette accents into one mesmerizing manicure. Whether you are an absolute beginner using simple water decals or a seasoned DIY artist working with micro-detail brushes, this guide will walk you through every step of creating spirit board nails that look like they came straight out of a luxury boutique salon. Let us dive into the ultimate guide to spooky season’s most spellbinding nail art!
At-a-Glance: Spirit Board Style Overview
Here is a quick breakdown of what is ahead in this complete guide. We will cover everything from classic vintage aesthetics to quick press-on solutions, so you can easily choose the path that fits your budget, time, and nail art skill level.
| Style Variant | Primary Polish Colors | Accent Features | Difficulty Level | Best For |
| Classic Monochrome | Onyx Black & Stark White | Micro letters & planchette | Intermediate / Advanced | Edgy gothic lovers |
| Aged Parchment | Tan, Sepia & Warm Brown | Burnt edges & sun/moon motifs | Advanced Fine-Detail | Vintage aesthetic fans |
| Decal Shortcut | Matte Black or Nude Gel | Pre-printed spirit board decals | Total Beginner | Quick 30-minute DIY |
| Matte & Glossy | Velvet Matte Black Base | Glossy 3D planchette & lettering | Intermediate | High-contrast lovers |
What Are Ouija Board Nails?
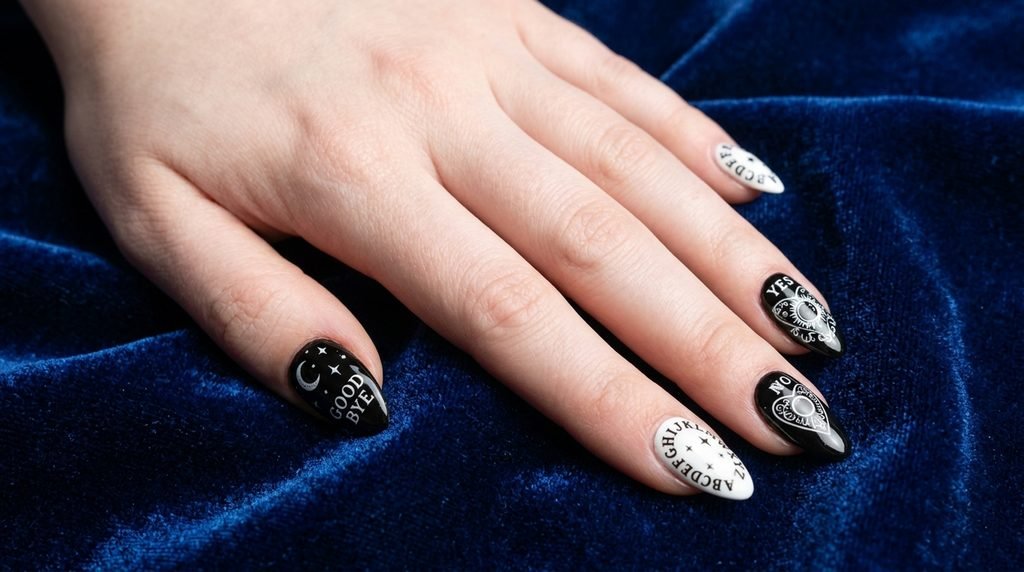
So, what exactly are spirit board nails? This nail design miniaturizes the classic talking board, placing ornate alphabets, numerical arcs, and magical prompts directly onto your nails.
Typically, the design splits key elements across your hand. You will see “YES” and “NO” painted on index or pinky nails, while “GOODBYE” rests smoothly along the thumb. The star of the show is almost always the planchette nail art, usually featured as a focal point on your ring finger.
Because official board titles carry trademark protections, artists often call these spirit board nails or gothic occult nails. Regardless of the name, the vibe is unmistakable: eerie, detailed, and utterly enchanting.
Why Spirit Board Nails Are Trending This Halloween
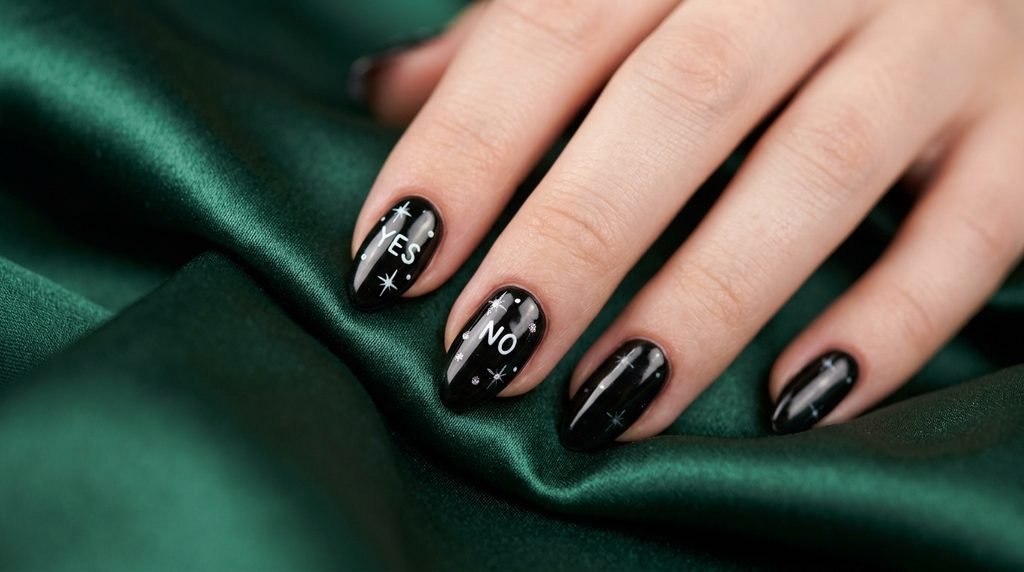
Halloween nail ideas evolve quickly, but gothic occult nails remain timeless. Why are they dominating social feeds right now? First, they offer incredible contrast. The stark white details against rich black or warm wood-toned polishes pop instantly on camera.
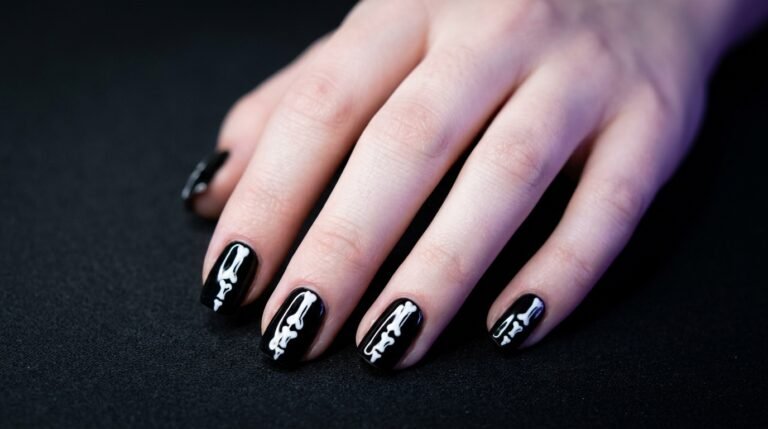
Second, they fit seamlessly into the broader witchy halloween nails trend. If you love tarot card halloween nails, death’s-head moth nails, or x-ray skeleton nails, spirit board art shares that exact dark, atmospheric energy.
Salon Communication Note: When booking with your technician, ask if they specialize in fine-line gel painting or if they prefer using water-transfer decals. Detailed lettering takes extra time, so give them a heads-up beforehand!
The Essential Anatomy of a Spirit Board Nail Design
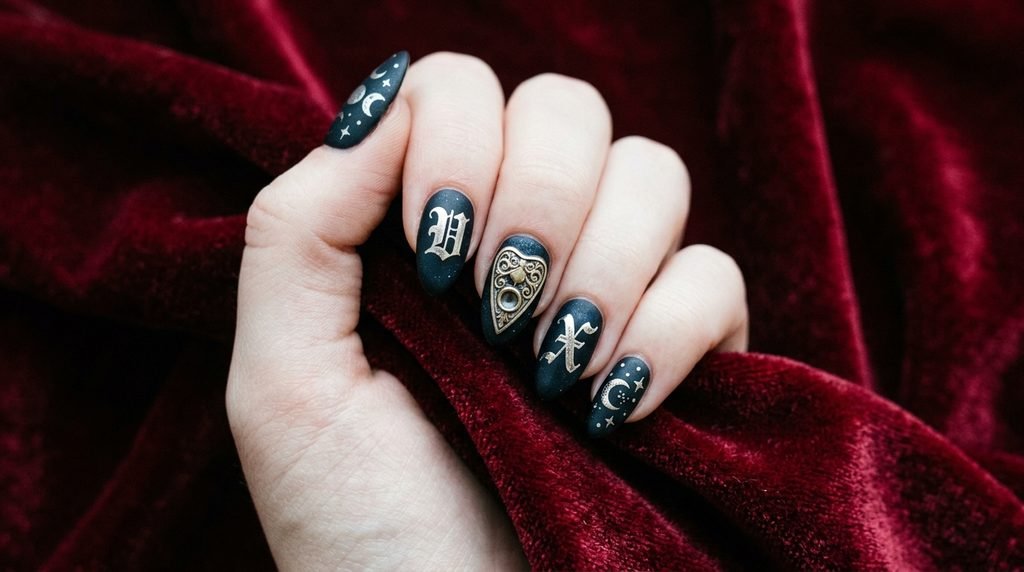
To make your spirit board nails recognizable, you do not need every single letter painted on every fingernail. Instead, focus on four signature visual elements:
- The Corner Greetings: Place “YES” on one side and “NO” on the other.
- The Alphabet Arc: Paint tiny, gothic serif letters curving along the nail bed.
- Celestial Accents: Add small suns, crescent moons, and twinkling stars.
- The Planchette Accent: Craft a heart-shaped viewing window on a hero nail.
Focusing on these key elements gives you a clean look without cluttering your manicure.
Choosing Your Base Color: Dark Gothic vs. Aged Wood
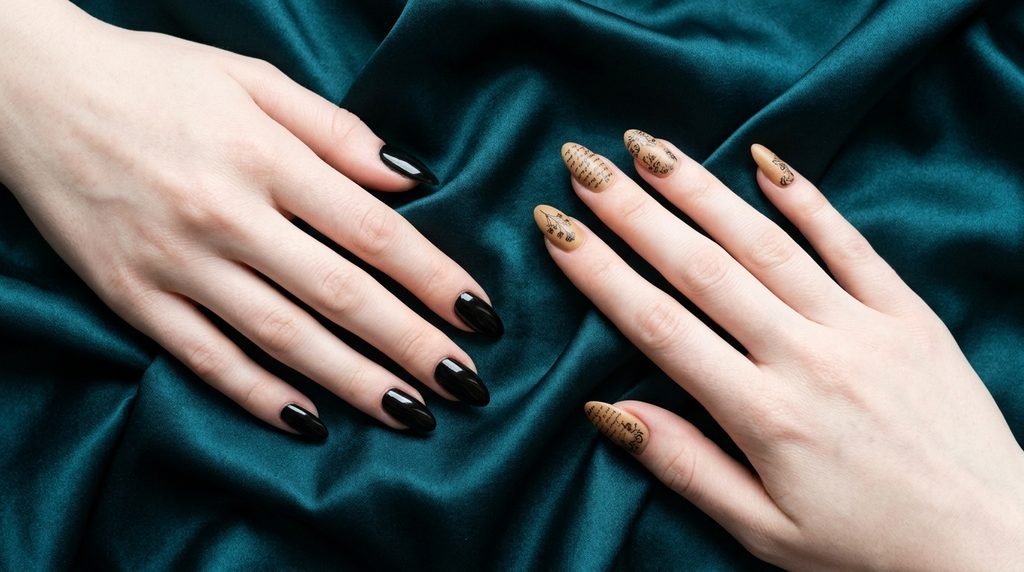
The background color completely changes the mood of your spooky nails. You have two iconic routes to explore.
First, the deep onyx black base creates classic black and white halloween nails. It provides maximum contrast, making tiny white letters instantly readable.
Second, an aged parchment or tan base offers an authentic antique look. Soft warm nude tones imitate aged wood or vintage cardboard.
Essential Supplies for DIY Spirit Board Nail Art
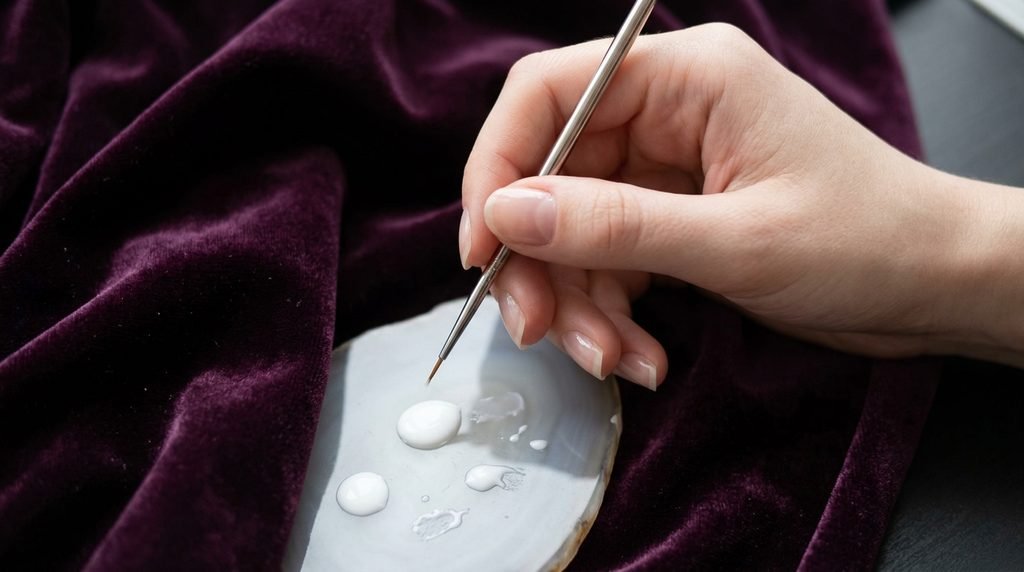
Before starting your manicure, gather all your tools to prevent cuticle flooding or messy smudge marks.
- Nail Prep: Dehydrator, gel primer, and a fine buffer block.
- Base Coats: High-adhesion base gel.
- Polishes: Jet black polish, crisp white liner gel, and warm nude gel.
- Tools: A 000 micro-detail striping brush and a dotting tool.
- Decals (Optional): Water-transfer ouija nail decals.
- Sealer: High-gloss gel top coat or velvet matte top coat.
Step 1: Nail Prep and Base Coat Application
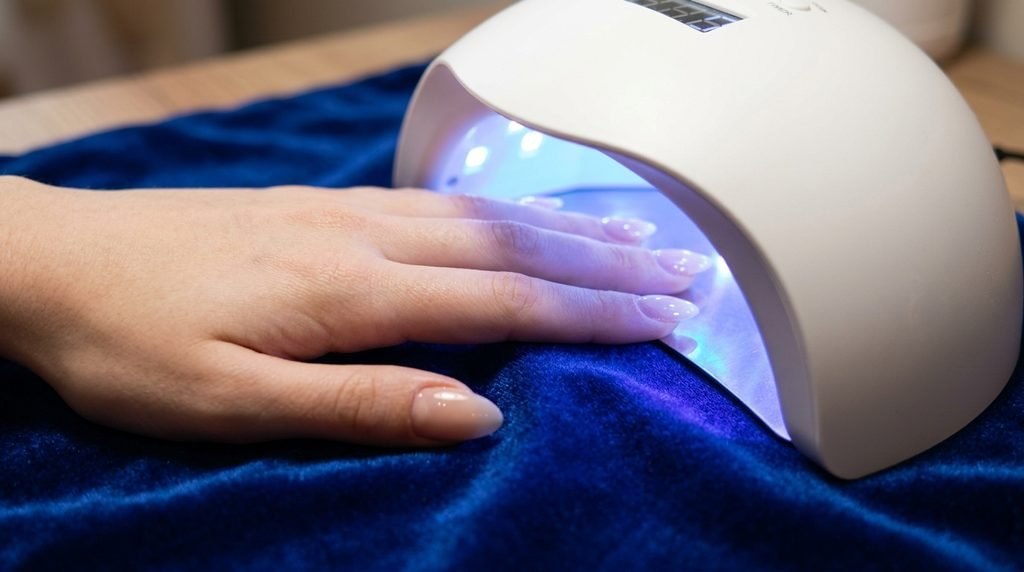
Great nail art starts with immaculate prep work. First, gently push back your cuticles using a wooden stick. Lightly buff away any shine from the natural nail surface.
Next, clean each nail with isopropyl alcohol to remove oil and dust. Apply a thin layer of gel primer, followed by your base gel. Cure under your LED lamp for 60 seconds. Thin coats prevent lifting and keep your base completely flat for detail work.
Step 2: Painting the Onyx Black and Nude Bases
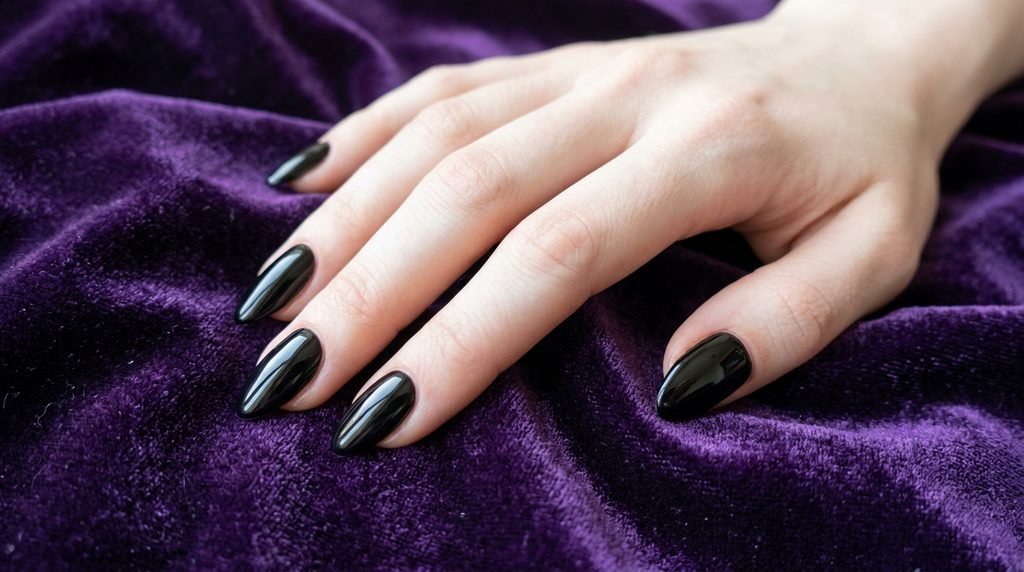
Now it is time for your background color. Apply two thin layers of your chosen base shade. Cure each layer for 60 seconds.
If you choose an accent nail for your planchette, paint that specific nail in a warm, wood-toned nude shade while keeping the surrounding nails deep black.
Pro Tip: Wipe off the sticky inhibition layer with alcohol before painting thin details. This keeps your white lines from bleeding into the base coat!
Step 3: Drafting the Micro Lettering (“YES”, “NO”, “GOODBYE”)
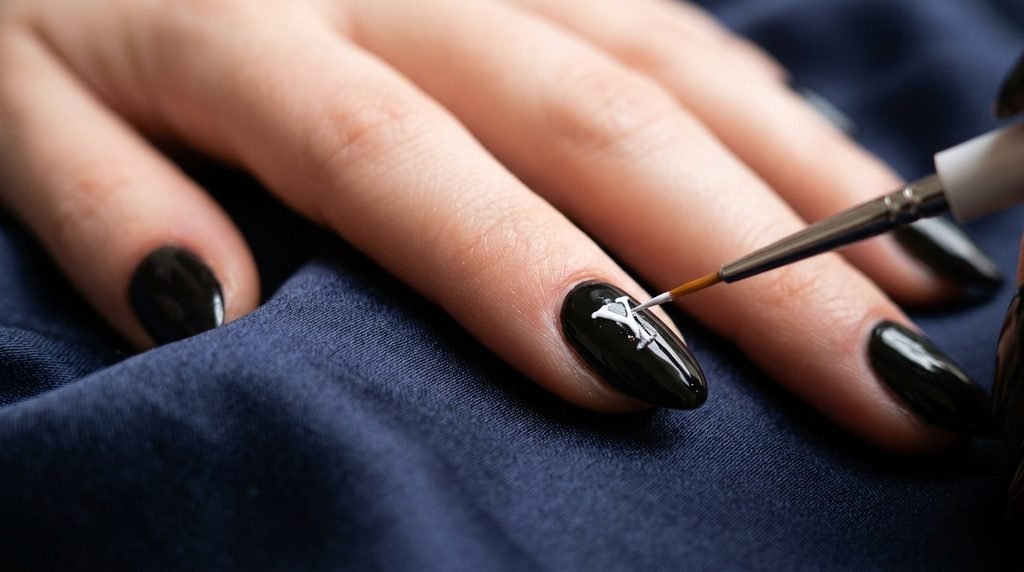
Now comes the fun part! Rest your wrist firmly on a stable table to steady your hand. Dip the tip of your 000 detail brush into white gel polish.
Paint “YES” on your index nail and “NO” on your pinky nail using tiny, delicate strokes. Place “GOODBYE” along the free edge of your thumb. Keep your letters short and simple—gothic serif accents make them pop without needing full-word complexity. Cure for 30 seconds to lock them in place.
Step 4: Step-by-Step Planchette Accent Nail Art Tutorial
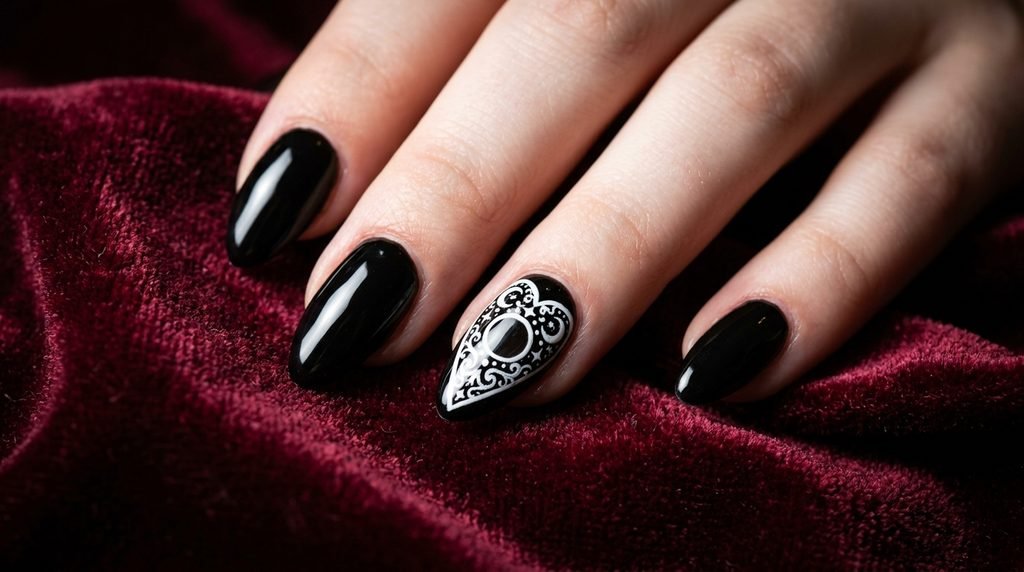
The planchette is the centerpiece of your planchette nail art. Here is how to map it out effortlessly:
- Outline the Shape: Draw a smooth, inverted heart shape with a pointed tip pointing toward your cuticle.
- Add the Viewing Hole: Place a small circle right in the upper middle section.
- Fill the Base: Carefully fill in around the circle with white polish, leaving the center clear.
- Detailing: Outline the outer edge in thin black ink or gel to give it depth.
Cure immediately for 60 seconds.
Step 5: Adding Celestial Motifs: Suns, Moons, and Stars
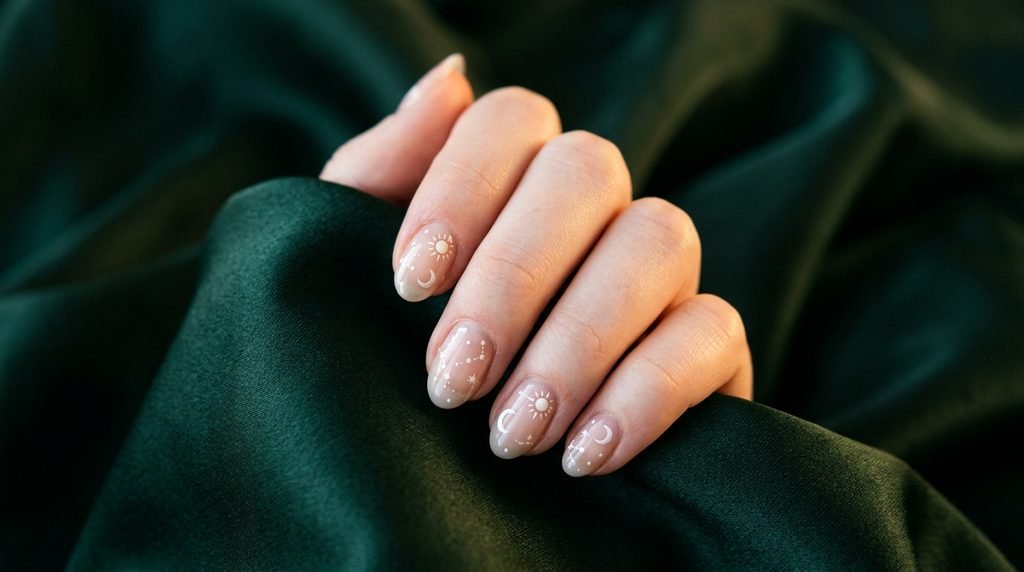
Fill empty space around your letters with classic spirit board symbols. Celestial shapes soften the design while adding a magical touch.
Use a small dotting tool to place tiny white dots across the black polish, creating distant stars. On another nail, paint a slender crescent moon and a radiating sun. These small details pull the entire witchy aesthetic together.
Step 6: Sealing with Matte vs. Glossy Gel Top Coat
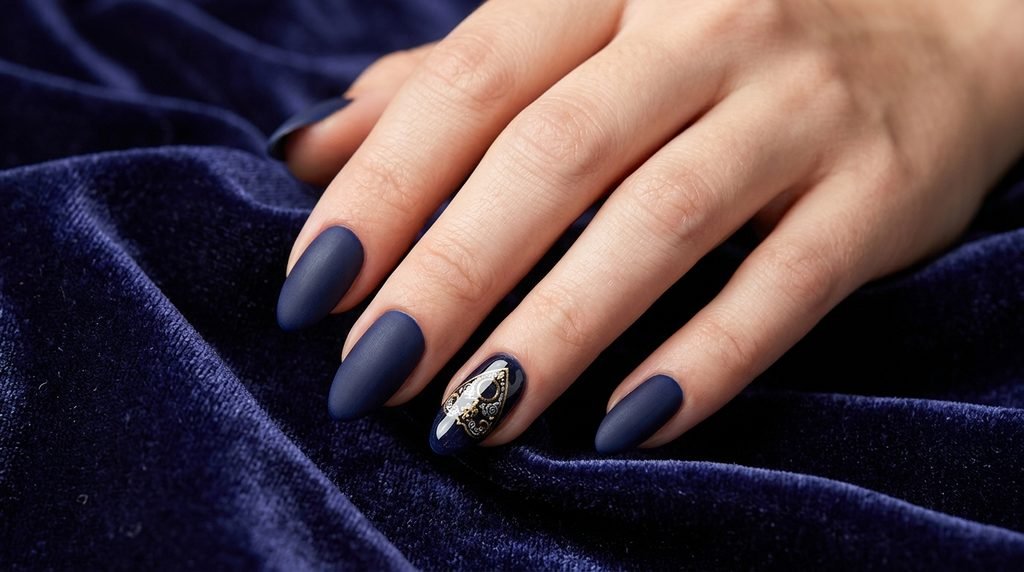
Your choice of top coat changes the whole finish. A high-gloss top coat gives you a glass-like shine that catches light beautifully.
Alternatively, a velvet matte top coat provides a rustic, vintage paper texture. For a stunning dynamic contrast, apply a matte coat over the entire nail, then paint over just the planchette with a glossy top coat. Cure for 60 seconds to lock in your work.
Using Ouija Nail Decals for Quick and Easy DIY
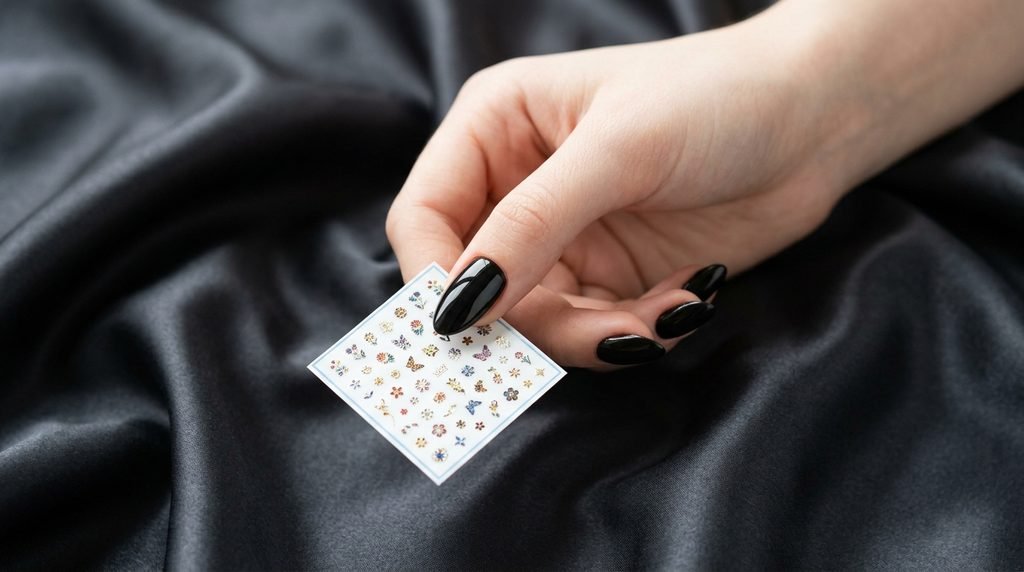
Not confident in hand-painting microscopic letters? Do not worry at all! Water-transfer ouija nail decals are an absolute game changer.
Cut out the desired letter strip or planchette decal. Submerge it in water for 15 seconds, then slide the backing paper away. Press the decal flat onto your cured, tack-free base polish. Smooth out air bubbles with a silicone tool, then seal with two thin top coats. It takes half the time with zero stress!
How to Adapt Spirit Board Nails for Short Nails
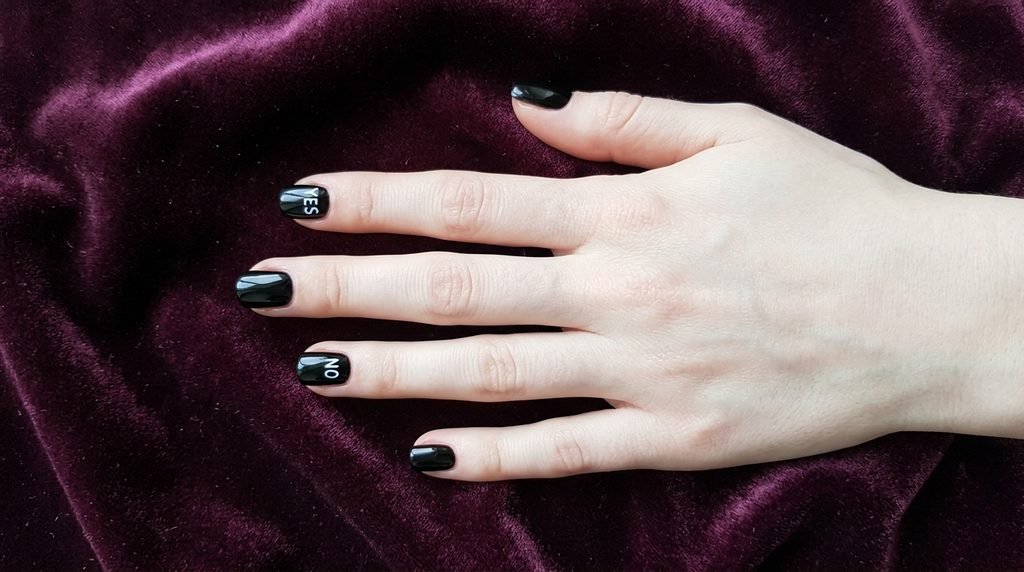
Do you have short natural nails? You can definitely wear this trend! The key for easy halloween nails short is simplifying the elements so your nails do not feel crowded.
Instead of attempting the full A–Z alphabet, dedicate one nail to “YES,” one to “NO,” and use a single planchette decal on your accent nail. Keep the background sleek and dark. This keeps your short nails looking clean, stylish, and deliberate.
How to Style Spirit Board Nails on Almond and Coffin Shapes
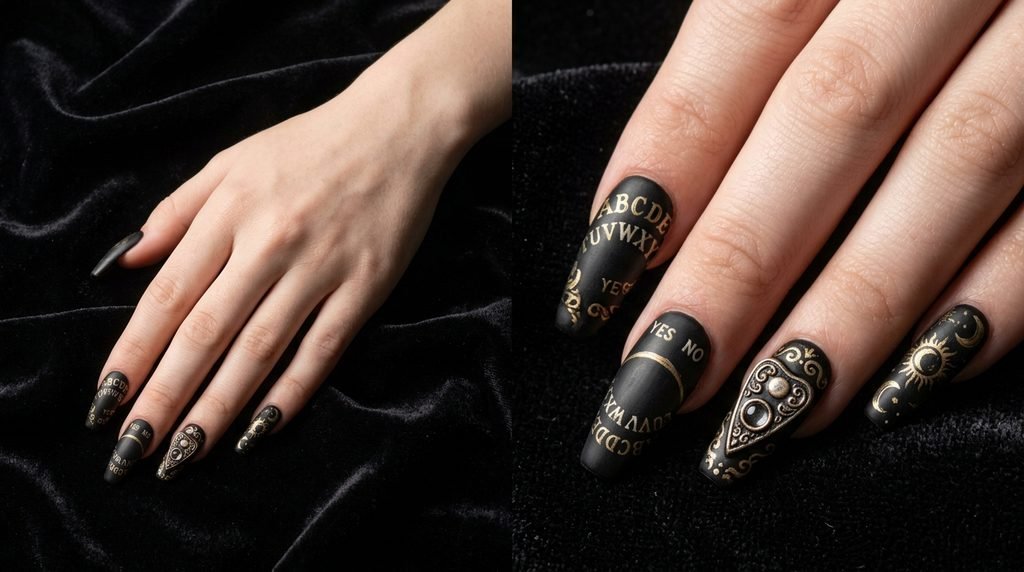
Nail shape dramatic changes how your spirit board design looks. Long, slender canvas shapes give you more room to show off intricate linework.
- Almond Nails: The soft taper highlights the curved shape of a heart planchette gracefully.
- Coffin Nails: The straight side edges offer a wider space for painting full letter arcs.
- Stiletto Nails: Sharp tips enhance the edgy, gothic occult aesthetic effortlessly.
Matte Black & Gold Foil Spirit Board Variations
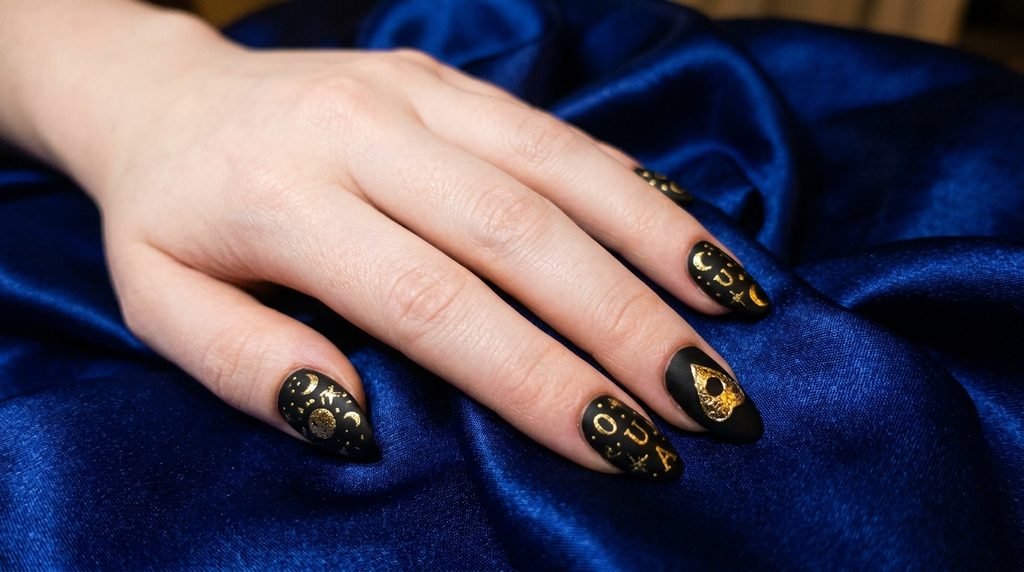
Want to upgrade your black and white halloween nails? Swap simple white liner gel for shimmering gold gel or gold foil transfer sheets.
A matte black base combined with metallic gold lettering looks incredibly rich and antique. The gold catches warm light, giving your nails the look of an ancient, brass-embossed magical artifact.
Mixing Spirit Board Art with Other Gothic Themes
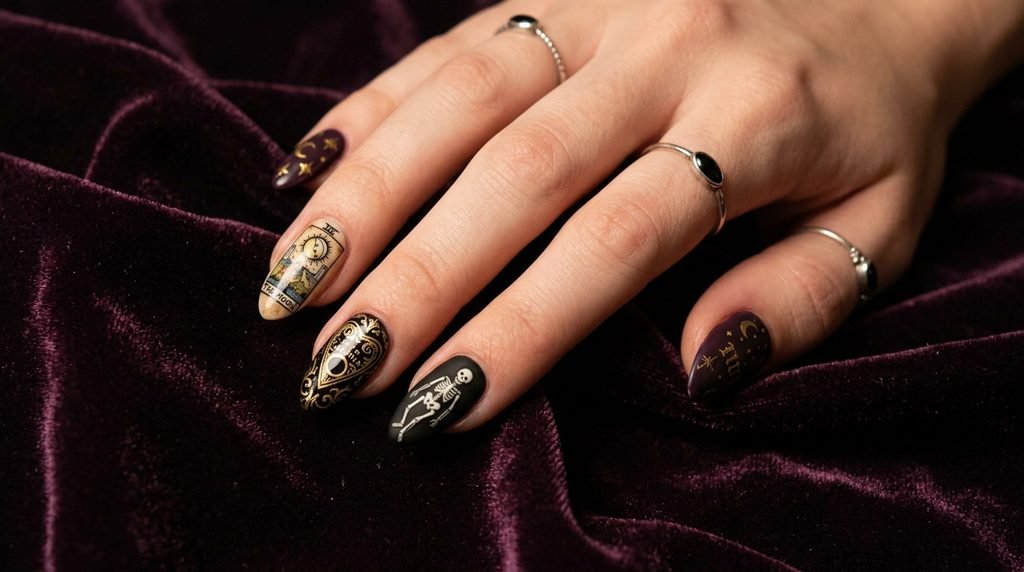
Why stick to just one spooky style when you can mix and match? Spirit board nails look stunning alongside other dark Halloween aesthetics.
Try pairing your planchette accent with tarot card halloween nails on your index finger, or add death’s-head moth nails for an eclectic look. You can also combine them with x-ray skeleton nails or stained glass halloween nails for a dramatic mix-and-match set.
Press-On Options for Easy Halloween Nails
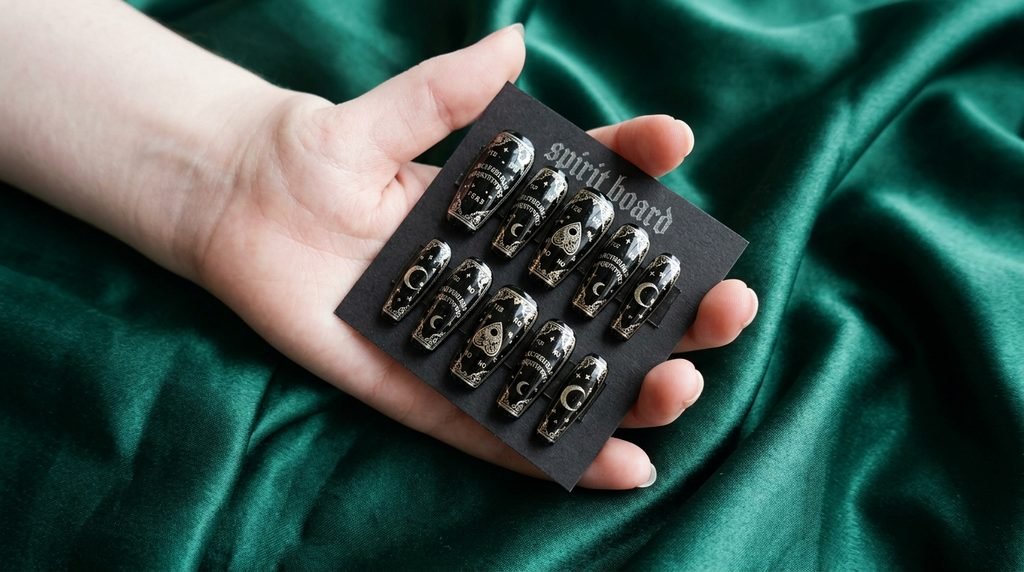
If you need a dramatic Halloween look in under 10 minutes, press-ons are your best friend. Modern ouija nails press on offer salon-quality art without sitting in a salon chair for hours.
Prep your natural nails by lightly buffing and cleaning them with alcohol. Apply strong nail glue to both your natural nail and the press-on. Press down firmly for 15 seconds, ensuring no air bubbles are trapped underneath.
Salon Guide: What to Ask Your Nail Tech For
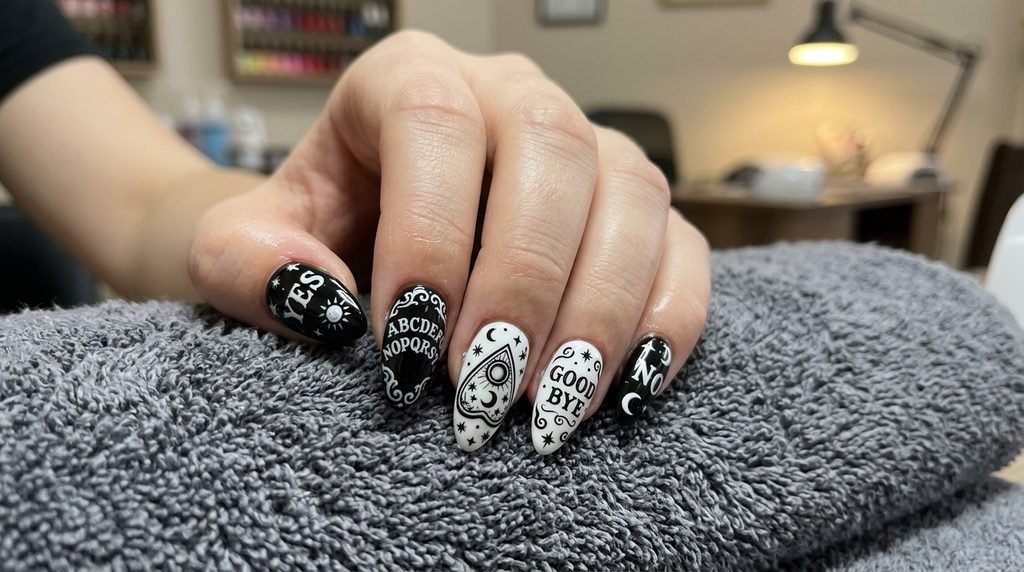
Heading to the salon for your Halloween appointment? Here is exactly what to show and ask your technician so you leave with a set you love:
- Base Choice: Ask for an opaque black gel or warm nude base.
- Line Work: Request hand-painted fine-line art or ask if you can bring water decals.
- Accent Nail: Ask for a planchette on the ring finger.
- Time & Price: Book an extra 20 minutes for detailed art to avoid a rushed appointment.
Troubleshooting Common DIY Spirit Board Nail Mistakes
Detail art can be tricky, but these fast fixes will keep your manicure looking flawless:
| Issue | Root Cause | Easy Fix |
| Smudged Letters | Base layer was still tacky | Wipe off sticky layer with alcohol before painting. |
| Bumpy Surface | Gel was painted on too thick | Apply two thin layers instead of one thick coat. |
| Decals Peeling | Edges were not fully sealed | Encapsulate decals fully with a top coat layer. |
| Thick Line Work | Too much polish on the brush | Roll brush bristles across a pallet to remove excess. |
Aftercare Tips to Keep Your Halloween Nails Fresh
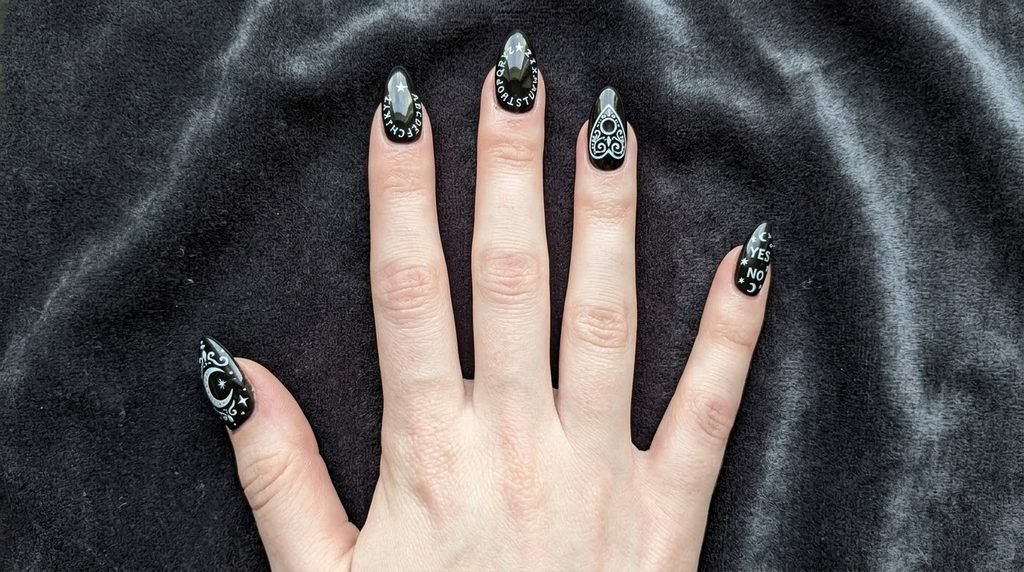
You put real effort into your Halloween nails, so keep them pristine through November 1st! Always wear gloves when washing dishes to prevent water from lifting the top coat.
Apply cuticle oil twice a day to hydrate skin and prevent peeling edges. Reapply a thin layer of top coat after 5 days to preserve shine and keep detailed art safe from chips.
Frequently Asked Questions (FAQ)
What are Ouija board nails?
Ouija board nails feature letters, numbers, and words like “YES,” “NO,” and “GOODBYE” painted on dark or wood-toned nails. They often feature a heart-shaped planchette on an accent nail.
How do you make Ouija board nails at home?
You can paint details using a 000 micro-detail brush and white gel polish. If hand-painting feels too difficult, apply water-transfer decals onto a cured base coat and seal with gel.
Can you use nail decals for Ouija board nails?
Yes! Water decals are ideal for detailed spirit board art. They provide sharp lettering without needing hand-painting skills.
What colors work best for spirit board nails?
Onyx black and stark white give you classic contrast. Warm wood-toned nude shades with burnt brown letters offer an antique parchment look.
Can you do Ouija board nails on short nails?
Yes! For short nails, feature simplified accents like “YES” and “NO” with a planchette on one nail. This keeps your design clean and uncluttered.
Conclusion
Spooky season is the perfect time to experiment with creative nail looks. Whether you prefer hand-painted artwork or quick water-transfer decals, spirit board nails offer a dark, stylish look for any Halloween event.
Save this guide for your next appointment or DIY nail session! Which design are you trying this year classic monochrome or antique wood-toned parchment?

Mia founded Daily Nail Idea after a decade in beauty editorial, tired of watching great nail art disappear into the scroll. She now leads the team’s editorial direction — deciding what’s worth featuring and what’s just noise — and still paints her own nails every Sunday night, no exceptions.