Molten Gold Splatter Nails: Nude and Gold Chrome Design September 2026
Introduction
Choosing your next nail look can feel tricky. You are likely scrolling Pinterest right now before your salon visit. We totally get that feeling!
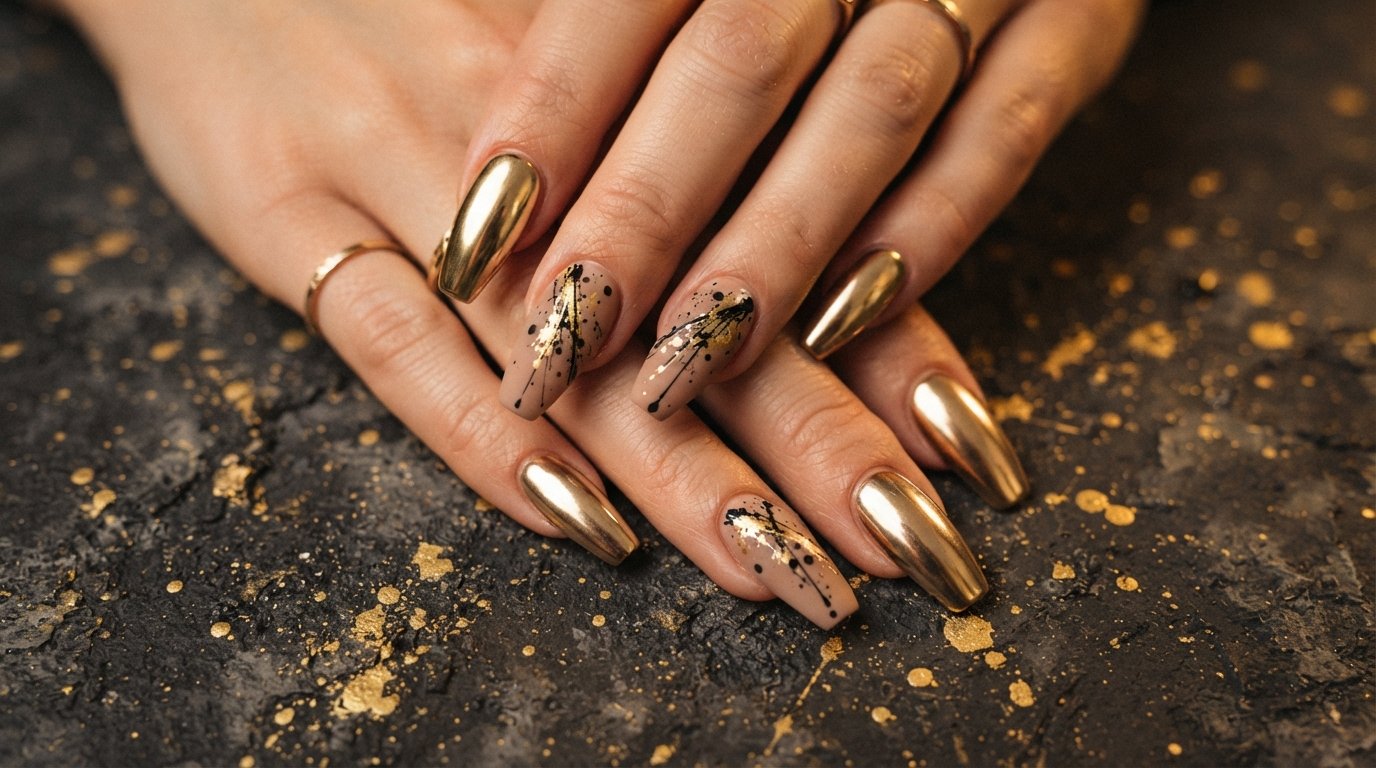
Today, we are diving into molten gold splatter nails. This chic design pairs nude and gold nails for a striking, high-contrast finish. It gives you a perfect mix of quiet luxury and high-glam drama.
Whether you want a bold set or something subtle, we have you covered. Let us guide you through shapes, colors, and step-by-step techniques for this gorgeous trend!
At-a-Glance
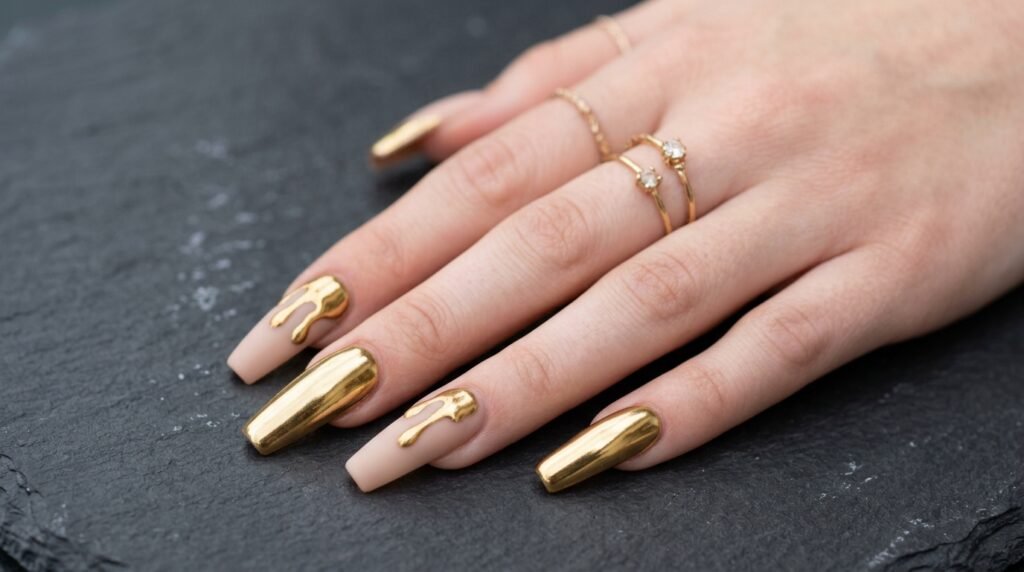
This guide breaks down everything you need to know about nude and gold nails with a splatter twist. Here is a quick look at what we will cover ahead:
- Key Elements: Combining matte nude bases with mirror-like gold chrome.
- Salon Communication: Exact phrasing to ask your nail technician for this look.
- Step-by-Step Tutorials: Complete prep, splatter execution, and durable top coat sealing.
- Shape Adaptations: Tailoring the layout for short, coffin, and almond nail shapes.
- Budget & Versatility: Press-on options, bridal adaptations, and office-friendly variations.
Achieving the Perfect Nude and Gold Nails Balance
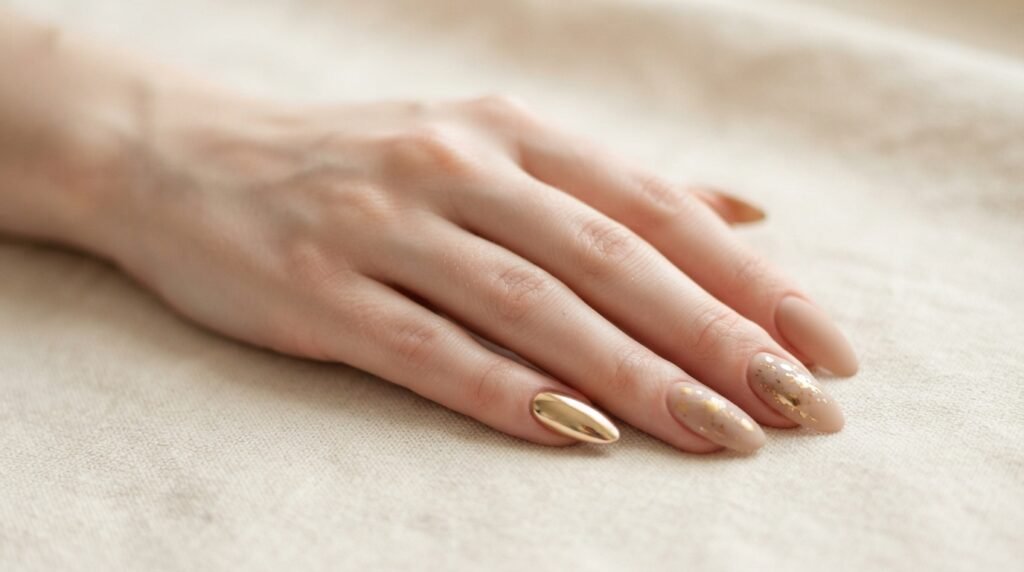
Creating this striking look relies on contrast. You need a subtle nude base and brilliant gold chrome accents.
First, select a nude shade that matches your skin undertone. Warm beige works great for warm tones. Cool taupes flatter pink undertones nicely.
Next, alternate your nail finishes across your hand. You can pair smooth matte nude bases with full-coverage glossy gold chrome nails.
- Thumb & Middle Finger: Full-coverage liquid gold chrome.
- Index, Ring, & Pinky Fingers: Matte nude base with gold splatter.
This distribution keeps your hands looking balanced and glamorous without feeling too overwhelming.
| Finish Type | Recommended Nail Placement | Best Base Coat | Visual Effect |
| Full Gold Chrome | Thumb, Middle Finger | Tack-Free Gel Top Coat | High-shine, mirror-like reflection |
| Matte Nude + Gold Splatter | Index, Ring, Pinky Fingers | Velvet Matte Gel Top Coat | Subtle background with popping metallic art |
Requesting the Molten Gold Splatter Nails Look at the Salon
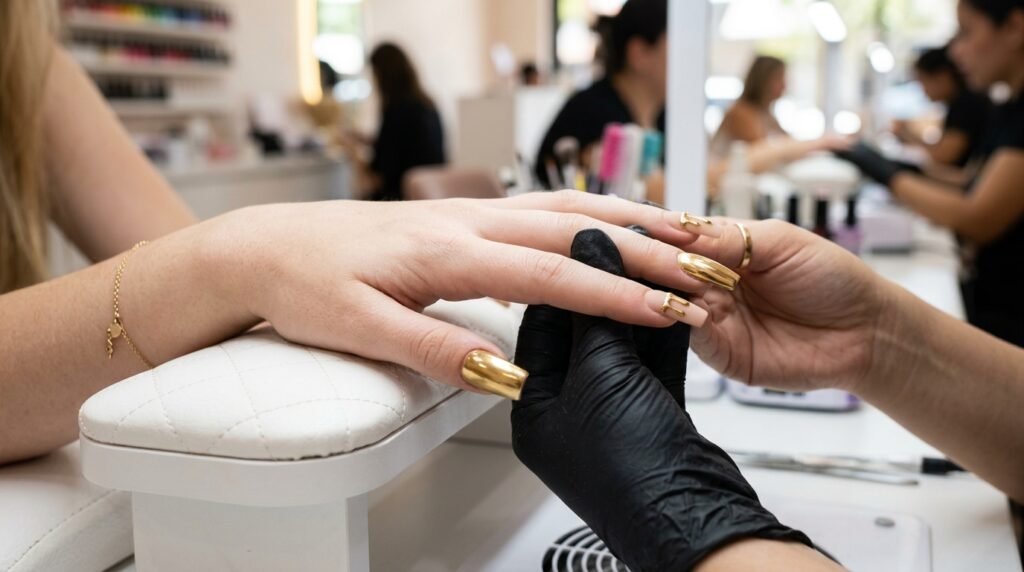
Communicating with your nail technician prevents disappointment. So, bring clear reference photos showing the exact splatter effect you want.
Specify that you want “nude and gold nails” with mixed finishes. Request a matte finish on the nude nails before adding gold art.
Salon Note: “I would like alternating nails. Please make some full gold chrome, and others a matte nude base with abstract molten gold splatter.”
Ask your technician to keep the splatter concentrated near the cuticles. Consequently, fine drip lines will cascade downward naturally.
Step-by-Step Tutorial: Nude Base and Gold Chrome Prep
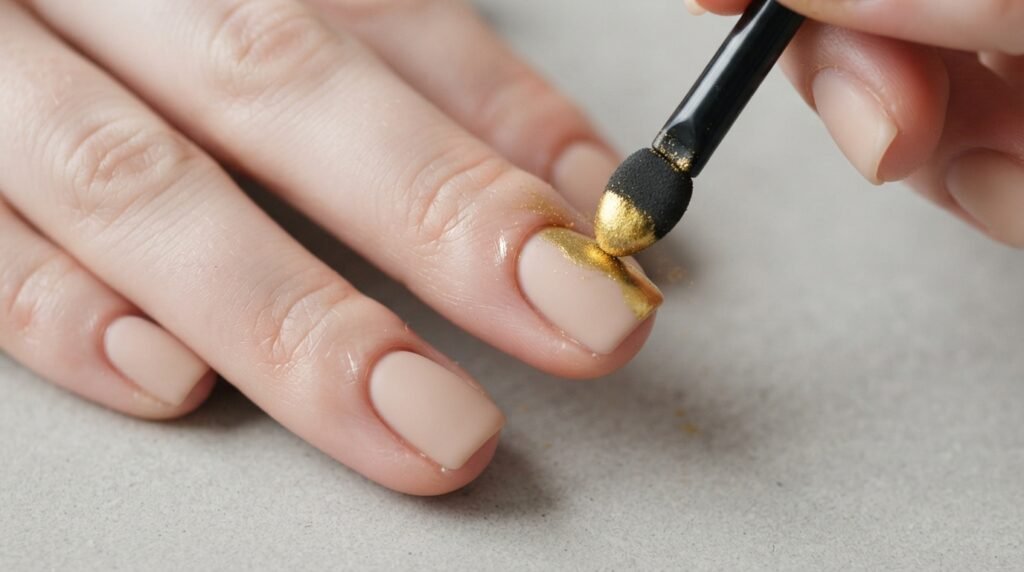
Proper nail preparation is essential for long-lasting gel art. Follow these steps to ensure your base stays flawless.
- Prep the Cuticles: Gently push back cuticles and remove shine with a fine buffer block.
- Dehydrate & Prime: Wipe nails with isopropyl alcohol, then apply a acid-free primer.
- Apply Base Coat: Brush on a thin layer of gel base coat and cure for 60 seconds.
- Apply Nude Gel: Apply two thin coats of nude gel polish, curing between each layer.
- Apply Matte Top Coat: Coat nude nails with matte gel top coat, then cure completely.
Prepping your matte background first ensures the gold chrome splatter stands out dramatically. [Affiliate opportunity: tack-free matte top coat for gel nails]
Step-by-Step Tutorial: Creating the Gold Splatter Nails Effect
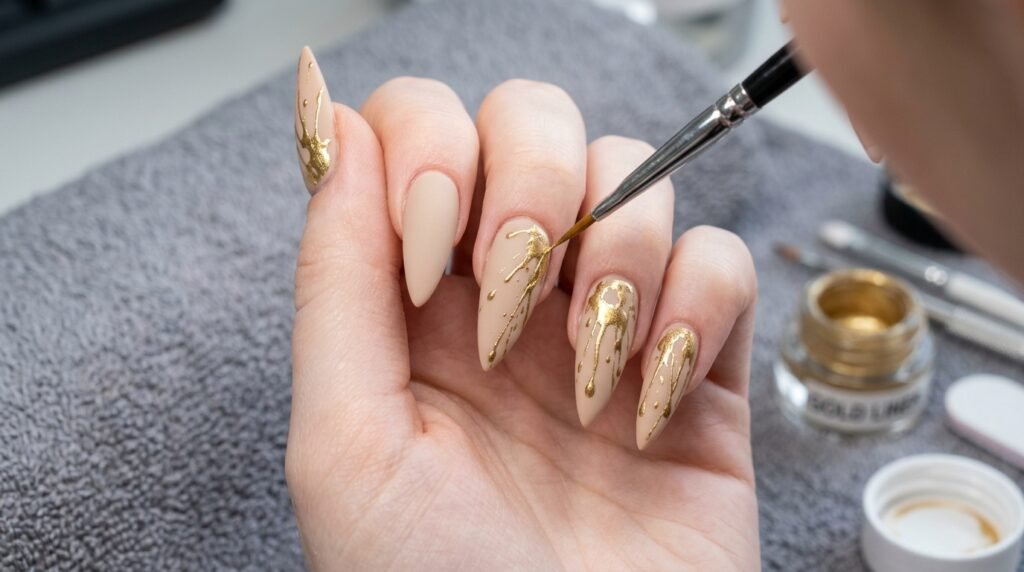
Now comes the fun part: adding the molten gold art. You can use gold gel paint or chrome powder.
- Method 1 (Gel Paint): Dip a fine detail brush into thick gold metallic gel paint. Flick or drop paint onto the matte base.
- Method 2 (Chrome Powder): Paint abstract splatters using clear tack-free gel. Cure for 30 seconds, then rub gold chrome powder over it.
Be sure to add tiny black gel paint droplets nearby. As a result, the dark shadow makes the gold look truly molten!
Cure your splatter art thoroughly under an LED lamp for 60 seconds.
Step-by-Step Tutorial: Finishing Nude and Gold Nails for Durability
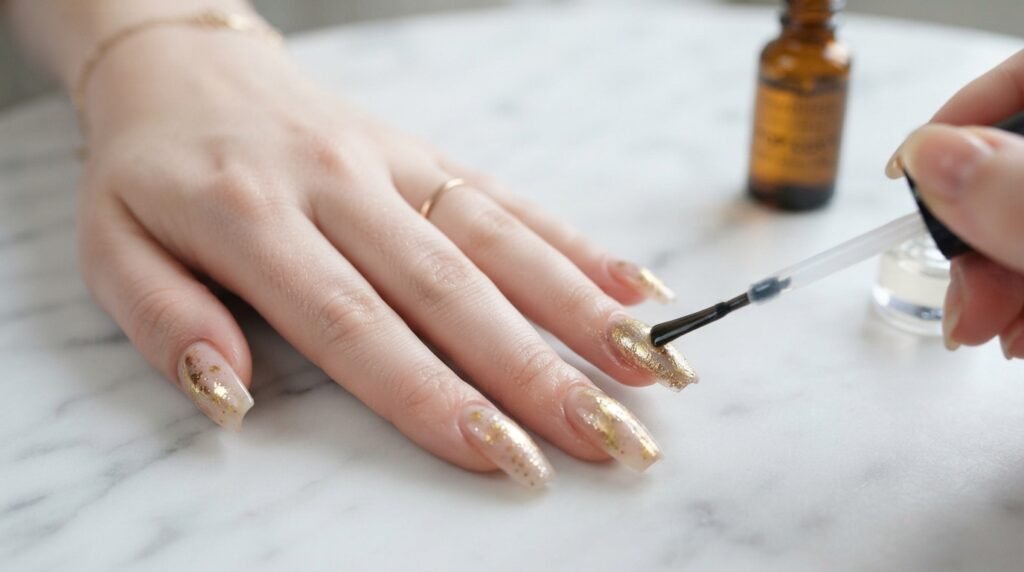
Sealing your chrome splatter prevents chipping and rubbing off. Follow these steps to lock in your design.
- Dust Off Excess: Use a soft fan brush to gently remove loose chrome powder from the skin.
- Cap the Free Edge: Apply a layer of clear builder gel or chrome-sealer gel over the art.
- Apply Final Top Coat: Use a glossy top coat over chrome areas, and matte top coat over nude areas.
- Final Cure: Cure under your LED light for a full 90 seconds.
This double-sealing method protects delicate chrome edges. Consequently, your gorgeous manicure can last up to three weeks without peeling!
Adapting Molten Gold Nails for Short, Squared Nails

Short nails look fantastic with metallic accents! However, heavy splatter can sometimes make short nails appear smaller.
Instead, keep your gold splatter concentrated along one side or near the tips. This diagonal placement visually elongates your nail beds.
- Pro Tip for Short Nails: Keep full chrome to just one accent finger, like the ring finger.
- Design Placement: Use tiny splatter dots near the cuticle rather than heavy drips.
This creates a clean, sophisticated look that flatters shorter lengths seamlessly.
Molten Gold Splatter: A Standout Bridal Option
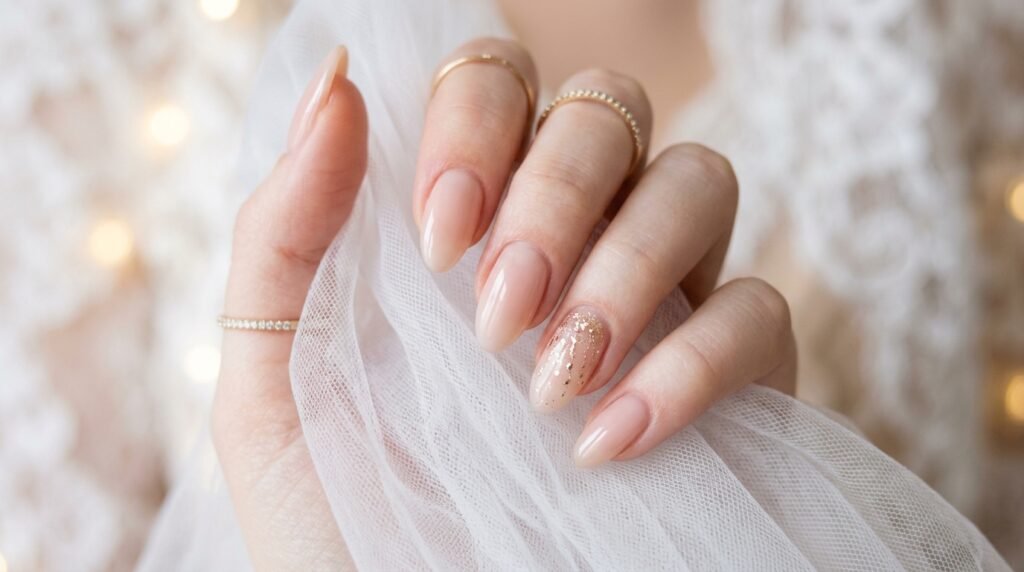
Bridal nails do not always have to be classic French manicures. Molten gold splatter offers an elegant, modern alternative.
For a softer wedding vibe, replace bright yellow gold with a soft champagne gold. The subtle shimmer adds warmth without clashing with your ring.
Use a sheer, blush-toned nude base for maximum softness. Additionally, keep the splatter very fine on just your ring fingers.
This design feels romantic, luxurious, and completely unique for your special day.
Customizing for the Quiet Luxury Aesthetic

The quiet luxury aesthetic favors subtle details over loud patterns. You can easily adapt this trend for a restrained look. Choose a milky nude base that closely matches your skin tone. Then, apply very delicate gold drips to only two fingers. Skip the full-coverage gold chrome nails entirely. Instead, let the soft matte nude take center stage with minimal metallic accents. This understated approach creates an expensive, polished vibe perfect for everyday wear.
Elevating Your Coffin Shape with Nude and Gold Nails
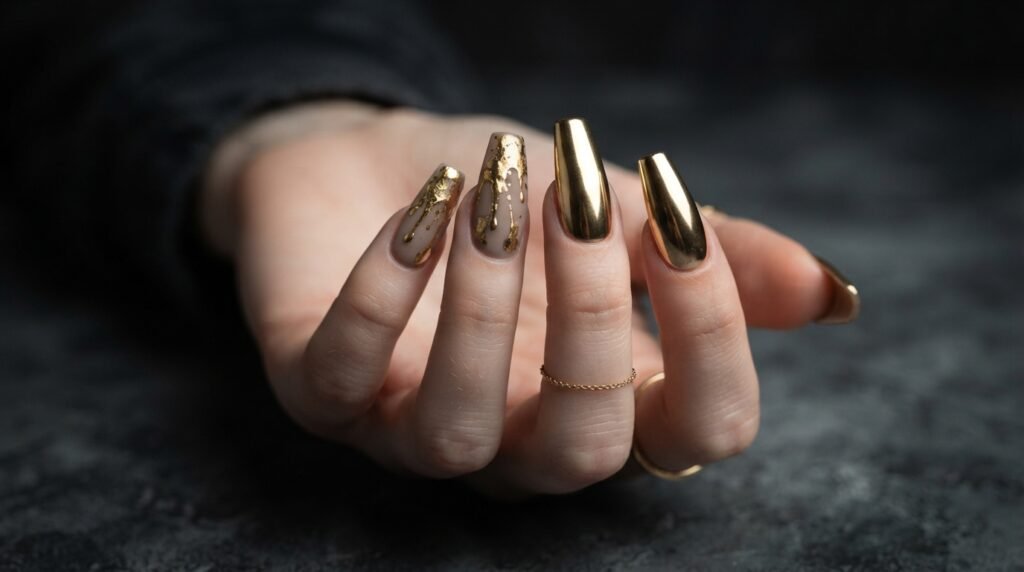
Long coffin nails provide the perfect canvas for dramatic art. You have plenty of space to experiment with bold patterns!
On coffin nails, let the molten splatter flow heavily from the cuticle down to the tapered tip. The contrast looks incredible!
| Nail Shape Feature | Best Splatter Technique | Accent Recommendation |
| Coffin Shape | Heavy, cascading cuticle drips | Full glossy gold chrome on thumb and pinky |
| Almond Shape | Side-swept diagonal splatter | Delicate chrome line along the side wall |
| Square Shape | Subtle tip-focused droplets | Single ring-finger full chrome accent |
Pairing sharp coffin edges with organic splatter creates an eye-catching, high-fashion manicure you will love showing off.
Achieving Gold Splatter on Pointed Almond Nails
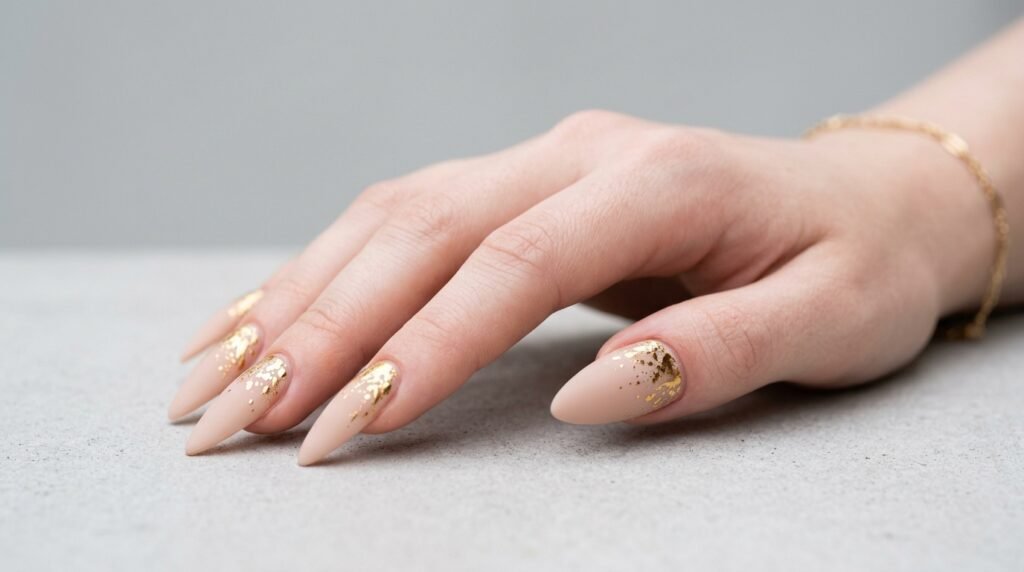
Almond nails are naturally elegant and lengthening. However, placement is key to keeping the tip looking sharp. Keep heavy splatter near the base of the nail. Allow only tiny dots or thin lines to reach the pointed tip. Alternating full gold chrome on your index finger balances the soft curve of almond nails. As a result, your hands look long and slender.
This shape-and-design pairing is ideal for anyone who loves classic, feminine silhouettes with a metallic edge.
Troubleshooting: Common Gold Chrome Issues and Fixes
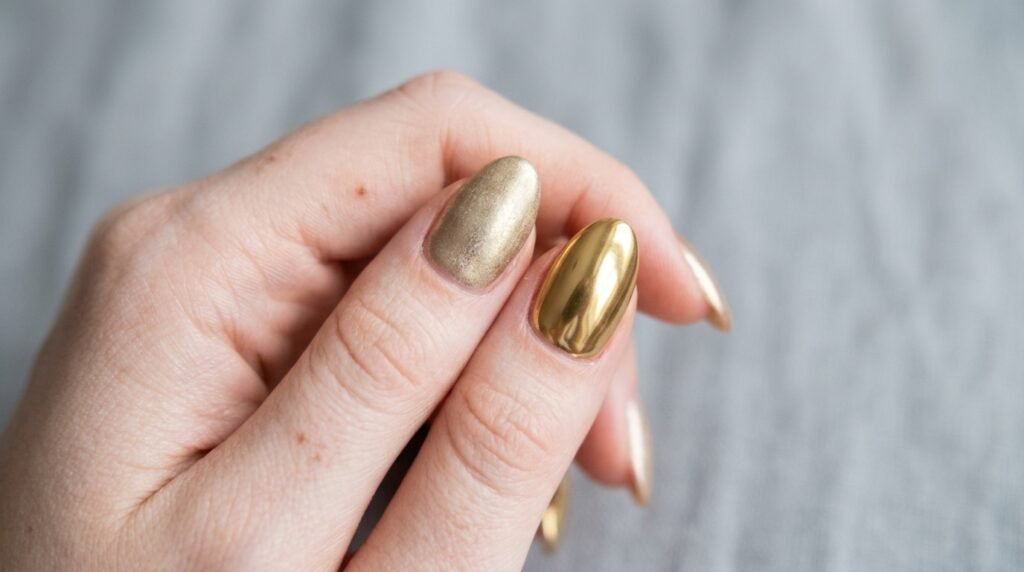
Gold chrome can sometimes look patchy or dull. Fortunately, these common mistakes are easy to fix with proper technique.
- Issue: Chrome looks cloudy.
- Fix: Your base top coat was cured too long. Cure tack-free top coat for exactly 30 seconds before applying powder.
- Issue: Chrome rubs off at the tips.
- Fix: You forgot to cap the free edge. Always seal tips with a thin coat of gel base before top coating.
Using quality chrome powder ensures a smooth, mirror-like finish every time. [Affiliate opportunity: professional gold chrome powder set]
Troubleshooting: Avoiding Cuticle Flooding with Gel Art
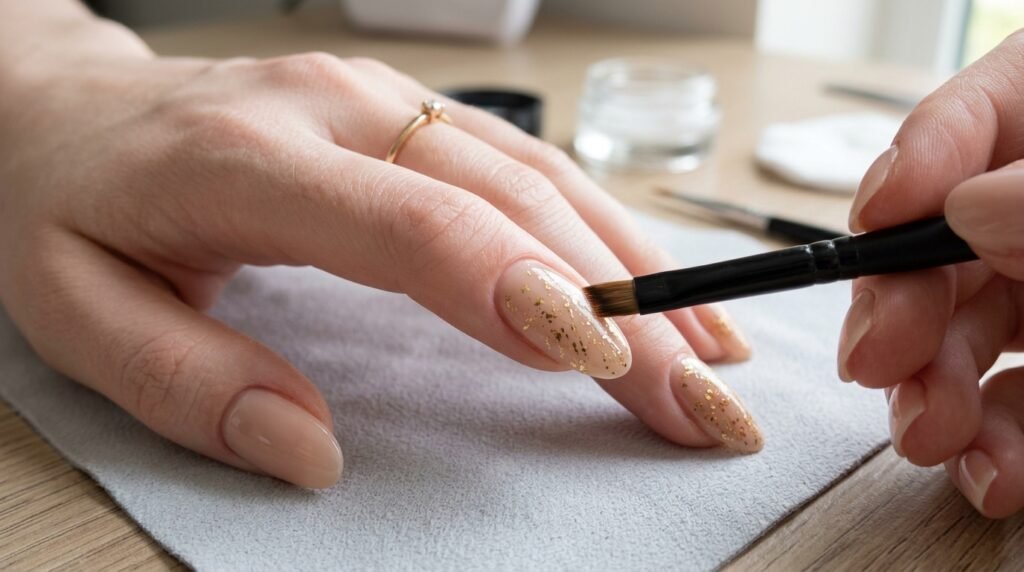
Cuticle flooding ruins clean lines and causes early lifting. Managing your gel volume is crucial when creating fine splatter. Always wipe excess gel off your detail brush onto a pallet before touching your nail. Work in light, controlled layers. If gel touches your skin, clean it immediately using a brush dipped in 91% rubbing alcohol before curing under the light.
Taking your time around the cuticles guarantees a clean, professional finish every single time.
Gold Splatter Variations: Exploring Glitter and Ink
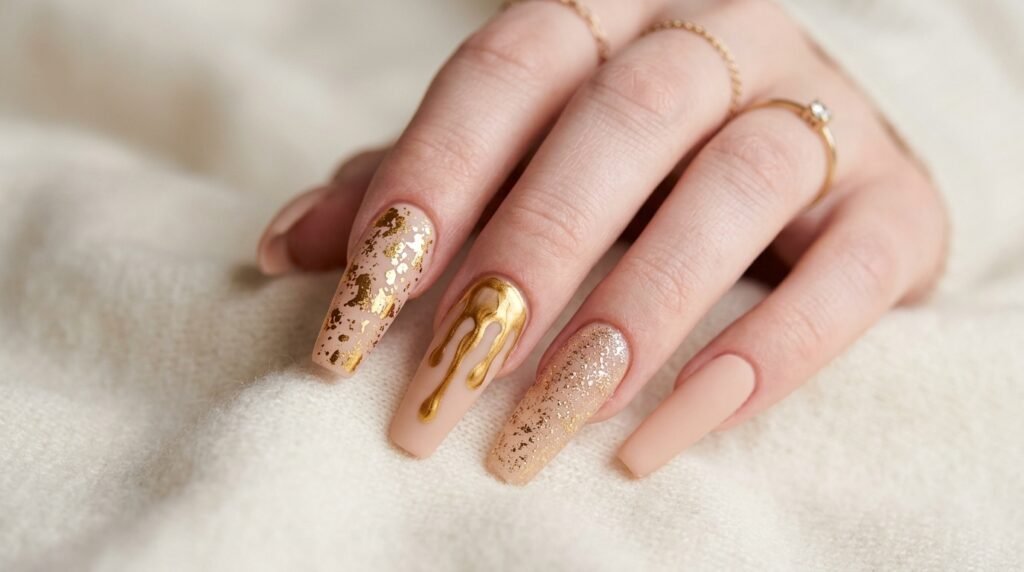
You can easily customize this design using different metallic mediums! Try these fun art variations at home:
- Metallic Foil: Dab gold leaf onto sticky gel spots for a textured, rugged splatter effect.
- Gold Metallic Ink: Drop metallic alcohol ink onto a matte base for soft, watercolor-like drips.
- Fine Gold Glitter: Mix fine gold glitter into clear gel for a sparkling, dimensional splash.
Experimenting with texture lets you tailor your nude and gold nails to your exact mood and preference!
Creating Gold Splatter Nails with Regular Polish
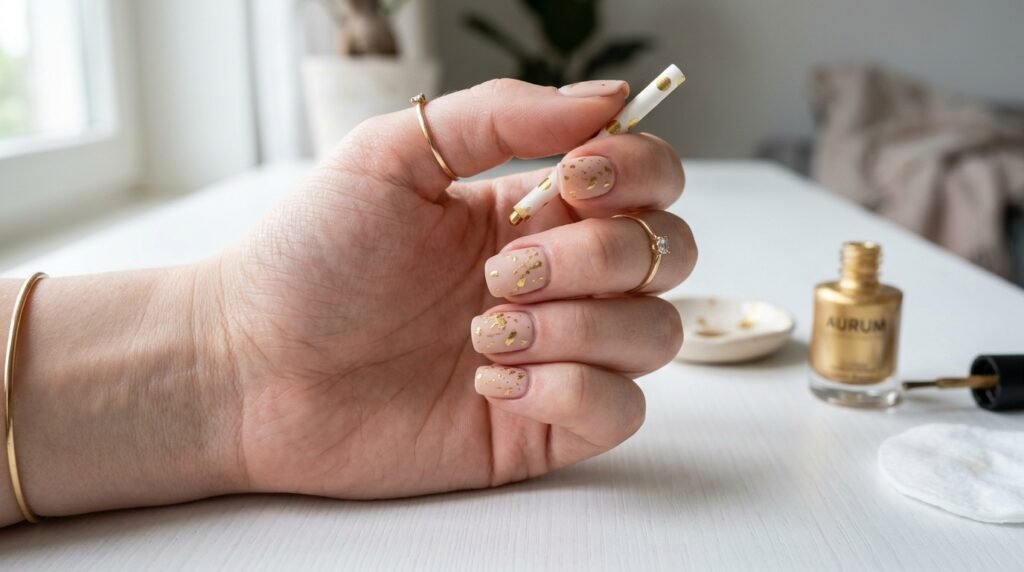
You do not need gel polish to recreate this look at home! Standard nail polish works wonderfully with a few simple tricks.
- Apply two coats of your favorite nude regular polish and let dry completely.
- Apply a matte top coat over the nude polish.
- Place a small dot of gold metallic polish onto a piece of paper.
- Dip a straw or stiff fan brush into the gold polish and flick it gently onto your nails.
- Seal with a fast-drying top coat once dry.
This quick method gives you a trendy splatter look without needing an LED lamp!
The Versatility of Nude and Gold Nails for Work

Wondering if this design works for professional settings? Yes, it absolutely can with a few small tweaks! Keep your nails short or medium length with a clean round or square shape. Use a soft, neutral beige base. Limit the gold splatter to just one subtle accent nail per hand. Keep the remaining nails a clean, classic matte nude.
This refined variation looks ultra-chic at the office while still showcasing your personal style.
Choosing Complementary Jewelry for Nude and Gold Nails
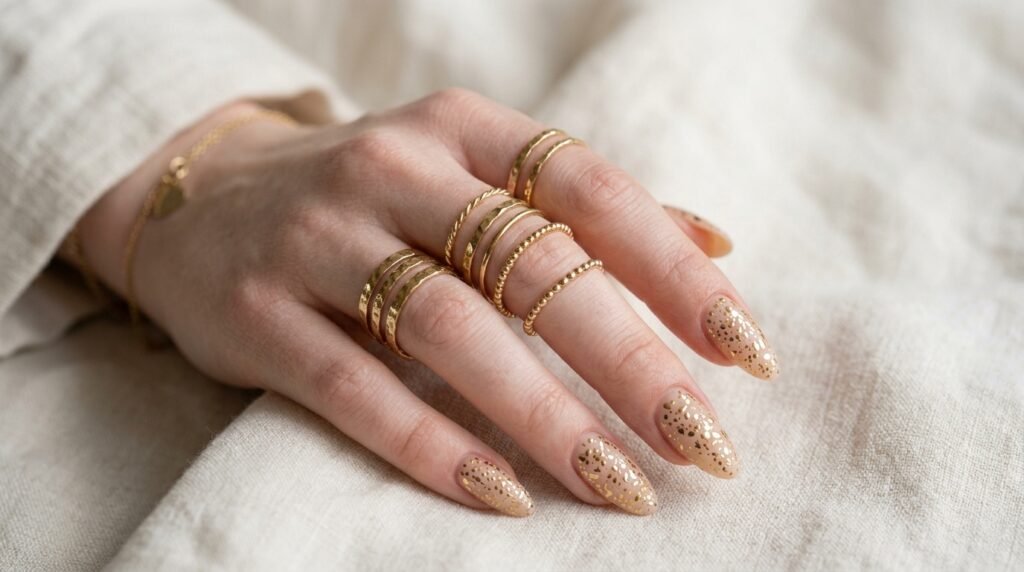
Pairing your manicure with the right rings elevates your overall look instantly. Warm gold metals complement this design best. Stack thin gold bands on fingers with matte nude polish to make the splatter pop. Avoid overly chunky rings that clash with the art.
- Best Matches: Polished yellow gold, warm champagne gold, delicate stacking rings.
- Finishes to Mix: Pair smooth gold rings with matte nail bases for chic textural contrast.
Coordinating your jewelry with your nails completes your aesthetic effortlessly.
Budget Options: Achieving the Look with Press-On Nails
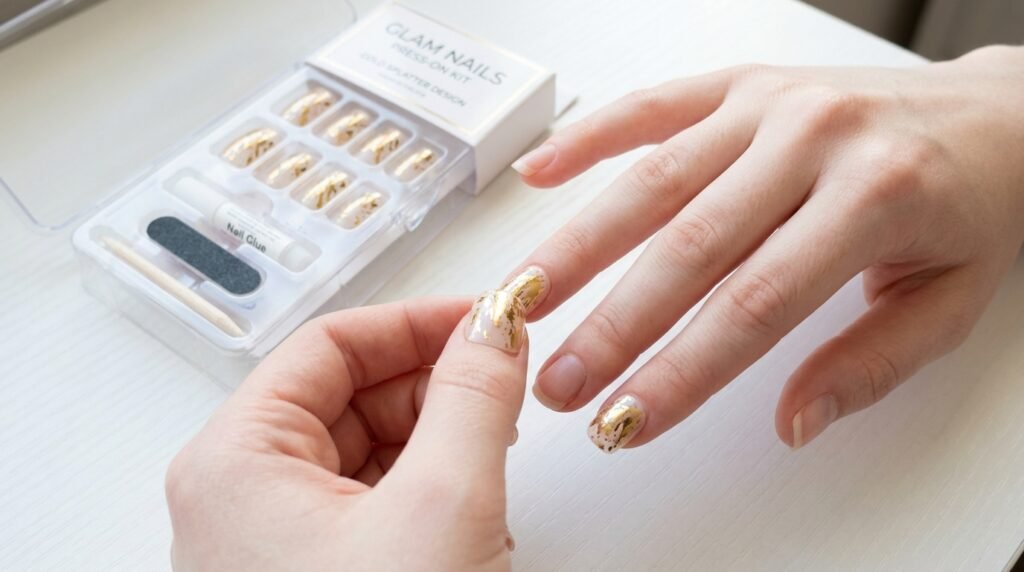
If you are short on time or budget, press-on nails offer a salon-quality result in minutes!
Many brands sell pre-made nude and gold press-on sets featuring full chrome and splatter accent nails.
- Prep Well: Gently buff your natural nails and wipe with alcohol before gluing.
- Choose Proper Sizes: Match press-on sizes carefully so the sidewalls align seamlessly.
- Press Firmly: Hold each nail down for 15 seconds to eliminate air bubbles.
Press-ons give you a gorgeous, temporary set perfect for a weekend event or photoshoot!
Nude and Gold Nails: A Chic Option for All Seasons

This versatile color palette transitions beautifully through every season of the year. In spring and summer, warm beige nudes feel sunny and beach-ready. The gold catches sunlight stunningly outdoors! In autumn and winter, switch to deeper taupe nudes paired with rich molten gold. It adds cozy warmth during colder months.
No matter the time of year, nude and gold nails remain a timeless, stylish choice.
Salon Communication: “Quiet Luxury” vs. “High Glam”
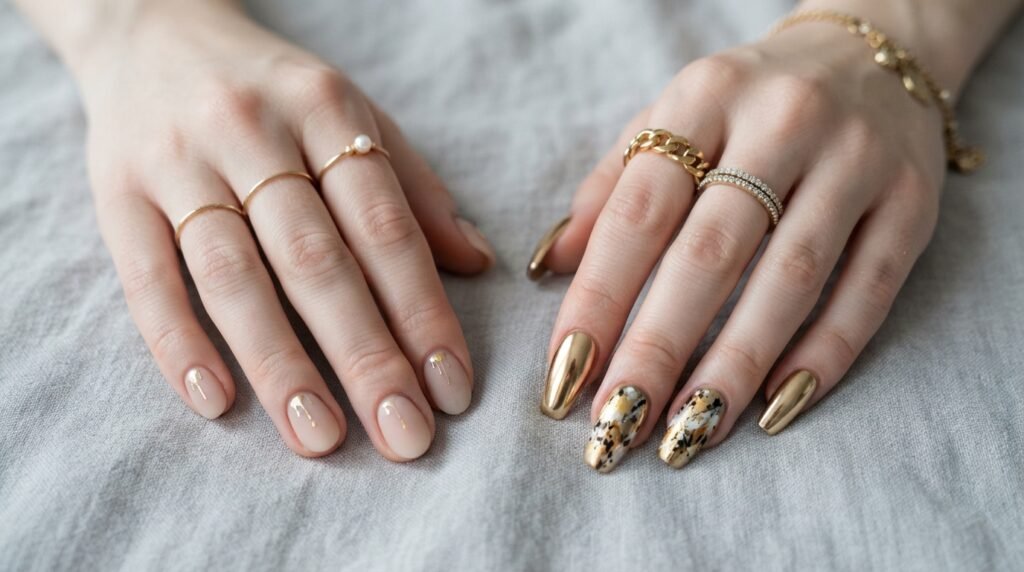
When talking to your nail tech, define your preferred aesthetic clearly so you leave happy.
- For “Quiet Luxury”: Ask for a sheer nude, subtle gold splatter, short length, and matte finish.
- For “High Glam”: Ask for full mirror chrome, dramatic dripping splatter, long coffin shape, and high contrast.
Using clear style terms helps your nail technician tailor product placement to your exact taste.
FAQs: Frequently Asked Questions About Molten Gold Nails
What is molten gold nail art?
Molten gold nail art uses chrome powder, metallic gel, or foil to create liquid-like drips, splatters, and metallic accents on nails.
How do you create a gold splatter effect on nails?
You can create a gold splatter effect by flicking metallic gel with a fan brush or painting abstract drops with clear gel and rubbing gold chrome powder over them.
What base color works best under gold splatter designs?
A nude or taupe base works best because the neutral backdrop allows the shiny gold chrome splatter to pop dramatically.
Is nude and gold nail art good for formal events?
Yes! Nude and gold nail art is extremely versatile, elegant, and perfect for weddings, galas, holiday parties, and formal dinners.
Conclusion
Nude and gold nails with molten splatter offer an incredible blend of chic contrast and glamour. Whether you love long coffin nails or short square shapes, this design adapts easily to your vibe. Ready to transform your hands? Save this post for your next salon visit or try the DIY tutorial at home! Which variation will you try first?

Mia founded Daily Nail Idea after a decade in beauty editorial, tired of watching great nail art disappear into the scroll. She now leads the team’s editorial direction — deciding what’s worth featuring and what’s just noise — and still paints her own nails every Sunday night, no exceptions.