Neon Skull & Flame Nails: Edgy Halloween Nail Art 2026
Introduction
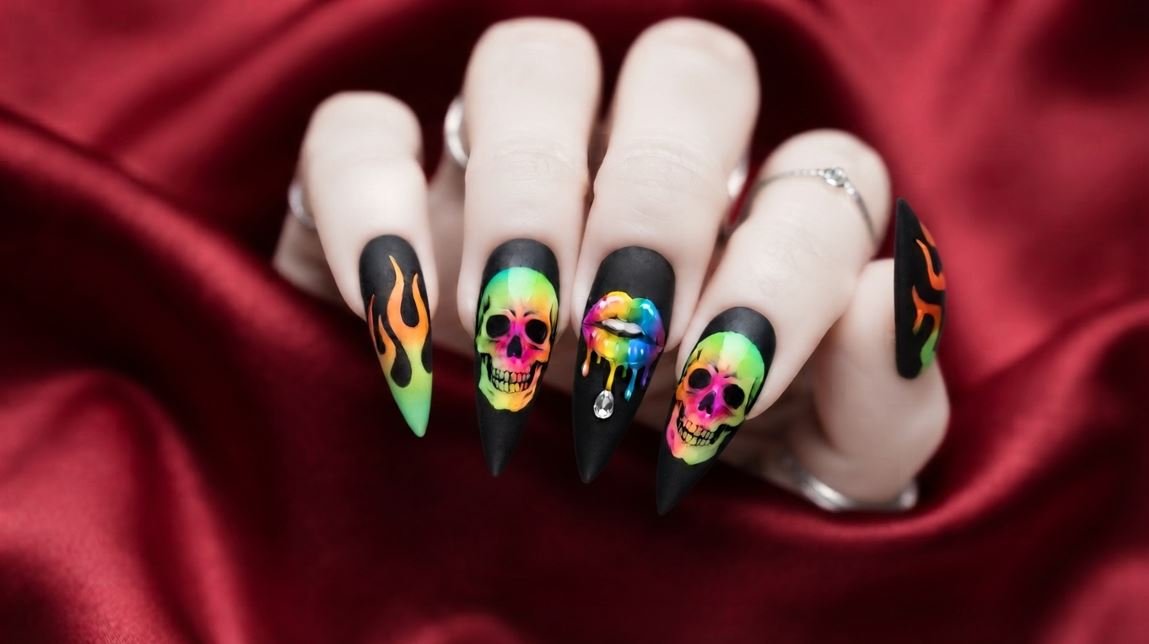
So, you saved five different spooky nail ideas on Pinterest, and now you are totally stuck. I get it! Sitting in the salon chair while your tech waits is super stressful. If you want something bold this year, neon skull nails are your ultimate move. Forget those boring ghost stickers and dusty orange polishes.
Instead, electric greens, hot pinks, and fierce flames are taking over October. This look blends rock-chic energy with creepy Halloween vibes. Plus, it transitions effortlessly from late-night haunted houses to weekend autumn festivals. Let’s break down every single detail so you know exactly what to ask for at your next appointment.
At-a-Glance
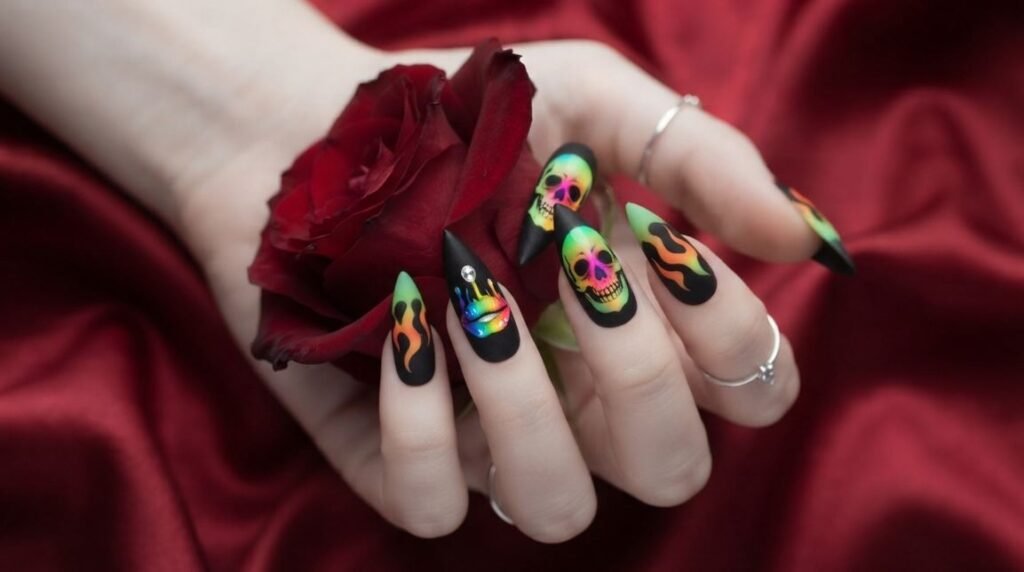
Here is what lies ahead in this comprehensive guide. We are breaking down twenty distinct neon skull and flame looks, complete with shape adaptations, salon communication notes, and DIY technical steps.
| Nail Element | Best Configuration | Salon Request Tip |
| Base Polish | Velvet Matte Black | “Use a non-wipe matte top coat over true pitch black.” |
| Neon Artwork | UV-Reactive Gel | “Please paint flames with high-pigment neon gel liner.” |
| Nail Shape | Long Stiletto or Coffin | “Keep the edges crisp and taper the sidewalls tightly.” |
| Finish | High-Gloss Artwork over Matte | “Layer glossy top coat only over the neon details.” |
Matte Black Base with Electric Green Skulls
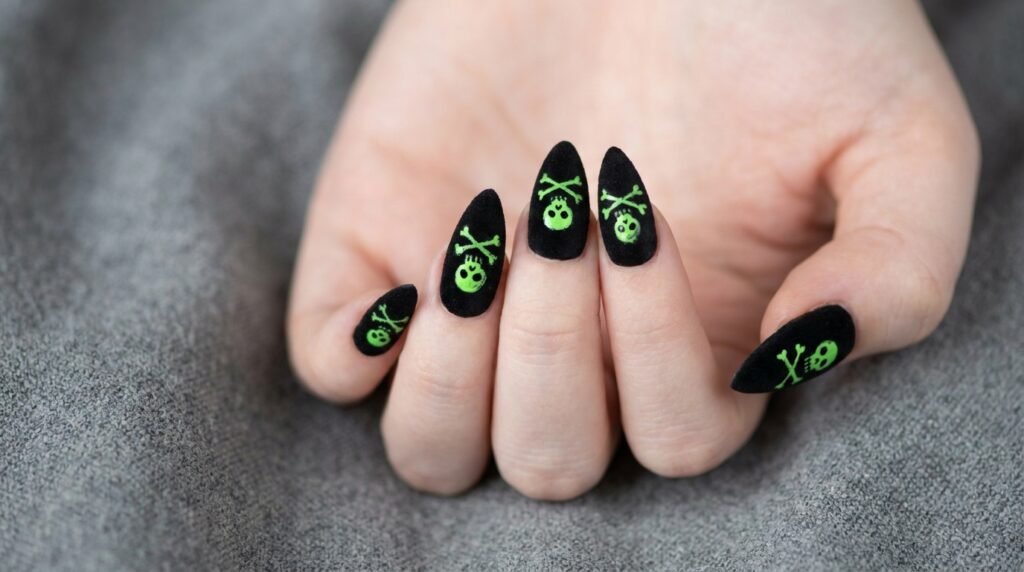
Starting off strong, a pitch-black matte base creates the ultimate contrast for neon artwork. When you add radioactive green skulls, the design pops right off your fingertips. I love using a true jet-black gel polish for this look. First, apply two thin coats of black polish, curing between each layer. Next, buff the surface gently to ensure a smooth matte finish. After that, use a fine liner brush to hand-paint your green skull outlines.
To make the green pop, paint a white gel base first. Then, layer your neon green right over it. Consequently, the color looks vivid even under dim lighting.
- Best Shape: Long Stiletto
- Ideal Occasion: Late-night Halloween parties
- Salon Tip: Ask for hand-painted detail work using high-pigment gel liners.
Hot Pink Flame Accents on Stiletto Nails
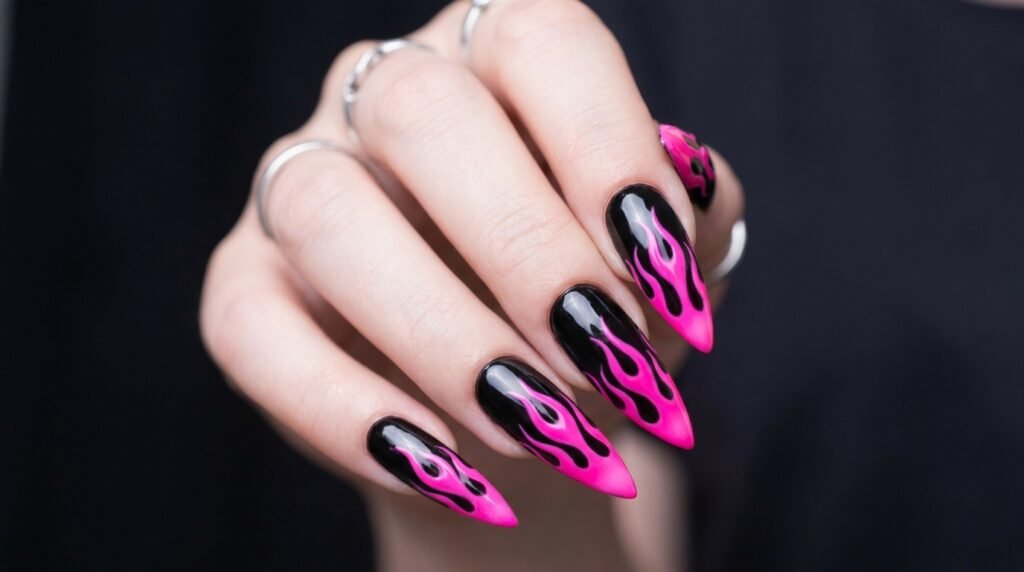
Flames do not always have to be red or orange. Hot pink flames bring a playful, edgy contrast to dark Halloween manicures. Furthermore, stiletto nails provide the perfect long canvas for sweeping fire lines. Start at the free edge of the nail, sweeping upward toward the cuticle with a thin detail brush. Keep the base of the flame thick, then flick your wrist to create sharp tips.
Because precision is key, work on one finger at a time and flash-cure for five seconds. Finally, cap the design with a shiny top coat for maximum glossy shine.
- Best Shape: Sharp Stiletto
- Ideal Occasion: October concerts or fall festivals
- DIY Rating: Intermediate (requires a steady hand)
Glow-in-the-Dark Radioactive Green Flame Art
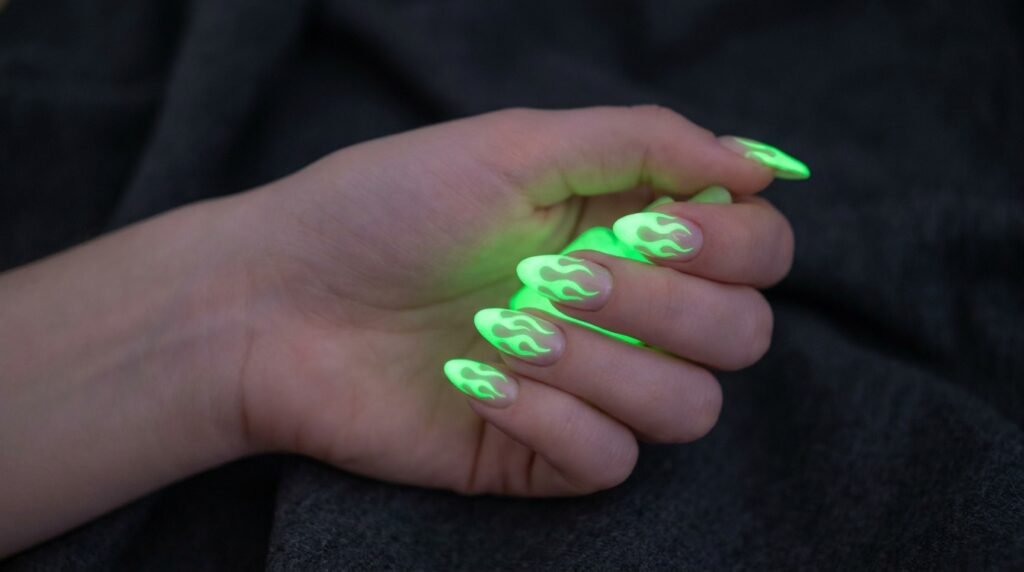
If you want maximum drama, glow-in-the-dark polish is essential. Radioactive green flames look super bright during the day, but they truly transform in darkness.
[Prep Nails] ➔ [Apply Black Base] ➔ [Paint White Flame Core] ➔ [Layer UV Glow Gel] ➔ [Seal Polish]
To achieve this, apply a glow-in-the-dark top coat over your neon artwork. Alternatively, mix glowing acrylic powder directly into your gel polish. Meanwhile, keep your cuticle area clean to avoid flooding. Always wipe away excess gel before curing under your UV lamp. As a result, your flames stay crisp and clear all night long.
- Best Shape: Almond or Medium Coffin
- Ideal Occasion: Clubbing, rave events, or haunted houses
- Budget Tier: Salon gel or luxury custom press-ons
Rainbow Drip Lip Nail Art with Rhinestone Teardrops
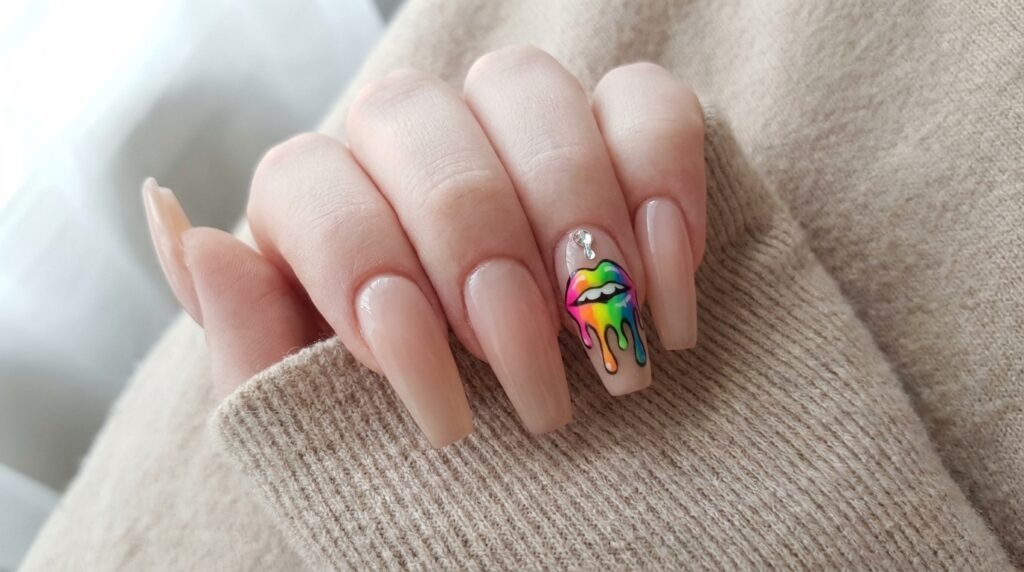
Want to mix creepy vibes with high glam? Rainbow drip lips add an edgy, pop-art spin to traditional Halloween nails. This design features an open-mouth silhouette dripping with neon colors. To start, paint the lips using a saturated neon pink polish. Next, use a dotting tool to drag drips of lime green, orange, and electric blue downward.
Add a single clear rhinestone teardrop right below the lip drip. Thus, you get an instant 3D effect that catches light from every direction.
- Best Shape: Long Square or Coffin
- Ideal Occasion: Halloween night out
- Salon Communication: “I want a pop-art lip design with 3D crystal accents.”
Orange to Green Gradient Flame Silhouettes
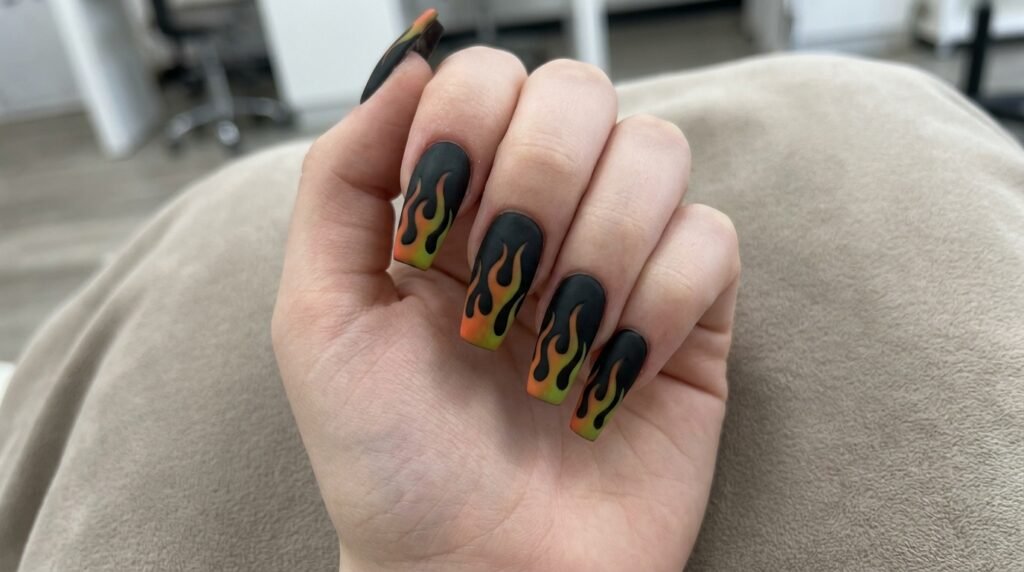
Gradient flames offer a fiery look that feels fresh and modern. Blending bright orange into electric green creates a toxic, radioactive vibe. First, paint your nail base with a velvet matte black polish. Then, sponge an orange-to-green gel gradient onto the center of the nail. After curing, use a black detail brush to carve out flame silhouettes over the gradient. Consequently, the bright colors peak through the dark outlines seamlessly.
- Best Shape: Coffin or Tapered Square
- Ideal Occasion: Pumpkin patch visits and fall weekend trips
- Maintenance: Apply cuticle oil daily to maintain skin hydration around matte bases.
Heavy Metal Skull Artwork with Silver Chrome
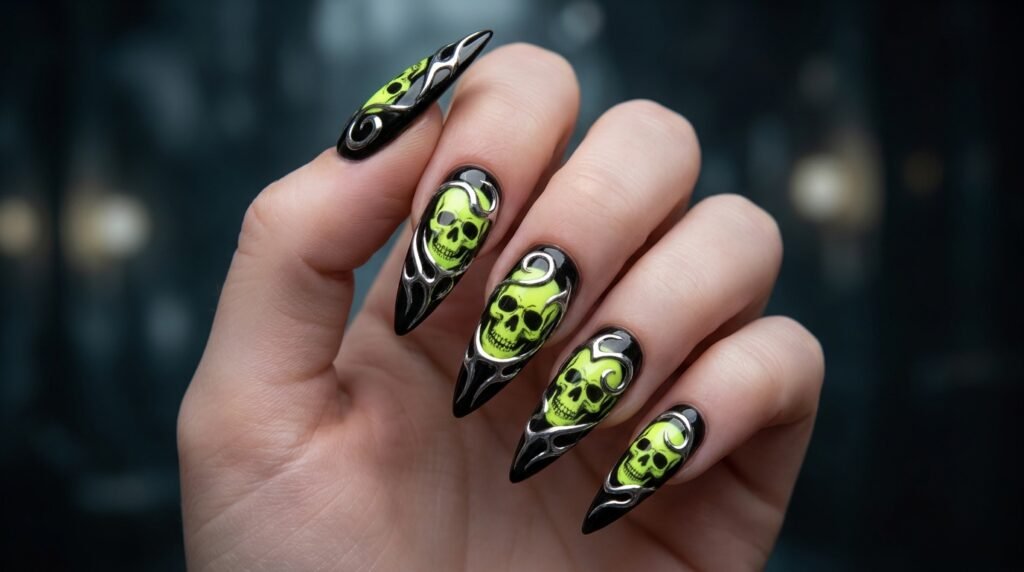
Give your neon skull nails an industrial metal edge by adding silver chrome accents. Chrome swirls look amazing wrapped around neon skull focal points. Start with your vibrant neon skull drawing in the middle of your accent nail. Next, paint delicate, tribal-style liquid metal swirls around the perimeter.
Curate your non-wipe chrome gel for 30 seconds under LED light. Then, rub silver chrome powder over those raised lines using a silicone tool.
- Best Shape: Extra Long Stiletto
- Ideal Occasion: Rock concerts and heavy metal Halloween events
- Salon Communication: “Can we add raised silver chrome line art around the neon design?”
Ombre Neon Dripping Slime Details
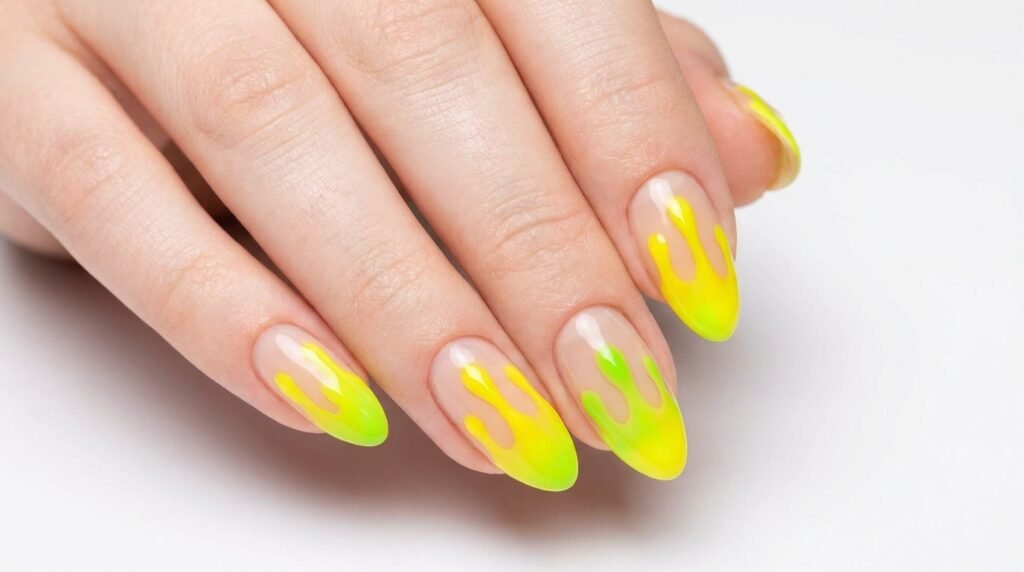
Dripping slime artwork is a classic Halloween staple that never goes out of style. However, executing it with a neon gradient elevates the look instantly. Begin with a clean nude or sheer black base polish. Next, paint neon yellow slime drips coming down from your cuticle line.
Blend that yellow into a neon lime green toward the tip using an ombre brush. Finally, outline the drips with a thin black gel line to make them pop off the nail.
- Best Shape: Medium Almond
- Ideal Occasion: Casual spooky season workday style
- DIY Tip: Use a large dotting tool to deposit the initial slime drops easily.
Dual-Tone Pink and Green Skull Collage
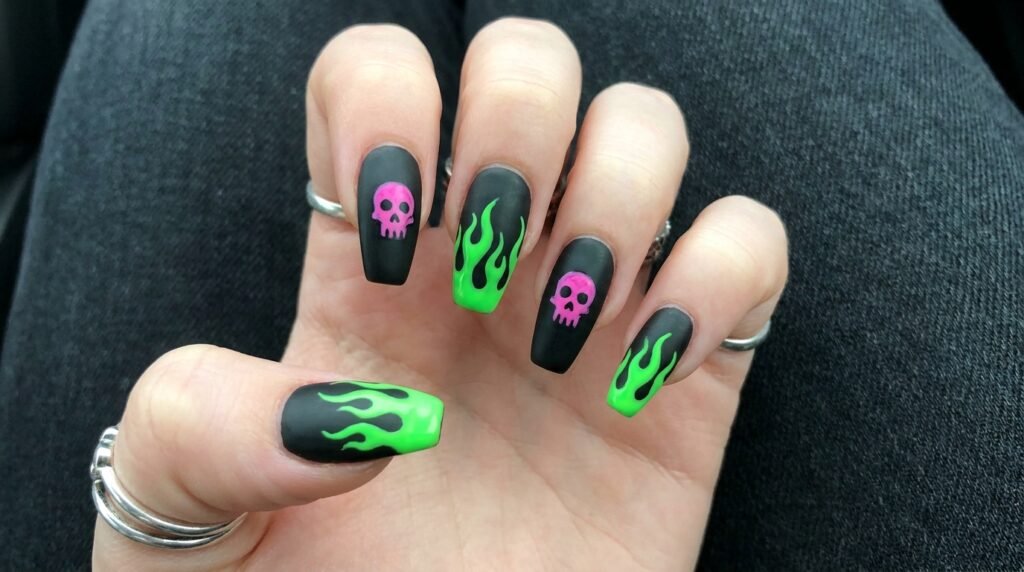
Why stick to just one neon shade when you can mix two iconic colors? Hot pink and radioactive green look ultra-chic together. Dedicate your index and middle fingers to hot pink skull graphics. Meanwhile, paint your ring and pinky fingers with electric green flames.
To unite the look, use black matte polish as the consistent background across all fingers. Therefore, the contrasting colors look intentional and cohesive.
- Best Shape: Coffin or Long Almond
- Ideal Occasion: Modern Halloween nail enthusiasts
- Budget Tier: High-end salon design
High-Gloss Accent Polish Over Matte Black
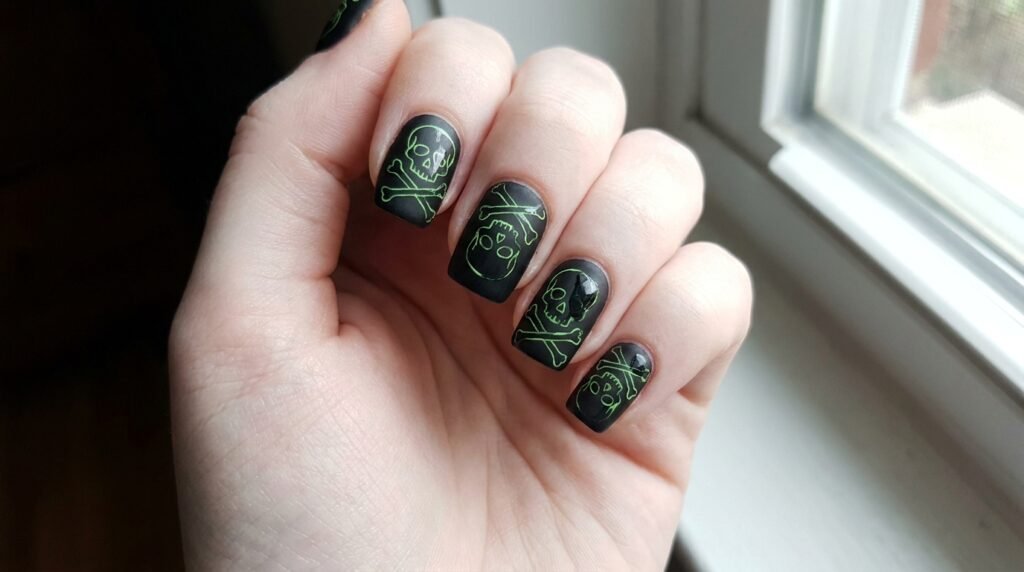
Playing with texture is an easy way to elevate any manicure. Combining high-gloss neon art with a flat matte black base creates incredible visual depth. First, apply two coats of jet-black polish followed by a matte top coat. Cure completely so the base stays velvety and smooth.
Next, paint your neon skull nails using glossy gel liners. Do not put matte top coat over your artwork! Instead, leave the neon shiny so it sits above the matte base.
- Best Shape: Short Square or Natural Shape
- Ideal Occasion: Low-key Halloween aesthetic lovers
- Technical Tip: Avoid touching the matte surface with oily fingers before snapping photos.
Minimalist Single Neon Flame Line Art
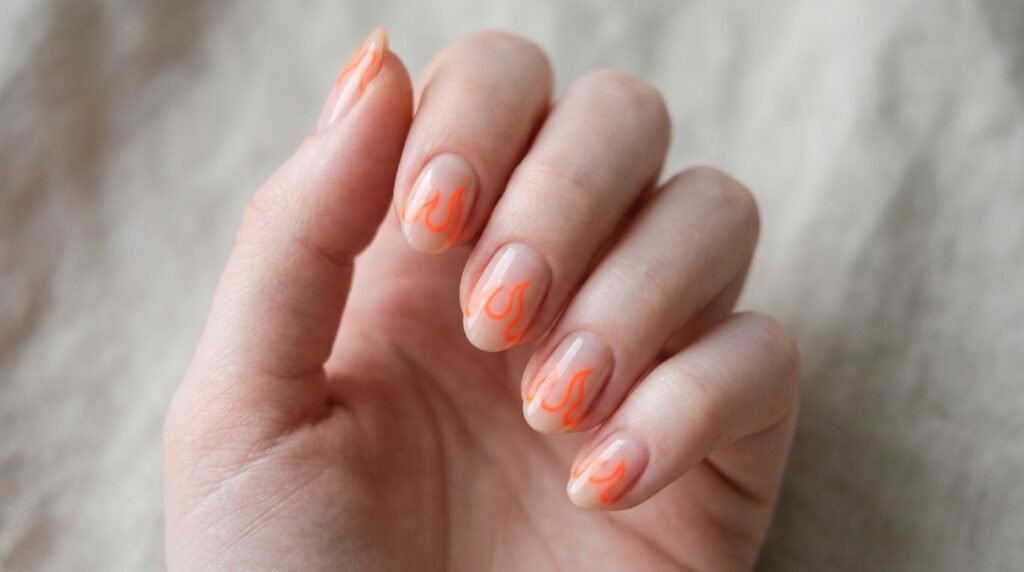
If full-coverage artwork feels like too much, try minimal line art instead. A single, razor-thin neon flame tracing the edge of your nail looks sleek and sophisticated. Use a micro-striper brush dipping into UV-reactive orange or green polish. Carefully trace the outer contour of your nail, looping up into a delicate flame silhouette.
This subtle approach keeps your nails looking clean while honoring spooky season. Furthermore, it works wonderfully on shorter natural nails.
- Best Shape: Short Oval or Natural Almond
- Ideal Occasion: Office-friendly Halloween style
- Salon Tip: “I want delicate outline-only flame art over a neutral base.”
UV Reactive Neon Purple and Skull Art
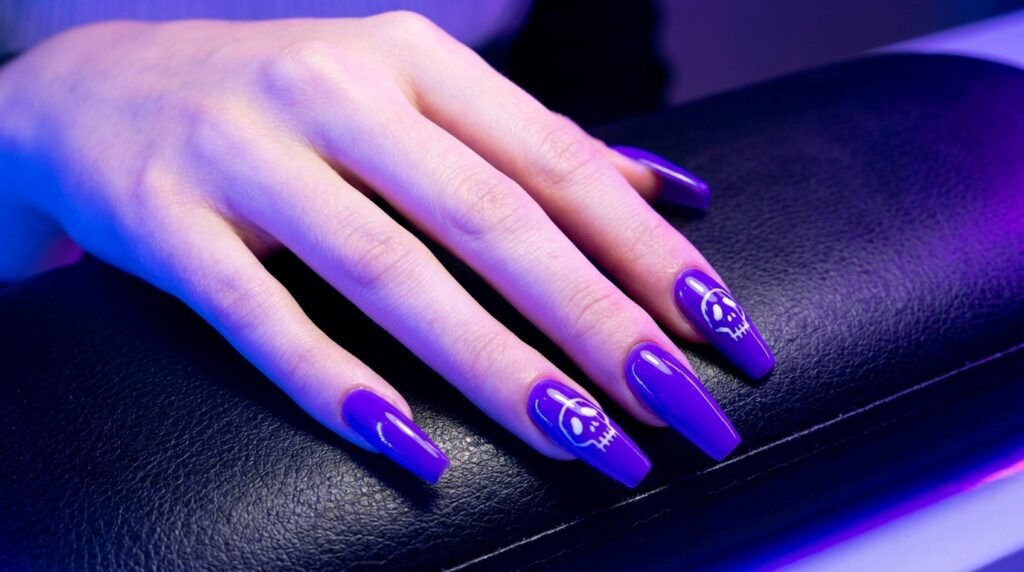
Purple is an underrated choice for Halloween, but bright neon purple adds instant intrigue. It pairs remarkably well with neon white skull accents. Paint the base with a deep ultraviolet shade that glows under blacklights. Then, draw minimalist skull teeth and eye sockets using bright white gel polish.
Add subtle purple highlights inside the eye sockets to create extra dimension. Consequently, your hands look stunning under nighttime venue lighting.
- Best Shape: Long Coffin
- Ideal Occasion: EDM festivals and late-night party events
- Affiliate Mention: [Affiliate opportunity: high-power UV keychains for quick gel curing]
Split-Face Neon Skull and Floral Nails
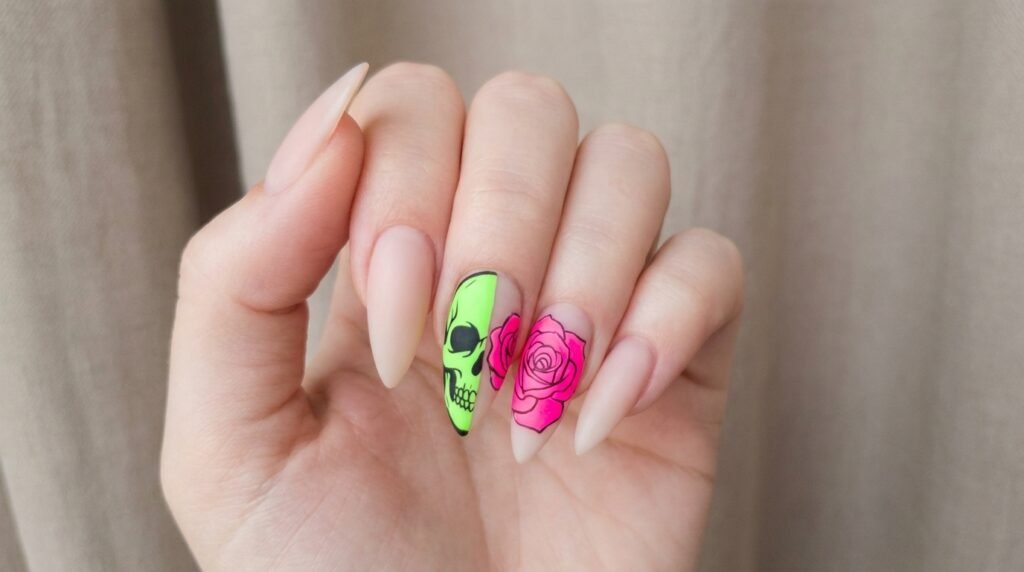
Combine creepy vibes with feminine beauty by choosing a split-face design. One half of the nail displays a neon skull, while the other half features spooky neon roses. Start by drawing a vertical line down the middle of your accent nail. On the left side, paint a neon green half-skull silhouette.
On the right side, layer bright pink gel line art to shape rose petals. This contrast creates a striking artistic balance that draws endless compliments.
- Best Shape: Medium to Long Stiletto
- Ideal Occasion: Fine art lovers celebrating spooky season
- Salon Communication: “Please split the accent nail between a skull profile and a floral outline.”
Neon Flame French Tips on Dark Bases
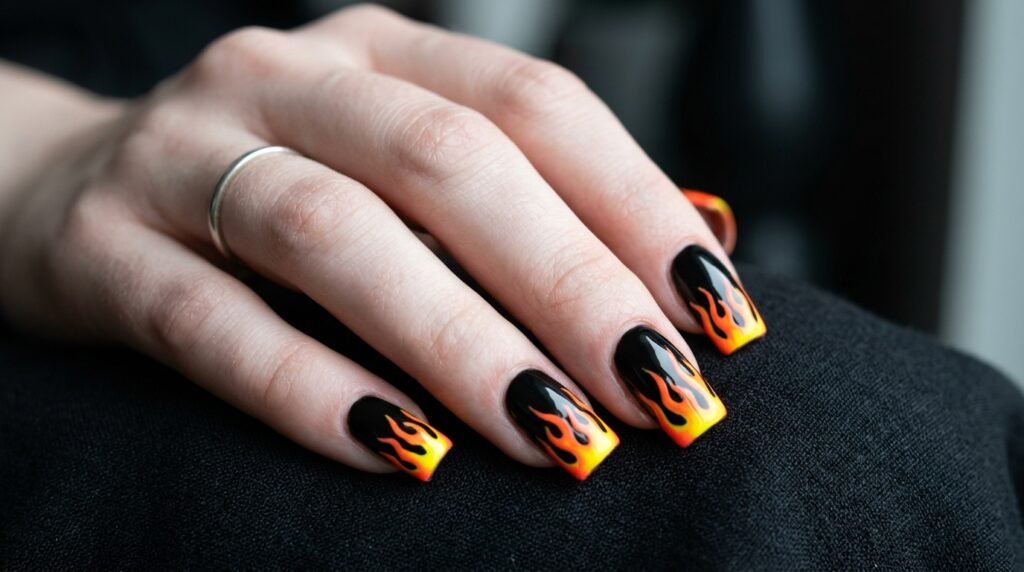
Update your traditional French manicure by replacing clean white arches with fiery neon tips. Flame French tips look exceptionally sharp on square and coffin shapes. Instead of a smooth smile line, paint jagged flame peaks extending downward toward your nail bed.
[Apply Sheer Base] ➔ [Paint Jagged Flame Outline] ➔ [Fill with Neon Orange] ➔ [Seal with High Gloss]
Use a bright neon orange gel for the main flame body. Then, outline the very tips in brilliant yellow for realistic heat distribution.
- Best Shape: Square or Coffin
- Ideal Occasion: Weekend autumn coffee runs and seasonal date nights
- DIY Rating: Intermediate
Acid Yellow Skull Graphics with Webbing Detail
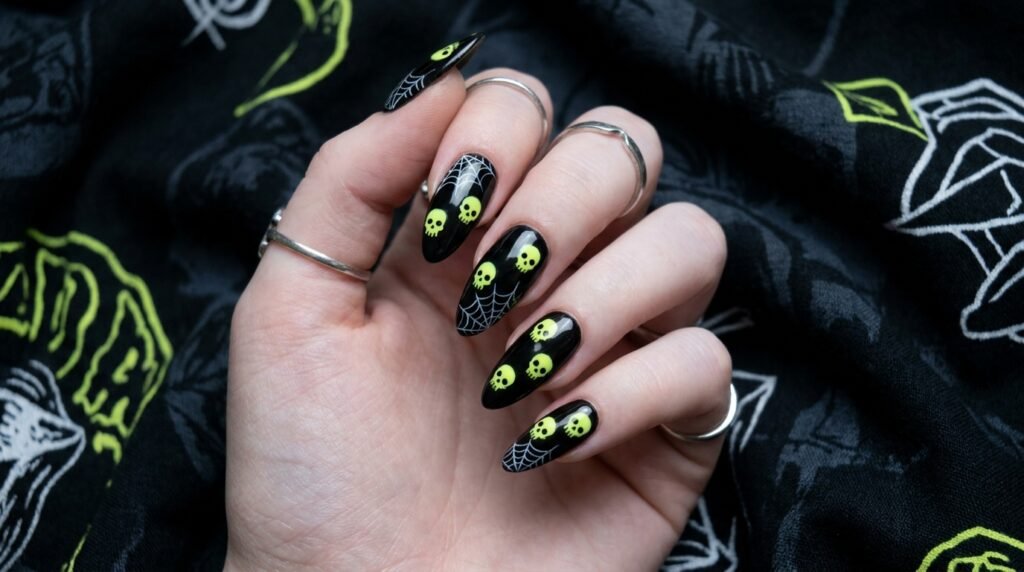
Acid yellow is another electric shade that demands attention. Pairing acid yellow skulls with delicate white cobwebs creates a super eerie composition. Paint your base black, then position a bright yellow skull near the free edge. Next, use a fine detail brush to draw fine white spiderwebs in the opposite corner.
Because spiderwebs require super-thin lines, spider gel works exceptionally well here. Simply stretch the gel across the nail for instant, perfect web strands.
- Best Shape: Long Almond
- Ideal Occasion: Costume parties and themed events
- Technical Tip: Use a non-wipe liner gel so your spiderwebs do not bleed into the base.
3D Textured Slime and Neon Flame Hybrid
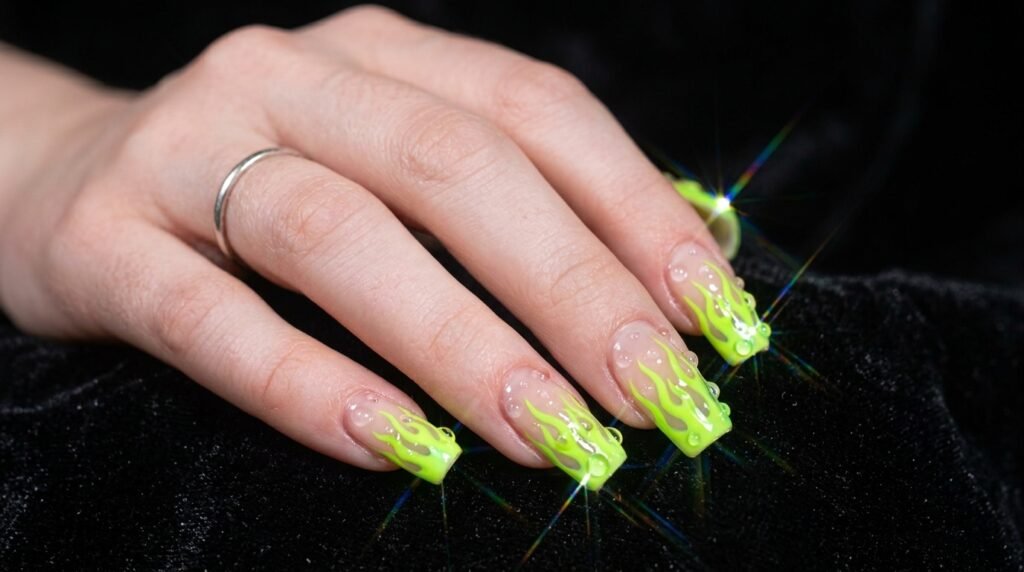
Take your manicure into the third dimension with raised builder gel accents. Combining 3D dripping slime with neon flames creates a tactile experience. Paint your neon flames first, curing them fully under your lamp. Next, place thick drops of clear hard gel over the flame tips to create raised water droplets.
Alternatively, build up 3D slime trails along the sides of your nails. The clear gel magnifies the neon color underneath while adding fun texture.
- Best Shape: Coffin or Stiletto
- Ideal Occasion: Trendsetters looking for maximum social media engagement
- Budget Tier: Salon expert service
Matte Purple with Neon Orange Skull Accents
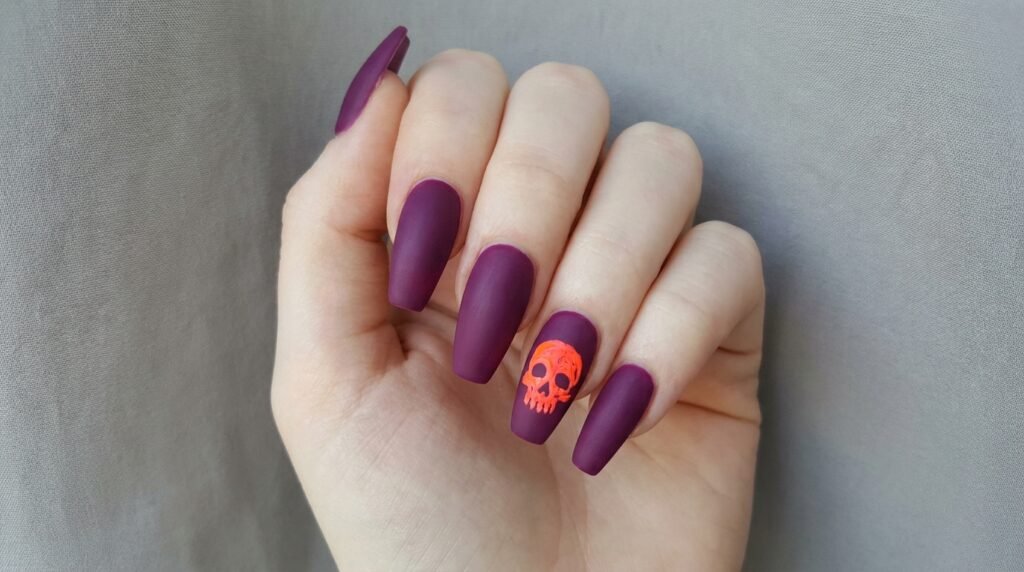
If black feels too harsh, deep matte purple provides an equally dramatic backdrop. Neon orange skulls look unbelievably vibrant against dark plum tones. Apply two coats of deep eggplant purple, sealing it with a flat matte finish. Next, paint bright orange skull art directly over the ring finger.
Because purple and orange are complementary colors, the design pops with incredible intensity. Thus, your hands look bold without relying exclusively on black.
- Best Shape: Medium Coffin or Almond
- Ideal Occasion: Fall bonfire gatherings
- Salon Tip: Bring a reference photo showing the exact shade of plum you prefer.
Holographic Sparkle Under Neon Flame Overlays
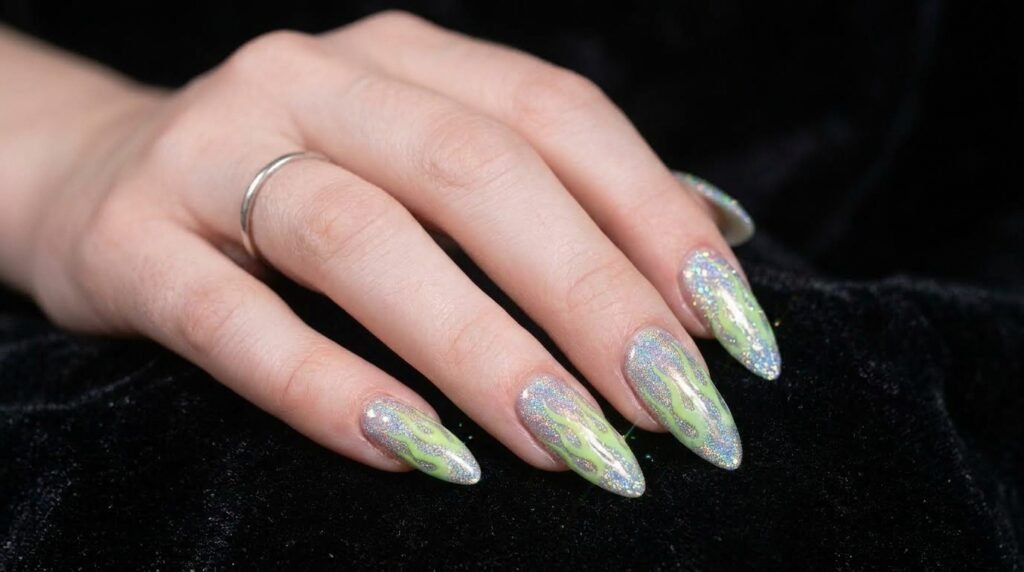
Who says Halloween art cannot sparkle? Adding a glittery holographic base beneath your neon flame outlines creates stunning shimmer whenever light hits your hands. Apply a layer of silver micro-glitter polish over your prep coat. Next, hand-paint sheer neon flames over the glitter using tinted jelly gels.
The glitter shines right through the neon polish. Consequently, your fire designs appear to flicker as your fingers move.
- Best Shape: Almond or Oval
- Ideal Occasion: Glamorous Halloween galas and evening dinners
- Maintenance: Apply a second layer of top coat after four days to preserve shine.
Full-Coverage Neon Graffiti Skull Art
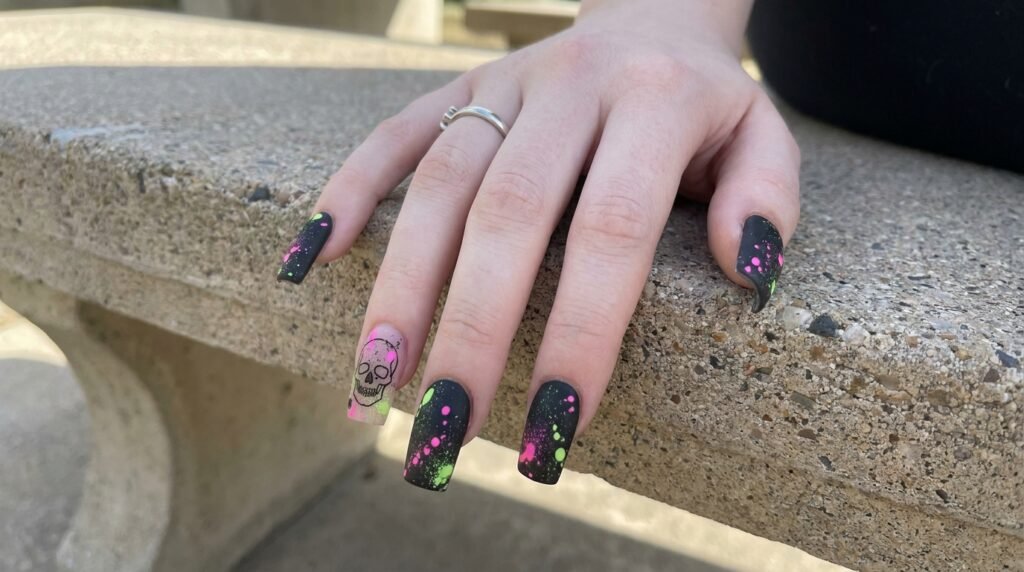
Embrace street-style aesthetics with full-coverage neon graffiti nail graphics. This style uses spray-painted splatter effects around abstract skull shapes. Dip an old fan brush or toothbrush into thin neon gel polish. Flick the bristles gently over your cured black base to create a realistic spray-paint splatter.
Once cured, draw sharp neon skull line art over the splatter background. This chaotic, energetic design looks edgy, artistic, and entirely unique.
- Best Shape: Long Square
- Ideal Occasion: Streetwear lovers and urban fall events
- DIY Tip: Protect your skin with liquid latex before doing spray-splatter techniques.
Toxic Slime Green Flame Stiletto Set
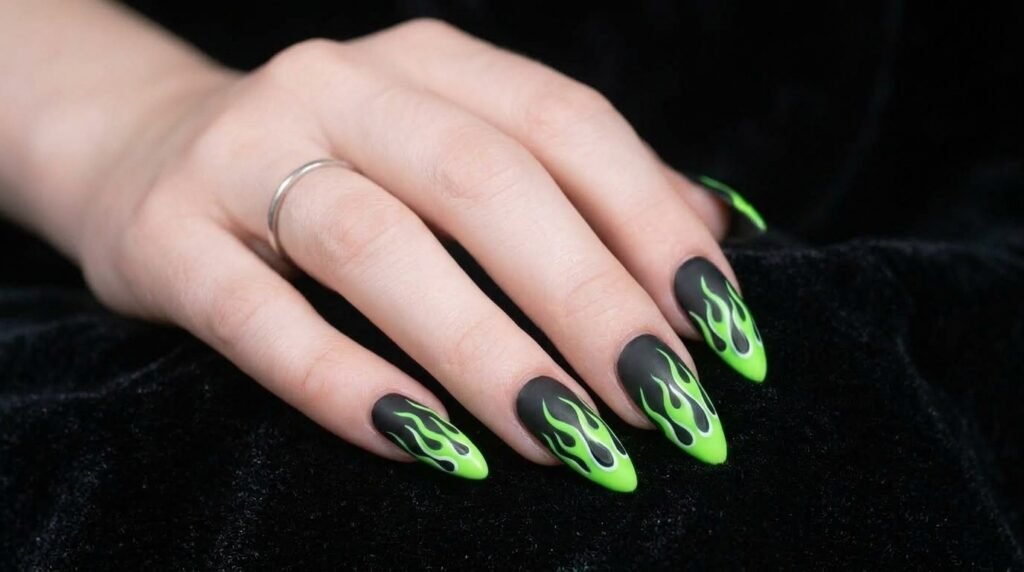
Keep it cohesive by choosing one intense shade across your whole hand. A full set of sharp stiletto nails featuring toxic slime green flames is utterly unforgettable. Vary the flame pattern on every single nail so the set looks dynamic. For example, place cuticle-rising flames on your index finger and full-coverage flames on your ring finger.
Because the color palette stays consistent, the set looks unified. Meanwhile, the varied fire placement prevents the design from feeling repetitive.
- Best Shape: Extra-Sharp Stiletto
- Ideal Occasion: Ultimate Halloween enthusiasts
- Salon Communication: “Let’s do toxic green flames on every nail with varied heights.”
How to Choose the Right Shape & Color for Halloween
When picking your perfect Halloween nail set, consider your daily routine and lifestyle. Long stiletto nails offer the most drama and space for detailed artwork like skulls. However, coffin shapes provide sturdy structural support if you work with your hands daily. Short natural nails also look incredible when styled with minimal neon flame tips.
| Priority | Recommended Shape | Recommended Color Scheme | Key Benefit |
| Maximum Drama | Extra Long Stiletto | Neon Green & Jet Black | Huge surface area for detail work |
| Daily Durability | Medium Coffin | Hot Pink & Matte Plum | Great strength with stylish length |
| Subtle Spooky | Short Almond or Oval | Electric Orange & Nude | Low-maintenance and office-friendly |
Color selection matters just as much as shape. Black bases provide maximum contrast for neon artwork, making greens, pinks, and oranges pop brightly. If you want a softer look, sheer nude bases with neon flame tips feel modern and effortless. Choose high-pigment gel polishes so your bright shades stay vibrant for weeks.
Frequently Asked Questions
What is neon skull nail art?
Neon skull nail art combines spooky skull illustrations with bright, electric colors like lime green, hot pink, and vibrant orange. It updates traditional dark Halloween designs into modern, high-contrast manicures.
How do you paint flame nail art on stiletto nails?
Start at the tip or cuticle using a thin detail liner brush. Paint the outer curves of the flame first, fill in the center with high-pigment neon gel, and sweep upward to create sharp, pointed tips.
What colors work best for glow-in-the-dark Halloween nails?
Radioactive greens, bright neon oranges, and vivid electric purples yield the strongest glow. Applying a bright white gel base under your glowing polish makes the color illuminate even brighter.
Is neon Halloween nail art good for a concert or festival look?
Yes, neon nail art looks incredible under stage lights and blacklights. The high-contrast designs pop in photos and match casual, rock-chic, or festival festival wardrobes effortlessly.
What is the difference between glow-in-the-dark and neon nail polish?
Neon polish features intensely bright daylight pigments that pop under UV blacklight, whereas glow-in-the-dark polish absorbs light and glows independently in total darkness.
Conclusion
Whether you prefer ultra-sharp stiletto shapes or wearable almond lengths, neon skull nails deliver unforgettable drama for October 2026. Save your favorite look from this guide right now so you are ready for your next salon trip! Which fierce design are you trying first?

Mia founded Daily Nail Idea after a decade in beauty editorial, tired of watching great nail art disappear into the scroll. She now leads the team’s editorial direction — deciding what’s worth featuring and what’s just noise — and still paints her own nails every Sunday night, no exceptions.