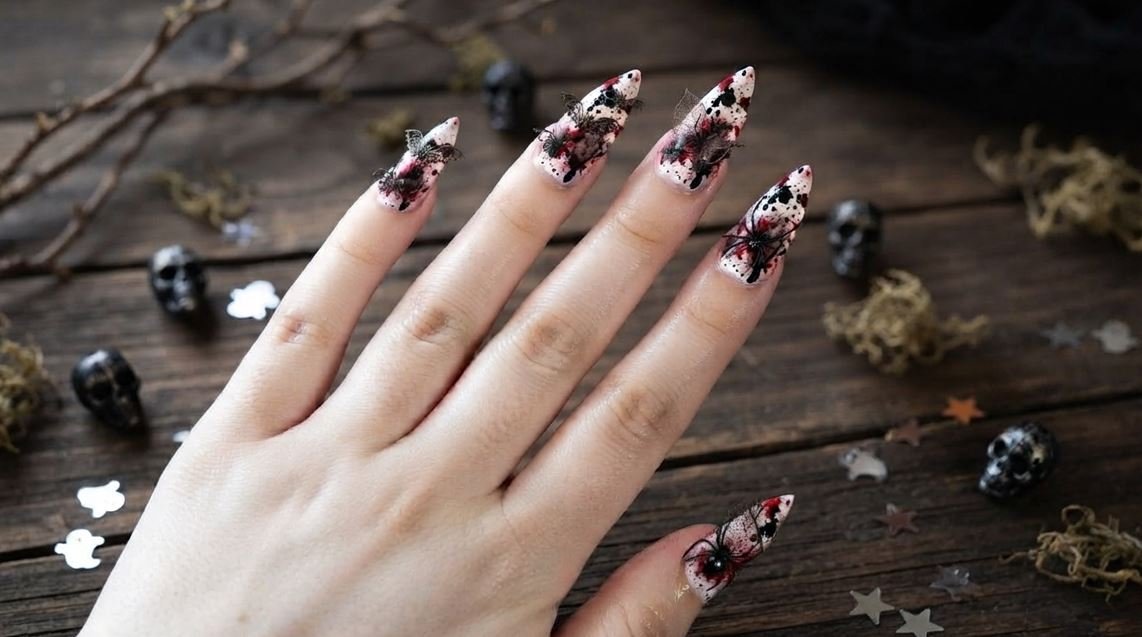
Blood Splatter Halloween Nails: The White Base Horror Design
Have you saved tons of spooky nails on Pinterest? But you aren’t sure which design to actually get. I totally get it! Halloween is the perfect time to go bold. Are you scrolling right now for inspo before your salon appointment? Or maybe you want to try a scary look at home.
Well, look no further than blood splatter nails. It’s the ultimate horror movie aesthetic. It looks incredibly cool. But more importantly, it’s actually achievable. You don’t need to be a master artist. It’s all about controlled chaos.
This year, skip the generic cute ghosts. Let’s do something with a bit more bite. A clean white base makes bright red polish pop. It creates the perfect high-contrast horror look. I love how dramatic and edgy it feels.
In this guide, I’m giving you everything you need. We’ll cover exact salon requests and DIY tutorials. I’ll share my favorite shape pairings too. You will leave this post knowing exactly what to do next. Let’s get spooky!
At-a-Glance: Killer Red and White Halloween Looks
Want a quick preview of what’s coming up? Here is a fast look at the specific designs covered in this guide. We will dive deep into:
- The classic white base blood splatter nails.
- Edgy stiletto shapes perfect for horror designs.
- Elegant yet spooky red splatter French tip nails.
- Subtle micro-dot accent nails.
- Plus, step-by-step DIY instructions.
We have a specific look for every mood. Whether you want subtle spooky or full scream queen. I’ve included Salon Communication tips throughout. These will help you get exactly what you want from your tech. I will even help you decide between splatter or drips. Let’s explore these killer options.
Why Blood Splatter Nails Are the Ultimate Spooky Szn Look
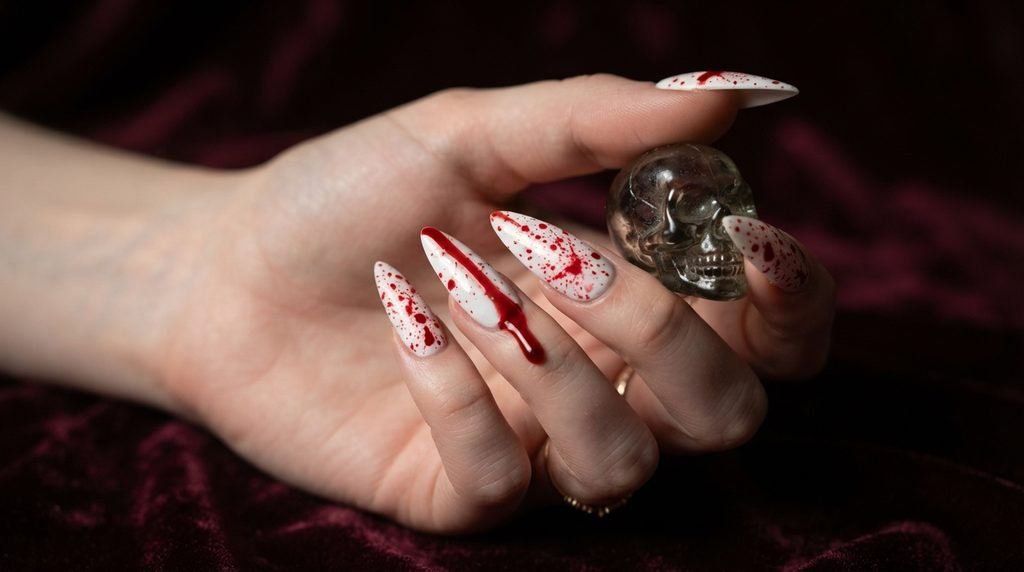
Honestly, nothing says “Halloween horror” quite like a fresh splatter design. I love how instantly recognizable it is. You walk in, and people get it. It has that classic “Scream Queen” energy. It’s bold, graphic, and visually striking. The stark red against white just screams horror. Plus, unlike intricate spiderwebs, it’s intentionally messy. Perfect for a slightly less precise (but still cool) look.
Choosing Your Canvas: The Power of a Crisp White Base
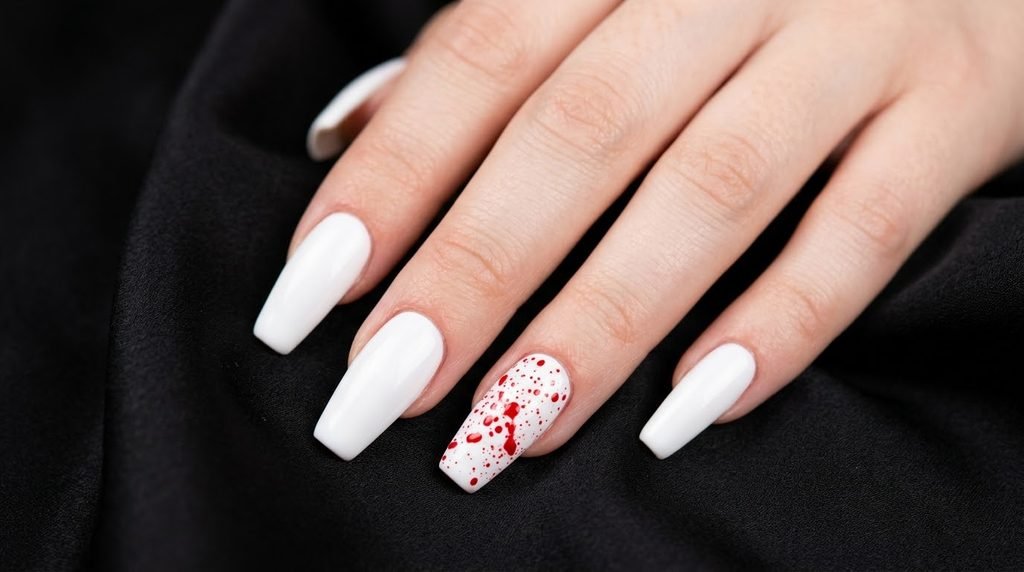
Your background color changes everything. For true blood splatter nails, a white base is non-negotiable. I recommend a solid, opaque bright white. This makes the red splatter intensely vibrant. It catches the eye instantly on Pinterest. Avoid sheer or milky whites here. You want maximum contrast. It creates that classic, graphic slasher-film aesthetic.
The Best Nail Shapes for a Scream Queen Vibe
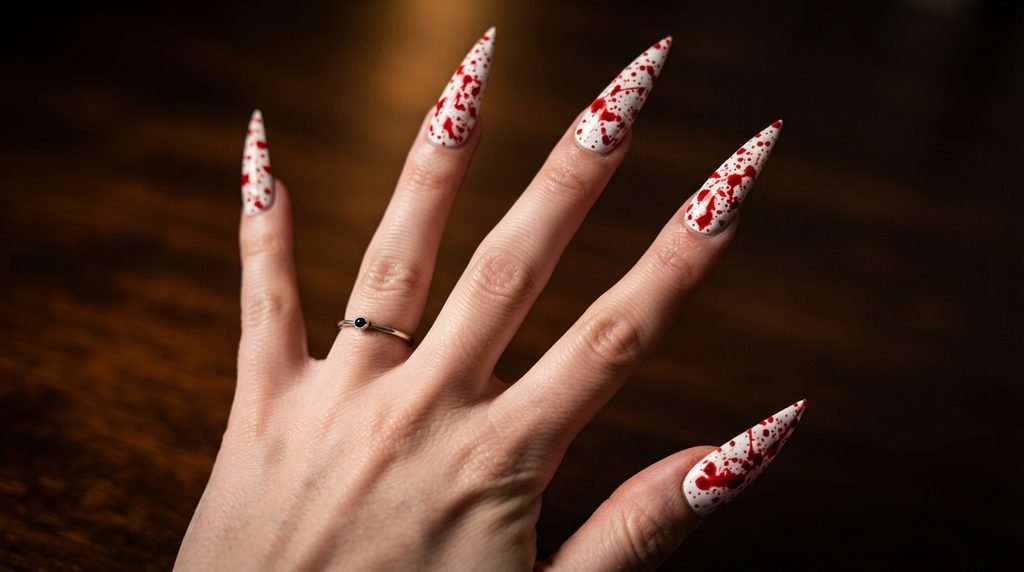
Your nail shape sets the entire mood. For a truly fierce and scary look, nothing beats long stiletto blood splatter nails. The sharp point enhances the horror vibe. Coffin shapes also look incredible and dramatic. If you prefer shorter nails, don’t worry. A square or squoval shape still works. Just keep the splatter more contained.
Classic Blood Splatter Nails with White Base: The Signature Look
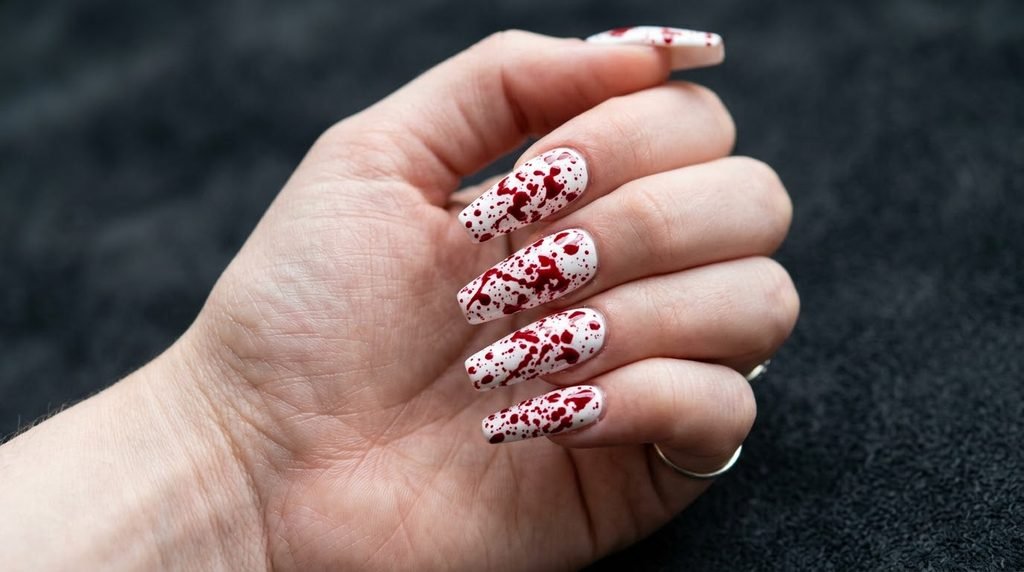
This is the main event. It’s the look everyone wants. Picture crisp white nails completely covered in random, fine red droplets. I adore the unpredictability. No two nails are ever the same. It looks like you just stepped off a horror movie set. It’s effective, scary, and high-impact. Ask your tech for this if you want the ultimate Halloween statement.
Red Splatter French Tip Nails: A Chic and Spooky Twist
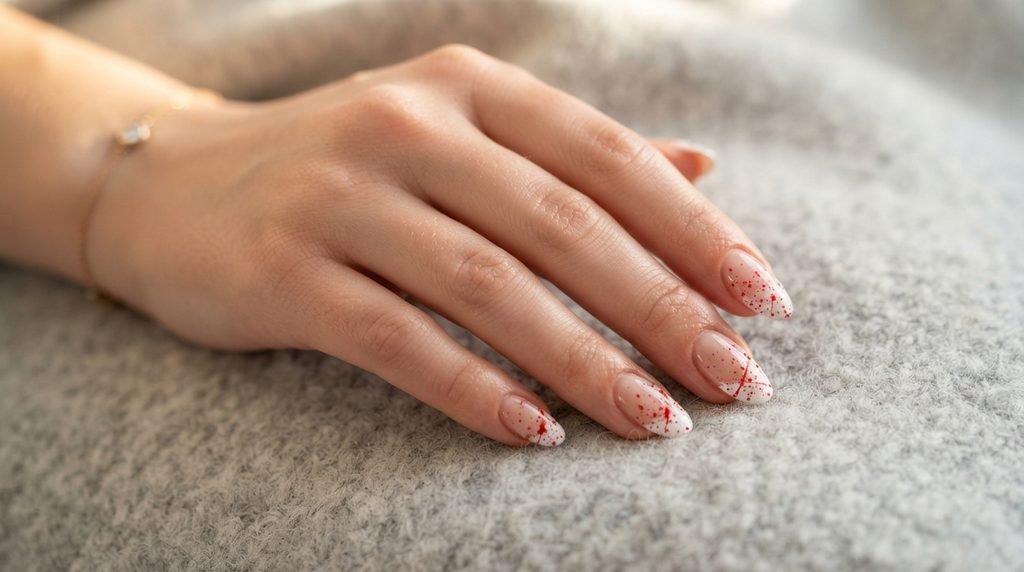
Maybe you want horror, but make it elegant. I completely understand. Meet the red splatter French tip nails. This look combines classic sophisticated with scary. We do a standard white or nude base. Then, we only apply the red splatter to the free edge (the tip). It looks incredibly chic yet completely festive. It’s a favorite for sophisticated Halloween parties.
Micro-Dot Accent Nails: Subtle Horror for Everyday Wear
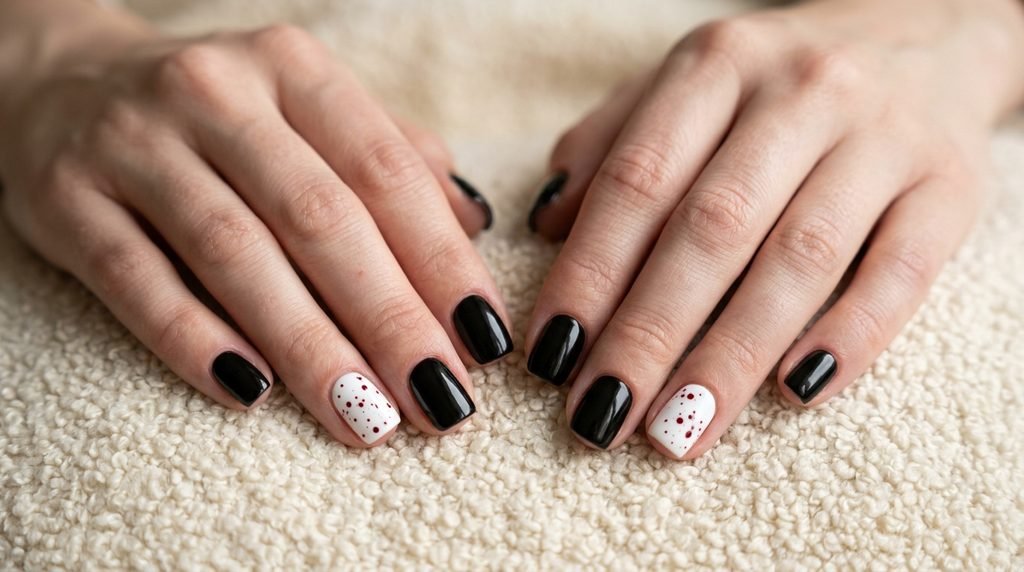
Not everyone wants ten fingers covered in “blood.” For a quieter spook, try a micro-dot accent. I often suggest doing eight solid white (or black!) nails. Then, choose your ring fingers for a small, controlled splatter. We keep the dots tiny and sparse. It’s a subtle nod to the season. It’s wearable for work or school but still fun.
Stiletto vs. Coffin: Which Shape Makes Red Splatter Pop More?
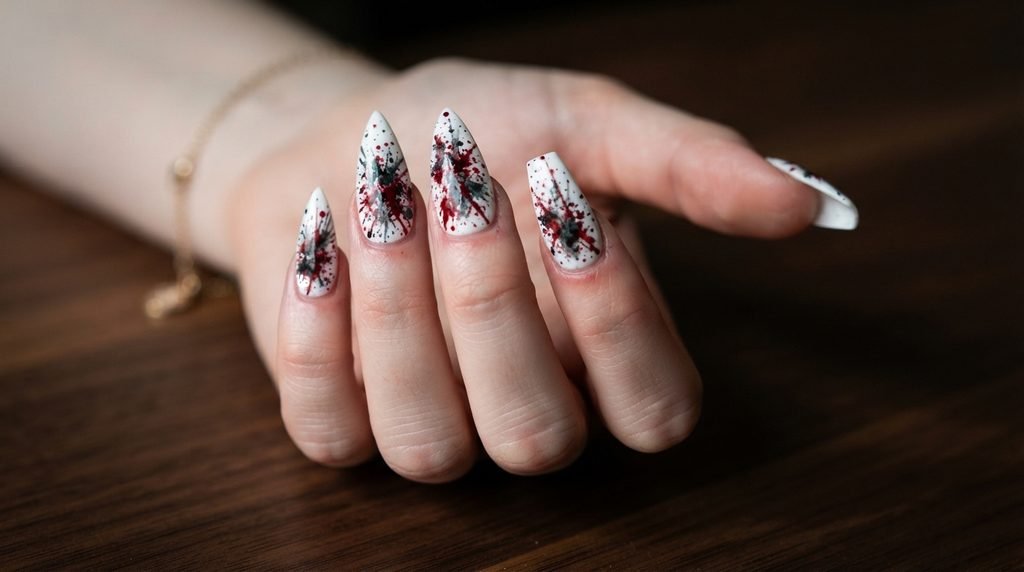
Both shapes are fantastic for this design. They offer lots of surface area for the splatter effect. Personally, I think horror splatter stiletto nails have an edgier, more “dangerous” feel. The point just makes the design look extra sharp. Coffin shape is slightly more modern and blocky. It showcases the high-contrast red against white beautifully too. Your preference rules!
Short Nails? Yes, You Can Do Blood Splatter Too!
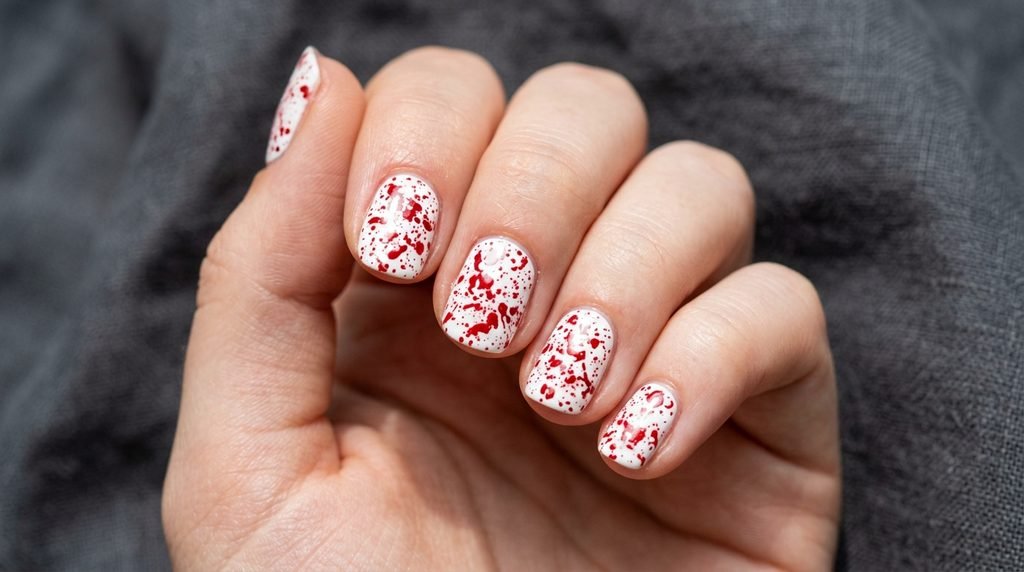
Do not feel left out if you prefer short nails. I actually love a compact red and white Halloween nail look. On short nails, the splatter effect is denser. It creates a bold, almost “textured” pattern. I recommend a square or rounded-square shape. Keep the white base bright. Ensure the red splatter is fine, not big blobs.
Salon Communication: Exactly What to Ask For at Your Appointment
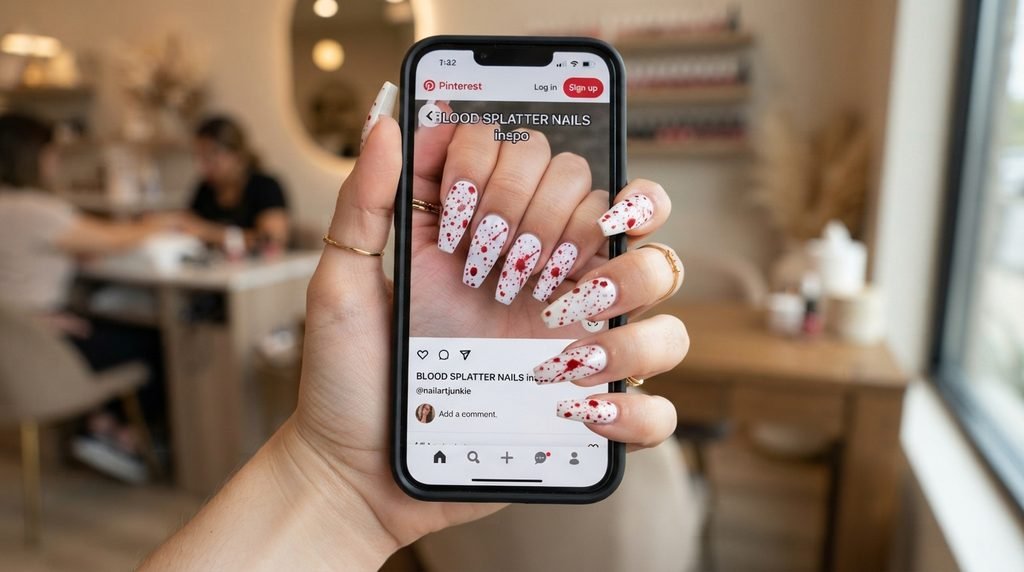
You need clear communication for this look. I advise bringing a reference photo (save this post!). Tell your tech you want a bright, opaque white base coat. Specifically use the phrase “blood splatter technique”. Clarify if you want it all over or just tips. If you want a specific “Scream” style drip accent, mention that clearly. It prevents messy misunderstandings.
The DIY Guide: Tools You Need for Mess-Free Splatter
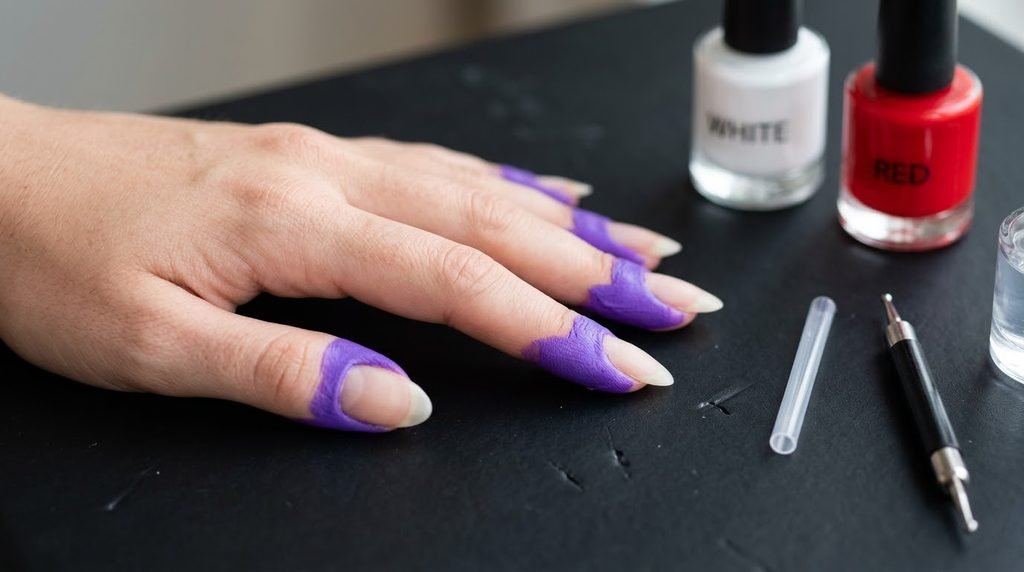
Want to try this at home? Let’s do it! First, you need your base white. And a great vibrant red. For the actual “splatter,” the pro tool is a small drinking straw. Yes, really! You will also need a dotting tool or bobby pin for finer drips. I highly recommend liquid latex or tape around your cuticles. It makes cleanup a total breeze.
Step-by-Step Tutorial: Nailing the Splatter Technique (Prep to Seal)
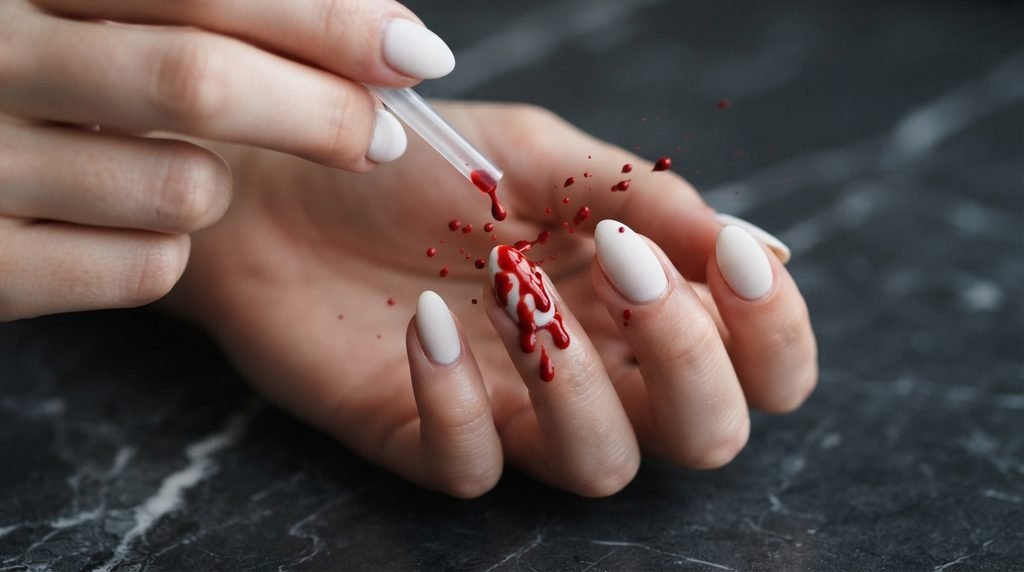
Let’s break down the home tutorial.
- Prep: Shape, clean, and base coat your nails. Use [Affiliate opportunity: high-quality base coat].
- Base Color: Apply two coats of opaque white. Let it dry completely. Crucial step.
- Cleanup Prep: Apply liquid latex (or tape) around your cuticles and fingers. This saves time later.
- The Splatter: Put a drop of red polish on a palette. Dip the end of the straw into the polish. Holding it an inch or two above your nail, blow sharply through the other end. Start with less pressure. Repeat to layer.
- Refine (Optional): Use a dotting tool for a few larger “drips.”
- Seal: Wait at least 15 minutes for the splatter to dry slightly. Carefully apply a generous layer of top coat. [Affiliate opportunity: glossy top coat for minimal smudging]. Remove cuticle protection.
Splatter vs. Drips: What’s the Real Difference in Technique?
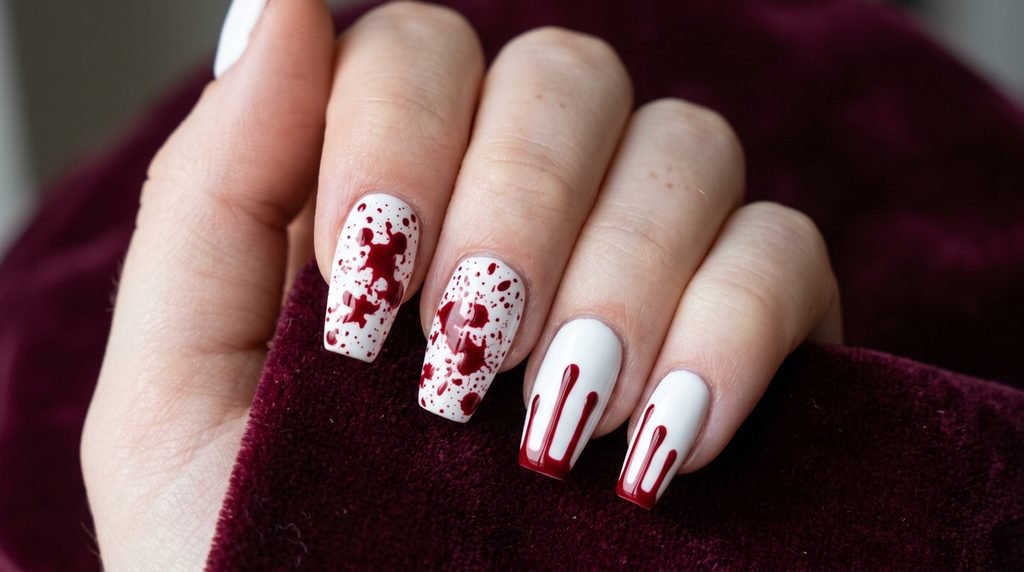
This is a great question. How you create blood splatter involves blowing the polish. This makes random, scattered fine droplets. Drips are created differently. You usually use a dotting tool. You place a large dot. Then gently “drag” the polish downward to look like gravity took over. Splatter is chaotic. Drips are controlled. They have very distinct visual styles.
The Horror Movie Marathon Mani: Pairing Splatter with Iconic Characters
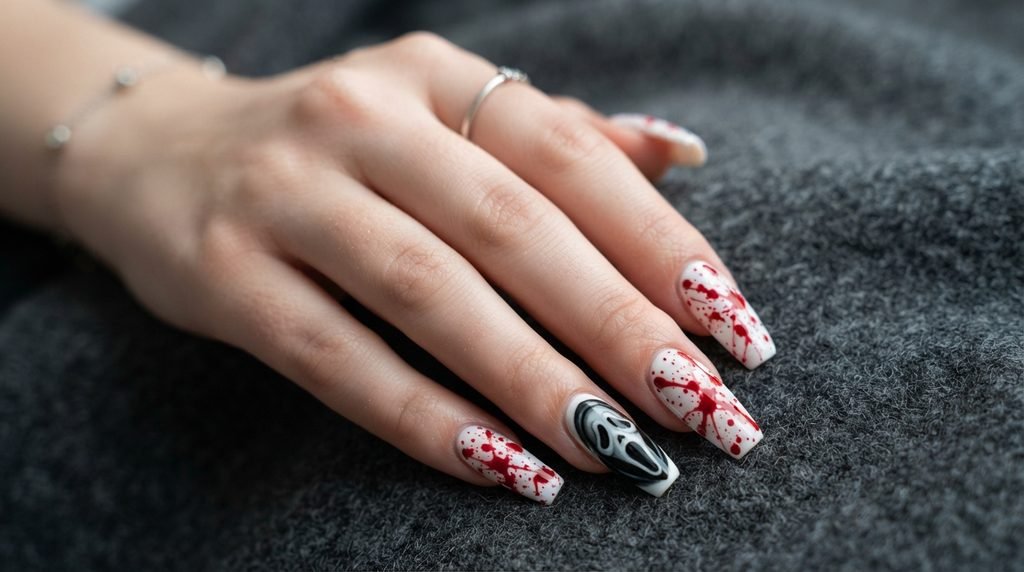
Want to theme your nails further? I’ve paired this style beautifully. Do eight splatter nails. Then, dedicate your accent nails to your favorite character. Think a black and white portrait of Ghostface. Or a red and green stripe (Freddy style). It turns your mani into a true horror tribute. This approach always gets tons of likes on Pinterest.
Glossy vs. Matte: Which Finish Elevates the Horror?
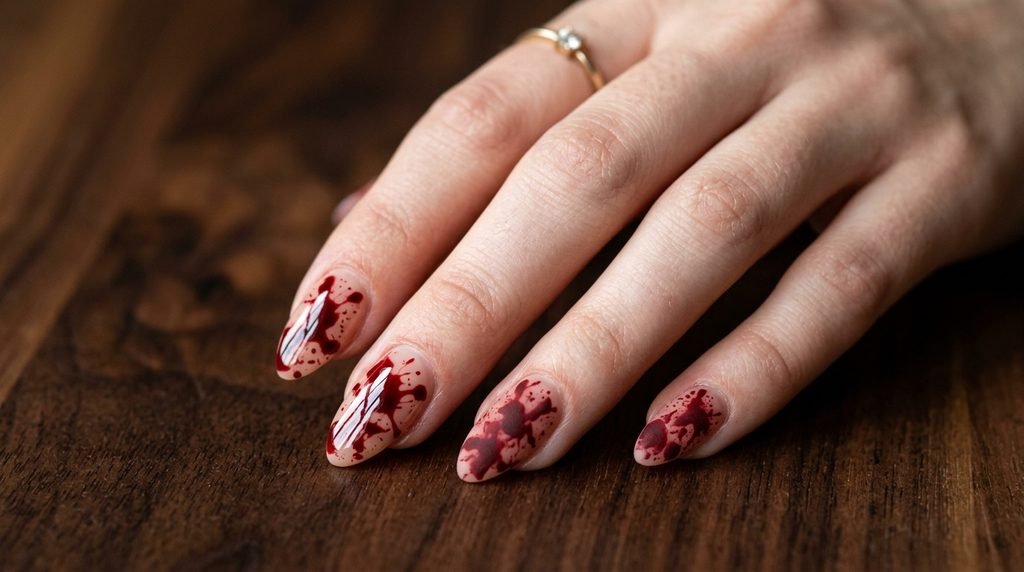
This choice drastically changes the feel. A standard high-gloss glossy top coat is the classic choice. It makes the red polish look fresh, vibrant, and “wet” like real blood. A matte top coat is very different. It makes the splatter look dried and weathered. I often find the glossy look more dynamic and scary. [Internal link opportunity: → Matte finish nails]
The “Scream Queen” Nail Design: Combining Splatter and Drips
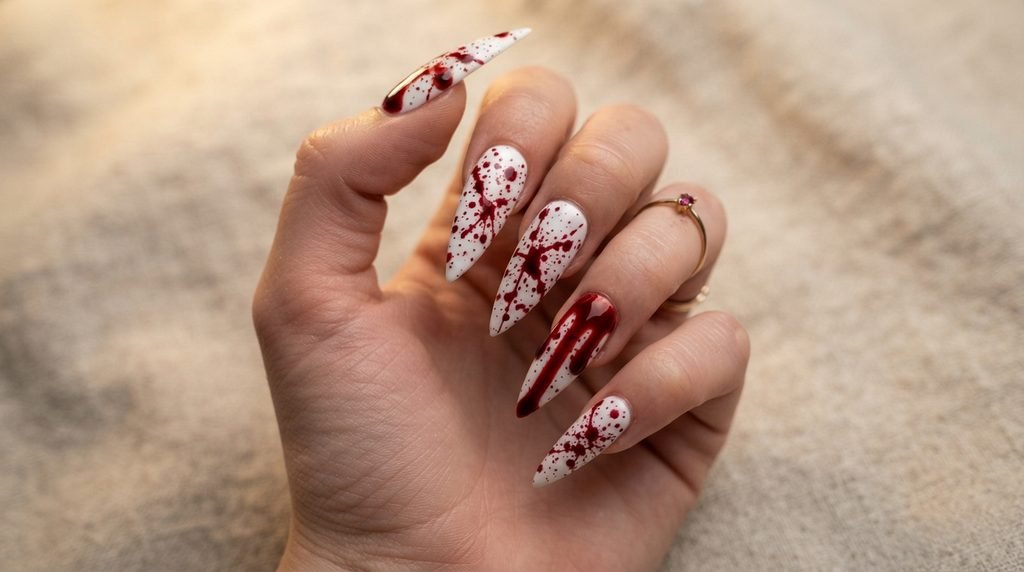
Why choose just one technique? The ultimate slasher look combines both. I advise asking for classic splatter across most nails. Then, add dramatic, thick blood drip nail art descending from the tip of your ring finger and thumb. It creates depth. It tells a visual story. It feels like a premium, custom salon design.
Technical Tip: Avoid Splatter Smudging When Top-Coating
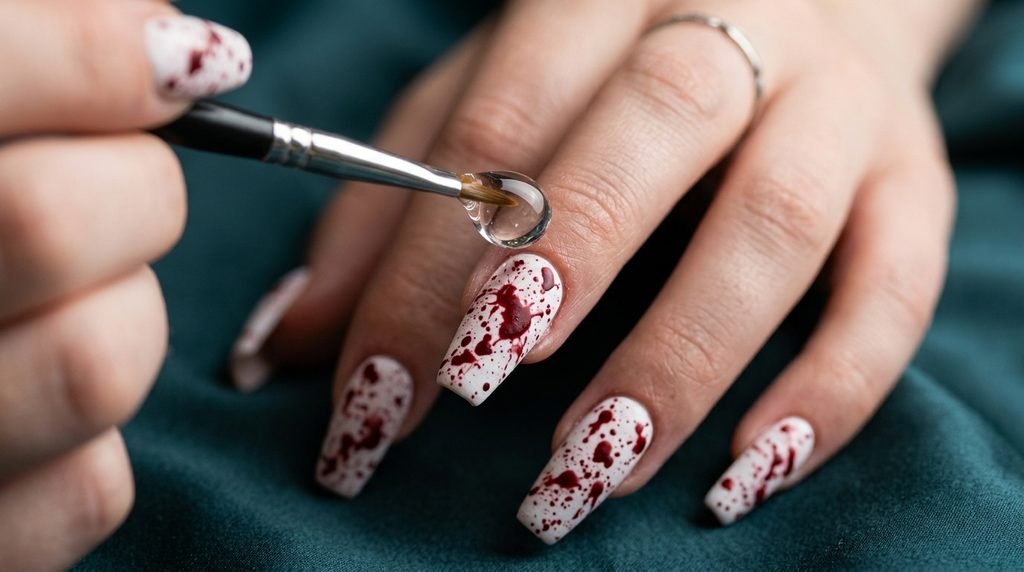
This is a common frustration! You love your splatter. Then you smudge it. Wait. Seriously, wait much longer than usual before top-coating. The fine droplets dry quickly. But larger dots need time. Apply a thick bead of top coat to your brush. Float the brush gently over the nail. Do not apply pressure. Avoid dragging.
Easy Blood Splatter Nail Art: The One-Finger Accent Method
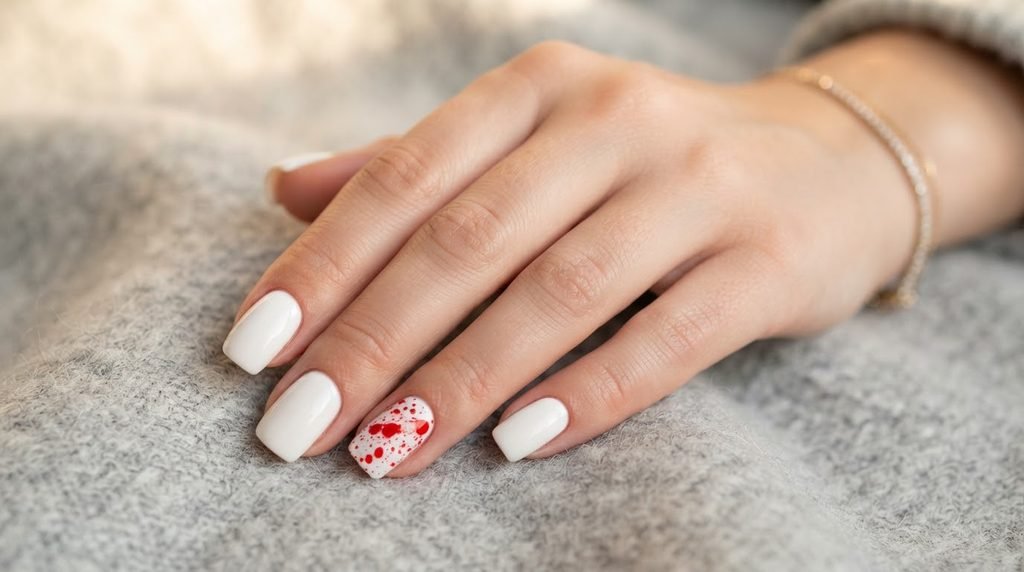
Maybe you find the straw blowing too intimidating. I get that! You can still get the look easily. Paint all nails white. Then, on just one nail (like your ring finger), dot some red polish. Take a small, dry fan brush or toothpick. Lightly drag it through the dots. It creates a simple, effective easy blood splatter nail art look.
Red and White Halloween Nails: From Press-Ons to Pro Gel
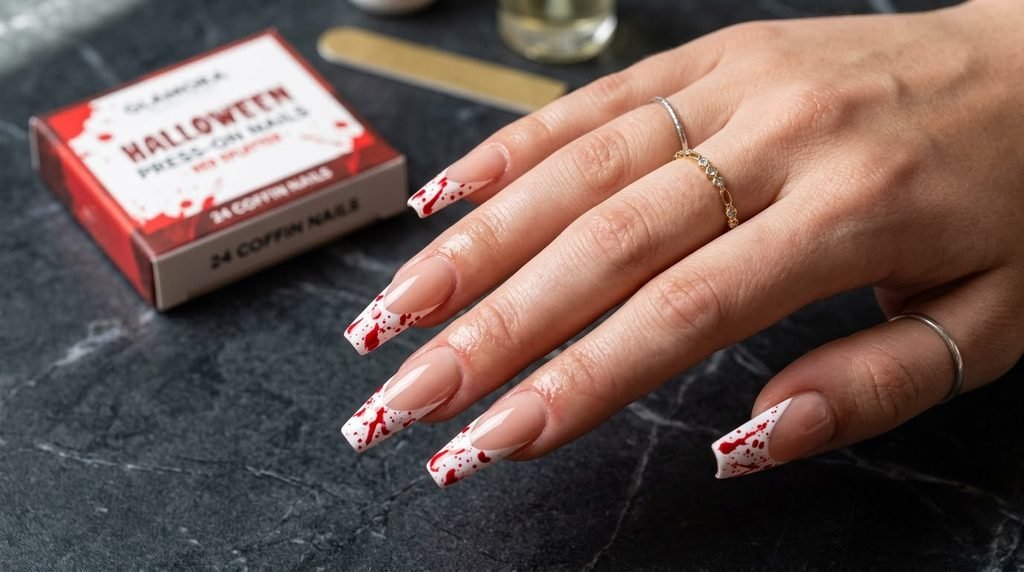
This aesthetic is available at every budget. The most premium option is a full set of long gel extensions at a salon. I advise this for duration and durability. You can also achieve this with high-quality red and white halloween nail press-ons. Look for reputable brands with sharp designs. DIY lacquer is the most affordable route. I covered the steps above!
Transitioning Your Look: Can Splatter Ever Go Sophisticated?
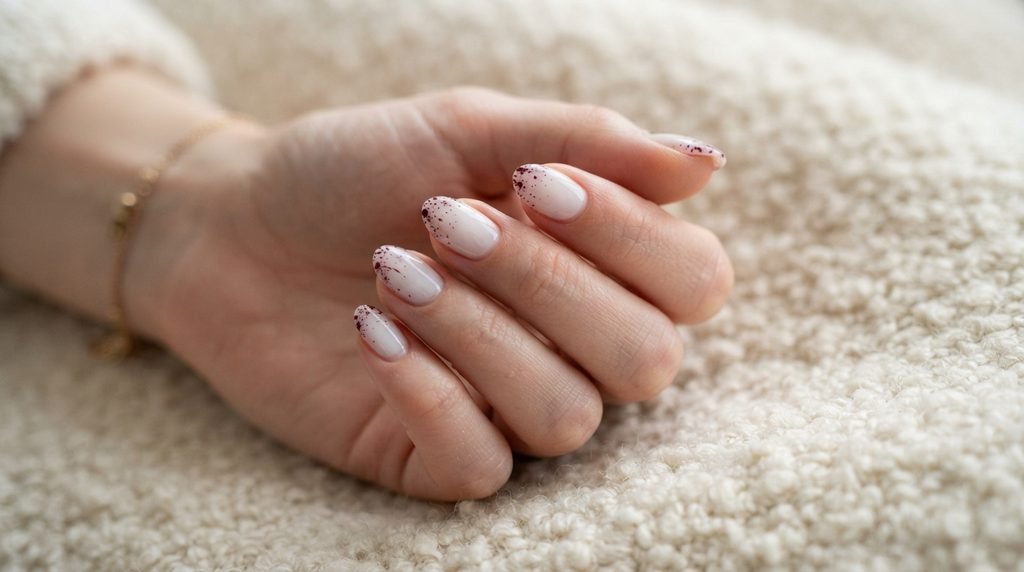
I actually believe it can! Think about the scale. Instead of the typical bright slasher red, use a deep oxblood or maroon. Keep the splatter extremely fine. Apply it over a sophisticated sheer nude or pearl white. Suddenly, you have “abstract splatter” instead of gore. It opens the look up for post-Halloween wear. [Internal link opportunity: → Red nails]
Longevity Tips: Keeping Your Scary Mani Perfect Until November 1st
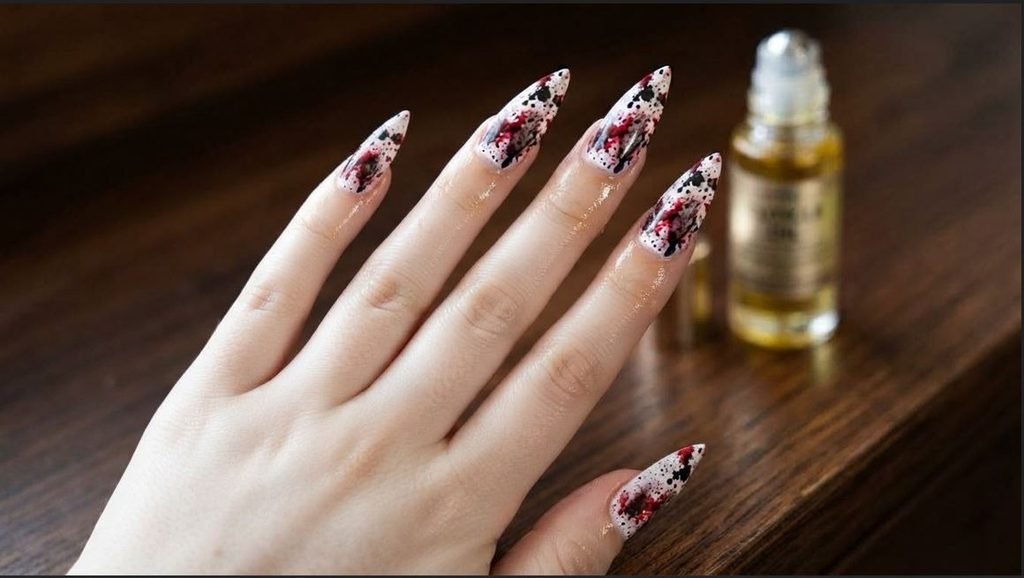
You want your killer nails to last. I always remind clients to wear gloves! Especially when cleaning with harsh chemicals. Re-apply a thin layer of top coat every 2-3 days. This helps prevent chipping. It also keeps that glossy “wet” look fresh. Be mindful of your new stiletto points! Use a rich cuticle oil daily.
Blood Splatter Nail Techniques vs. Results
| Technique | Method | Visual Effect | Precision | Occasion |
| Straw Blowing | Blow polish through a small straw onto a dry base. | Scattered, random, fine droplets of varying sizes. | High chaos, random pattern. | Slasher, classic horror. |
| Splatter Fan Brush | Dip fan brush tips in polish; flick bristles onto the nail. | Dense, consistent pattern of micro-dots. | Moderate control. | Accent nail, subtle splatter. |
| Splatter Toothpick Drag | Apply dots; drag or “splat” polish using a toothpick. | Larger, more controlled “splash” effect. | More precise placement. | Targeted splatter accents. |
| Drip (Comparison) | Place a large bead of polish; drag downward with a dotting tool. | Single, gravity-defying thick stream. | High control. | Minimalist horror, dramatic accent. |
Choosing Your Perfect Blood Splatter Occasion
| Look Style | Base Color | Red Placement | Shape Pairing | Perfect Occasion |
| Full Scream Queen | Bright Opaque White | Random, all over every nail. | Stiletto / Coffin | Slasher movie night, haunted house visit. |
| Chic Horror French | Clear / Nude with White Tip | Only on the white tip. | Almond / Coffin | Sophisticated Halloween party. |
| Everyday Spooky Accent | Solid White (or Black) | Ring finger accent nail only. | Any (Short to Long) | Work, school, grocery run. |
| Themed Character Mani | Character Art / Stripe | Used as a filler or detail on other nails. | Any (Long better) | Cosplay event, fan convention. |
FAQs About Blood Splatter Nails
What is blood splatter nail art?
It is a dynamic, abstract Halloween design. It features a solid base color (usually white) with scattered, irregular droplets of red polish. The random pattern resembles splattered blood. It looks graphic, spooky, and high-impact.
What base color works best for blood splatter designs?
A crisp, opaque white is the superior choice. It provides the maximum contrast. It makes the red polish look incredibly vibrant. I always suggest avoiding sheer whites for this graphic aesthetic.
Are blood splatter nails hard to do at home?
Not necessarily! The “blowing through a straw” technique is actually quite simple. The key is preparation. Use liquid latex to protect your skin. It prevents a massive mess and makes the process much more fun.
Is blood splatter nail art beginner friendly?
Yes, relatively. Because the design is intentionally messy and random, you don’t need perfect hand stability. You can try the accent nail method with a toothpick if the straw feels intimidating.
What’s the difference between blood splatter and blood drip nails?
Blood splatter is created by blowing polish. It results in random, scattered fine droplets all over. Blood drips are created by dragging dots downward. They result in controlled, smooth streams descending from one point (usually the tip).
I really hope this guide inspires you. Are you saving this look for your next salon visit? Or getting your straw ready at home? Whether you choose elegant French tips or full-blown stiletto horror. Remember, it’s all about creating that perfect moment. Let your nails finish your costume! I can’t wait to see which look you try. Be sure to tag me in your spooky photos. Which style are you most excited for?

Mia founded Daily Nail Idea after a decade in beauty editorial, tired of watching great nail art disappear into the scroll. She now leads the team’s editorial direction — deciding what’s worth featuring and what’s just noise — and still paints her own nails every Sunday night, no exceptions.