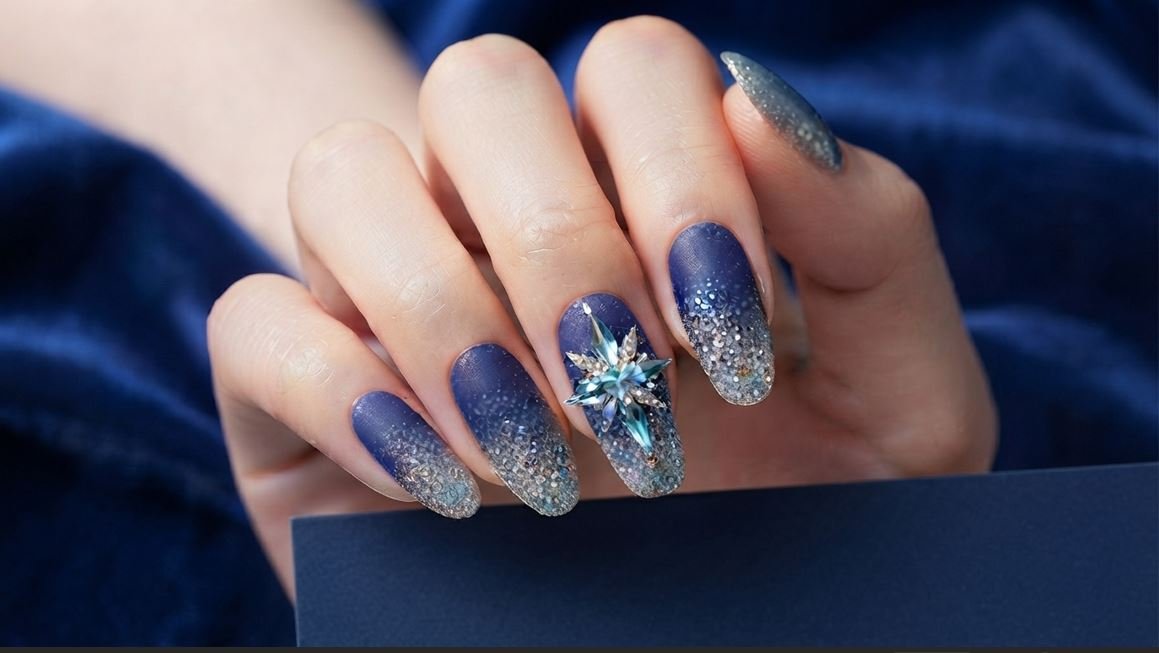
Icy Blue Ombré Nails with Crystal Snowflake Accent: Your Winter Manicure Solved!
Struggling with what to ask for at your next nail appointment? We completely understand the pre-manicure panic for blue ombre winter nails! You’re scrolling Pinterest, saving everything from basic nudes to wild neon, but nothing feels quite right. You need a look that’s stylish, seasonal, but also incredibly wearable.
Well, look no further, because I have the absolute perfect solution for you: blue ombre winter nails with a stunning crystal snowflake accent! This isn’t just another pretty design; it’s the look for creating that magical, winter wonderland vibe right on your fingertips. I’m completely obsessed with how this particular combo balances elegance with a playful, sparkly touch.
Think gorgeous icy blue fading effortlessly into a shimmering glitter, all topped off with one statement nail featuring intricate crystals shaped like a delicate snowflake. Seriously, it’s like channeling your inner Elsa without being over the top for blue ombre winter nails. It screams ‘sophisticated winter chic’ and is guaranteed to get you compliments all season long.
Forget those generic ’50 best nail ideas’ lists that leave you more confused than before. This guide is all about this specific look for blue ombre winter nails – how to achieve it, how to style it, and exactly what to say to your nail tech to make sure you walk out with the exact manicure you envision.
So, if you’re ready to embrace the frosty beauty of the season, let’s dive into everything you need to know about blue ombre winter nails! Trust me, this look is exactly what your winter self has been searching for.
Blue Ombré Winter Nails: At-a-Glance
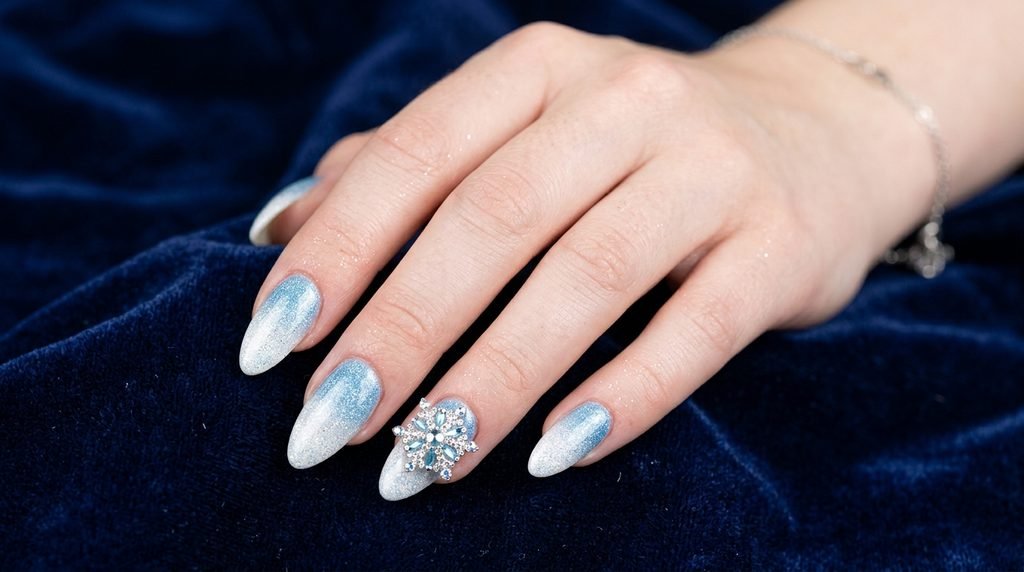
Ready to rock the most magical winter manicure? We’re diving deep into the stunning world of icy blue ombré nails featuring a gorgeous crystal snowflake accent. This post isn’t just about general inspiration; it’s a dedicated guide to perfecting this exact sophisticated look. Here’s a quick peek at what we’ll cover:
- Why this specific combination works so perfectly for the winter season and holiday occasions.
- The essential tools you (or your tech!) will need, from polishes to crystals.
- A complete, step-by-step tutorial for achieving that seamless ombré fade.
- Our top secrets for creating that perfect showstopping crystal snowflake accent nail.
- How to customize this look for different nail shapes (almond, square, coffin, short nails!).
- Actionable tips for communicating exactly what you want at your salon appointment.
- How to get the look yourself with a gorgeous, high-quality press-on option.
So, if you’re looking for real, actionable guidance on getting this dreamy winter vibe, keep reading! You’ll have all the details and confidence to ask for (or create!) this gorgeous look for your next manicure.
Icy Blue Ombré Nails: The Ultimate Guide to Perfecting This Winter Trend
Ready to nail your look for the cold season? This guide is your ultimate resource for mastering the icy blue ombré trend, complete with that dazzling crystal snowflake accent we’re all completely obsessed with! We’ll cover everything from technique to styling for a look that’s guaranteed to turn heads and keep your fingertips sparkling. Let’s get started and make your winter nail dreams a reality!
Why Blue Ombré Nails Are THE Winter Look
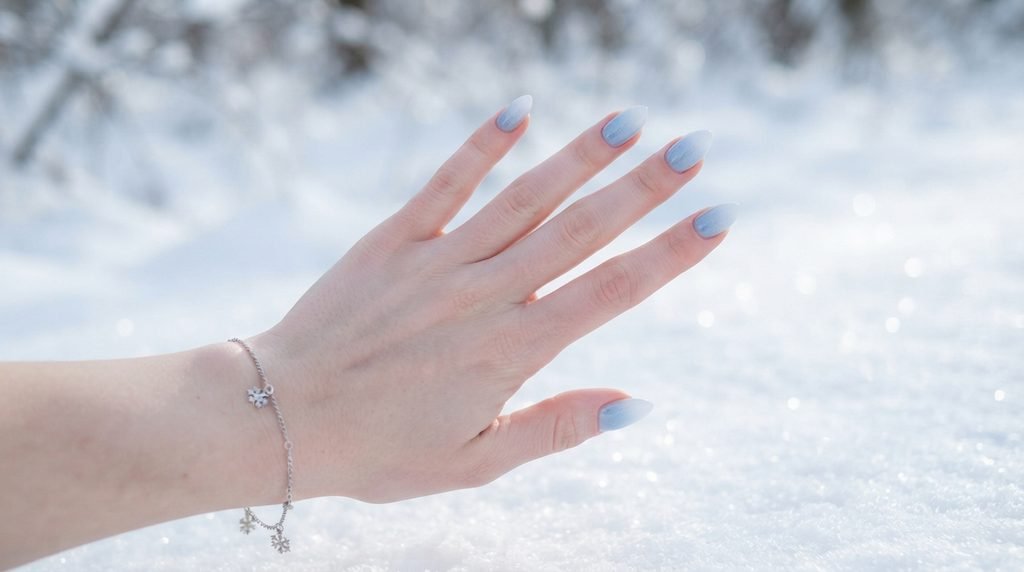
First, let’s chat about why we love this look so much! There’s just something so magically cohesive about the combination of icy blue and crisp white that perfectly captures the heart of winter. It beautifully mimics the soft gradient you see in the winter sky or on snow-covered landscapes. It feels incredibly fresh and vibrant compared to typical dark winter shades. Plus, adding those crystals creates instant sparkle, reflecting the light much like freshly fallen snow. It’s elegant, cheerful, and undeniable seasonal chic!
Getting the Seamless Blend: Blue to White Ombré Technique
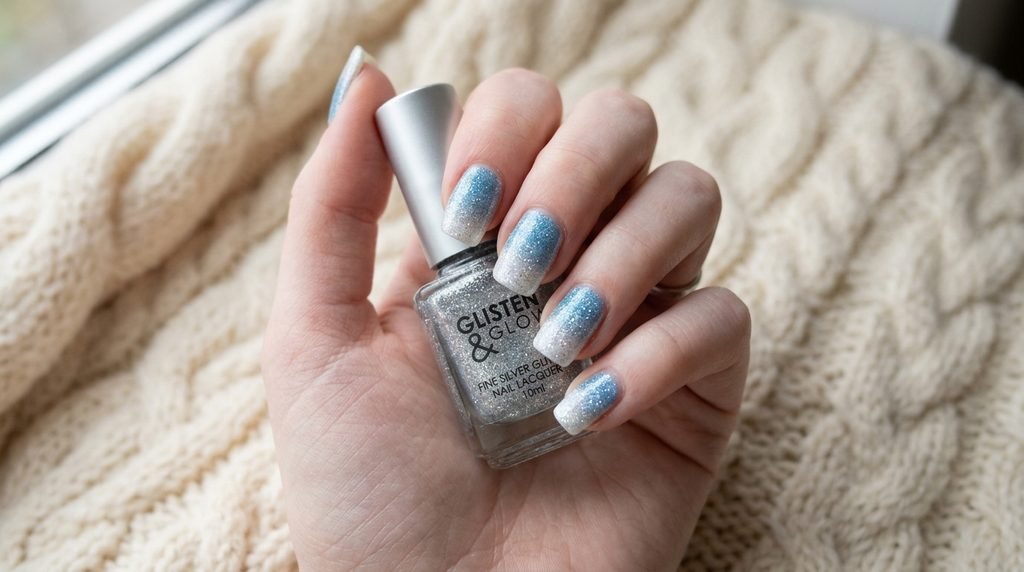
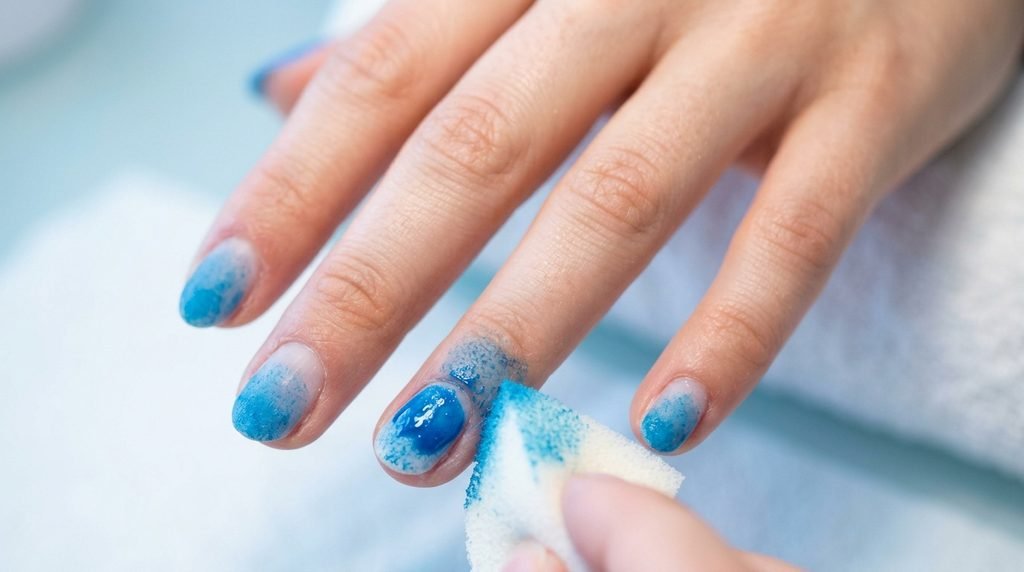
Achieving that perfect, seamless blue to white ombré requires a few technical tricks. Seriously, it’s not as hard as it looks! We strongly recommend using the sponge gradient method for the smoothest transition. Basically, you’ll apply small strips of your blue and white polishes directly onto a makeup sponge, slightly overlapping them. Then, you gently dab the sponge onto your nail in a sweeping motion, building up color and blending. Key tip: Do not saturate the sponge too much! Layering slowly is the absolute key to avoiding a streaky mess. Technical note: Ensure each layer dries slightly before adding more!
All About the Sparkle: Choosing Your Glitter
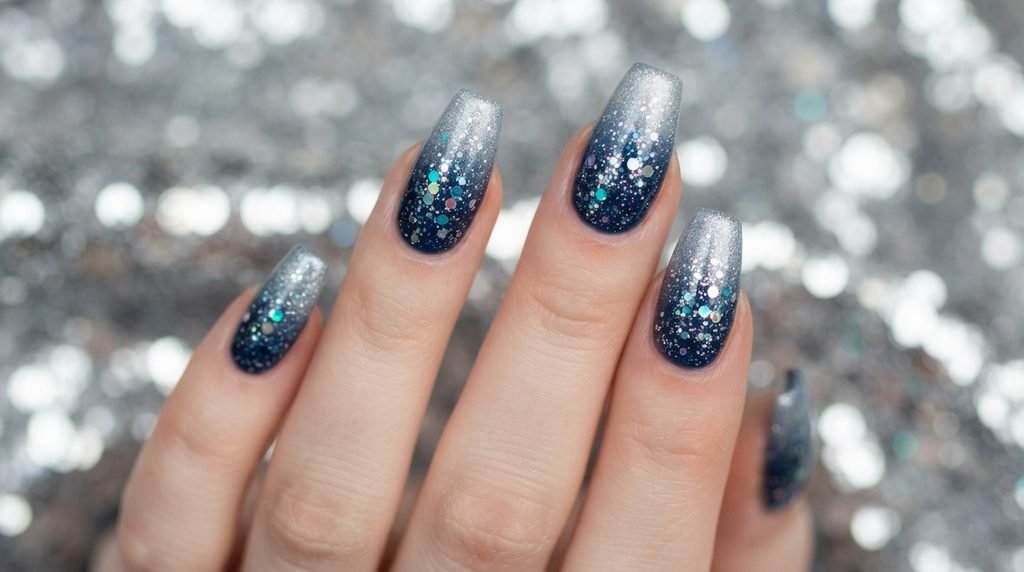
Okay, now let’s talk glitter – because who can resist more sparkle in winter?! Seriously, choosing the right glitter texture makes all the difference with this specific look. You have two amazing directions: a fine, subtle silver glitter for a delicate sheen or larger, iridescent hex glitters for a bold, icy sparkle that catches every single light. Think about your desired vibe. Fine glitter gives a magical, almost fairy-like dusting. Larger glitters create that dramatic, snowflake-catching-the-light feel. Honestly, we love layering a fine glitter under the snowflake accent for maximum effect! It adds incredible depth. Affiliate opportunity: gorgeous fine silver glitter polish]
Statement Time: How to Ask For the Crystal Snowflake Accent
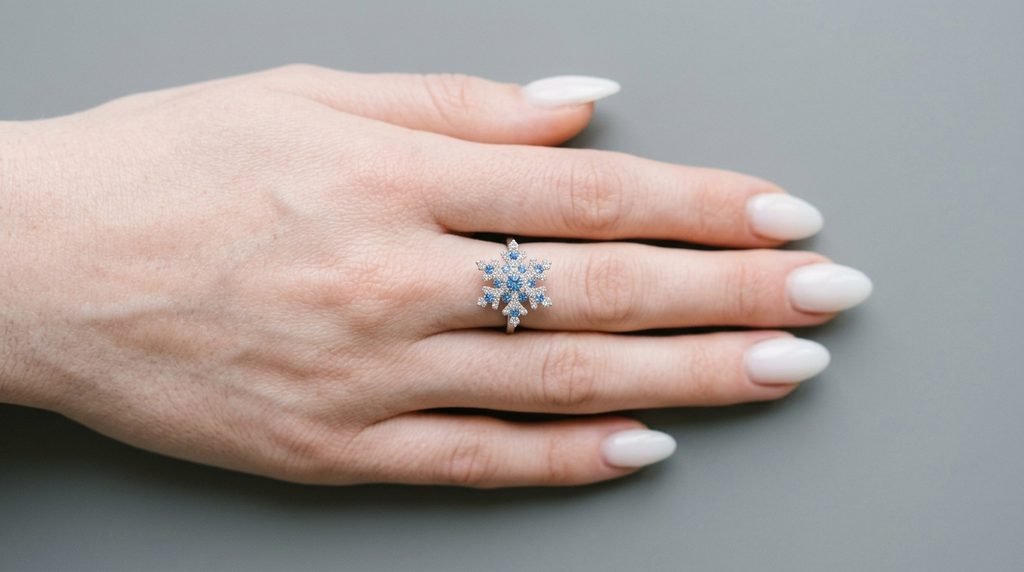
So you’ve decided on the snowflake accent – excellent choice! But how do you explain this intricate detail to your nail technician without getting something that looks… off? Be super specific! We suggest asking for either a pre-made, high-quality 3D crystal charm or individual, precision-placed small crystals forming a custom snowflake design. Showing them this specific blog post is also a fantastic idea! Avert cuticle flooding by: asking your tech to place the crystal detail slightly away from your cuticle and sidewalls. This helps prevent lifting and makes your manicure last longer. Just trust us on this one!
Mastering the At-Home Glitter Ombré Gradient
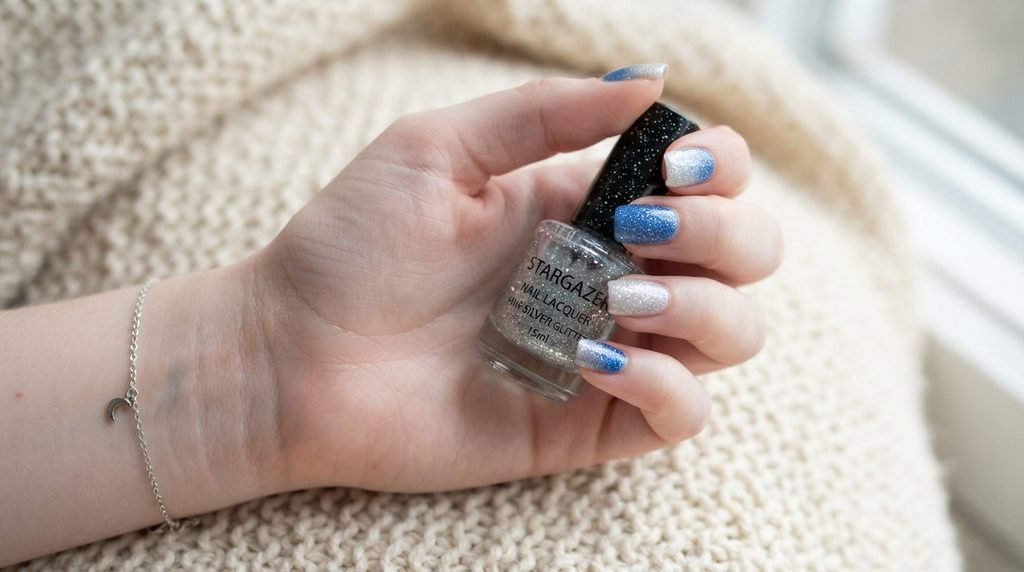
Thinking of tackling this stunning look yourself at home? We absolutely think you can! The gradient is surprisingly achievable. Here’s your step-by-step:
1. Start with a clean base coat, then paint your whole nail white or very light blue.
2. While that’s still slightly tacky, use a makeup sponge to dab on your darker blue polish, starting at the cuticle and blending up.
3. Key DIY technique: Don’t put blue on the entire sponge! Just do the edge that will blend.
4. Slowly build the blue color, dabbing and softening the line.
5. Once dry, apply your glitter polish only from the mid-nail to the tip. This is much easier than blending glitter on a wet sponged gradient! Voila! Beautifully blended at home.
Salon Talk: Communication Notes for Your Nail Tech
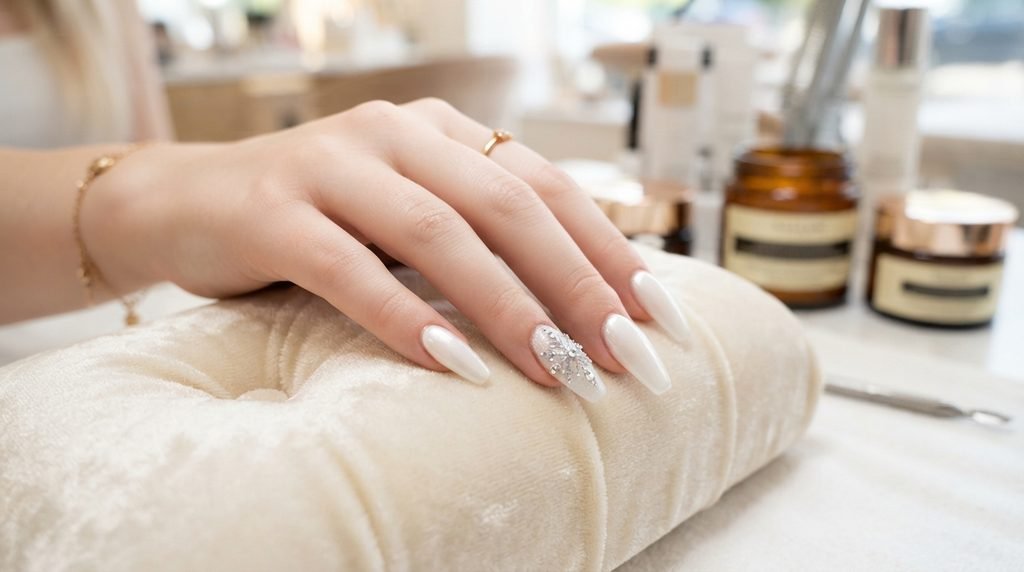
Feeling nervous about asking for something so detailed? Don’t worry, we got you! Seriously, it’s all about communicating clearly. Try saying this: “I’d love to do an icy blue ombré manicure, blending light blue near the cuticle into white at the tips, with a subtle silver glitter top coat. Then, for the ring finger accent, could we please do a detailed snowflake using small, clear and blue crystals? I really like the look in these photos!” Adding specificity always helps: mentioning that you want the snowflake as a statement and giving them visual reference completely eliminates guesswork! We find techs love it when clients have a clear vision.
Shape Slay: Almond Winter Nails with Blue Glitter
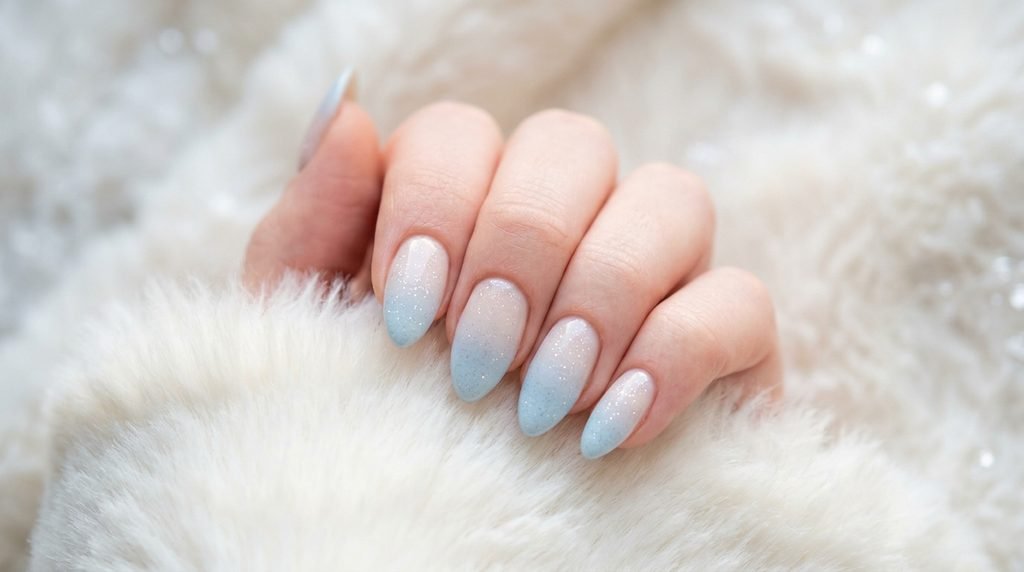
Thinking about shape? We find that the elegant curve of almond nails pairs beautifully with this particular soft, gradient look! Seriously, the gentle taper completely enhances the flowing blend of colors. It’s feminine, chic, and incredibly flattering. If you’re deciding between shapes, the almond shape looks absolutely stunning with this blue glitter ombre. The delicate snowflake accent sits perfectly on the wider part of the nail bed, looking graceful and balanced rather than overwhelming. It’s an effortlessly glamorous choice for winter, giving you that sophisticated edge you’re looking for.
Coffin Style: Edgy Blue Ombré & Crystal Sparkle
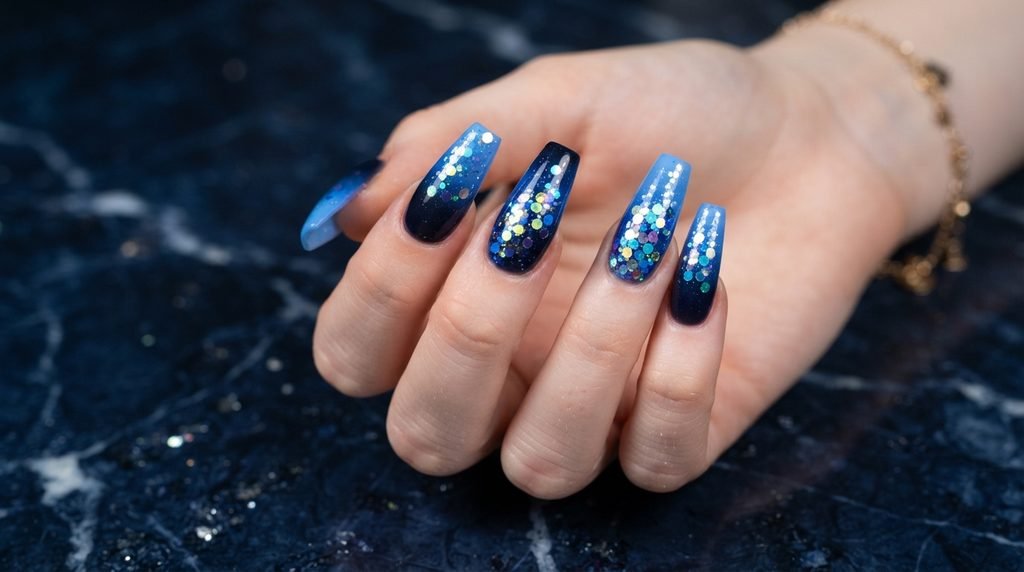
Want something a little more dramatic? Then coffin nails are your answer! This trendy, square-tipped shape completely changes the vibe, making it edgy and statement-making. Seriously, the sharper angles of a coffin nail look fierce with this icy, graphic ombré and the bold crystal snowflake. The larger surface area allows for a truly epic, intricate snowflake design that demands attention. We love how the long length accentuates the seamless blue-to-white gradient, making it feel extra luxurious. Styling pairing: coffin shape + high-gloss finish + large iridescent glitters for a truly bold, winter queen aesthetic!
Short and Sweet: Adapting the Icy Blue for Less Length
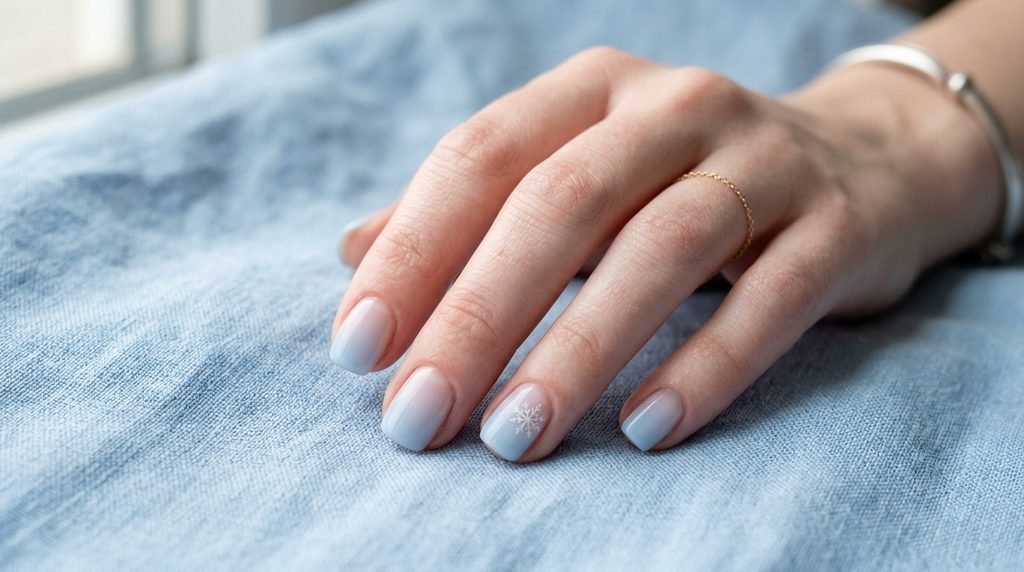
Think you can’t rock this look with short nails? Absolutely not true! We adore this icy blue vibe on shorter natural nails or short acrylic extensions. Seriously, it’s all about adaptation. Instead of a very long, dramatic gradient, ask for a soft, subtle vertical ombré (blending side to side or just the very tip). This gives the illusion of length! Key placement: instead of a massive crystal snowflake, try a delicate, fine-lined painted snowflake accent with just a few small strategically placed crystals to catch the light. It looks incredibly chic and keeps the design in perfect proportion. Don’t let length limit your winter sparkle!
Beyond Blue: Complementary Color Pairings for Winter
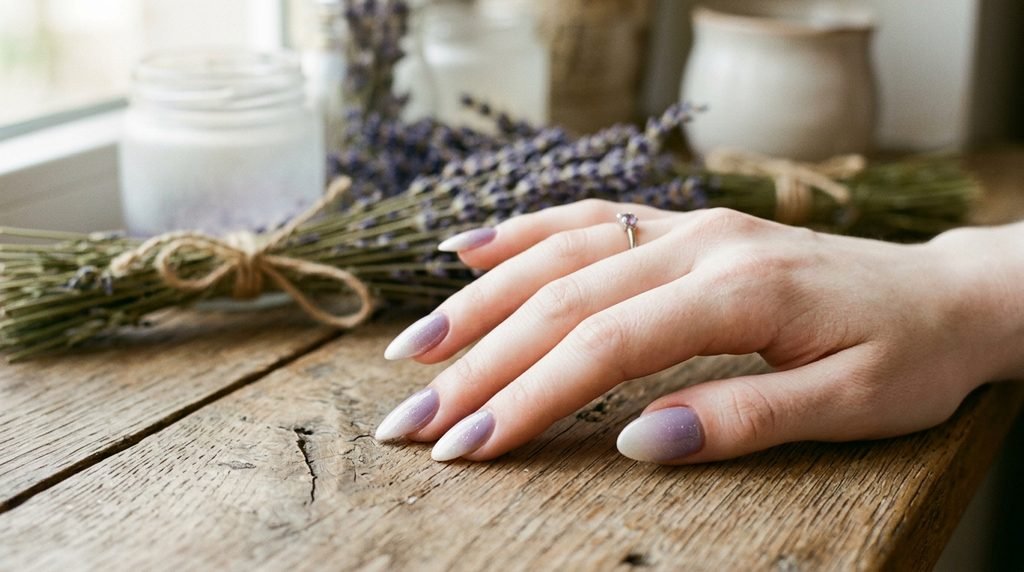
While icy blue is our star, don’t be afraid to experiment with other wintery color pairings that seriously slay! Seriously, we are loving dusty, muted lavenders and soft greys right now. These shades create a beautifully subtle, almost vintage-feeling ombré when paired with white. Think sophisticated and muted, not just bright blue. You could even try a deep, true navy blue that fades into sparkling silver – incredibly glamorous for evening holiday events! Don’t forget, metallic silver itself makes for a stunning accent nail or as a base coat for a full silver-to-white glitter blend. Explore other frosty hues to find your unique winter vibe!
Press-On Perfection: Achieving the Look with Luxe Fakes
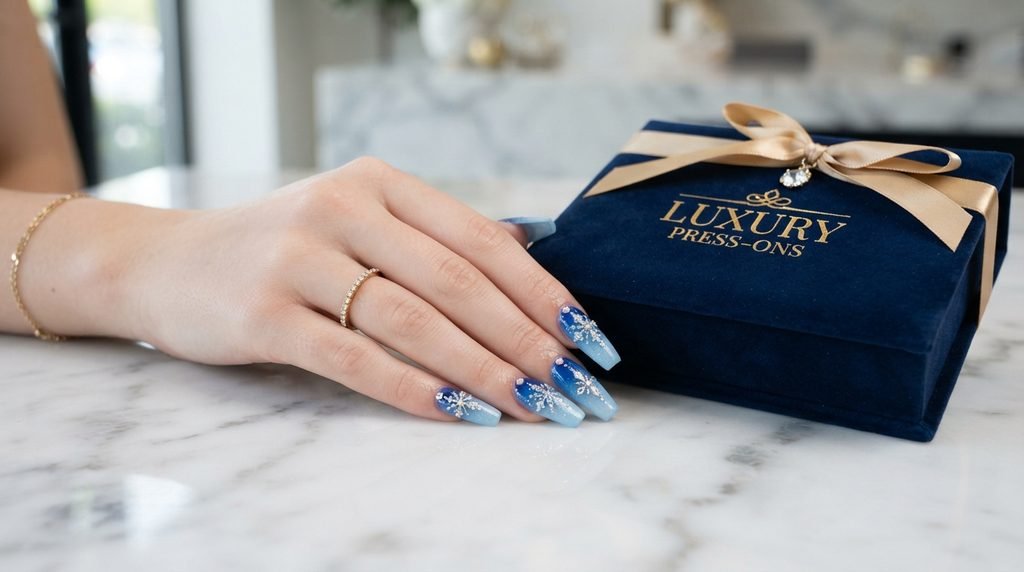
Honestly, sometimes you just want that incredible salon-quality look without the time or expense! That’s where luxury press-on nails come in and completely save the day. Seriously, you can find gorgeous, high-end press-on sets featuring this exact icy blue ombré and crystal snowflake design! Look for options with detailed hand-painted elements and secure, sparkling crystals. Why we love this: you can apply them in minutes for an instant, perfect manicure! Plus, they’re reusable if removed carefully. Affiliate opportunity: gorgeous press-on set with crystal snowflake design]. It’s a game-changer for getting complex nail art instantly.
Maintaining the Magic: Tips for Lasting Winter Manicures
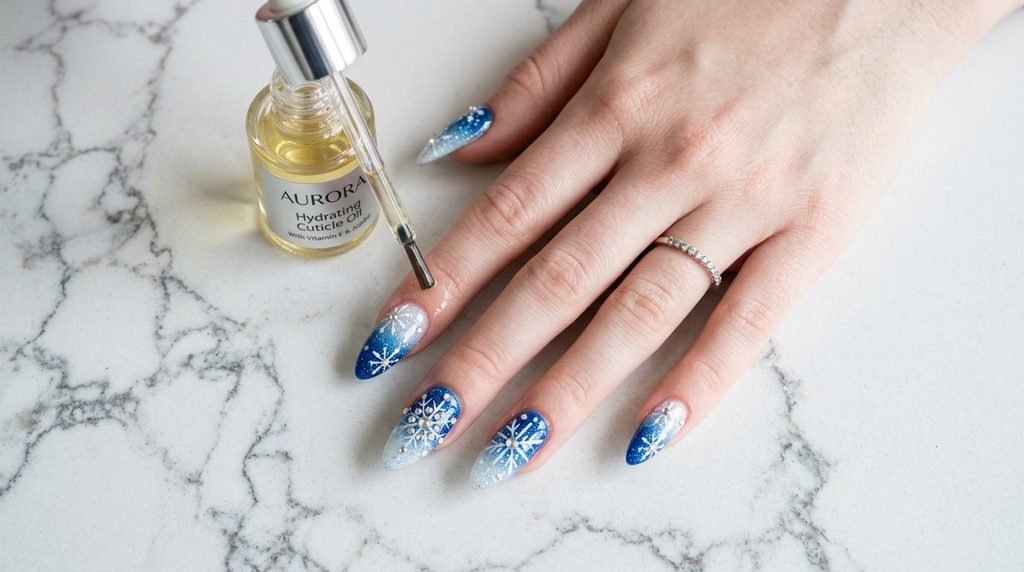
We all want our gorgeous manicures to last, right?! Especially with that amazing crystal snowflake, you want to make sure it stays put all season long. Here are our top maintenance secrets:
1. Protect your nails: seriously, wear gloves when doing dishes or cleaning! Water is the enemy of a long-lasting mani.
2. Oil your cuticles: dry, flaky skin makes your manicure look dull and can lead to lifting. Use a nourishing cuticle oil daily.
3. Seal the crystals: ask your tech to use a gel overlay or a clear rhinestone glue only around the base of the snowflake charm. This provides extra security without dimming the sparkle. Trust us, these simple steps significantly extend your winter glam!
Budget vs. Splurge: Achieving the Look at Any Price Point
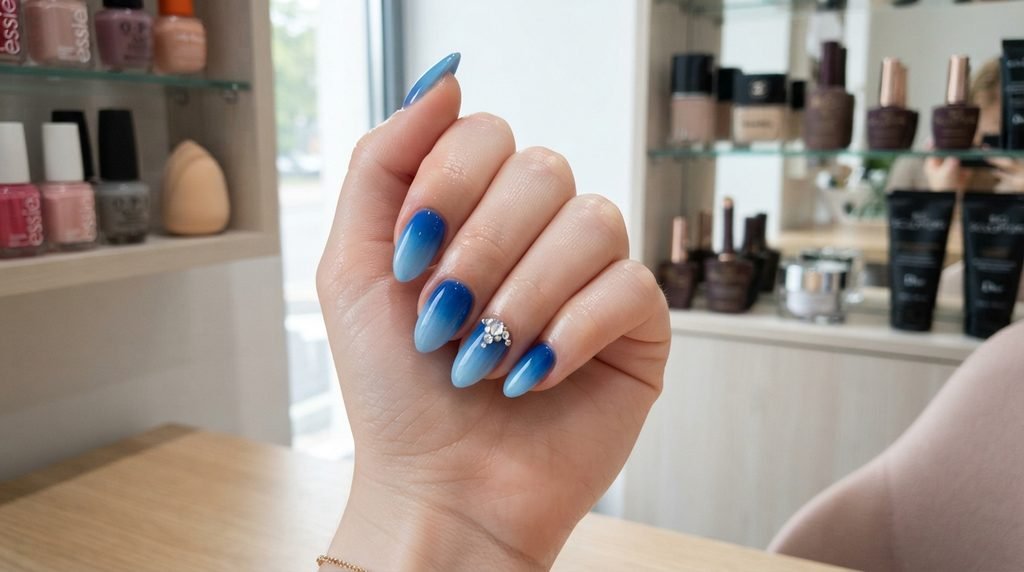
So, how much does this amazing look cost? It’s all about finding the balance that works for you. You can look incredibly chic without breaking the bank!
| Budget Option | Price Level | What You Get | Estimated Cost |
| Splurge | $$–$$$ | Reputable salon, structured gel or acrylic set, hand-placed crystals, professional finish and longevity | Higher salon cost |
| Mid-Range | $ | High-quality press-on nail set with a near-perfect, salon-inspired look | Often under $20 |
| DIY | $ | Sponge, affordable nail polishes, and crystals from a drugstore or online | Less than $10 |
| Best for Saving | $ | Recreate the complete look yourself with inexpensive materials | Under $10 |
Ocassionally Elegant: When to Wear Your Icy Manicure
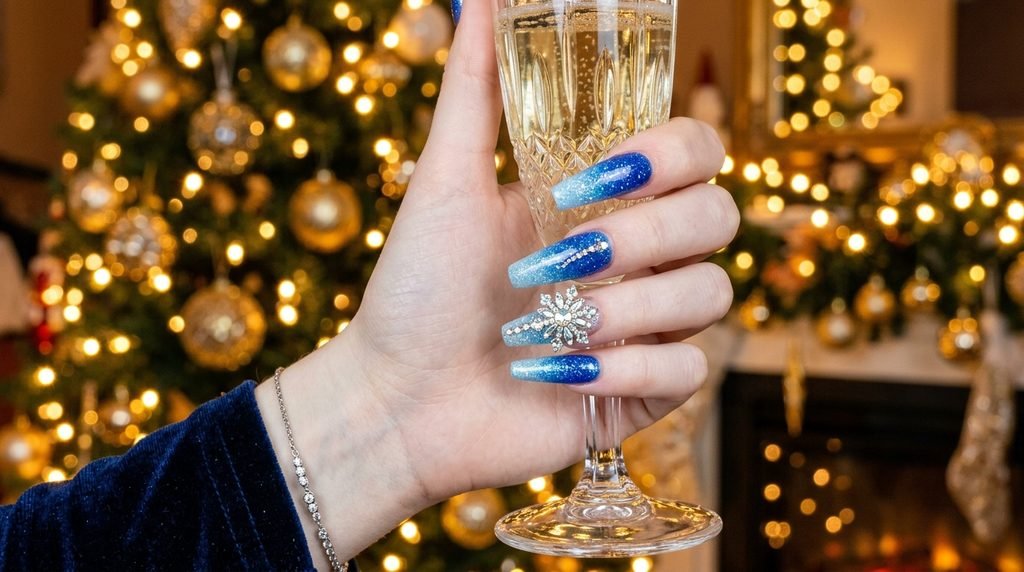
Wondering where this look fits in? Let me tell you, it’s incredibly versatile for all your winter occasions! Perfect for: a sparkling Christmas dinner, a glamorous New Year’s Eve party (it pairs flawlessly with sequined dresses!), a fun winter date night, or even just brightening up your everyday look. Seriously, it’s not too Christmassy, making it appropriate all winter long. Human touch: we even love it for cozying up with coffee by the fire! This look adds a touch of festive elegance to any moment, big or small. You’ll find yourself making excuses to show off your dazzling fingertips!
Technical Deep-Dive: Gel Polish vs. Nail Lacquer
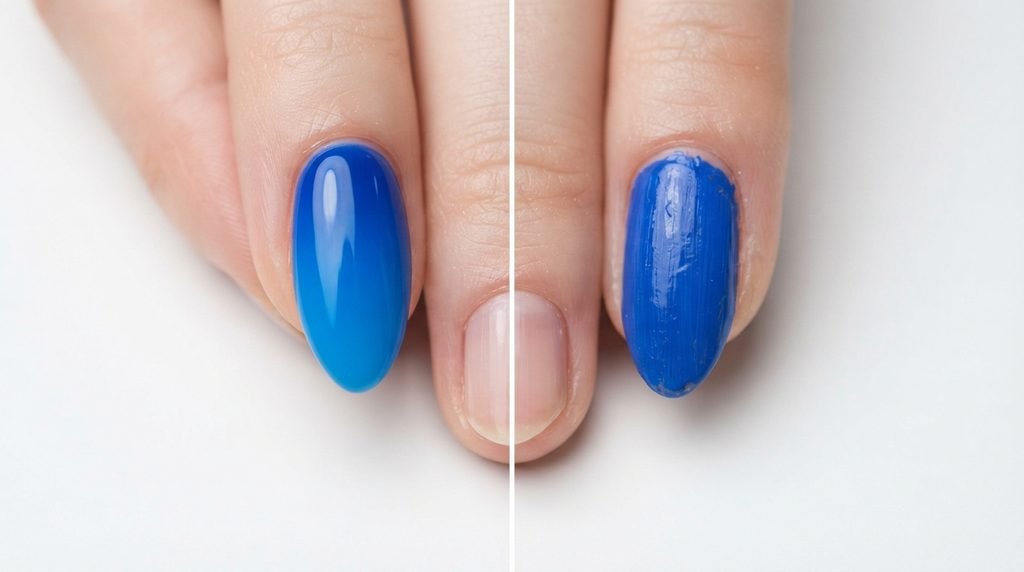
Thinking about what type of polish to use? It absolutely matters! Gel polish is strongly recommended for achieving that flawlessly smooth, vibrant ombré look. Gel cures instantly under a UV/LED light, meaning no dry time and a glossy, chip-resistant finish that lasts weeks. Technical tip: mixing different brands of gel might cause curing issues, so stick to one line if possible for the ombré. Regular lacquer is totally acceptable too, and great for DIY! It’s easier to blend colors with the sponge method while wet, but you must wait fully for each layer to dry to avoid streaking and chips. Weigh your desired longevity versus ease of use!
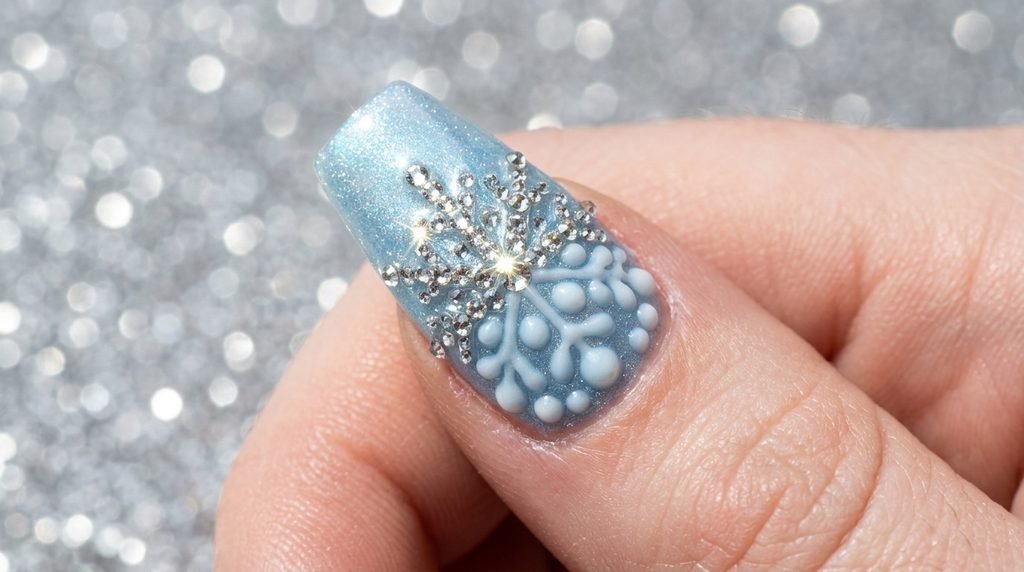
Sizing Up Your Bling: Crystal Options for Snowflake Designs
Not all crystals are created equal! Seriously, picking the right type of crystal takes your look from zero to hero. Here’s your sparkle guide: for maximum brilliance and sparkle, opt for high-quality glass cut crystals (like Swarovski or similar brands). They reflect light like tiny diamonds! For a softer, more subtle shimmer, faceted acrylic rhinestones are a great, budget-friendly option. Think about the scale of your nail too. Smaller nails need tinier, delicate crystals to look proportionate. On long coffin or stiletto nails, you can definitely go larger for that truly extra statement. Technical note: clear crystals offer timeless sparkle, while blue-tinted crystals enhance the icy theme. Choose your shine wisely!
DIY Design: Creating a Painted Snowflake Accent
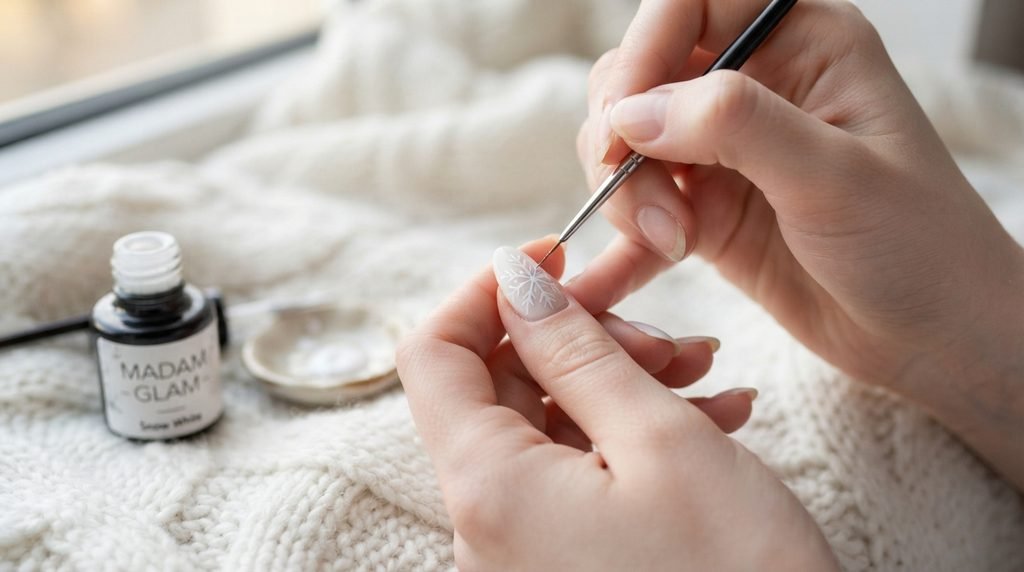
Maybe crystals aren’t your thing, or you prefer a smoother texture? Absolutely no problem! A painted snowflake design is an equally beautiful alternative and perfect for a DIY project. Seriously, you can get incredibly detailed! How to achieve: use a fine detailing brush or a dotting tool with opaque white nail art polish or acrylic paint. Start with simple intersecting lines and then add delicate ‘V’ shapes and dots to create branching snow crystals. You can make it as simple or complex as you like. Pro tip: practicing on a fake nail or a clean piece of paper first massively helps you get the brush strokes right before painting your accent nail. Human tone: we love the subtle, almost rustic elegance of a painted design!
Gel Management: Preventing Lumpy or Thicker Ombré
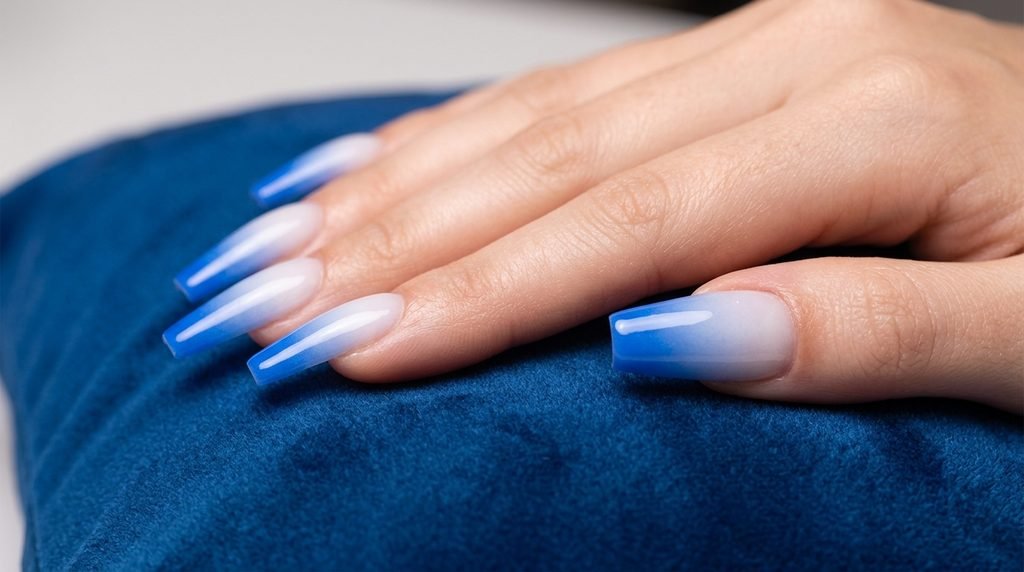
Nobody wants lumpy nails, especially with a gradient! Gel management is crucial here to prevent product buildup and thick, artificial-looking nails. Avoid the dreaded lump: always work in thin, even layers. If you apply gel too thickly with the sponge, it might not cure fully underneath, leading to peeling. Salon communication note: if you’re getting extensions, ask your tech for a ‘structured manicure’ which involves building up the gel only where needed, keeping the ombré blend thin and natural. A good tech knows how to create that smooth apex without thickness. Thinner gel ombré looks far more professional and elegant! Trust us, less is definitely more.
Alternative Ombré: Reverse and Vertical Gradient Ideas
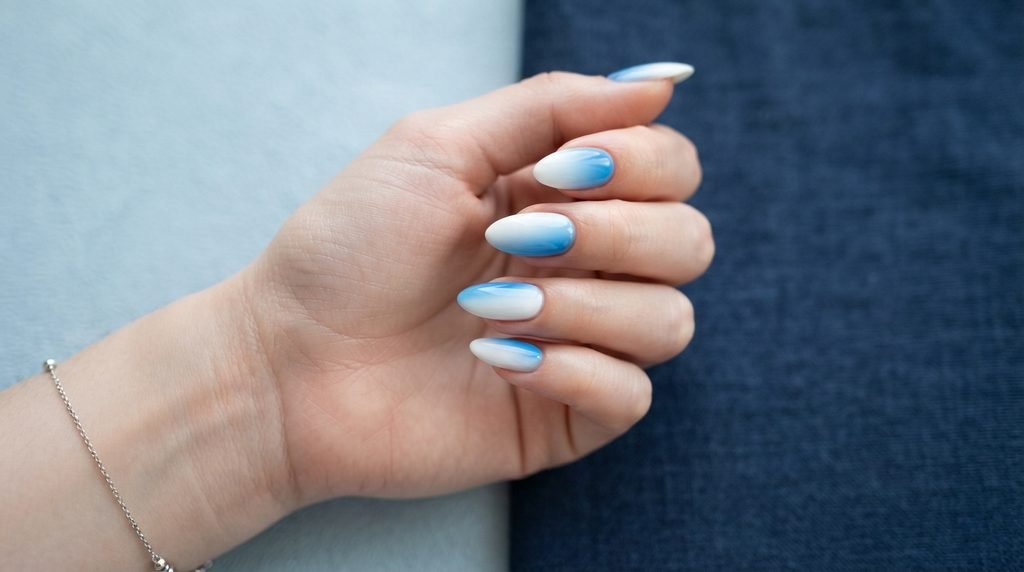
Feeling adventurous? Who says your ombré has to go from top to bottom?! Try these creative twists: the reverse ombré features the darker color near the tip and the light color by the cuticle – it’s visually intriguing and gives a fresh perspective. Vertical ombré blends the colors horizontally across your nail bed, which can be incredibly slimming and elegant, especially on shorter nails. It creates sophisticated stripes of color blend. You can even combine them, like a vertical white-to-blue fade with the reverse blue-to-white at the cuticle for a truly unique look! Don’t be afraid to think outside the box and personalize your winter digits.
Seasonal Serenity: The Mood Behind the Icy Vibe
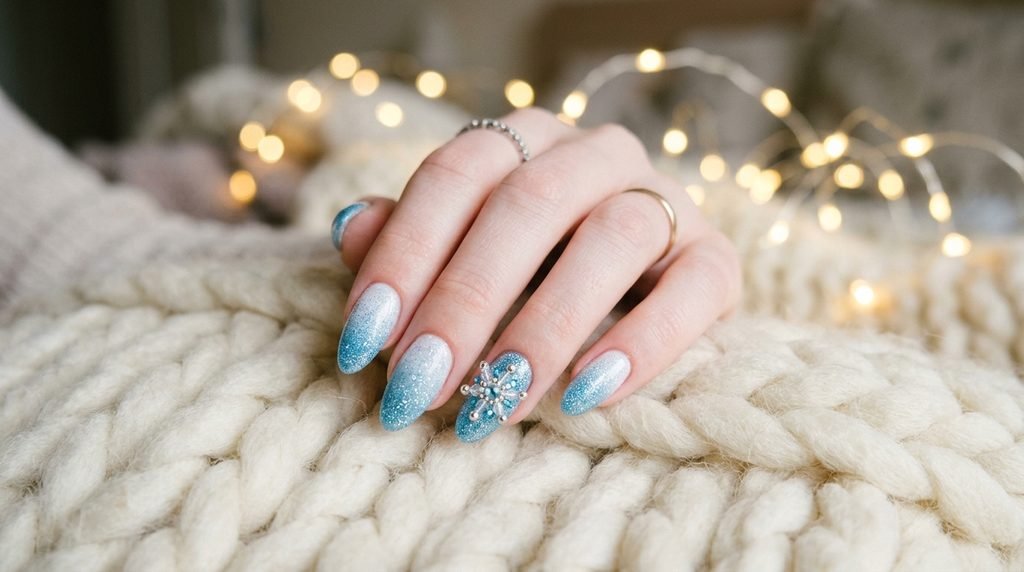
Finally, let’s talk about the vibe of this incredible look. Beyond just looking pretty, icy blue ombré nails with sparkle are all about channeling that serene, calm, and beautiful energy of the winter season. Seriously, it’s like carrying a tiny, cheerful piece of winter magic wherever you go! We love how this look can make you feel more confident and put-together, even on those gray, snowy days. It adds a touch of brightness and elegance, lifting your mood and making you feel ready to embrace the chilly air. It’s serene, sophisticated, and utterly uplifting. Human touch: it’s amazing how a sparkling mani can change your whole outlook!
Blue Ombré Winter Nails: Frequently Asked Questions
You’ve got questions about this gorgeous look, and I’ve got answers! Here are some common things people ask before committing to this stunning winter manicure style.
What is the trending blue nail design for winter 2026?
You’re looking at it! Seriously, we are seeing a massive trend towards exactly what we’ve covered:icy blue ombré bases paired with intricate, hand-placed or pre-made 3D crystal snowflake charms and accents. It perfectly blends the popular ombré technique with the timeless beauty of seasonal details. High-gloss finishes and subtle fine glitter dusting are also huge components. This combination is dominating Pinterest and salon requests for a truly sophisticated, sparkling winter vibe.
How do you create a blue ombre nail gradient at home without getting messy?
The sponge gradient technique is the absolute best method, but yes, it can be messy! Our top secret for avoiding a mess is applying a liquid latex barrier around your nail bed before you sponge. Seriously, this stuff is a game-changer! You paint it onto your cuticles and sidewalls, let it dry, do your messy sponging, and then peel it right off. It takes all the excess polish with it, leaving you with perfectly clean skin. Technical note: Work in thin layers with the sponge to build color slowly.
What crystal placement works best for a snowflake accent nail?
This depends on the scale of your nail and snowflake! For maximum impact: we love placing the snowflake centrally on the ring finger. For a delicate look: placing a smaller snowflake near the base of the nail or diagonally across the upper half looks incredibly chic. Ensure your crystals are securely attached using proper rhinestone glue or a bead of clear gel polish cured underneath, only around the base of the charm – don’t cover the facets! Technical tips: Avoid the cuticle to prevent lifting.
What nail shape suits blue glitter ombre best?
The wonderful thing about this look is that it’s incredibly adaptable! However, we find that both almond and coffin shapes are the absolute most flattering for showcasing the smooth color fade of an ombré. Almond’s curved edges complement the soft gradient beautifully, giving a feminine touch. Coffin shape offers a larger surface area, allowing for a more dramatic gradient and a showstopping, intricate crystal design. Both shapes accentuate the sparkle perfectly, making it difficult to choose!
Is blue ombre nails good for the holidays or everyday wear?
We say… both! Seriously, this look has a magical versatility. For everyday: the blue to white gradient feels fresh and adds a touch of seasonal serenity, like carrying a little frosty sparkle. The sparkle is subtle enough for most workplaces. For holidays: the addition of the crystal snowflake accent elevates it instantly, making it sparkling and celebratory enough for any Christmas or New Year’s party. It’s festive without being overly traditional, making it perfect for the entire season.
Sparkling Off: Final Thoughts
So, are you feeling inspired to rock this incredibly stunning winter look?! We truly hope this guide has given you all the details, techniques, and confidence you need. Seriously, icy blue ombré nails with a crystal snowflake are the answer for your next winter manicure. It’s the perfect blend of seasonal charm, sophisticated sparkle, and wearable elegance.
Whether you’re heading to the salon with precise instructions, attempting it yourself at home, or opting for the convenience of gorgeous press-ons, you’re ready! Don’t forget to prioritize healthy cuticles and thin gel layers for a lasting finish.
If you loved this deep dive into the perfect winter aesthetic, be sure to save it for your next appointment! Which style are you leaning towards – elegant almond or edgy coffin? Let us know! For more inspiring seasonal nail ideas, check out our guide on [Internal link opportunity: festive red and gold Christmas nail designs].
Thanks for shimmering with us, and happy winter manicuring!

Mia founded Daily Nail Idea after a decade in beauty editorial, tired of watching great nail art disappear into the scroll. She now leads the team’s editorial direction — deciding what’s worth featuring and what’s just noise — and still paints her own nails every Sunday night, no exceptions.