
Christmas Dessert Nails: 25 Simple Holiday Ideas Inspired by Your Favorite Treats
You are standing in the salon chair or sitting at your kitchen table with a cup of tea, scrolling through endless red glitter photos, and feeling completely stuck for Christmas Dessert Nails. You want festive nails for December, yet you dread complicated nail art that chips the moment you start wrapping gifts or rolling out cookie dough. I have been there countless times, both behind the nail desk and doing my own manicures at midnight before a holiday party.
That is why Christmas dessert nails are the smartest choice you can make this season. Instead of relying on tricky tiny portraits or heavy rhinestones, simple holiday nails inspired by hot cocoa, gingerbread, peppermint, and cranberry use simple dots, stripes, and swirls. Paired with a sturdy short almond Christmas nails shape, these holiday nails winter Christmas designs look cozy, intentional, and delicious. Let us walk through the exact colors, 25 step-by-step designs, and salon scripts you need for your best December nail ideas yet.
At a Glance: Your Holiday Dessert Manicure Guide
Here is what is ahead in this complete holiday nail guide. First, we will look at why dessert themes pair so well with short almond nails during the busiest month of the year. Next, you will find two quick-reference tables covering our exact dessert color palette and a time-and-tool planner.
After that, we will dive straight into 25 specific nail designs broken down into five delicious flavor categories. Every single idea includes difficulty ratings, timing, salon scripts, shape adaptations, and DIY steps. Finally, you will get my step-by-step home application tutorial, shape-specific prep advice, and answers to your top holiday manicure questions. Grab your favorite mug, and let us pick your next look.
1. Why Dessert-Inspired Nails Are Perfect for Christmas

When December hits, your hands work overtime. You are tying ribbons, washing roasting pans, digging through winter coat pockets, and baking batches of cookies. Long stiletto extensions or bulky 3D charms simply get in the way. Meanwhile, plain red polish can sometimes feel a bit too predictable when you want something fun.
Dessert-inspired Christmas nail ideas solve both problems at once. They tap into instant visual nostalgia that everyone recognizes from across the dinner table. Even better, the techniques behind them are remarkably forgiving.
- Beginner-friendly geometry: A marshmallow is just a soft white dot. Icing is a wavy line. Peppermint is a simple swirl. You do not need steady fine-art skills to pull these off.
- Built for short almond nails: The tapered, rounded tip of a short almond nail mimics the shape of a Jordan almond or a sugar cookie. It elongates your fingers while staying short enough to type, cook, and wrap presents safely.
- Multi-season wearability: Mocha, latte, and cranberry tones transition effortlessly from Thanksgiving straight through January without screaming “leftover Christmas.”
- Easy salon communication: Showing your nail tech a photo of a hot cocoa mug or naming specific food shades removes any guesswork during your appointment.
If you normally gravitate toward clean, understated manicures, you can easily adapt these treats to fit your comfort zone.
2. Best Christmas Dessert Nail Colors & Planner

Before you sit down to paint or book your appointment, it helps to see the exact shades and tools side by side. Choosing the right Christmas nail colors makes all the difference between a muddy brown and a rich, appetizing hot chocolate shade. Always check how warm or cool a brown or red leans against your hands [Internal link opportunity: → skin tone colors].
The Dessert Color Palette
| Flavor Inspiration | Exact Shade Description | Undertone | Best Finish | Season Crossover |
| Hot Cocoa | Deep roasted mocha brown | Warm | High-gloss | Fall through January |
| Marshmallow | Soft milky cream white | Neutral | Glossy or sheer | Year-round |
| Gingerbread | Spiced caramel terracotta | Warm | Glossy base, matte icing | Late November to December |
| Peppermint | Bright cherry candy red | Cool | Ultra-glossy glass | December |
| Cranberry | Deep translucent ruby berry | Cool | Jelly gloss or velvet | Thanksgiving to New Year |
| Latte Foam | Warm toasted oat beige | Neutral | Satin or cream | All winter |
| Pistachio | Pastel sage-tinted cream | Cool | Glossy | Winter and Spring |
| Gold Sugar | Micro-fine champagne shimmer | Warm | Topper over any base | Holiday parties |
The Dessert Nail Planner
| Dessert Theme | Base Color | Key Detail | Difficulty | Time | Tools Needed |
| Hot Cocoa | Mocha brown | Cream marshmallow dots | Easy | 20 min | Dotting tool |
| Gingerbread | Caramel ginger | White icing lines & dots | Medium | 30 min | Fine liner brush |
| Peppermint | Crisp white | Red swirl or stripes | Medium | 25 min | Striping brush |
| Sugar Cookie | Creamy white | Colorful micro-dots | Easy | 20 min | Dotting tool |
| Cranberry | Deep ruby red | Gold sugar flecks | Easy | 15 min | Glitter topper |
| Latte | Soft oat beige | Cocoa swirl line | Easy | 20 min | Thin brush |
| Pistachio | Soft sage green | Cream and gold dots | Easy | 20 min | Dotting tool |
| Candy Cane | White and red | Diagonal stripes | Medium | 25 min | Striping brush |
Hot Cocoa and Marshmallow Nails
Cozy browns are the undisputed stars of subtle holiday nails. They feel warm, rich, and sophisticated without demanding bright neon attention.
3. Classic Hot Cocoa with Marshmallow Dots
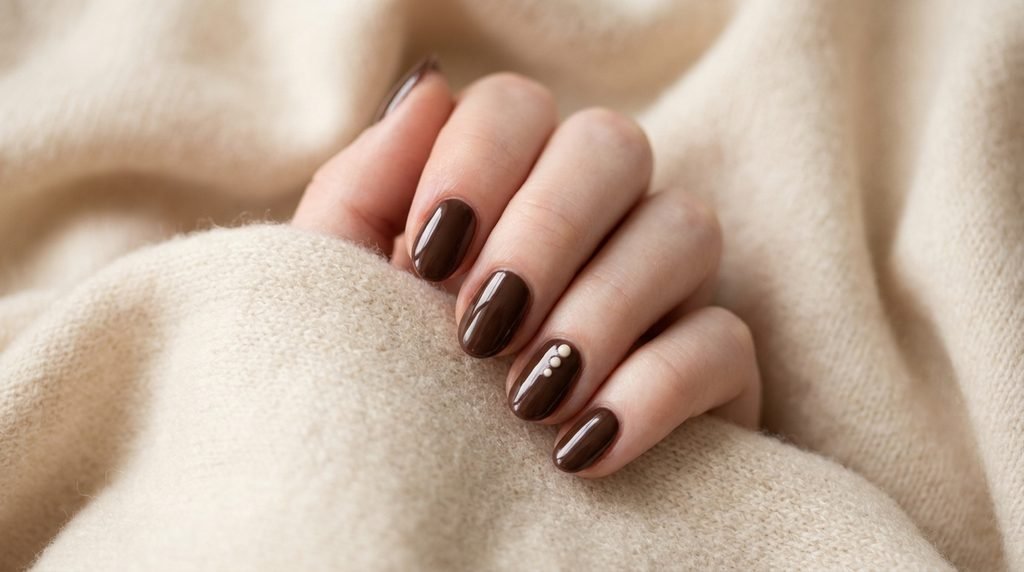
Nothing beats the immediate comfort of a steaming mug of chocolate on a freezing afternoon. This design translates that exact feeling onto your fingertips using a rich brown base and tiny floating marshmallow dots. It is my personal go-to recommendation whenever a client wants festive nails that still look chic at the office.
- Skill & Time: Beginner | 20 minutes | Theme: Hot cocoa | Finish: High-gloss.
- Shape & Occasion: Ideal for short almond Christmas nails and cozy family gatherings or casual gift shopping.
- Salon Communication: Ask for “two coats of a rich, warm dark chocolate brown gel, with three tiny off-white dots clustered near the tip of each ring finger.”
- At-Home & Budget Notes: Press-on sets in glossy espresso work great here. At home, dip a bobby pin tip into milky white polish to stamp on uneven, realistic mini marshmallows. Avoid stark chalk white, which looks too harsh against warm brown.
4. Cocoa Gloss with Whipped Cream French Tips

If you love a classic French manicure, swapping white tips for a creamy, frothy swirl gives you an instant winter upgrade. The dark brown base acts like the drink, while the soft cream tip mimics freshly whipped cream melting on top.
- Skill & Time: Beginner | 25 minutes | Theme: Hot cocoa | Finish: Creamy gloss.
- Shape & Occasion: Flatters short almond and squoval shapes for holiday brunches and winter date nights.
- Salon Communication: Tell your tech, “I want a warm mocha base with a soft, slightly thicker milky-cream French tip instead of stark white.”
- At-Home & Budget Notes: Use a rounded silicone stamper or the side of your polish brush to sweep cream polish across the free edge. Do not worry about a razor-sharp smile line; a slightly soft edge actually looks more like real whipped cream.
5. Swirling Iced Mocha Latte Nails
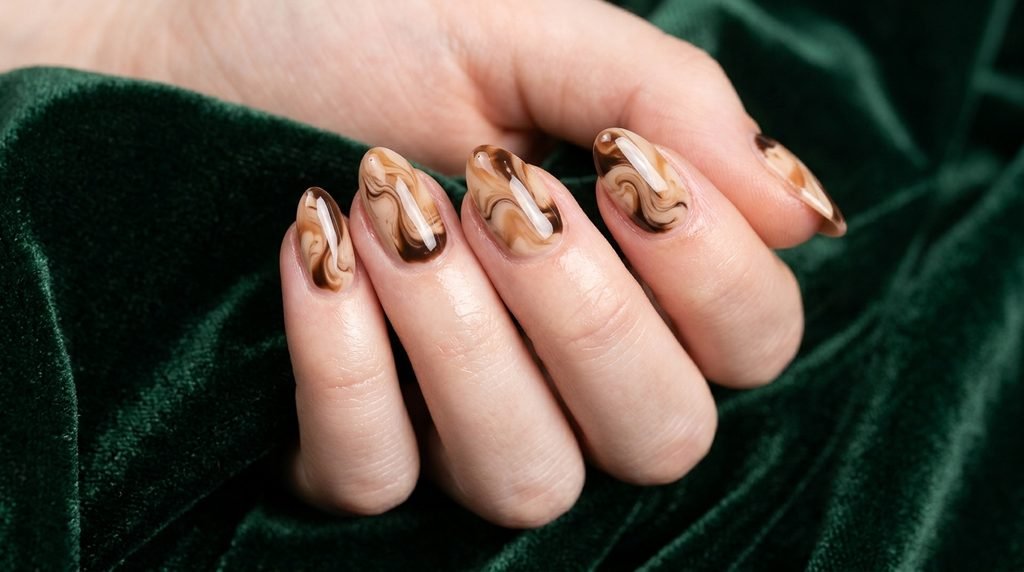
Coffee lovers will adore this swirled marbled effect that looks just like cold cream hitting iced espresso. Because every swirl turns out slightly different, you never have to stress about making your left hand match your right hand perfectly.
- Skill & Time: Beginner | 20 minutes | Theme: Latte | Finish: High-gloss.
- Shape & Occasion: Gorgeous on almond and medium coffin nails for everyday December nail designs.
- Salon Communication: Ask for “a milky beige base with wet-on-wet swirls of dark espresso and caramel brown on two accent nails.”
- At-Home & Budget Notes: Apply a wet coat of oat-milk beige, immediately drop tiny beads of dark brown and tan onto the wet polish, and drag a toothpick through them in an S-curve. Float a thick top coat over the surface so you do not drag the wet colors.
6. Dark Chocolate with Gold Foil Flakes
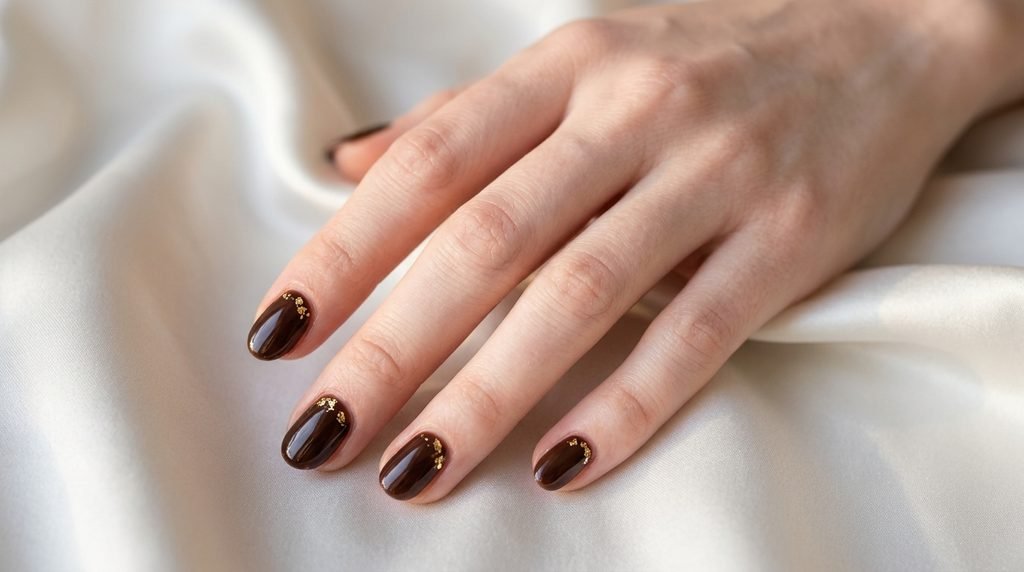
Sometimes you want your cozy brown manicure to feel dressed up enough for a formal holiday dinner. Pressing delicate edible-style gold leaf flakes over a dark cocoa base gives you that luxury artisan truffle look in under fifteen minutes.
- Skill & Time: Beginner | 15 minutes | Theme: Dark chocolate truffle | Finish: Glossy with metallic flecks.
- Shape & Occasion: Stunning on short almond and short square nails for evening cocktail parties.
- Salon Communication: Request “a deep bittersweet chocolate base with scattered gold leaf flakes pressed near the cuticles on the middle and ring fingers.”
- At-Home & Budget Notes: Wait until your dark brown polish is 80 percent dry and slightly tacky, then gently tap tiny pieces of gold foil onto the nail with a clean finger before sealing.
7. Cozy Cocoa Mug and Steam Accent
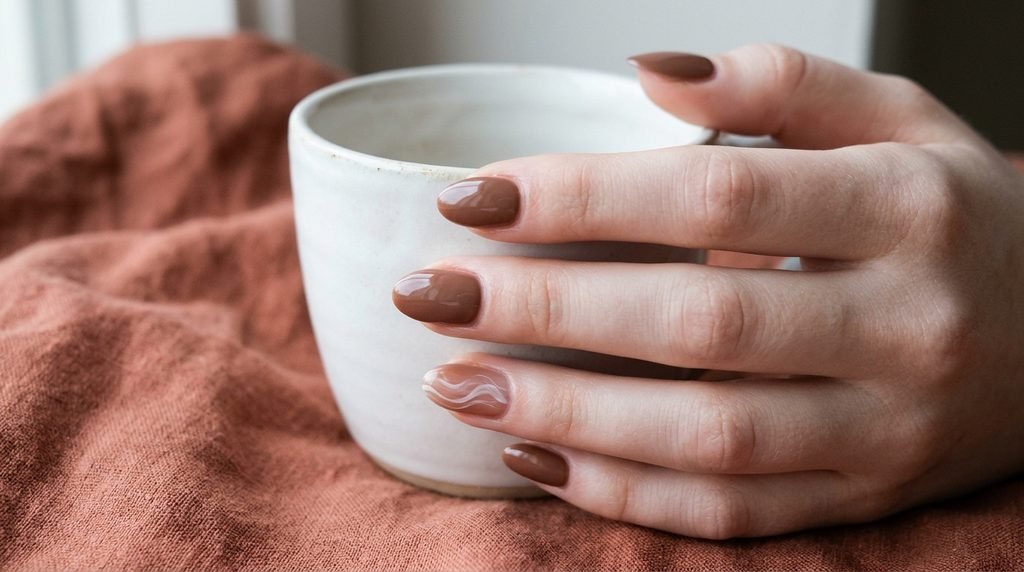
For anyone who wants a playful nod to winter drinks without going overboard, adding delicate wispy steam lines over a cocoa base hits the sweet spot. It feels artistic, light, and effortlessly charming.
- Skill & Time: Intermediate | 30 minutes | Theme: Hot cocoa | Finish: Glossy.
- Shape & Occasion: Best on short almond or oval nails for weekend cabin trips and tree-decorating nights.
- Salon Communication: Ask your nail artist for “a warm cocoa brown manicure with sheer, wispy white wavy lines rising from the tip of one accent nail to look like steam.”
- At-Home & Budget Notes: Mix one drop of white polish with two drops of clear top coat on a piece of foil to make a sheer milky tint. Use a thin liner brush to paint two parallel S-curves rising toward the tip.
Gingerbread and Sugar Cookie Nails
Spiced browns, warm caramels, and snowy white icing details make gingerbread nails the ultimate playful baking-season manicure.
8. Classic Gingerbread with White Icing Scallops

This design captures the exact look of freshly piped royal icing along the edge of a warm gingerbread cookie. The contrast between the spiced terracotta-brown base and the crisp matte white piping looks good enough to eat.
- Skill & Time: Intermediate | 30 minutes | Theme: Gingerbread | Finish: Glossy base with textured white icing.
- Shape & Occasion: Tailored for cute Christmas nails almond shapes during cookie swaps and holiday baking marathons.
- Salon Communication: Say, “I would like a warm caramel-ginger base on all nails, with wavy white icing squiggles painted along the tips like a decorated cookie.”
- At-Home & Budget Notes: Paint your caramel base and let it dry completely. Dip a fine detail brush into thick white polish and draw a gentle wave across the top third of your nail, followed by a row of tiny white dots underneath.
9. Spiced Caramel with Gumdrop Candy Buttons

If fine line work intimidates you, skip the piping and go straight for the candy buttons. A warm gingerbread base paired with three tiny jewel-toned dots down the center of the nail is foolproof and wildly cute.
- Skill & Time: Beginner | 20 minutes | Theme: Gingerbread | Finish: High-gloss.
- Shape & Occasion: Works beautifully on short square and short almond nails for casual December wear.
- Salon Communication: Ask for “a warm gingerbread brown base with three tiny dots—red, green, and white—lined up vertically down the center of my ring fingers.”
- At-Home & Budget Notes: Use a small dotting tool to place three evenly spaced dots down the middle of the nail. Let the dots dry for ten full minutes before applying top coat so the red does not bleed into the white.
10. Frosted Sugar Cookie with Micro-Sprinkles

A soft, buttery vanilla base dotted with tiny pastel and festive flecks mimics a thick frosted sugar cookie. It brightens up heavy winter sweaters while staying sweet and approachable.
- Skill & Time: Beginner | 20 minutes | Theme: Sugar cookie | Finish: Glossy.
- Shape & Occasion: Great for short almond and round nails for family photos and daytime holiday events.
- Salon Communication: Request “two coats of a creamy vanilla-white polish with tiny scattered red, green, and gold micro-dots on two accent nails.”
- At-Home & Budget Notes: Instead of painting tiny dashes, use the smallest tip of a dotting tool to tap tiny pinpricks of red, sage green, and warm gold randomly across a dry cream base.
11. Iced Snowflake Cookie Accent Nails
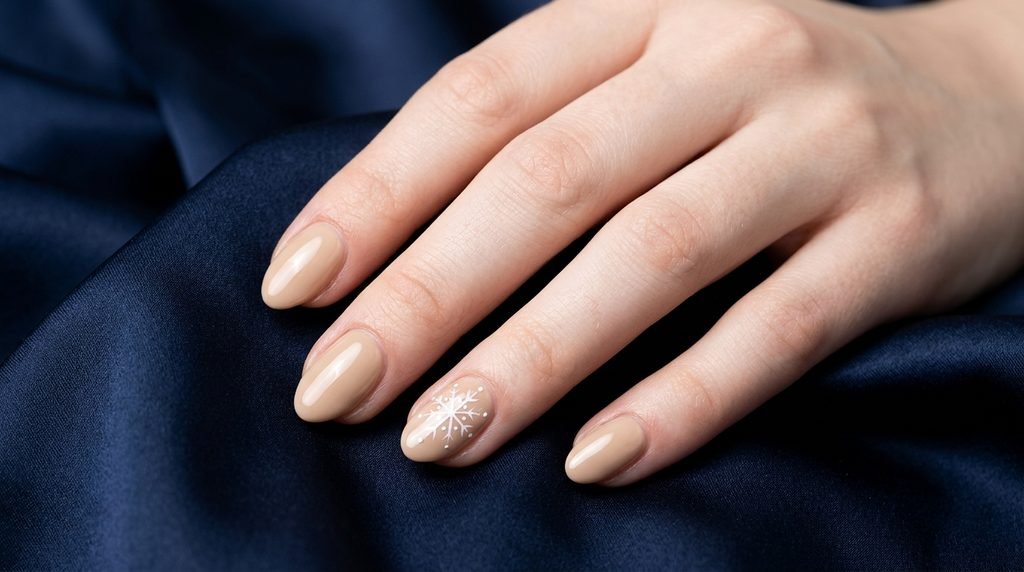
Combine a warm cookie-dough beige base with delicate white icing dots arranged into a simple star-shaped snowflake. It feels wintry and festive without relying on standard bright red polish.
- Skill & Time: Intermediate | 30 minutes | Theme: Iced cookie | Finish: Glossy.
- Shape & Occasion: Ideal for almond and oval shapes for winter concerts and snowy December weekends.
- Salon Communication: Ask for “a warm toasted-oat cookie base with a minimalist white dot-and-line snowflake painted on each middle finger.”
- At-Home & Budget Notes: Start with a cross (+) of thin white lines, add an X through the center, and place tiny white dots at the tip of every spoke. Keeping the lines short makes the snowflake look neat and proportional on short nails.
12. Minimalist Gingerbread Bow and Piping Accent
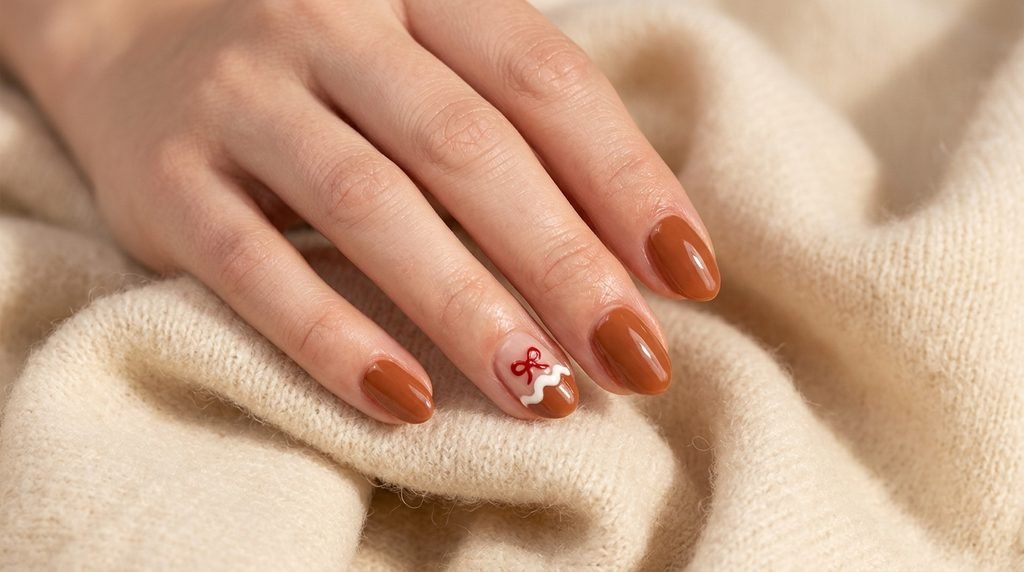
Rather than trying to paint an entire tiny face, capture the charm of a gingerbread cookie using just white wavy cuff lines and a tiny red bow dot. It reads immediately as holiday baking while staying clean and wearable.
- Skill & Time: Intermediate | 25 minutes | Theme: Gingerbread | Finish: Glossy.
- Shape & Occasion: Charming on short almond Christmas nails for school parties, office gift exchanges, and wrapping nights.
- Salon Communication: Tell your tech, “Give me a spiced ginger-brown manicure with a wavy white icing band across the tip and a tiny red bow dot on the ring finger.”
- At-Home & Budget Notes: Paint a wavy white stripe near the tip, then place two tiny red triangles meeting at a center dot just below the wave to form a crisp little bow.
Peppermint and Candy Cane Nails
Crisp white and bright cherry red are the ultimate holiday power couple. These Christmas nails candy cane designs keep things fresh, graphic, and cheerful.
13. Classic Candy Cane Diagonal Stripes

Nothing says December quite like crisp diagonal red-and-white stripes. Limiting the stripes to one or two accent nails keeps the look modern and prevents it from feeling overwhelming.
- Skill & Time: Intermediate | 25 minutes | Theme: Candy cane | Finish: Ultra-glossy.
- Shape & Occasion: Sharp and festive on short almond and coffin nails for holiday parades and festive parties.
- Salon Communication: Ask for “glossy cherry red on most nails, with a crisp white base and diagonal red candy-cane stripes on the ring and middle fingers.”
- At-Home & Budget Notes: [Affiliate opportunity: thin nail striping tape and cherry red polish] Apply a white base, let it dry completely, place thin striping tape diagonally across the nail, paint red over the whole nail, and peel the tape off immediately while wet.
14. Soft Pink Peppermint Swirl Nails
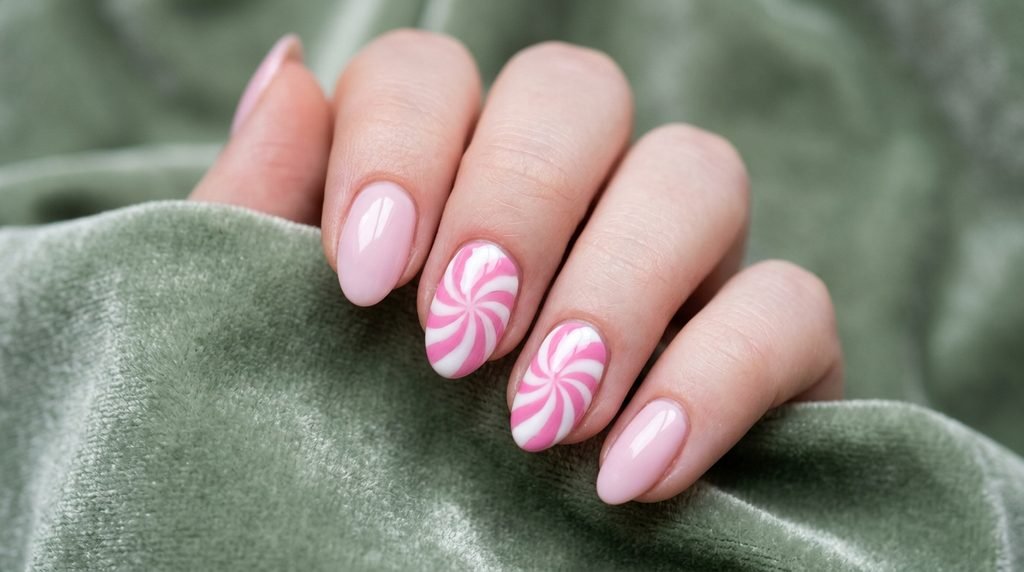
If traditional fire-engine red feels too bold for your personal style, swap it for a soft candy-pink and white swirl. It looks just like a pastel strawberry-peppermint candy and flatters every skin tone.
- Skill & Time: Intermediate | 25 minutes | Theme: Peppermint | Finish: Glassy gloss.
- Shape & Occasion: Dreamy on short almond nails for bridal showers, winter birthdays, and sweet feminine aesthetics.
- Salon Communication: Say, “I want a milky pink base with hypnotizing white and bubblegum-pink peppermint pinwheel swirls on two accent nails.”
- At-Home & Budget Notes: Place alternating dots of pink and white in a circle on the nail, then drag a clean toothpick from the outer edge toward the center in a gentle spiral motion.
15. Peppermint French Tip Manicure
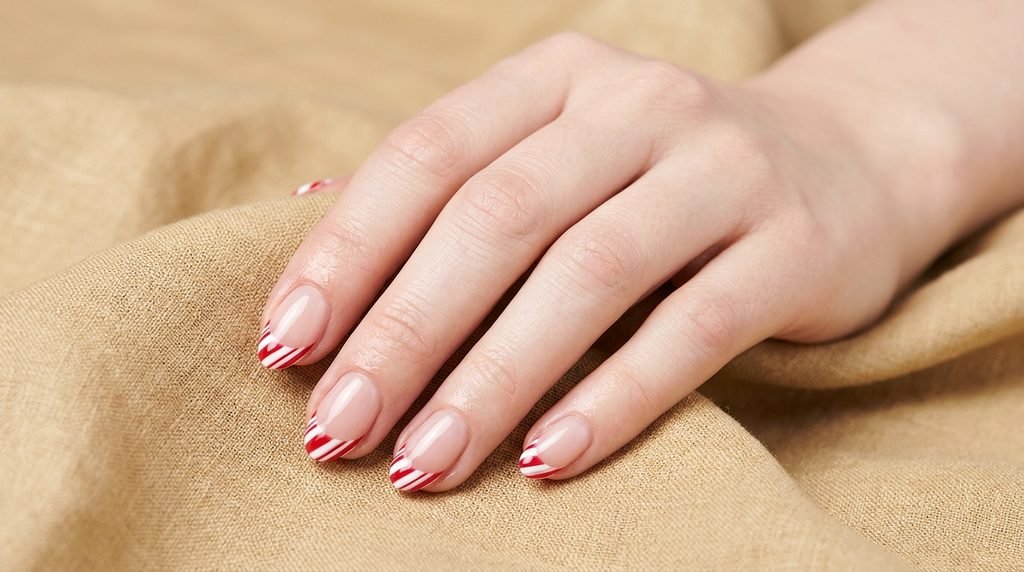
Give your everyday French manicure a holiday twist by painting the tips in alternating diagonal red and white stripes. From afar it reads as a classic red tip, while up close it reveals a sweet candy-cane detail.
- Skill & Time: Intermediate | 30 minutes | Theme: Peppermint | Finish: High-gloss.
- Shape & Occasion: Extremely flattering on short almond and oval nails for holiday work parties and family dinners.
- Salon Communication: Request “a sheer neutral pink base with peppermint-striped red and white French tips following the almond curve.”
- At-Home & Budget Notes: Paint a solid white French tip first. Once dry, use a thin liner brush to add three slanted cherry-red stripes across the white tip only.
16. Single Candy Cane Heart Accent Nail

Two curved candy canes leaning together form a subtle holiday heart that feels sweet rather than overly kitschy. Pairing this single accent nail with solid creamy white nails keeps the overall manicure fresh and bright.
- Skill & Time: Intermediate | 25 minutes | Theme: Candy cane | Finish: Glossy.
- Shape & Occasion: Lovely on short almond nails for romantic winter date nights and Christmas Eve.
- Salon Communication: Ask for “a glossy soft-white manicure with two tiny striped candy canes forming a heart shape on the center of each ring finger.”
- At-Home & Budget Notes: Paint two hooked J-shapes facing each other in white, then add tiny red cross-stripes over the hooks using a toothpick dipped in red polish.
17. Silver-Lined Peppermint Candy Nails

Adding a hair-thin metallic silver stripe alongside your red and white peppermint lines makes the design sparkle like real foil-wrapped candy. It catches the candlelight at evening gatherings effortlessly.
- Skill & Time: Intermediate | 30 minutes | Theme: Wrapped peppermint | Finish: Glossy with metallic silver.
- Shape & Occasion: Festive on almond and short square nails for New Year’s Eve crossover and formal holiday dinners.
- Salon Communication: Tell your tech, “I want a classic red-and-white peppermint swirl accent nail, outlined with a super-thin metallic silver glitter line.”
- At-Home & Budget Notes: Use a silver metallic striper polish right along the border where the red and white colors meet. This also neatly hides any tiny wobbles in your hand-painted lines.
Cranberry, Mocha and Latte Nails
When you want elegant holiday nails that feel grown-up, rich, and effortlessly chic, deep berry reds and velvety coffee neutrals lead the pack.
18. Translucent Cranberry Jelly Nails

Sheer, squishy cranberry nails look just like glossy sugared berries or homemade cranberry sauce catching the winter sun. The translucent finish makes short nails look healthy, hydrated, and effortlessly modern.
- Skill & Time: Beginner | 15 minutes | Theme: Cranberry | Finish: Squishy jelly gloss.
- Shape & Occasion: Stunning on short almond Christmas nails for formal dinners, theater nights, and wine tastings.
- Salon Communication: Ask for “two thin coats of a sheer, translucent ruby-cranberry jelly polish so my natural nail tip faintly peeks through.”
- At-Home & Budget Notes: If you do not own a jelly polish, mix two drops of deep crimson polish with four drops of clear top coat on a palette before painting.
19. Frosted Cranberry with Gold Sugar Flecks

Elevate a deep berry manicure by dusting a fine champagne-gold shimmer over the tips or layering a delicate gold sparkle topper. It mimics the look of cranberries rolled in sparkling sanding sugar for a holiday dessert platter.
- Skill & Time: Beginner | 20 minutes | Theme: Sugared cranberry | Finish: Shimmering gloss.
- Shape & Occasion: Made for holiday galas, weddings, and dressy December evenings on almond or coffin shapes.
- Salon Communication: Say, “Give me a deep, rich cranberry red base with a light dusting of fine gold sugar shimmer faded down from the tips.”
- At-Home & Budget Notes: Apply two coats of deep burgundy-red, let them dry, and dab a fine gold micro-glitter polish onto the top third of the nail using a makeup sponge for a seamless sparkle fade.
20. Velvet Satin Mocha Brown Nails
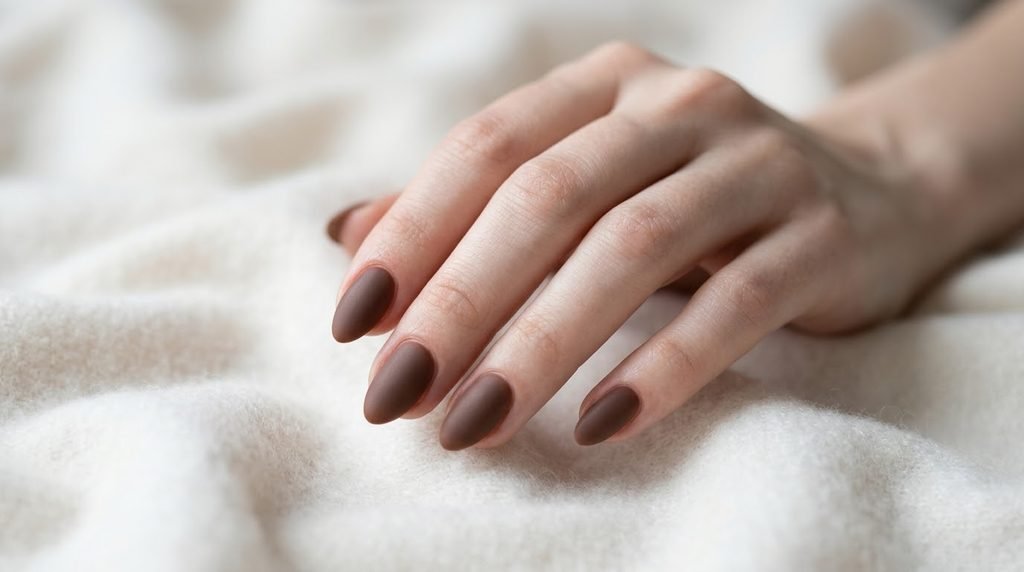
Warm mocha brown nails in a soft satin finish look like rich chocolate mousse or velvet ganache. They offer a quiet, luxurious alternative to red and green while still feeling undeniably cozy for winter.
- Skill & Time: Beginner | 20 minutes | Theme: Chocolate mousse | Finish: Satin or velvet matte.
- Shape & Occasion: Gorgeous on short almond and squoval nails for everyday workwear and minimalist winter wardrobes
- Salon Communication: Request “a medium-dark warm mocha brown with a soft satin-matte top coat instead of high shine.”
- At-Home & Budget Notes: Paint two even coats of warm brown polish, let dry completely, and finish with one smooth coat of matte top coat. Keep cuticle oil handy, as matte finishes highlight dry skin around the nail bed.
21. Creamy Oat Milk Latte Nails

Trending latte nails blend warm beige, soft caramel, and sheer milky tones into a manicure that looks expensive on everyone. For December, adding a whisper of pearl shimmer turns this coffee-shop staple into a festive neutral.
- Skill & Time: Beginner | 15 minutes | Theme: Winter latte | Finish: Pearlescent cream.
- Shape & Occasion: Flattering on every nail length and shape, especially short almond nails for travel and busy holiday weeks.
- Salon Communication: Ask for “a warm, creamy oat-latte beige with a subtle glazed pearl topper for a soft winter glow.”
- At-Home & Budget Notes: Layer one coat of sheer warm beige over one coat of milky white, then finish with a sheer champagne shimmer polish to replicate a salon chrome glaze without needing a UV lamp.
22. Deep Burgundy with Champagne Polka Dots
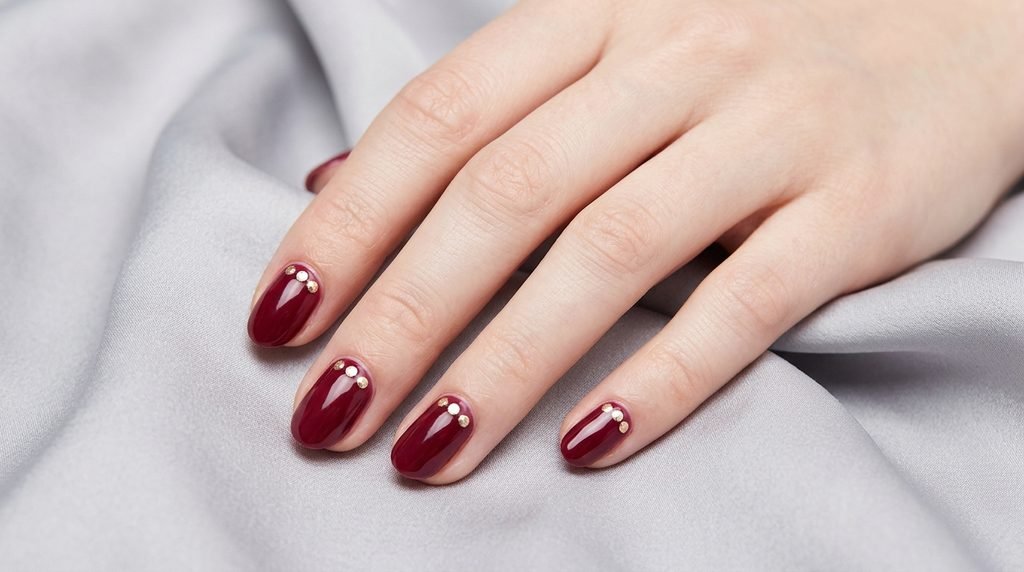
Rich wine-colored burgundy paired with tiny champagne-gold dots looks like a glass of holiday bubbly next to a plate of dark chocolates. It is understated, festive, and takes almost zero technical skill.
- Skill & Time: Beginner | 20 minutes | Theme: Dark cherry & champagne | Finish: Glossy.
- Shape & Occasion: Chic on short almond and short square nails for office holiday parties and New Year’s toast gatherings.
- Salon Communication: Tell your tech, “Paint all my nails a deep burgundy-cranberry, then add three tiny metallic champagne dots near the base of each nail.”
- At-Home & Budget Notes: Place a single tiny gold dot centered just above the cuticle on each nail. That single pinpoint of metallic light instantly makes a dark manicure feel intentional and high-end.
Sprinkle and Sweet Treat Nails: Colorful Christmas
If your holiday style leans joyful, nostalgic, and bright, these colorful Christmas nails bring bakery-case cheer right to your fingertips.
23. Confetti Sprinkle Dots on Vanilla Cream

Turn your nails into a freshly iced bakery cupcake by scattering cheerful dots of cherry red, pine green, pastel pink, and gold across a creamy vanilla base. It feels playful, bright, and impossible not to smile at.
- Skill & Time: Beginner | 20 minutes | Theme: Holiday sprinkles | Finish: High-gloss.
- Shape & Occasion: Fun on short almond and round nails for gift wrapping, baking with kids, and casual December days.
- Salon Communication: Ask for “a soft vanilla-cream base with scattered tiny confetti dots in red, green, pink, and gold across all ten nails.”
- At-Home & Budget Notes: Work one color at a time across all ten nails using a small dotting tool. Spacing out three to four dots per color prevents overcrowding and keeps the design airy.
24. Pistachio Cream and Berry Pink Duo
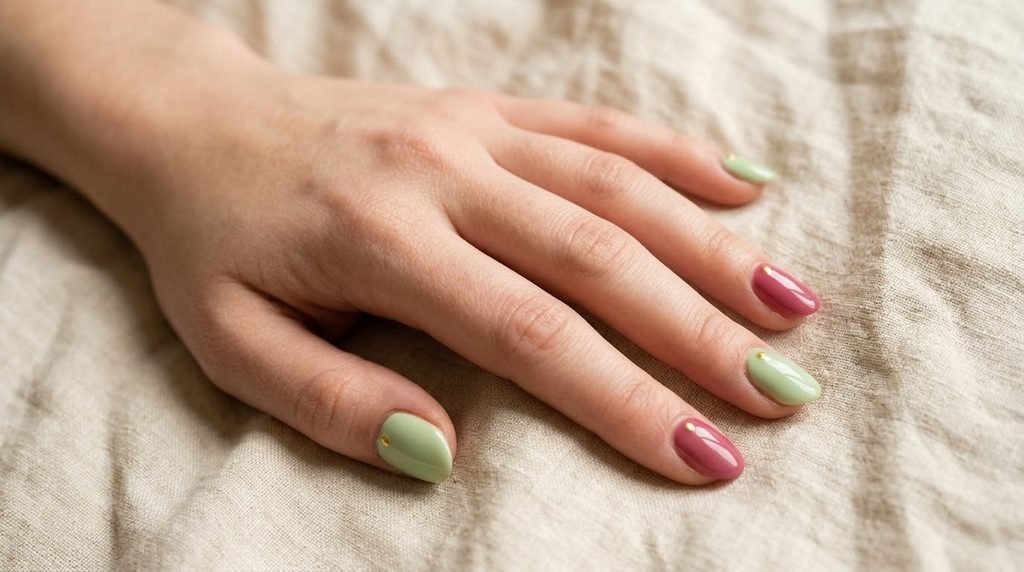
Inspired by Italian holiday pastries and spumoni ice cream, pairing soft pastel pistachio green with rosy berry pink is a chic, unexpected twist on traditional red and green.
- Skill & Time: Beginner | 20 minutes | Theme: Pistachio pastry | Finish: Glossy.
- Shape & Occasion: Trendy on short almond nails for brunch dates and creative winter outfits.
- Salon Communication: Say, “I want alternating nails in soft pastel pistachio green and warm berry pink, with a tiny gold dot at the cuticle of each nail.”
- At-Home & Budget Notes: Alternate pistachio green on your thumb, middle, and pinky fingers with berry pink on your index and ring fingers for an instant salon-curated color block look.
25. Red and Green Candy Dot French Tips

Instead of a solid painted line, create a delicate French tip made entirely of tiny alternating red and green candy dots. It gives you classic Christmas colors in a light, modern, minimalist layout.
- Skill & Time: Beginner | 25 minutes | Theme: Holiday nonpareils | Finish: Glossy.
- Shape & Occasion: Adorable on short almond Christmas nails for every December event from tree trimming to Christmas morning.
- Salon Communication: Request “a sheer natural pink base with a French tip border made of tiny alternating red and emerald-green dots along the free edge.”
- At-Home & Budget Notes: Start by placing one green dot right at the center peak of your almond tip, then work outward down both sides alternating red and green dots until you reach the sidewalls.
26. Easy DIY: How to Paint Dessert Nails at Home
You do not need a professional studio setup to recreate these sweet designs at your dining table. Follow this exact prep-to-seal routine so your manicure stays smooth, glossy, and chip-free through all your holiday tasks.
- Shape and dry-prep your nails. File your nails into a soft short almond shape, filing in one direction to prevent peeling. Gently push back your cuticles with an orangewood stick and wipe each nail plate with rubbing alcohol to remove natural oils.
- Apply a ridge-filling base coat. Brush on one thin layer of base coat, capping the free edge of the nail. Let it dry for two full minutes so your color grips tightly.
- Paint two thin base color coats. Apply your cocoa, caramel, cream, or cranberry base in two thin, even layers rather than one thick coat. Thin layers dry faster and prevent annoying dents later.
- Set up a makeshift palette. Place a dime-sized drop of your accent colors (like milky white or cherry red) onto a piece of aluminum foil or a silicone mat. Never dip your art tools straight into the polish bottle neck, where thick clumps hide.
- Stamp your dots or pull your swirls. Dip a dotting tool or toothpick into your accent drop, tap once on the foil to remove excess polish, and lightly touch your nail. Keep your pinky finger anchored against the table to steady your hand.
- Float your glossy top coat. Wait at least ten minutes for your dots or icing lines to set. Pick up a generous bead of quick-dry top coat and glide it over the nail without letting the bristles scrape the art underneath.
27. Quick Tips for Short Almond Nails and Fine Details
Working on shorter nails requires slightly different proportions than painting long salon extensions. Keep these practical bench tips in mind to make your nail art look crisp and professional.
- Leave a hair of breathing room at the cuticle: When painting dark cocoa or bright cranberry shades, stop just shy of the skin fold. Leaving a tiny, uniform gap prevents cuticle flooding and makes your manicure look clean for days longer.
- Scale your dots down: On short almond nails, smaller dots look much more refined than large blobs. Use the smallest ball tip on your dotting tool or the blunt end of a sewing pin for delicate sprinkles and marshmallow clusters.
- Fix wobbly lines immediately: Keep a tiny angled makeup brush dipped in pure acetone next to you. If a peppermint stripe or icing wave goes crooked, sweep it clean right away before it dries.
- Protect your work in the kitchen: Dishwater and hot oven steam soften regular nail polish quickly. Slip on lined rubber gloves when washing baking sheets, and apply cuticle oil every night to keep your short almond tips flexible rather than brittle.
If you love seasonal themes that feel fun and wearable, check out our favorite warm-weather food-inspired looks too [Internal link opportunity: → picnic nails].
28. Frequently Asked Questions
What are dessert-inspired Christmas nails?
Dessert-inspired Christmas nails copy the colors and details of holiday treats, like hot cocoa brown with marshmallow dots, gingerbread with white icing lines, and peppermint red and white swirls. They are cozy, easy to recognize, and simple to recreate on short almond nails.
How do I paint hot chocolate nails?
Paint a mocha or chocolate brown base, then add small white or cream dots on one or two nails to look like marshmallows. A thin tan line near the cuticle can mimic cocoa foam. Seal with a glossy top coat for a rich, creamy shine.
How do I make gingerbread nails?
Use a warm brown base like caramel or ginger, then add thin white lines with a fine brush or dotting tool to mimic icing. Tiny red or green dots can look like candy buttons. Start with one accent nail if you are a beginner.
What colors are best for peppermint nails?
Classic peppermint uses crisp white and cherry red. For a softer look, try pale pink and white swirls. Add a thin silver line or glossy top coat so the stripes look glossy and candy-like.
Are dessert nails easy for beginners?
Yes. Most designs use dots, stripes, or simple swirls. Begin with a solid base, then add one accent nail with a dotting tool or thin brush. It takes about 30 minutes and uses just a few polishes.
What nail shape is best for detailed dessert designs?
Short almond or soft oval nails work well. They are sturdy during holiday baking and cooking, and they give enough surface for small details like icing lines, dots, or swirls.
Conclusion
Holiday manicures do not need to feel stressful, expensive, or overly complicated to turn heads at your next gathering. Whether you lean toward cozy hot cocoa marshmallow dots, spiced gingerbread icing, or glossy sugared cranberry, these simple designs bring instant warmth to your winter look. Pick your favorite flavor combination, grab a dotting tool or show this list to your nail tech, and save this guide for your next appointment!

Jade Lin is the author behind the nail ideas at DailyNailIdea.com. She writes about simple nail designs, easy nail art for beginners, cute acrylic looks and seasonal color trends. Her articles focus on ideas that are easy to copy, with clear tips on colors, tools and nail shapes. She has loved nail art since 2012.