Floral Ghost Nails: Botanical Line Art Meets Halloween
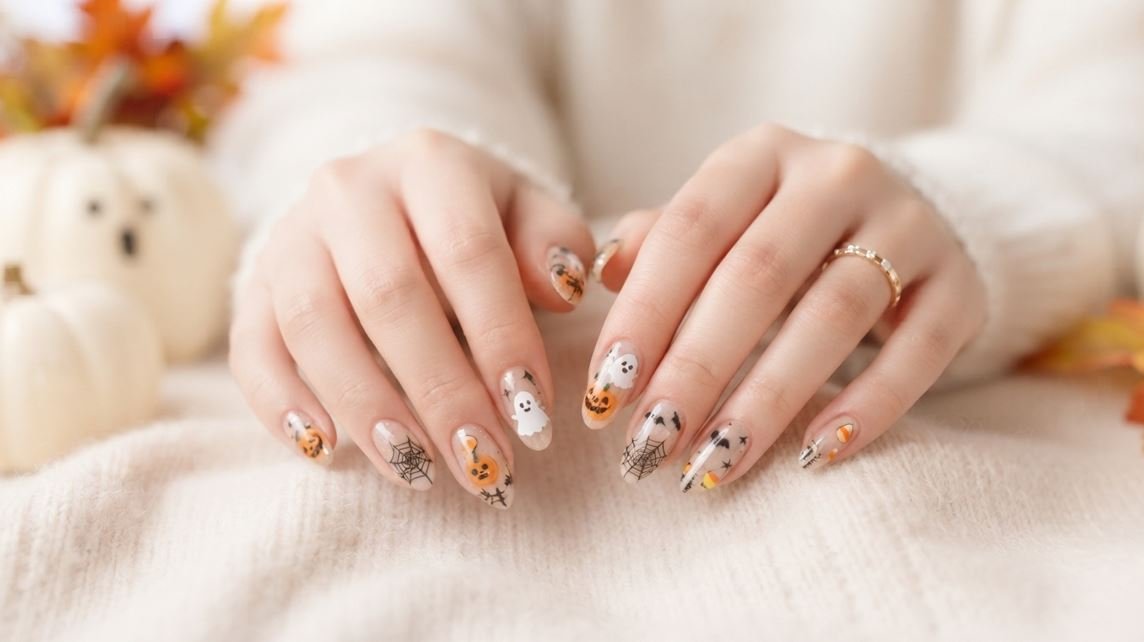
Not sure what to ask your nail tech for this October? You want something spooky, but deep down, heavy gore and blood-drip art just feel wrong for your daily vibe. You saved a dozen pictures on Pinterest, but you are still stuck choosing between pretty florals and playful holiday spirit. Fortunately, you do not have to choose at all this season. Cute ghost nails mixed with delicate botanical line art are officially taking over salons. This fresh trend blends soft, friendly little phantom silhouettes with fine-line wildflowers, leaves, and pastel vines. As a result, you get a playful manicure that feels festive, stylish, and completely wearable for your everyday life. In this full guide, we will break down every way to rock cute ghost nails with a botanical twist. From short natural beds to long acrylics, you will find the exact look for your next appointment.
At-a-Glance: The Botanical Ghost Look
Here is a quick preview of what is ahead in this visual guide:
- The Aesthetic: Friendly, non-scary phantom shapes blended with delicate wildflower line art, leafy vines, and starry accents.
- Best Shapes: Works beautifully on everything from natural short ovals to dramatic long almond and coffin acrylics.
- Color Palettes: Classic black-and-white contrast, dreamy soft pinks, moody sage greens, and warm autumn earth tones.
- Salon & DIY Options: Easy hand-painted line techniques, water decals, press-on options, and gel layering tips.
Classic Black and White Botanical Phantom
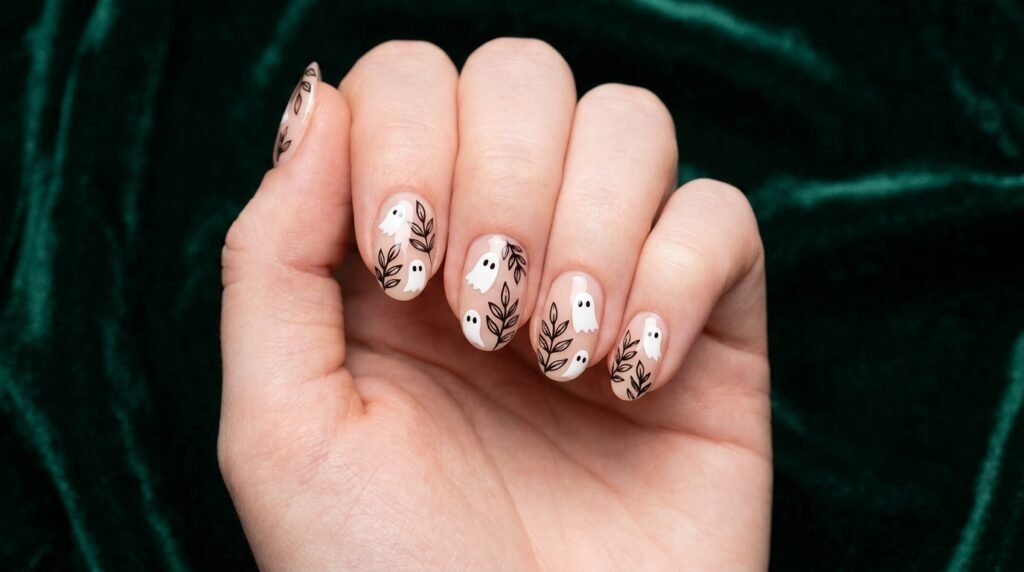
Classic contrast never goes out of style during October. A crisp milky white base makes black botanical line art pop instantly. For this style, ask your technician for a milky nude foundation. Paint a chubby white phantom outline on your accent fingers. Then, overlay delicate black line-art leaves curving across the phantom’s sheet. The high contrast looks sharp, clean, and modern.
- Best Nail Shape: Short oval or medium almond.
- How to Ask at the Salon: “I’d like a sheer nude base with milky white ghost silhouettes, layered with fine black botanical line art.
- Budget Tier: DIY with gel polish and a micro-striping brush, or high-end salon gel detail.
Soft Pink Softness for a Kawaii Vibe
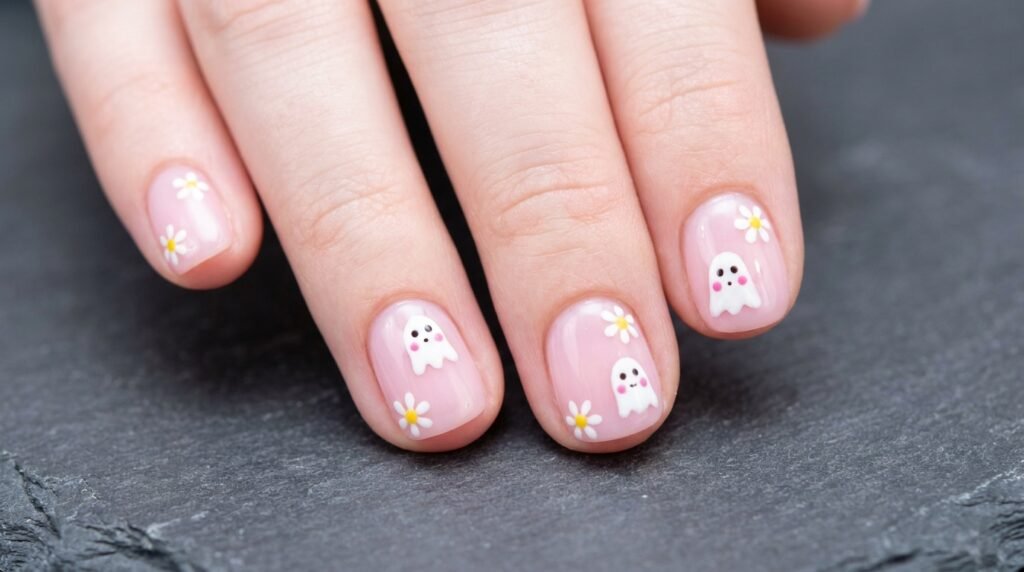
If you prefer soft shades over dark tones, this style is your best match. Pink tones bring a sweet, dreamy energy to October manicures. Start with a sheer pastel pink base coat. Add small white specters with tiny blush spots painted right onto their cheeks. Surround the little figures with tiny painted daisies and soft green sprigs. Consequently, your hands look adorable while still fitting the spooky season theme.
- Best Nail Shape: Short round or soft square.
- How to Ask at the Salon: “Paint a blush pink base with tiny cute specters, blush details, and small white daisy line art.”
- Budget Tier: Press-on nails provide an instant, affordable match for this exact style.
Almond Halloween Nails with Wildflower Vines
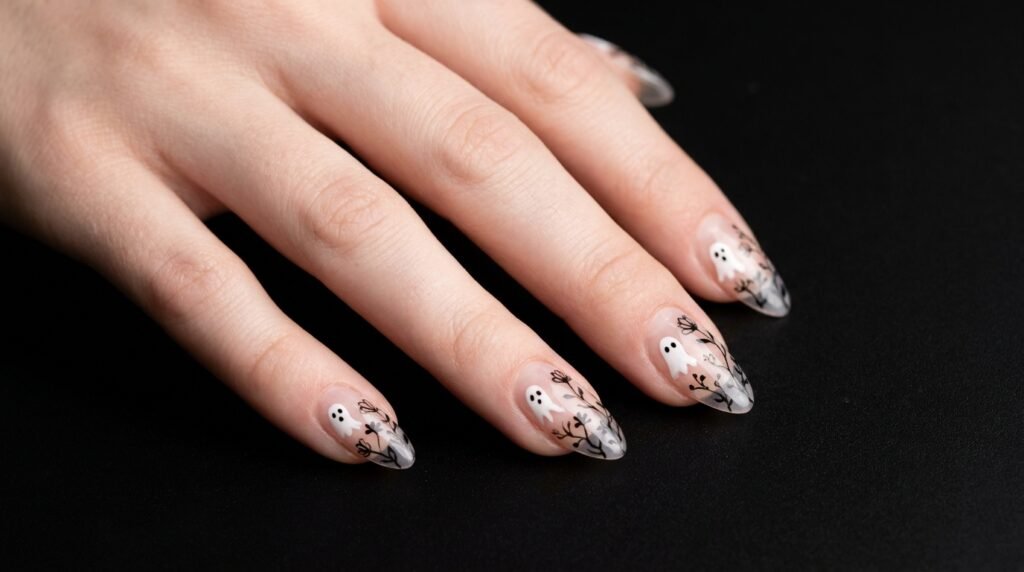
Almond shapes create the ultimate canvas for flowing botanical art. The elongated tip gives your artist extra room to stretch leafy vines upwards. On an almond shape, position the little phantom silhouette at the base near your cuticle. Next, guide delicate leafy vines up toward the tip of your nail. This placement visually lengthens your fingers while keeping the art balanced. Furthermore, the curve of an almond nail perfectly mirrors the flowing drape of a sheet.
- Best Nail Shape: Medium to long almond.
- How to Ask at the Salon: “I want almond nails with a negative space base, placing ghost figures near the cuticle and vines reaching the tips.”
- Budget Tier: Salon gel extensions for maximum length and detail canvas.
Short Halloween Nails with Micro Botanical Sprigs
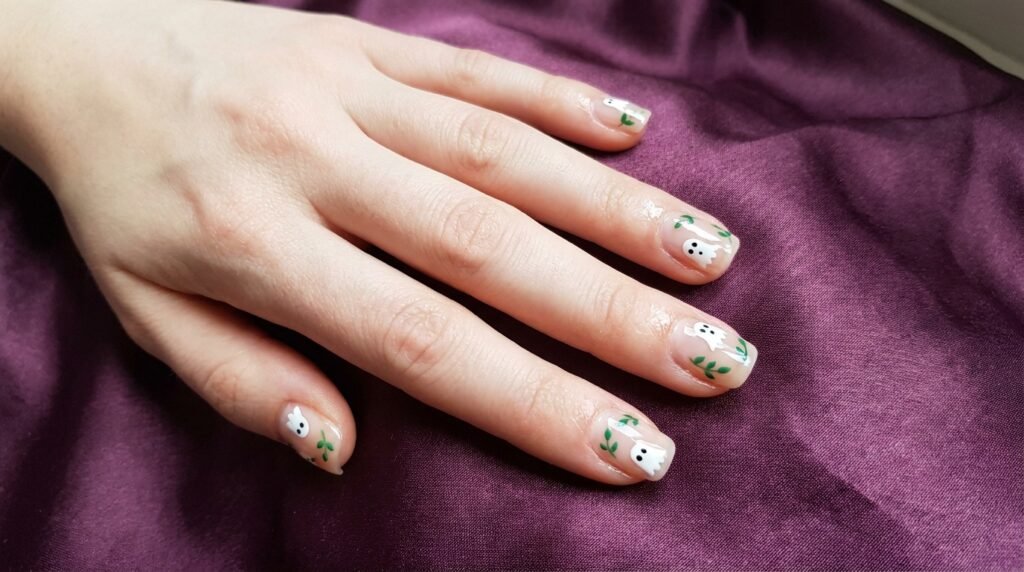
You do not need long acrylics to enjoy detailed holiday nail art. In fact, short halloween nails look exceptionally neat with minimalist micro-doodles. Keep the scale tiny so your nail beds do not look overcrowded. Paint micro-phantom shapes on just two accent nails. Add tiny two-leaf botanical sprigs between them. Because the elements remain small, your natural short nails look clean, organized, and elevated.
- Best Nail Shape: Short square or natural squoval.
- How to Ask at the Salon: “Keep my natural length, use a glossy clear base, and paint micro-sized ghosts with tiny leaf sprigs.”
- Budget Tier: DIY at home using nail stickers or water transfer decals over natural polish.
Moody Sage Green and Earthy Botanical Accents
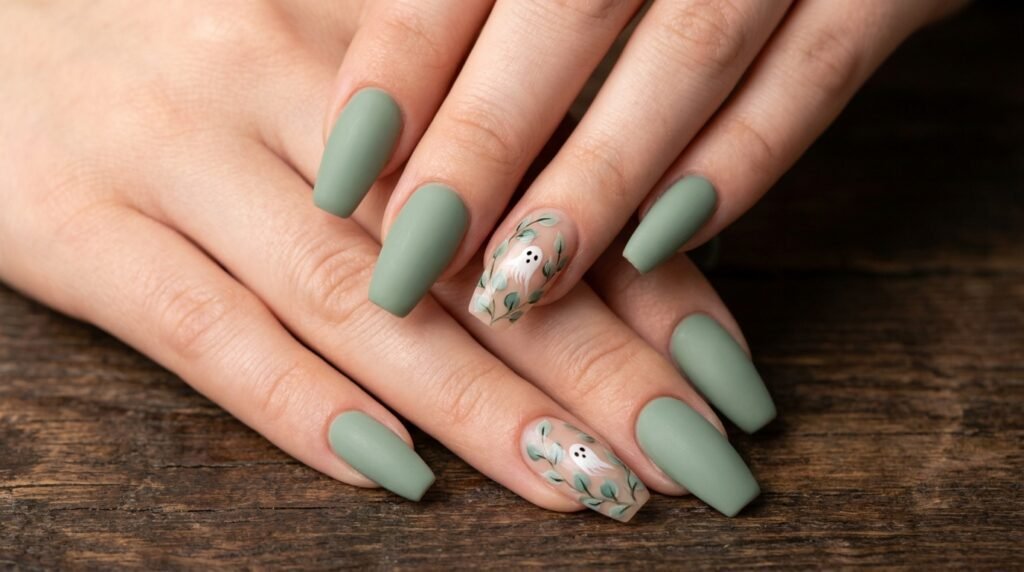
Swap standard orange for muted sage green to get an elevated autumn palette. Muted green tones bring a cozy, forest-inspired mood to your seasonal look. Paint your index and pinky nails in solid sage green with a matte top coat. On your middle nails, build a nude base with floating white specters nestled inside eucalyptus branches. As a result, the earthy green grounds the playful character art beautifully.
- Best Nail Shape: Medium coffin or almond.
- How to Ask at the Salon: “Combine solid matte sage green nails with sheer accent nails featuring white specters and eucalyptus leaves.”
- Budget Tier: Mid-range salon visit or easy DIY polish swap.
Golden Hour Sunflower and Pumpkin Sprigs
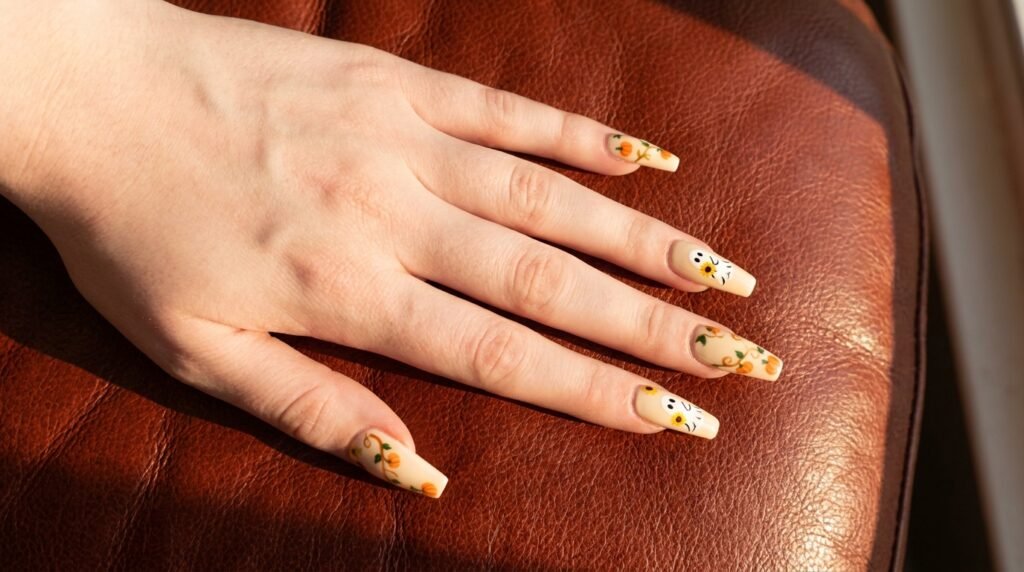
Warm gold and terracotta shades add cozy autumn energy to your holiday manicure. Instead of simple green leaves, pair your little friendly specters with tiny yellow sunflower heads and orange pumpkin vines. Use a warm cream background color to tie the rich autumn palette together. This combination shifts the design smoothly from early September all the way through Thanksgiving week.
- Best Nail Shape: Long coffin or oval.
- How to Ask at the Salon: “I’d like a warm cream base with small ghosts holding tiny sunflowers, accented with terracotta vines.
- Budget Tier: Salon acrylic set for intricate multi-color layering.
Negative Space Ghost Silhouettes with Dried Floral Accents
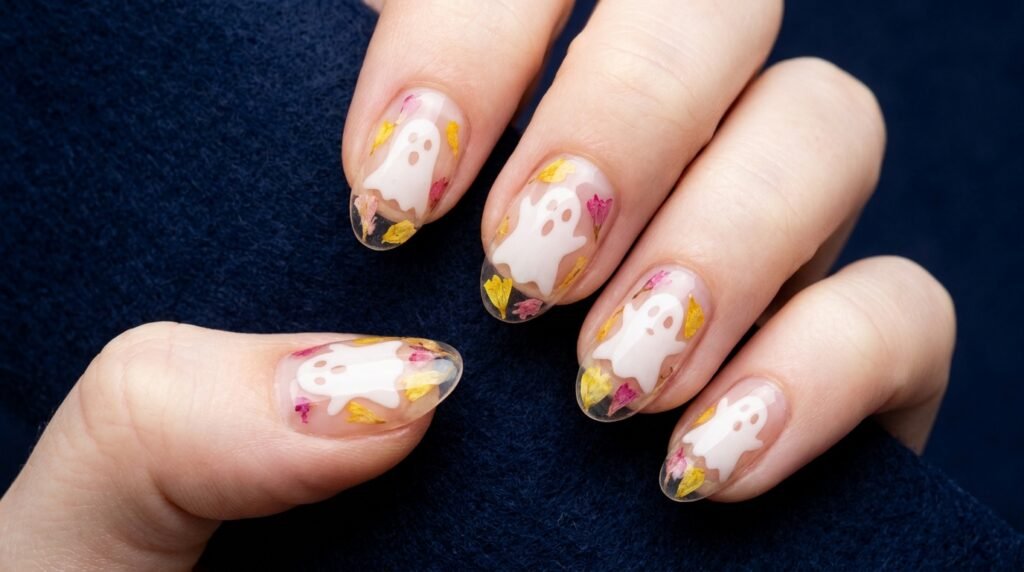
Negative space designs let your natural nail bed shine while keeping maintenance remarkably low. Leave the center of your nail bare with only a glossy clear coat. Paint tiny white specter outlines along the side edges. Then, place real mini dried flower petals around the shapes before sealing with gel. Therefore, as your nails grow out over three weeks, the cuticle line remains virtually invisible.
- Best Nail Shape: Any shape, especially natural almond or oval.
- How to Ask at the Salon: “Apply a clear base coat with negative space phantom outlines and encapsulated dried mini flowers.”
- Budget Tier: DIY encapsulated gel kit at home.
Lavender Dreams with Midnight Botanical Vines
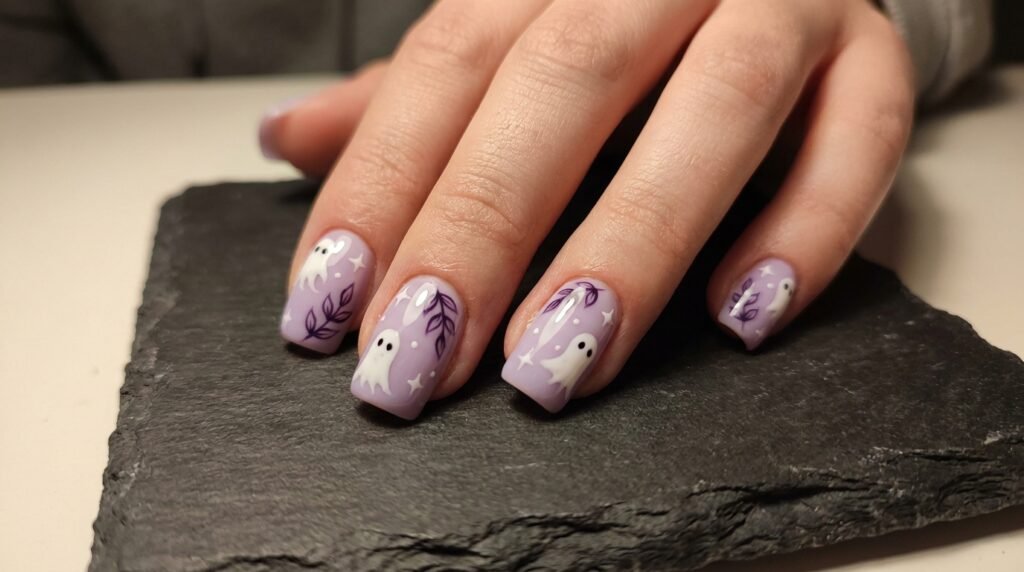
Lavender provides a stunning, unexpected twist on traditional October colors. It offers a soft alternative to harsh purple hues. Choose a milky lavender polish as your main background. Layer crisp white specter shapes over top, adding deep purple botanical stems for contrast. Finally, dot tiny white stars around the leaves to create a dreamy night-sky mood.
- Best Nail Shape: Medium square or coffin.
- How to Ask at the Salon: “I want a pastel lavender base with white ghosts, dark violet leaf outlines, and white star dots.”
- Budget Tier: Salon gel polish over natural nails.
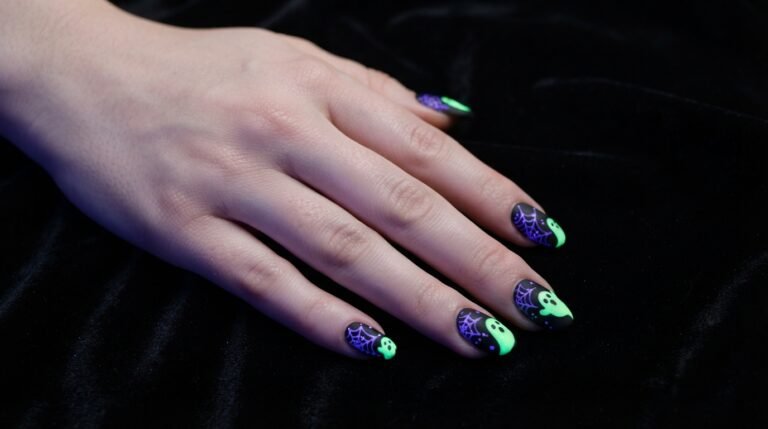
Matte Black Canvas with Glowing Neon Florals
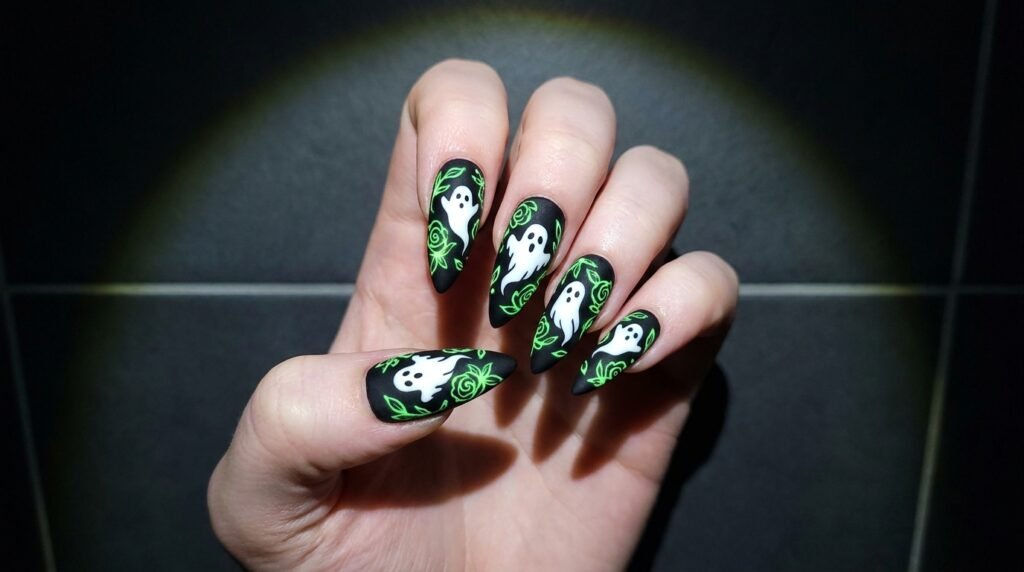
If you love dark moody nails but still want bright pop colors, try a matte black canvas. Paint your nails in pitch black, then apply a velvety matte top coat. Paint your friendly specter using stark white polish so it stands out sharply. Next, frame it with bright neon green or magenta floral lines. The stark contrast makes the artwork look like it is glowing under night lights.
- Best Nail Shape: Long stiletto or coffin.
- How to Ask at the Salon: “I need a matte black base, white ghost details, and neon-colored line art for the flowers.”
- Budget Tier: High-end salon acrylics with custom detail painting.
Minimalist Line-Art Phantom with Fern Fronds
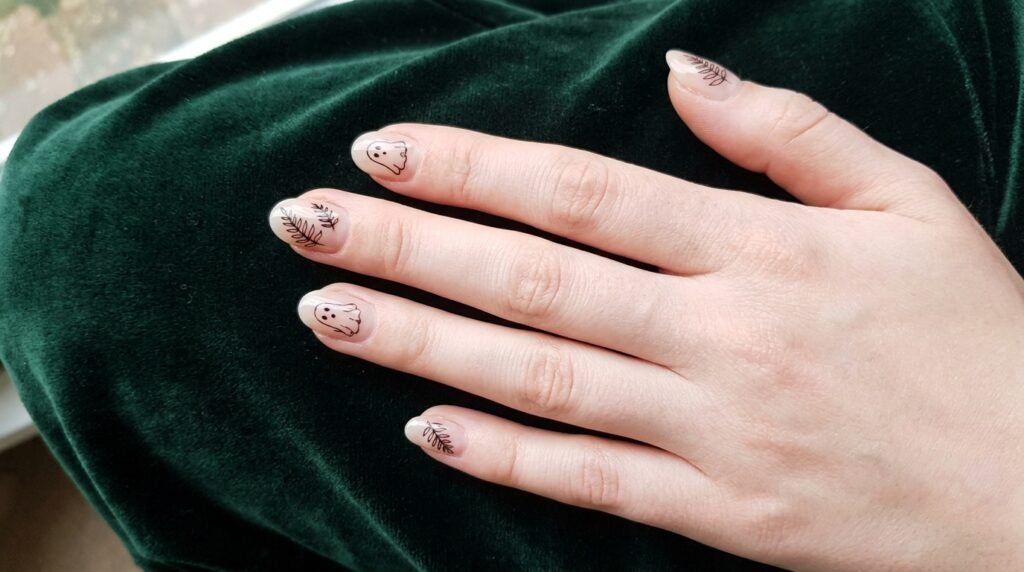
Minimalist lovers do not need heavy colors to make a statement. Simple line work creates a high-fashion look with minimal effort. Skip solid color fills altogether. Instead, use a fine detail brush to outline the phantom shape using thin black lines on a sheer nude base. Paint tiny fern fronds draping around the figure’s head. The result is understated, elegant, and completely office-appropriate.
- Best Nail Shape: Short oval or squoval.
- How to Ask at the Salon: “I want sheer nude nails with fine-line black outline ghosts and delicate fern fronds, no solid color fills.”
- Budget Tier: Easy DIY with a fine-liner nail pen.
3D Gel Phantom Details on Textured Botanical Backgrounds
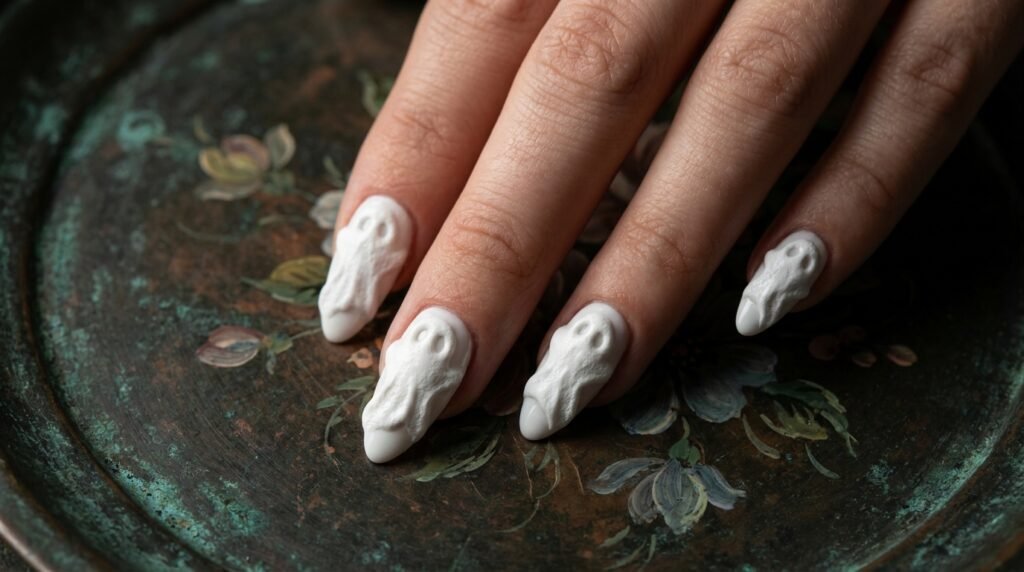
Texture takes your seasonal manicure to a whole new level. 3D builder gels create raised elements that feel amazing to touch. Paint a smooth botanical floral base first. Then, use clear or white builder gel to craft a raised, puffy specter on top. The 3D figure literally pops off your nail bed, casting tiny real shadows over the painted flowers beneath it.
- Best Nail Shape: Long almond or coffin.
- How to Ask at the Salon: “Paint a flat botanical floral pattern first, then use hard gel to create a raised 3D ghost on top.”
- Budget Tier: Specialist nail artist salon appointment.
Celestial Moon and Botanical Starry Phantoms
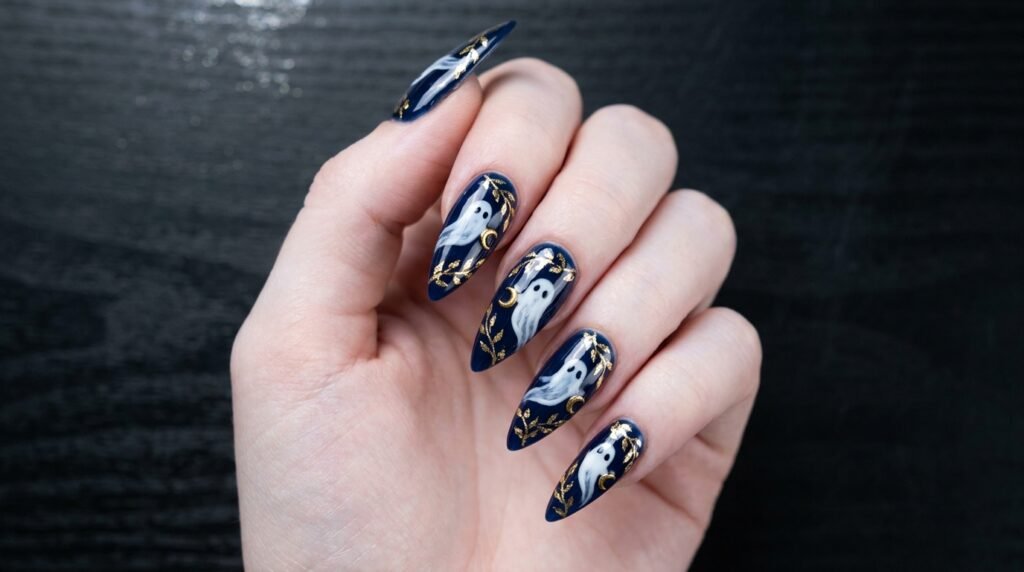
Combine night-sky magic with your floral themes for a whimsical finish. Paint a dark navy blue base coat to mimic the midnight sky. Add white specters holding tiny crescent moons, then surround them with golden botanical vines and star bursts. Consequently, your nails capture a magical, starry night vibe.
- Best Nail Shape: Almond or stiletto.
- How to Ask at the Salon: “Deep navy blue background, white ghosts holding gold crescent moons, with gold leaf vines.”
- Budget Tier: Salon visit with foil stamping or gold gel accents.
French Tip Twist with Floating Ghost and Floral Tips
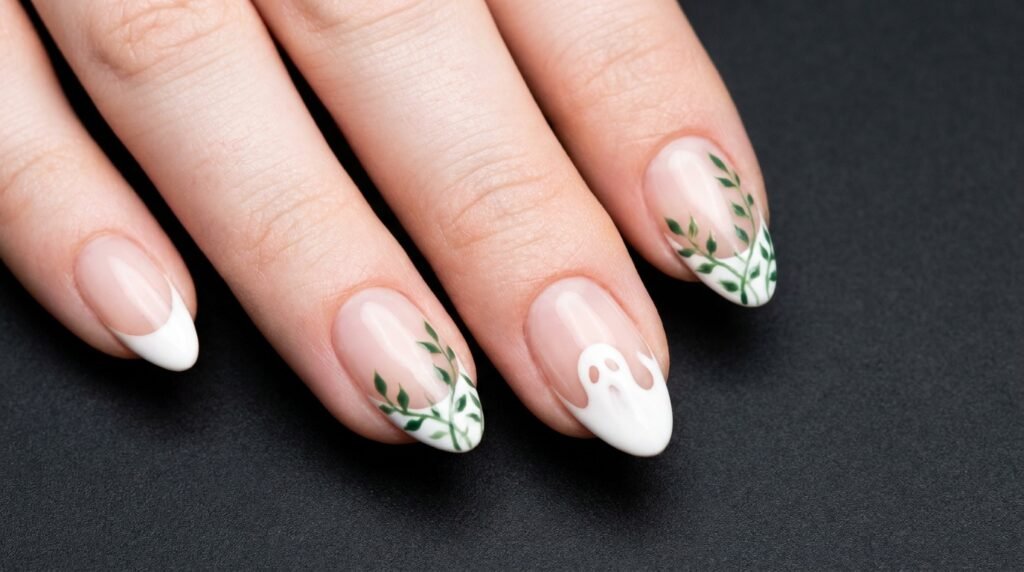
Give the timeless French manicure a festive seasonal upgrade. Instead of plain white tips, curve your French line to form the wavy bottom of a specter on your middle finger. On your remaining fingers, paint thin green vine lines along the white smiling edge. This subtle touch adds festive fun while keeping your manicure classic.
- Best Nail Shape: Almond or long square.
- How to Ask at the Salon: “Classic French manicure base, but turn one tip into a ghost shape and add vine accents to the other tips.”
- Budget Tier: Salon gel polish or high-end press-on kit.
Terracotta Autumn Leaves and Friendly Specters
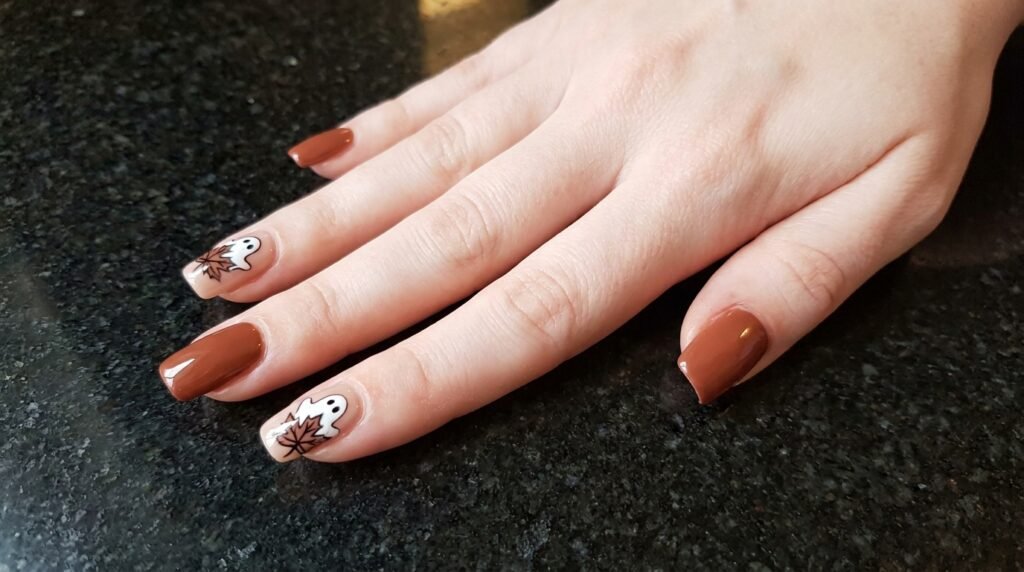
Embrace peak fall colors with rich terracotta, burnt orange, and warm chocolate brown tones. Paint alternating fingers in glossy terracotta and warm nude. On the nude nails, paint friendly specters peeking out from behind falling autumn leaves. This combination feels warm, cozy, and perfect for pumpkin patch visits.
- Best Nail Shape: Medium oval or squoval.
- How to Ask at the Salon: “Terracotta and nude accent scheme with cute specters hiding behind autumn leaves.”
- Budget Tier: Easy DIY with standard fall polish shades.
Sheer Milk-Bath Nails with Floating Floral Phantoms
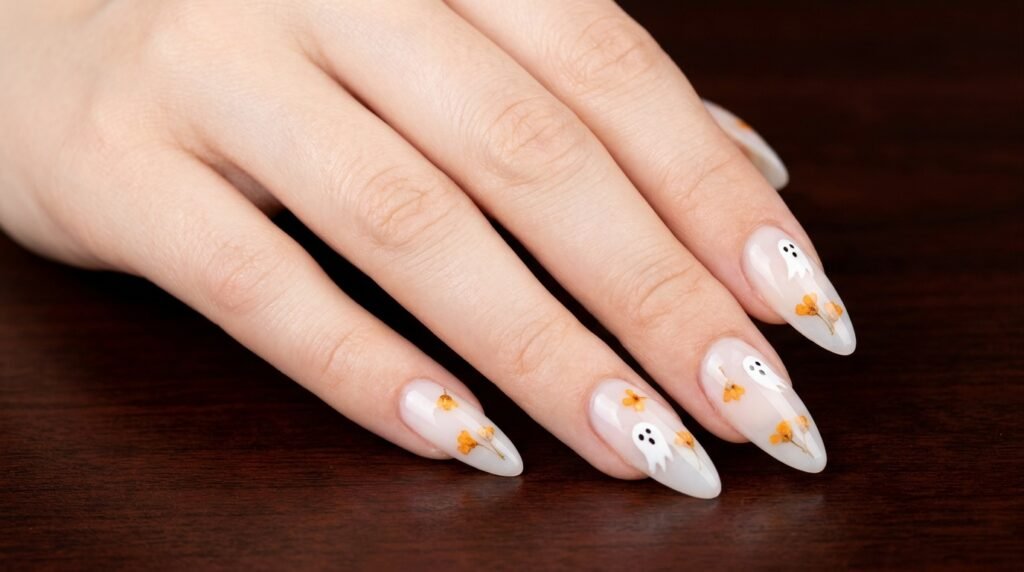
Milk-bath nails remain one of the trendiest visual effects in modern nail design. Layer real miniature dried blossoms over a semi-sheer milky white gel base. Paint your soft white specter silhouette right between the encapsulated flower layers. This creates a mesmerizing depth effect, making the phantom look like it is floating inside a cloudy floral pool.
- Best Nail Shape: Medium to long almond.
- How to Ask at the Salon: “Milky white translucent gel with encapsulated mini flowers and hand-painted ghosts between layers.”
- Budget Tier: Professional salon gel encapsulation.
Pastel Goth Charcoal with Ivy Line Art
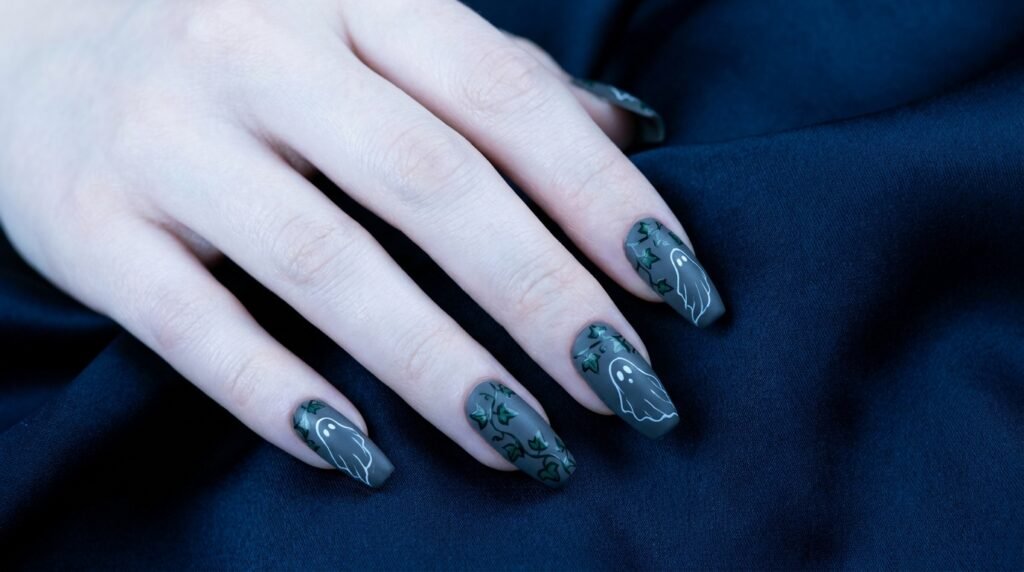
For those who love dark aesthetic looks without going fully pitch black, charcoal grey is the answer. Apply a smooth charcoal grey base polish. Draw soft white specters surrounded by dark green ivy line art. The dark grey tone offers an moody backdrop while allowing the botanical linework to stand out clearly.
- Best Nail Shape: Coffin or square.
- How to Ask at the Salon: “Charcoal grey base with white specter accents and dark green ivy line art.”
- Budget Tier: Salon gel application or quality press-ons.
Gold Foil Accents on Botanical Ghost Canvas
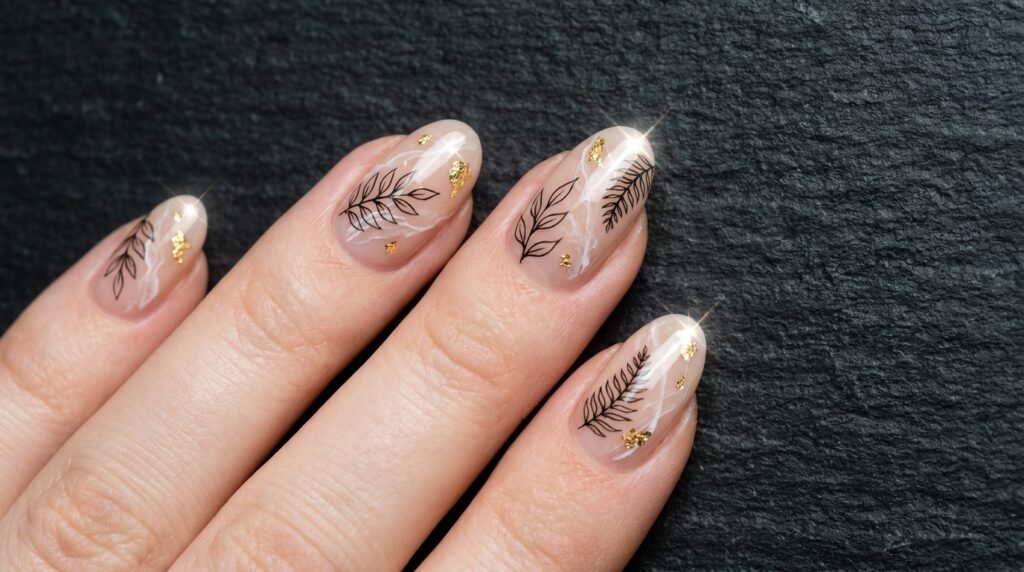
Add a touch of luxury to your holiday manicure using bright gold leaf foil flakes. Paint your ghost figures and floral sprigs on a neutral nude base. Before applying your top coat, press tiny gold foil flakes around the floral stems. The gold catches the light beautifully, instantly elevating simple line art into a high-end look.
- Best Nail Shape: Any shape, especially almond or oval.
- How to Ask at the Salon: “Nude base with white specters, botanical line art, and scattered gold leaf foil accents.”
- Budget Tier: Easy DIY addition using gold foil and clear top coat.
Salon Guide: How to Order This Look
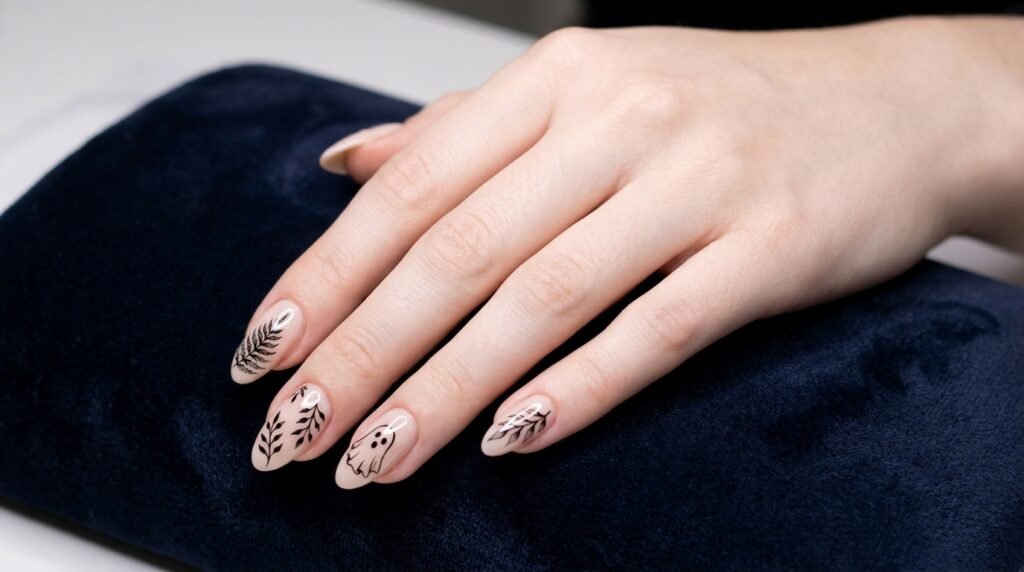
Ready to get this look at your salon? Communication is key to getting exact results. Save 2-3 photos showing the exact phantom shape and flower style you want. Ask your technician for a fine-liner brush artist if you want hand-painted work. Always clarify whether you want a sheer nude background or a solid color base before they start painting.
- Best Nail Shape: Match to your natural bed length.
- Salon Prep Tip: Show your artist the line-art complexity upfront so they schedule enough time.
- Budget Tier: Hand-painted art usually adds a small custom design fee per nail.
DIY Guide: How to Recreate Botanical Ghosts at Home
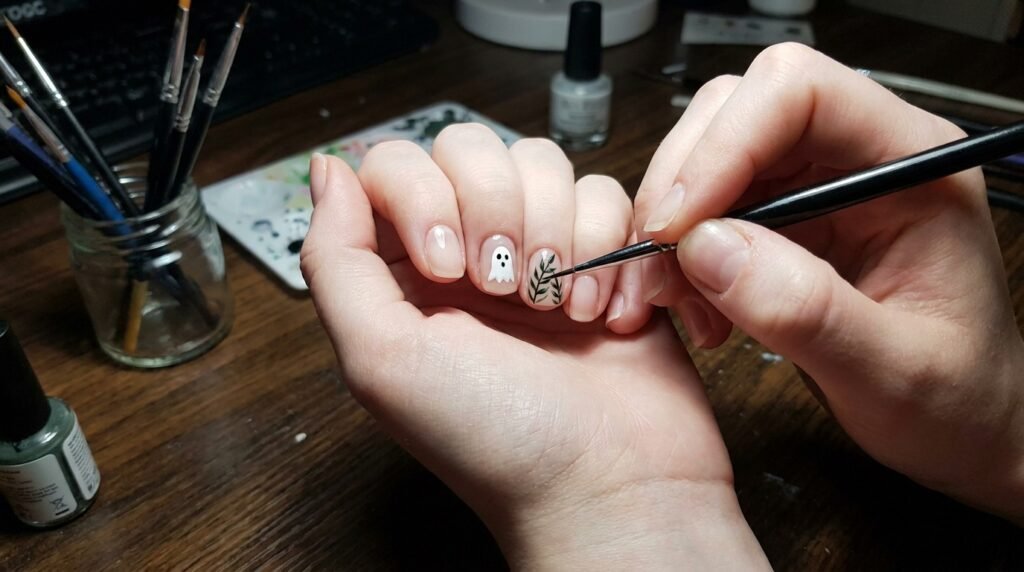
Recreating this aesthetic at home is simpler than it looks. Follow these simple steps for clean results:
- Apply your favorite nude or pastel base coat and let it dry completely.
- Dot a drop of white polish onto your nail, then use a detail brush to drag it down into a smooth wavy drape.
- Add two tiny eye dots using a toothpick dipped in black polish.
- Draw simple two-leaf stems framing the shape using a fine nail art pen.
- Seal everything with a high-gloss top coat to smooth out all layers.
- Best Nail Shape: Short oval or natural squoval.
- DIY Hack: Use floral nail stickers if drawing fine lines by hand feels too tricky.
- Budget Tier: Ultra-affordable at-home DIY setup.
Cute Ghost Nails FAQs: Botanical Line Art & Halloween Trends
Here are answers to the most common questions about creating non-scary, floral holiday nails.
What are floral ghost nails?
Floral ghost nails are a seasonal nail art trend that pairs friendly white ghost silhouettes with delicate botanical line art like leaves, vines, and wildflowers. This combination creates a cute, chic alternative to traditional scary Halloween designs.
How do you draw a cute ghost with flowers on nails?
Start by painting a white teardrop or bell shape using a fine liner brush. Add two small black dots for eyes to keep it friendly. Once dry, use a micro-brush to draw thin floral stems and leaves wrapping around or coming out from behind the shape.
What’s a non-scary Halloween nail design?
A non-scary alternative includes friendly specters paired with flowers, pastel pink Halloween themes, star-dusted night skies, or simple pumpkin accents. These styles let you join the seasonal fun without dark or spooky imagery.
What nail shape works best for floral ghost designs?
Almond and coffin shapes work best because their length provides ample space for tall botanical vines. However, short oval and square shapes look equally adorable when using micro-sized line art.
Can you do floral ghost nails without acrylics?
Yes, you can easily create this design on natural nails using gel polish, nail pens, or press-ons. Water decals and nail stickers also offer quick at-home results without salon acrylics.
Conclusion
Combining botanical line art with playful holiday shapes gives you the ultimate best-of-both-worlds manicure. It is cheerful, stylish, and fits every cozy autumn mood perfectly. Save your favorite style from this guide to show your nail tech at your next appointment! Which design will you try first—the classic black-and-white contrast or the soft pink floral look?

Mia founded Daily Nail Idea after a decade in beauty editorial, tired of watching great nail art disappear into the scroll. She now leads the team’s editorial direction — deciding what’s worth featuring and what’s just noise — and still paints her own nails every Sunday night, no exceptions.